Discovery of Besitos
Besitos Information
Morphology: Siphoviridae

Sample Collection

 ºº
ºº
| Collector Name: |
Shelby Jeffers | Rebeca Fernandez | Shelby Jeffers | Rebeca Fernandez | Rebeca Fernandez |
| Sample No. | 3 | 2 | 2 | 3 | 1 |
| Date of Collection | 09/19/2022 | 08/29/2022 | 08/29/2022 | 08/31/2022 | 08/29/2022 |
| Sample Type | water | soil | soil | water | soil |
| General Location | Traditions South AC unit | Glen Rose Golf Course | Jaycee Park | parking lot Tarleton | Glen Rose Golf Course |
| Location Description | water from AC unit, really bad smell | soil under divots | soil under tree | rain from the parking lot | soil under divots |
| GPS Coordinates |
32º12’54.00″N 98º13’26.40″W |
32.2578º N 97.7226ºW | 32.2233Nº 98.2306ºW | 32.2160º N 98.2160º W | 32.2578º N 97.7226ºW |
| Sample Depth | surface | 1 inch | surface | surface | 1 inch |
| Ambient Temperature | 27ºC | 35ºC | 35ºC | 28ºC | 35ºC |
Isolation/Purification
Title: Direct Isolation
Date: 31/08/2022 Redo: yes Sample: RF1
Purpose: This procedure is toextract phages from the environmental sample and infect the host bacteria using plaque assay.
Notes:
Material used: environmental sample,liquid media, 5ml syringe, 0.22µm syringe filter, 5ml serological pipettes, microcentrifuge tubes, 15ml conical tube matches and fire can
1) Clean the workspace with ethanol so aseptic work could be done.
2) Liquid media was added to the sample until it was submerged by 2ml, it was then mixed thoroughly
3) Next, the tube was placed in the shaking incubator for 1h
4) A serological pipette was used to remove the liquid from the sample and it was placed in a 3ml syringe
5) This syringe was attached to a 0.22µm syringe filter, and the liquid was filtered into a microcentrifuge tube
6) Then, 250µl of the host bacteria cultures was obtained and with a micropipettor it was mixed with the phage sample
7) The host and sample were mixed by gently tapping the tube
8) Then, it was let undisturbed for 7 minutes
9) Later, 3ml of top agar were added using a serological pipette to theinoculated bacteria tube
10) The mixture was then transferred onto the plate (without bubbles)
11) The plate was tilted so the agar fully covered evenly the whole plate
12) The agar plate was let undisturbed for 20 mins
13) It was then placed in the incubator (23-30 degrees C) at 10:10am (09/02/2022)
Results: Sample contaminated, retrieve new sample and restart.
Conclusions and Next Steps: No phage found, get another sample.
Title: Direct Isolation
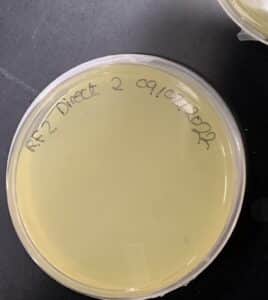
Date: 31/08/2022 Redo: yes Sample: RF2
Purpose: This procedure is to extract phages from the environmental sample and infect the host bacteria using plaque assay.
Notes:
Material used: environmental sample,liquid media, 5ml syringe, 0.22µm syringe filter, 5ml serological pipettes, microcentrifuge tubes, 15ml conical tube matches and fire can
1) Clean the workspace with ethanol so aseptic work could be done.
2) Liquid media was added to the sample until it was submerged by 2ml, it was then mixed thoroughly
3) Next, the tube was placed in the shaking incubator for 1h
4) A serological pipette was used to remove the liquid from the sample and it was placed in a 3ml syringe
5) This syringe was attached to a 0.22µm syringe filter, and the liquid wasfiltered into a microcentrifuge tube
6) Then, 250µl of the host bacteria cultures was obtained and with a micropipettor it was mixed with the phage sample
7) The host and sample were mixed by gently tapping the tube
8) Then, it was let undisturbed for 7 minutes
9) Later, 3ml of top agar were added using a serological pipette to the inoculated bacteria tube
10) The mixture was then transferred onto the plate (without bubbles)
11) The plate was tilted so the agar fully covered evenly the whole plate
12) The agar plate was let undisturbed for 20 mins
13) It was then placed in the incubator at 10:37am (09/02/2022)
Results: no phage found
Conclusions and Next Steps: no phage found, we will get another environmental sample
Title: Direct Isolation
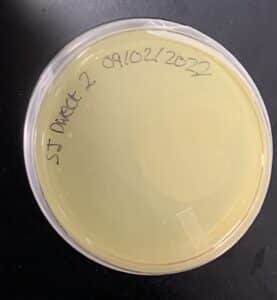
Date: 31/08/2022 Redo: no Sample: SJ2
Purpose: This procedure is to extract phages fromthe environmental sampleand infect the host bacteria using plaque assay.
Notes:
Material used: environmental sample,liquid media, 5ml syringe, 0.22µm syringe filter, 5ml serological pipettes, microcentrifuge tubes, 15ml conical tube matches and fire can
1) Clean the workspace with ethanol so aseptic work could be done.
2) Liquid media was added to the sample until it was submerged by 2ml, it was then mixed thoroughly
3) Next, the tube was placed in the shaking incubatorfor 1h
4) A serological pipette was used to remove the liquid from the sample and it was placed in a 3ml syringe
5) This syringe was attached to a 0.22µm syringe filter, and the liquid was filtered into a microcentrifuge tube
6) Then, 250µl of the host bacteria cultures was obtained and with a micropipettor it was mixed with the phage sample
7) The host and sample were mixed by gently tapping the tube
8) Then, it was let undisturbed for 7 minutes
9) Later, 3ml of top agar were added using a serological pipette to the inoculated bacteria tube
10) The mixture was then transferred onto the plate (without bubbles)
11) The plate was tilted so the agar fully covered evenly the whole plate
12) The agar plate was let undisturbed for 20 mins
13) It was then placed in the incubator (23-30 degrees C) at 10:24am (09/04/2022)
Results: Sample contaminated, retrieve new sample and restart.
Conclusions and Next Steps: No phage found, get another sample.
Title: Direct Isolation
Date: 09/12/2022 Redo: no Sample: RF3-1 (Liquid sample)
Purpose: This procedure is to extract phages from the environmental sample and infect the host bacteria using plaque assay.
Notes:
Material used: environmental sample,liquid media, 5ml syringe, 0.22µm syringe filter, 5ml serological pipettes, microcentrifuge tubes, 15ml conical tube matches and fire can
1) Clean the workspace with ethanol so aseptic work could be done.
2) Then, 250µl of the host bacteria cultures was obtained and with a micropipettor it was mixed with the phage sample
3) The host and sample were mixed by gently tapping the tube
4) Then, it was let undisturbed for 10 minutes
5) Next, 3ml of top agar were added using a serological pipette to the inoculated bacteria tube
6) The mixture was then transferred onto the plate (without bubbles)
7) The plate was tilted so the agar fully covered evenly the whole plate
9) The agar plate was let undisturbed for 20 mins
9) It was then placed in the incubator (23-30 degrees C) at 9:35am (09/12/2022)
Results: There was no phage found, new samples will be retrieved
Conclusions and Next Steps: Retrieve another environmental sample.
Title: Direct Isolation
Date: 09/26/2022 Redo: no Sample: SJ-W-1 (Liquid sample)
Purpose: This procedure is to extract phages from the environmental sample and infect the host bacteria using plaque assay.
Notes:
Material used: environmental sample,liquid media, 5ml syringe, 0.22µm syringe filter, 5ml serological pipettes, microcentrifuge tubes, 15ml conical tube matches and fire can
1) Clean the workspace with ethanol so aseptic work could be done.
2) Then, 250µl of the host bacteria cultures was obtained and with a micropipettor it was mixed with the phage sample
3) The host and sample were mixed by gently tapping the tube
4) Then, it was let undisturbed for 10 minutes
5) Next, 3ml of top agar were added using a serological pipette to the inoculated bacteria tube
6) The mixture was then transferred onto the plate (without bubbles)
7) The plate was tilted so the agar fully covered evenly the whole plate
9) The agar plate was let undisturbed for 20 mins
9) It was then placed in the incubator (23-30 degrees C) at 11.00am (09/26/2022)
Results: 09/28/2022 we will see if there is a phage in the plaque
Conclusions and Next Steps: If there is a phage we will continue with next step (amplification) if not we will retrieve another environmental sample

Title: Direct Isolation
Date: 09/26/2022 Redo: yes Sample: RF2
Purpose: This procedure is to extract phages from the environmental sample and infect the host bacteria using plaque assay.
Notes:
Material used: environmental sample,liquid media, 5ml syringe, 0.22µm syringe filter, 5ml serological pipettes, microcentrifuge tubes, 15ml conical tube matches and fire can
1) Clean the workspace with ethanol so aseptic work could be done.
2) Liquid media was added to the sample until it was submerged by 2ml, it was then mixed thoroughly
3) Next, the tube was placed in the shaking incubator for 1h
4) A serological pipette was used to remove the liquid from the sample and it was placed in a 3ml syringe
5) This syringe was attached to a 0.22µm syringe filter, and the liquid was filtered into a microcentrifuge tube
6) Then, 250µl of the host bacteria cultures was obtained and with a micropipettor it was mixed with the phage sample
7) The host and sample were mixed by gently tapping the tube
8) Then, it was let undisturbed for 7 minutes
9) Later, 3ml of top agar were added using a serological pipette to th
e inoculated bacteria tube
10) The mixture was then transferred onto the plate (without bubbles)
11) The plate was tilted so the agar fully covered evenly the whole plate
12) The agar plate was let undisturbed for 20 mins
13) It was then placed in the incubator (23-30 degrees C) at 11.00am (09/26/2022)
Results: Sample contaminated, the sample was re-done, this time there wasn’t contamination but there wasn’t any phage
Conclusions and Next Steps: on 09/28/2022 a phage was adopted from another group, that same day we did the serial dilutions.
Title: First Serial Dilution and Plaque Assay
Date: 09/28/2022 Redo: No Sample: RF4
Purpose: This protocol was performed in order to obtain liquid phage samples of decreasing concentrations.
Notes:
First Serial Dilution
1. Work bench was prepared for aseptic work. The materials were gathered which are a phage buffer, liquid phage sample, a micropipetter and 8 microcentrifuge tubes.
2. 7 microcentrifugetubes were arranged on a rack and labeled 10^-1 through 10^-7. Once tubes were labeled and arranged, 90μl of phage buffer were added to each tube using a micropipetter and sterile tip.
3. To begin the dilution, 10μl of undiluted liquid phage sample were added to the first tube, labeled 10^-1. The new solution was then mixed using a vortex.
4. Using a new pipette tip, 10μl of solution from the 10^-1 tube were added to the 10^-2 tube and then was placed in the vortex.
5. This last step was repeated for each successive dilution until the last tube (10^-7).
Plaque Assay
Once the serial dilution was complete, a plaque assay was done using the first 6 tubes of diluted liquid phage sample.
1. Work bench was prepared for aseptic work. The materials were gathered which are top agar, host bacteria, and 5 ml serological pipettes.
2. 1 agar plate and tube of host bacteria for each of the 6 diluted liquid phage samples was gathered. The agar plates and culture tubes were each labeled to match the corresponding liquid sample.
3. Using a micropipettor, 10µl of serial dilution was deposited into the corresponding culture and mixed well. The host bacteria and liquid phage sample solution were let undisturbed for 7 minutes.
4. 3ml of top agar was transferred into each tube of bacteria and liquid phage solution using a 5ml pipette. Immediately after adding top agar to each sample, it was aspirated and poured onto an agar plate. Mixture was spread through the plate evenly. Plates were allowed to solidify and placed into the incubator.
Results:
We picked a plaque and we proceeded with the second serial dilution

Second Serial Dilution: We picked a plaque and the sames steps were followed
Date: 10/10/2022
1. Work bench was prepared for aseptic work. The materials were gathered which are a phage buffer, liquid phage sample, a micropipetter and 8 microcentrifuge tubes.
2. 7 microcentrifuge tubes were arranged on a rack and labeled 10^-1 through 10^-7. Once tubes were labeled and arranged, 90μl of phage buffer were added to each tube using a micropipetter and sterile tip.
3. To begin the dilution, 10μl of undiluted liquid phage sample were added to the first tube, labeled 10^-1. The new solution was then mixed using a vortex.
4. Using a new pipette tip, 10μl of solution from the 10^-1 tube were added to the 10^-2 tube and then was placed in the vortex.
5. This last step was repeated for each successive dilution until the last tube (10^-7).
Results:
We had to re-do the second serial dilution because there was contamination on the plates
Plaque Assay: 10/10/2022
1. Work bench was prepared for aseptic work. The materials were gathered which are top agar, host bacteria, and 5 ml serological pipettes.
2. 1 agar plate and tube of host bacteria for each of the 6 diluted liquid phage samples was gathered. The agar plates and culture tubes were each labeled to match the corresponding liquid sample.
3. Using a micropipettor, 10µl of serial dilution was deposited into the corresponding culture and mixed well. The host bacteria and liquid phage sample solution were let undisturbed for 7 minutes.
4. 3ml of top agar was transferred into each tube of bacteria and liquid phage solution using a 5ml pipette. Immediately after adding top agar to each sample, it was aspirated and poured onto an agar plate. Mixture was spread through the plate evenly. Plates were allowed to solidify and placed into the incubator.
Results: We had to re-do the second serial solution because we deposited the wrong amount of serial dilution into the corresponding culture, we had to re-do everything as there weren’t enough liquid phage samples
Date: 10/12/2022

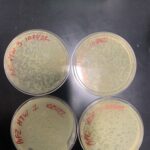
Title: Collecting Plate Lysates and Full Plate Titer
Date: 10/19/2022 Redo: No Sample: RF- 2/2
Purpose: The purpose of this procedure is to calculate the phage concentration, titer, of our phage lysate. The full plate titer is the most accurate method to determine the number of infectious phage in our lysate.
Notes:
1.) 8 ml of sterile phage buffer was applied to our webbed plate (10^-1 from our second serial dilution).
2.)The plate was left to sit at room temperature for about 4 and a half hours.
3.) The phage buffer was then swirled around gently.
4.) After the incubation was complete, the lid was removed. On the bench, the plate was tilted by placing it on the edge of the lid to allow the lysate to pool to one side.
5.) A 0.22 μm filter was prepared by opening the package, leaving the filter inside, but not removing the filter and set to the side.
6.) Using a 5 mL syringe to aspirate the lysate from the plate. Then the syringe was attached to the filter and the filtrate was collected in a 15 mL sterile conical tube.
7.) The tube was then labeled with “Low Volume Lysate” and the date.
Then we proceed to the full plate titer procedure.
1.) We got six microcentrifuge tubes and labeled them 10-1 to 10-6. Then each tube was filled with 90 μL.
2.) Then we performed 10-fold serial dilutions. It started by taking 10 μL of the undiluted lysate and added it to the 10-1 tube and then vortexing it. This process continued through the 10-6 tube and making sure to vortex and change pipette tips after each dilution.
3.) The lysate and the 10-1 through 10-6 dilutions had to be plated just like the plaque assay. 10 μL of phage solution was micropipetted into 250 μL of host bacteria, the diluted phage and bacteria set for 8 minutes.
4.) Once the phage and bacteria bound together, a serological syringe was used to collect 3 mL of top agar to dispense into the solution, then it was immediately aspirated back into the syringe.
5.) The agar was then dispersed onto agar plates and the plate was moved around to insure it covered the whole top surface of the plate.
6.) The plates were placed in the incubator de 10/19/2022 at 10.00 for 24-48h.
Results: The webbed plates weren’t enough concentrated so we repeated the serial dilution.
Amplification
Title: Flooding Webbed Plate & Collecting Lysate
Date: 10/25/2022 Redo: Sample: Rf-2/2
Purpose: To generate a plate with a high phage concentration as well as a highly concentrated liquid phage sample.
Notes:
1.The bench was prepared aseptically.
2. The plates to be flooded were three 10^-2, 10^-3, 10^-5. These plates were obtained and all other supplies were collected.
3. 8mL of sterile phage buffer was collected three different times in 10mL serological pipettes, and dispensed onto each of the webbed plates. These plates were left in the refrigerator at 4ºC during the night
4. After the plates were left for the night, the lysate was collected using a syringe. Before dispensing the lysate into a sterile 50mL conical tube, it was filtered to remove any agar particles or any bacteria.
Results:
We calculated the titer and it was 1.44×10^8
Conclusions and Next Steps:
prepare for TEM
Title: TEM (TRANSMISSION ELECTRONIC MICROSCOPY)
Date: 10/28/2022 Sample: RF2/2
Purpose: To prepare the phage sample for viewing with a transmission electron microscope.
Notes:
We prepared the bench and used aseptic technique, working close to a flame, we also disinfected our area with 70% ethanol.
1.
a. The phage sample was prepared. 1 ml of the high-titer lysate was transferred into a sterile microcentrifuge tube.
b. The sample was put in the centrifuge for 1 hour at 4 °C at top speed to concentrate the phage particles at the bottom of the tube.
c. Using a micropipettor, the supernatant was removed.
d. 100 μl of phage buffer were added and we let it sit at 37 °C for 30 minutes and then at 4 °C for 20 minutes.
2. The grid was set up.
a. A fresh pair of gloves were put on, disinfected with ethanol, and allowed to dry.
b. In the previously prepared work space, the cover was removed from a 5 x 5 cm piece of parafilm, and the parafilm was placed into the lid of a Petri dish.
c. A PELCO Tab was placed onto the parafilm in the lid of the Petri dish and then exposed. Then using EM forceps, we grabbed a new grid
e. The grid was placed dark-and-shiny side UP, on the edge of the tab so that only the very edge of the grid was touching the adhesive.
3. The phage was mounted and stained.
a. Using a micropipettor,10 μl of lysate was transferred onto the grid without touching the tip to the grid itself.
b. The phage was allowed to settle and attach onto the grid for 5 minutes.
c. The excess fluid was wicked off.
d. The grid was rinsed times by pipetting 10 μl of sterile water onto the grid, allowing it to sit for 2 minutes, and wicking off the water.
e. 10 μl of 1 % uranyl acetate was added to the grid.
f. It sat for 2 minutes.
g. Excess stain was wicked off and it was allowed to air dry for less than 1 minute before putting it safely back into the grid box.
4) The phage was observed.
RESULTS:
- We prepared our grid for it to be shipped to the facility for TEM
CONCLUSIONS AND NEXT STEPS:
- When we get it back we will record its morphology
DNA Extraction

Title: Archiving Phage Sample
Date: 11/02/2022 Sample: RF2/2
Purpose: To prepare a high-titer lysate for long-term storage
Procedure:
- We certified our phage on Phagesdb.org
- We retrieved two barcoded tubes for storage from the University of Pittsburgh and a third tube for storage at Tarleton.
- We printed labels and labeled each tube
- Then we prepared ourDMSO/Lysate mixture, by dispensing 4.0 ml of your high-titer lysate into a sterile 15 ml conical tube.
- Next we added 280 μl DMSO to the tube, cap the tube, and then vortex the mixture.
- About 1.4mL of our lysate and DMSO mixture were placed in the tubes.
- They were then placed in the fridge.
Title:Phage DNA Extraction Procedure Day 1
Date: 10/31/2022 Redo: no Sample: RF2/2
Purpose: The goal of this procedure is to obtain high quality DNA from the concentrated phage lysate
Notes:
1) First, the HVL was gently mixed, then aliquoted into a 15 mL conical tube. 20 microliters of nuclease were added to it. The tube was inverted 4 times and then placed in the incubator at 37ºC for 10 minutes. It was then aliquoted into 5 microcentrifuge tubes. 1mL was placed into each tube. Then, 20 microliters of ZnCl2 was added to each microcentrifuge tube. They were all inverted gently and incubated at 37ºC for 5 minutes in order to precipitate the phage. Next, they were centrifuged at 10,000 rpm for 1 minute to pellet the phage.
2) The supernatant was removed, but all 5 pellets were kept in the microcentrifuge tubes. To resuspend the phage, 500 microliters of TES buffer was added to each tube. Then they were incubated at 60ºC for 15 minutes. Next, 1 microliter of Proteinase K was added and mixed gently. The tubes were incubated at 37ºC for 10 minutes.
3) 60 microliters of potassium acetate was added to each tube, they were all mixed well, and then placed onto ice for 15 minutes. The tubes were centrifuged at 4ºC for 1 minute at 12,000 rpm. The supernatants were then kept this time and placed in new microcentrifuge tubes. The pellet tubes were discarded. Lastly, 500 microliters of isopropanol was added to each tube, mixed, and then placed on ice until 11/02/2022
Results:
The sample was ready for DAY 2 procedure
Conclusions and Next Steps:
Title: DNA extraction procedure Day 2
Date:11/02/2022 Redo: Sample: RF2/2
Purpose: The goal of this procedure is to obtain high quality DNA from the concentrated phage lysate
Notes:
- We centrifuged our tubes at max speed for 10 minutes, to pellet DNA
- Then we discarded the supernatant liquid toisolate the pellet
- Then we added 250 ul of our 70% ethanol to each tube, and then centrifuged at top speed for 1 minute, in order to wash our pellet
- Then we dried the DNA pellets at room temperature by turning upside-down onto paper towels, tapping out excess liquid, and leaving it upside-down until pellets began to turn clear. (If not dry enough, we wouldn’t be able to recover enough DNA!
- We resuspended the first pellet in 50uL nuclease-free water. Then used that solution to resuspend the next pellet. We did this until all 5 pellets have been resuspended in the same 50uL of water
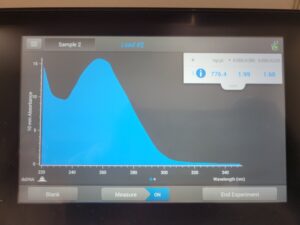
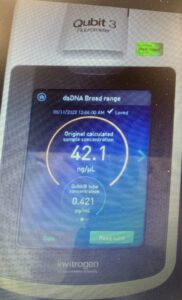
- We then checked our DNA concentration and quality with the Nanodrop.
Results:
Next day of class we will continue with next procedure
Conclusions and Next Steps:
We can see how in the nanodrop our salt contamination was high with (1.60) but our protein purity value mas good with (1.99). The Qubit showed the concentration was 42.1ng/µl which is pretty low.
Characterization
Title: Setting up restriction enzymes
Purpose: This procedure is to add restriction enzyme to cut the DNA of our sample and to visualize it for the next part in our procedure.
Notes:
The restriction enzymes used in the procedure: N,S,H,SAII,M
Preparing genomic DNA:
1. We gently mixed our DNA sample by slightly vortexing it at a low speed. Then we incubated our sample at 65°C for 10 minutes, and then immediately placed the sample in ice and then centrifuged the tube for less than a minute.
2. By using the concentration of our DNA sample, we calculated the volume of DNA we needed.
Setting Up Restriction Enzyme Reactions:
3. We set 5 tubes for each of the enzymes reactions and then we used the table to determine the volume that is needed for each tube, we used 0.6 ul of DNA and 0.5ul of restrictive Enzyme, 25ul of water and 2.5ul of reaction buffer.
4. Then the tubes were gently mixed and spun in the centrifuge for less than a minute.
5. The the tubes were incubated at 37°C for 1 hour.
6.Once the incubation is done, we spun the tubes for less than a minute and stored them in the freezer at -20ºC
Title: Making and Casting Agarose Gel
Date:11/08/2022 Redo: Sample: RF2/2
Purpose: To cast an agarose gel for electrophoresis
Notes:
1. We set up the gel electrophoresis apparatus and placed the comb to prepare for the gel.
2. We calculated that we needed 0.28 g of agarose powder and we transferred that to an Erlenmeyer flask.
3. Then we added 40 ml of 1X TBE Buffer to the Erlenmeyer flask and swirled to mix.
4. Next we heated the mixture for 1 minute in the microwave,
5. We took it out and allow the flask to cool for around 15 minutes.
6. Once it cooled down, we added ethidium bromide and then mixed it by swirling it.
7. We then pored the mixture of agarose and ethidium bromide into the gel cast and we used a 10 well comb to creat the well in the gel.
8. We let the gel sit for arond 20 minutes to cool and solidify
9.Onces solidified, we carefully removed the comb and then gently removed the cast carrying the gel and then we placed the cast platform back into the apparatus but we put the wells in the direction of the (-) cathode.
10. Lastly, we poured 1X TBE Buffer into the gel apparatus until the gel was submerged with buffer
11. We used a micropipette and introduced the ladder in the first well, then we did the same with the dna (we put in each well 8ul)
11.We then plugged the electrodes into the power supply with the power set at 100 V.
12.We left the gel to run until the dye got to 5-6 marker of the gel box
13. After 1 hour and 40 minutes, we turned off the power box, took out the gel box container from the gel apparatus, then place the gel over the UV lights machine in the storage room of the lab .

Results:
We compared the size of the ladder with our phage and we came to the conclusion our phage has 23130 base pairs
Conclusions and Next Steps:
We have to re-do dna extraction because we want to have more amount of it.(40ul) Our DNA concentration was too low because we used too much water and too little DNA when we were setting up our restriction enzymes
Title:
Date: Redo: Sample:
Purpose:
Notes:
Results:
Conclusions and Next Steps: