Discovery of EnderDragon
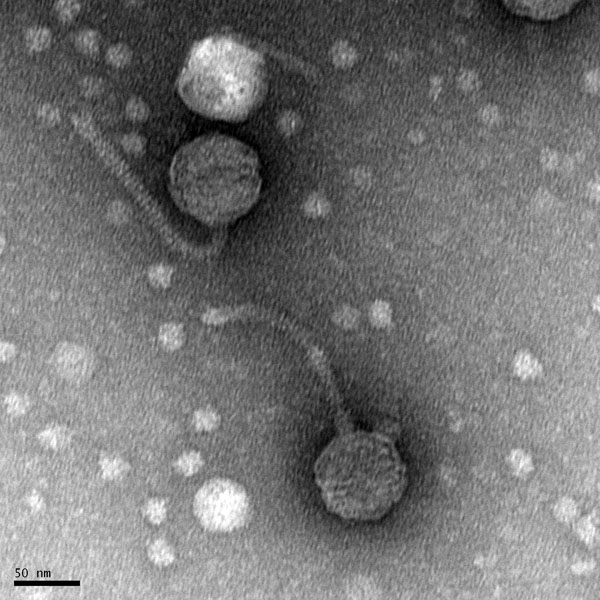
EnderDragon Information
Morphology: Siphoviridae
Sample Collection
| Collector Name |
Aryana Pernarelli | Austin Densmore | Aryana Pernarelli | Aryana Pernarelli |
| Sample No. | 1 | 2 | 3 | 4 |
| Date of Collection | 8/29/2021 | 8/29/2021 | 9/3/2021 | 9/3/2021 |
| Sample Type | Soil | Mud | Sand | Sand |
| General Location | Stephenville City Park | Farm outside of Glen Rose | Stephenville City Park | Stephenville City Park |
| Location Description | Near a stream, on the bank | mud with plants next to pond | On the bank of a river | On the bank of a river |
| GPS Coordinates | 32.214213, -98.203171 | 32.182196, -97.704445 | 32.215901, -98.201810 | 32.215901, -98.201810 |
| Sample Depth | top soil, 1cm | surface to 3cm | top, 3cm | top, 3cm |
| Ambient Temperature | 30°C | 29°C | 30°C | 30°C |
| Collector Name |
Aryana Pernarelli | Austin Densmore | ||
| Sample No. | 5 | 6 | ||
| Date of Collection | 9/6/2021 | 9/13/21 | ||
| Sample Type | Clay | Dirt | ||
| General Location | Conroe, Tx | Farm outside of Glen Rose | ||
| Location Description | Wet clay near a tree | Dirt under rock next to tree | ||
| GPS Coordinates | 30.371207, -95.612493 | 32.182178, -97.704097 | ||
| Sample Depth | top | surfact to 3cm | ||
| Ambient Temperature | 30°C | 18°C |
Isolation/Purification
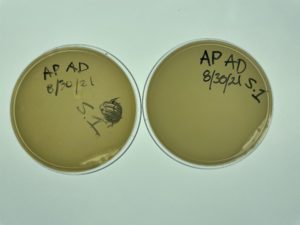
Direct Isolation & Plaque Assay of Sample 1
Date: 08/30/2021 Redo: No Sample: 1
Purpose: This procedure is to extract bacteriophages from an environmental sample and isolate using plaque assay.
Notes:
1. I washed my hands, put on gloves, and cleansed my workspace with Cidecon and 70% ethanol. I wiped it down with kimwipes.
2. I got my supplies: a serological pipette, a glass pipette tip 10mL, a 5mL syringe, .22um filter, a micro centrifuge tube, a bunsen burner, 100uL pipette and pipette tips, agar plate, tube with 250uL of bacteria , warm agar (later on).
3. I lit my bunsen burner to create an aseptic area.
4. To my tube full of dirt, I added 3mL of liquid media first and shook it up. With the serological pipette using a 10 mL pipette, I added 2 more mL for a total of 5mL of liquid media in order to get my environmental sample a consistent liquid phase. I put my tube in the shaking incubator at 250 rpm from 10:25am until 12:00pm. The end result was a solid chunk of dirt at the bottom, leaving 2mL of cloudy liquid isolate at the top.
5. At 12:00pm, I began the purification. From the liquid isolate that pooled at the top of my tube, I removed it all with a sterile 5mL syringe, and got roughly 2mL of brown liquid isolate. I then pushed the liquid through a .22um filter, and into a micro centrifuge tube. I had to use 2 .22um filters because my sample was dirty and clogged the first filter. I got a total of .75 mL of filtered sample isolate into the tube.
I began the process of the plaque assay.
6. I took the 100uL pipette and pipette tips, and got 100uL of isolate from the microcentrifuge tube. I added the full 100uL of isolate into the bacteria tube full of 250uL of bacteria. Since I needed to add 250uL of isolate, I pipetted another 100uL of isolate into the tube. I repeated it for a 3rd time pipetting 50uL of isolate into the bacteria tube for a total of 250uL of isolate added to 250uL of bacteria.
7. I waited for 5 minutes for the bacteriophage to attach to the bacteria in the tube.
8. After waiting for my isolate to attach to the bacteria in the tube, I began the plating process.
9. With a serological pipette, I aspirated 3mL of warm agar, and put it in the tube with the bacteria and isolate together.
10. Right away, I drew up the mixture of warm agar, bacteria, and isolate back into the serological pipette.
11. I dispensed the mixture onto a plate immediately, and tilted the plate slightly to ensure that the top agar was a uniform depth around the plate.
12. I let it sit out for 18 minutes to let the top agar settle.
13. I inverted the plate and put it in the 29C incubator and waited 48 hours.
They are put into the incubator face down and will be there for 44 hours.
Results:
No bacteriophage found.
Conclusions and Next Steps:
There were no plaques found on the plaque assay. We will try again with another sample.
Direct Isolation & Plaque Assay of Sample 2
Date: 09/01/2021 Redo: No Sample: 2
Purpose: This procedure is to extract bacteriophages from an environmental sample and isolate using plaque assay.
Notes:
1. I washed my hands, put on gloves, and cleansed my workspace with Cidecon and 70% ethanol. I wiped it down with kimwipes.
2. I got my supplies: a serological pipette, a glass pipette tip 10mL, a 5mL syringe, .22um filter, a micro centrifuge tube, a bunsen burner, 100uL pipette and pipette tips, agar plate, tube with 250uL of bacteria , warm agar (later on).
3. I lit my bunsen burner to create an aseptic area.
4. To my tube full of dirt, I added 3mL of liquid media first and shook it up. With the serological pipette using a 10 mL pipette, I added 2 more mL for a total of 5mL of liquid media in order to get my environmental sample a consistent liquid phase. I put my tube in the shaking incubator at 250 rpm from 10:25am until 1:00pm. The end result was a solid chunk of dirt at the bottom, leaving 2mL of cloudy liquid isolate at the top.
5. At 1:00pm, I began the purification. From the liquid isolate that pooled at the top of my tube, I removed it all with a sterile 5mL syringe, and got roughly 2mL of brown liquid isolate. I then pushed the liquid through a .22um filter, and into a micro centrifuge tube. I had to use 2 filters because my sample was dirty and clogged the first filter. I got .75 mL of filtered sample isolate into the tube.
I began the process of the plaque assay.
6. I took the 100uL pipette and pipette tips, and got 100uL of isolate from the microcentrifuge tube. I added the full 100uL of isolate into the bacteria tube full of 250uL of bacteria. Since I needed to add 250uL of isolate, I pipetted another 100uL of isolate into the tube. I repeated it for a 3rd time pipetting 50uL of isolate into the bacteria tube for a total of 250uL of isolate added to 250uL of bacteria.
7. I waited for 5 minutes for the bacteriophage to attach to the bacteria in the tube.
8. After waiting for my isolate to attach to the bacteria in the tube, I began the plating process.
9. With a serological pipette, I got 3mL of warm agar, and put it in the tube with the bacteria and isolate together.
10. Right away, I drew up the mixture of warm agar, bacteria, and isolate back into the serological pipette.
11. I dispensed the mixture onto a plate immediately, and tilted the plate slightly to ensure that the top agar was a uniform depth around the plate.
12. I let it sit out for 20 minutes to let the top agar settle.
13. I inverted the plate and put it in the 29C incubator and waited 48 hours.
Results:
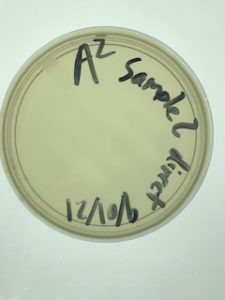
No bacteriophage found.
Conclusions and Next Steps:
There were no plaques found on the plaque assay. We will try again with another sample.
Title: Sample 3 Isolation & Purification
Date: 09/03/2021 Redo: No Sample: 3
Purpose: To Isolate a Bacteriophage using plaque assay.
Notes:
1. I washed my hands, put on gloves, and cleansed my workspace with Cidecon and 70% ethanol. I wiped it down with kimwipes.
2. I got my supplies: a serological pipette, a glass pipette tip 10mL, a 5mL syringe, .22um filter, a micro centrifuge tube, a bunsen burner, 100uL pipette and pipette tips, agar plate, tube with 250uL of bacteria , warm agar (later on).
3. I lit my bunsen burner to create an aseptic area.
1. To my tube full of dirt, I added 3mL of liquid media first and shook it up with my hand to mix it. With the serological pipette using a 10 mL pipette, I added 2 more mL for a total of 5mL of liquid media in order to get my environmental sample a consistent liquid phase. I put my tube in the shaking incubator at 250 rpm from 2:30pm to 3:30pm.
The end result was a solid chunk of dirt at the bottom, leaving 2mL of cloudy liquid isolate at the top.
2. At 3:30pm, I began the purification. From the liquid isolate that pooled at the top of my tube, I removed it all with a sterile 5mL syringe, and got roughly 2mL of brown liquid isolate. I then pushed the liquid through a .22um filter, and into a micro centrifuge tube. I had to use 2 filters because my sample was dirty and clogged the first filter. I got 1 mL of filtered sample isolate into the microcentrifuge tube.
3. Using a 100uL micropipette, I added 250uL of the isolate into the tube containing 250uL bacteria. I used 3 separate tips to get the total 250uL of isolate.
4. I waited 5 minutes for the bacteriophage and bacteria to meld together in the tube.
We then started the plaque assay.
5. I took the 100uL pipette and pipette tips, and got 100uL of isolate from the microcentrifuge tube. I added the full 100uL of isolate into the bacteria tube full of 250uL of bacteria. Since I needed to add 250uL of isolate, I pipetted another 100uL of isolate into the tube. I repeated it for a 3rd time pipetting 50uL of isolate into the bacteria tube for a total of 250uL of isolate added to 250uL of bacteria.
6. I waited for 5 minutes for the bacteriophage to attach to the bacteria in the tube.
7. After waiting for my isolate to attach to the bacteria in the tube, I began the plating process.
8. With a serological pipette, I got 3mL of warm agar, and put it in the tube with the bacteria and isolate together.
9. Right away, I drew up the mixture of warm agar, bacteria, and isolate back into the serological pipette.
10. I dispensed the mixture onto a plate immediately, and tilted the plate slightly to ensure that the top agar was a uniform depth around the plate.
11. I let it sit out for 20 minutes to let the top agar settle.
It went into the incubator at 29C at 4:00pm on 9/3/2021.
Results:
I took my sample out at 4:45pm on 9/7/2021.

There was contamination in the Agar plate.
Conclusions and Next Steps:
I concluded that I did not sterilize properly, and use the sterile techniques like I should have since I was working singularly. I must have cross contaminated somewhere along the way.
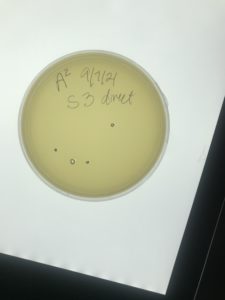
Sample 4 Purification
Date: 9/7/2021 Redo: Yes Sample: 4
Purpose: To Isolate bacteriophage using plaque assay.
Notes:
1. I washed my hands, put on gloves, and cleansed my workspace with 1:128 Cidecon and 70% ethanol. I wiped it down with kimwipes.
2. I got my supplies: a serological pipette, a glass pipette tip 10mL, a bunsen burner, 100uL micropipette with tips, agar plate, tube of bacteria 250uL, warm agar (later on).
I am doing another direct plaque assay on the isolate from sample 3. Since sample 3 was contaminated, I decided to re-plate it and do another plaque assay. The step that I started from was the isolate that was derived from pushing my shaken, incubated sample through a .22uL filter with a sterile 5ml syringe into a microcentrifuge tube.
2. I had about .75uL of filtered isolate left over from sample 3 in the microcentrifuge tube.
I began the process of the plaque assay.
3. I lit my bunsen burner to create an aseptic area.
4. I took the 100uL pipette and pipette tips, and got 100uL of isolate from the microcentrifuge tube. I added the full 100uL of isolate into the bacteria tube full of 250uL of bacteria. Since I needed to add 250uL of isolate, I pipetted another 100uL of isolate into the tube. I repeated it for a 3rd time, and pipetted 50uL of isolate into the bacteria tube for a full 250uL of isolate added to 250uL of bacteria.
5. I waited for 5 minutes for the bacteriophage to attach to the bacteria in the tube.
6. After waiting for my isolate to attach to the bacteria in the tube, I began the plating process.
7. With a serological pipette, I aspirated 3mL of warm agar, and put it in the tube with the bacteria and isolate together.
6. Right away, I drew up the mixture of warm agar, bacteria, and isolate back into the serological pipette.
7. I dispensed the mixture onto a plate immediately, and I tilted the plate slightly to ensure that the top agar was a uniform depth around the plate.
8. I let it sit out for 20 minutes to let the top agar settle.
9. I put the agar plate in the 29C incubator at 5:30pm 9/7/2021.
Results:
At 4:00 pm on 9/9/2021, I checked the plate for the presence of plaques. There were small circles on the plate. They were indistinguishable from plaques or bubbles. I decided to keep the plate in there for another 3 days to be taken out 9/13/2021.
Conclusions and Next Steps:
No bacteriophage found.
Enriched Isolation and Purification of Sample 5
Date: 9/8/2021 Redo: No Sample: 5
Purpose: Isolate and purify bacteriophage with plaque assay.
Notes:
I brought in my refrigerated clay/dirt sample that filled 7ml of the 15ml tube.
1. I washed my hands with antibacterial soap, put on gloves, and then cleaned my area to make it sterile. 1. I cleansed my workspace with 1:128 Cidecon and 70% ethanol. I wiped it down with kimwipes.
2. I got out the supplies needed to do the isolation and plaque assay. I got the Bunsen burner, a rack to hold the samples, a 50 ml conical tube, liquid media, serological pipette, and my sample in the 15ml tube.
3. After lighting the bunsen burner to create an aseptic area, I poured the contents of my soil into the empty 50mL conical tube. I got around 7mL of sample into the tube.
4. My liquid media was already out, so with the serological pipette, I extracted pyca media 10mL at a time and put it into the 50mL conical tube with my sample already inside. I repeated going back and forth putting liquid media with my sample until the liquid media was at the 35mL mark on the 50mL conical tube.
5. I hand shook the sample to create a homogenous liquid. There were still chunks in the tube, so I took it to the vortex to try to break up the chunks. Once it was a homologous liquid of pyca liquid, and dirt sample, I put it in the shaking incubator at 9:45am. The incubator is set at 250rpm and 29 degrees Celsius.
6. at 10:45am, I took the 50mL conical tube out of the shaking incubator. The mixture looked light gray in color, it wasn’t quite separated distinctly between the isolate, and the debris.
7. In order to separate the isolate from the pellet, I put the 50mL conical tube into the centrifuge for 10 minutes at 2,000xg. When It was finished, I observed that there were two distinct layers in the tube. The bottom layer was the hard pellet and debris from my sample, and the top layer was the isolate. It resulted in about 20mL of isolate.
8. I prepared for the filtration step. I got a 5mL syringe, 6 .22um filters, and another sterile 50mL conical tube. I set my tube with the isolate in the rack next to the empty 50mL tube. Using the 5mL syringe, I extracted the isolate. I then opened a .22um filter and attached the syringe full of isolate. I made sure to keep the filter opening in the package to reduce contamination. Once the .22um filter was attached to the syringe, I plunged the syringe, and dispensed the filtered isolate into the new sterile 50mL conical tube. I repeated this step 5 times, each time with a new filter. I repeated drawing up 5mL of isolate, and filtering it into the new tube. I filtered all of the isolate, and ended up with 22mL of filtered isolate in a new tube.
9. Now it was time to seed the culture with host bacteria. I gathered the host bacteria, and made sure I got .5mL. I poured the bacteria culture into the tube with my filtered isolate. I shook it around to ensure dispersal.
10. I labeled my tube, opened the cap so there was room for air to slip in, and I taped the lid down to make sure it didn’t come off. I put the isolate into the shaking incubator 9/8/2021 at 11:00am. The rpm is 220, and temperature is 29 degrees Celsius.
PART 2
It sat in the shaking incubator until 9/13/2021 at 10:00am. I observed that my enriched sample took on a brown color.
1. I prepared my bench for aseptic work, and assembled my supplies. I got a serological pipette, 4 microcentrifuge tubes, micropipette, and micropipette tips, a rack, and bacteria.
2. I began the filtration of the enriched culture.
3. Using a serological pipette, I transferred 1.4 ml of my enriched culture to a micro centrifuge tube. I did this twice for a total of 2 microcentrifuge tubes of enriched culture. This was done close to the burner to ensure aseptic technique.
4. I immediately closed the microcentrifuge tubes filled with enriched culture, and placed them in the centrifuge to be spun. This is to pellet the bacteria at the bottom. It was in the centrifuge for 1 minute at Level 10. Once it was finished, my pelleted bacteria took on a brown color at the bottom. My supernatant was a light brown, not clear.
5. Since my supernatant was not clear, I did a filtration. Once I got the required supplies of a 5ml syringe, a .22um filter, and a serological pipette, I began.
6. I opened the package for the syringe carefully and removed the plunger from the syringe.
7. I serologically pipetted 1ml of supernatant from each microcentrifuge tube (making sure to miss the bacteria pellet at the bottom) into the syringe with the plunger removed. I took a total of 1ml from each microcentrifuge tube and put it into the syringe for a total of 2ml of supernatant.
8. I put the plunger back into the syringe. I also opened the .22um filter and attached it to my syringe with 2ml of supernatant. I plunged the supernatant through the filter into a new sterile microcentrifuge tube. I ended up with 1mL of filtered supernatant. I immediately capped the sample and began the plaque assay.
PLAQUE ASSAY
1. I took the 100uL pipette and pipette tips, and got 100uL of isolate from the microcentrifuge tube. I added the full 100uL of isolate into the bacteria tube full of 250uL of bacteria. Since I needed to add 250uL of isolate, I pipetted another 100uL of isolate into the tube. I repeated it for a 3rd time pipetting 50uL of isolate into the bacteria tube for a total of 250uL of isolate added to 250uL of bacteria.
2. I waited for 5 minutes for the bacteriophage to attach to the bacteria in the tube.
3. After waiting for my isolate to attach to the bacteria in the tube, I began the plating process.
4. With a serological pipette, I got 3mL of warm agar, and put it in the tube with the bacteria and isolate together.
5. Right away, I drew up the mixture of warm agar, bacteria, and isolate back into the serological pipette.
6. I dispensed the mixture onto a plate immediately, and tilted the plate slightly to ensure that the top agar was a uniform depth around the plate.
7. I let it sit out for 20 minutes to let the top agar settle.
8. The plate was put into the incubator at 29C at 11:00 on 9/13/2021.
Results:
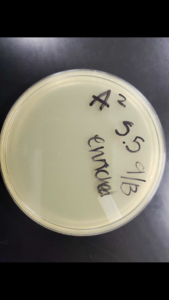
Conclusions and Next Steps:
no bacteriophage found.
Enriched Isolation and Purification of Sample 6
Date: 9/13/2021 Redo: No Sample: 6
Purpose: Isolate
Notes:
I brought in my refrigerated clay/dirt sample that filled 7ml of the 15ml tube.
1. I washed my hands with antibacterial soap, put on gloves, and then cleaned my area to make it sterile. 1. I cleansed my workspace with 1:128 Cidecon and 70% ethanol. I wiped it down with kimwipes.
2. I got out the supplies needed to do the isolation and plaque assay. I got the Bunsen burner, a rack to hold the samples, a 50 ml conical tube, liquid media, serological pipette, and my sample in the 15ml tube.
3. After lighting the bunsen burner to create an aseptic area, I poured the contents of my soil into the empty 50mL conical tube. I got around 7mL of sample into the tube.
4. My liquid media was already out, so with the serological pipette, I extracted pyca media 10mL at a time and put it into the 50mL conical tube with my sample already inside. I repeated going back and forth putting liquid media with my sample until the liquid media was at the 35mL mark on the 50mL conical tube.
5. I hand shook the sample to create a homogenous liquid. There were still chunks in the tube, so I took it to the vortex to try to break up the chunks. Once it was a homologous liquid of pyca liquid, and dirt sample, I put it in the shaking incubator at 9:45am. The incubator is set at 250rpm and 29 degrees Celsius.
6. at 10:45am, I took the 50mL conical tube out of the shaking incubator. The mixture looked light gray in color, it wasn’t quite separated distinctly between the isolate, and the debris.
7. In order to separate the isolate from the pellet, I put the 50mL conical tube into the centrifuge for 10 minutes at 2,000xg. When It was finished, I observed that there were two distinct layers in the tube. The bottom layer was the hard pellet and debris from my sample, and the top layer was the isolate. It resulted in about 20mL of isolate.
8. I prepared for the filtration step. I got a 5mL syringe, 6 .22um filters, and another sterile 50mL conical tube. I set my tube with the isolate in the rack next to the empty 50mL tube. Using the 5mL syringe, I extracted the isolate. I then opened a .22um filter and attached the syringe full of isolate. I made sure to keep the filter opening in the package to reduce contamination. Once the .22um filter was attached to the syringe, I plunged the syringe, and dispensed the filtered isolate into the new sterile 50mL conical tube. I repeated this step 5 times, each time with a new filter. I repeated drawing up 5mL of isolate, and filtering it into the new tube. I filtered all of the isolate, and ended up with 22mL of filtered isolate in a new tube.
9. Now it was time to seed the culture with host bacteria. I gathered the host bacteria, and made sure I got .5mL. I poured the bacteria culture into the tube with my filtered isolate. I shook it around to ensure dispersal.
10. I labeled my tube, opened the cap so there was room for air to slip in, and I taped the lid down to make sure it didn’t come off. I put the isolate into the shaking incubator 9/8/2021 at 11:00am. The rpm is 220, and temperature is 29 degrees Celsius.
PART 2
It sat in the shaking incubator until 9/13/2021 at 10:00am. I observed that my enriched sample took on a brown color.
1. I prepared my bench for aseptic work, and assembled my supplies. I got a serological pipette, 4 microcentrifuge tubes, micropipette, and micropipette tips, a rack, and bacteria.
2. I began the filtration of the enriched culture.
3. Using a serological pipette, I transferred 1.4 ml of my enriched culture to a micro centrifuge tube. I did this twice for a total of 2 microcentrifuge tubes of enriched culture. This was done close to the burner to ensure aseptic technique.
4. I immediately closed the microcentrifuge tubes filled with enriched culture, and placed them in the centrifuge to be spun. This is to pellet the bacteria at the bottom. It was in the centrifuge for 1 minute at Level 10. Once it was finished, my pelleted bacteria took on a brown color at the bottom. My supernatant was a light brown, not clear.
5. Since my supernatant was not clear, I did a filtration. Once I got the required supplies of a 5ml syringe, a .22um filter, and a serological pipette, I began.
6. I opened the package for the syringe carefully and removed the plunger from the syringe.
7. I serologically pipetted 1ml of supernatant from each microcentrifuge tube (making sure to miss the bacteria pellet at the bottom) into the syringe with the plunger removed. I took a total of 1ml from each microcentrifuge tube and put it into the syringe for a total of 2ml of supernatant.
8. I put the plunger back into the syringe and deposited the supernant into a microcentrifuge tube. I immediately capped the sample and began the plaque assay.
PLAQUE ASSAY
1. I took the 100uL pipette and pipette tips, and got 100uL of isolate from the microcentrifuge tube. I added the full 100uL of isolate into the bacteria tube full of 250uL of bacteria. Since I needed to add 250uL of isolate, I pipetted another 100uL of isolate into the tube. I repeated it for a 3rd time pipetting 50uL of isolate into the bacteria tube for a total of 250uL of isolate added to 250uL of bacteria.
2. I waited for 5 minutes for the bacteriophage to attach to the bacteria in the tube.
3. After waiting for my isolate to attach to the bacteria in the tube, I began the plating process.
4. With a serological pipette, I got 3mL of warm agar, and put it in the tube with the bacteria and isolate together.
5. Right away, I drew up the mixture of warm agar, bacteria, and isolate back into the serological pipette.
6. I dispensed the mixture onto a plate immediately, and tilted the plate slightly to ensure that the top agar was a uniform depth around the plate.
7. I let it sit out for 20 minutes to let the top agar settle.
8. The plate was put into the incubator at 29C at 11:00 on 9/13/2021.
Results:

Conclusions and Next Steps:
There was major contamination because we accidentally forgot to filter the supernate after centrifuging but there were plaques that were uncontaminated so we proceded with serial dilutions with this plate. We also prepared an aditional plaque from leftover supernate in case these plaques were unusable.
Enriched Isolation and Purification of Sample 6.2
Date: 9/15/2021 Redo: Yes Sample: 6.2
Purpose: Isolate
Notes:
This sample is a redo of sample 6 starting from after the final centrifuging.
1. I washed my hands with antibacterial soap, put on gloves, and then cleaned my area to make it sterile. 1. I cleansed my workspace with 1:128 Cidecon and 70% ethanol. I wiped it down with kimwipes.
2. I got out the supplies needed to do the isolation and plaque assay. I got the Bunsen burner, a rack to hold the samples, serological pipette, and my supernate in the 15ml tube.
3. I lit my bunsen burner and prepared to filter my supernate from sample 6
4. Since my supernatant had other bacteria within it, I did a filtration. Once I got the required supplies of a 5ml syringe, a .22um filter, and a serological pipette, I began.
5. I opened the package for the syringe carefully and removed the plunger from the syringe.
6. I serologically pipetted 1ml of supernatant from each microcentrifuge tube (making sure to miss the bacteria pellet at the bottom) into the syringe with the plunger removed. I took a total of 1ml from each microcentrifuge tube and put it into the syringe for a total of 2ml of supernatant.
7. I put the plunger back into the syringe and deposited the supernant into a microcentrifuge tube. I immediately capped the sample and began the plaque assay.
PLAQUE ASSAY
1. I took the 100uL pipette and pipette tips, and got 100uL of isolate from the microcentrifuge tube. I added the full 100uL of isolate into the bacteria tube full of 250uL of bacteria. Since I needed to add 250uL of isolate, I pipetted another 100uL of isolate into the tube. I repeated it for a 3rd time pipetting 50uL of isolate into the bacteria tube for a total of 250uL of isolate added to 250uL of bacteria.
2. I waited for 5 minutes for the bacteriophage to attach to the bacteria in the tube.
3. After waiting for my isolate to attach to the bacteria in the tube, I began the plating process.
4. With a serological pipette, I got 3mL of warm agar, and put it in the tube with the bacteria and isolate together.
5. Right away, I drew up the mixture of warm agar, bacteria, and isolate back into the serological pipette.
6. I dispensed the mixture onto a plate immediately, and tilted the plate slightly to ensure that the top agar was a uniform depth around the plate.
7. I let it sit out for 20 minutes to let the top agar settle.
8. The plate was put into the incubator at 29C at 11:00 on 9/15/2021.
Results:

Conclusions and Next Steps:
There was no contamination on the plate and the plate contained many plaques and possibly many phages. This plate will be saved for later use in case our serial dilution of sample 6 does not produce good results.
Title: Serial Dilution 1
Date: 9/15/2021 Redo: No Sample: 6
Purpose: to isolate the phage through serial dilution.
Notes:
1. Although our plate had a lot of contamination, we were able to find multiple phages that were free of contaminants, and we selected the best to isolate for serial dilution.
2. Using a micropipette, we aspirated 100ul of phage buffer into the first microcentrifuge tube.
2a. We got 5 more microcentrifuge tubes and added 90ul of phage buffer to each of them using the micropipette.
3. A micropipette with a sterile tip was placed perpendicular to the surface of the agar, and then gently placed in the center of our chosen phage plaque. The bacteria that surrounds was avoided.
3a. The pipette tip was then placed into the first microcentrifuge labeled “1” and tapped along the inside to try and dislodge the phage sample within the tip. The phage buffer with the phage sample was aspirated a few times to make sure that it was mixed together.
4. We then started the serial dilution protocol. We began by setting up the 6 microcentrifuge tubes in order labelled, 1, 10^-1, 10^-2, 10^-3, 10^-4, 10^-5.
4a. We started with 10ul of the undiluted phage sample from the first microcentrifuge tube, and added it to the 10^-1 tube and then vortexing it. This process continued all the way through to the 10^-5 tube. We vortexed and changed pipette tips each time after putting 10ul of solution into the microcentrifuge tubes.
5. The next step is plating the dilutions.
5a. We took the 100uL pipette and pipette tips, and got 10uL of solution from each of the microcentrifuge tubes and added the 10ul to 250ul of bacteria.
5b. We waited for 5 minutes for the bacteriophage to attach to the bacteria in the tube.
5c. After waiting for the isolate to attach to the bacteria in the tube, we began the plating process.
5d. With a serological pipette, we got 3mL of warm agar, and put it in the tube with the bacteria and isolate together.
5e. Right away, we drew up the mixture of warm agar, bacteria, and isolate back into the serological pipette.
5f. we dispensed the mixture onto a plate immediately, and tilted the plate slightly to ensure that the top agar was a uniform depth around the plate.
5g. I let it sit out for 20 minutes to let the top agar settle.
step 5 was repeated for each dilution, 1 – 10^-5.
the plates were put in the incubator 9/15/2021 at 29 degrees celsius.
Results:
The plates were taken out of the incubator on 9/17/2021 and put in the fridge.
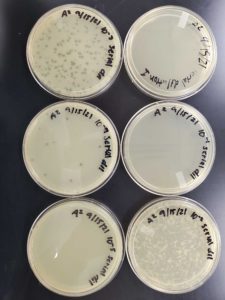
Conclusions and Next Steps:
The next step is to do the second serial dilution.
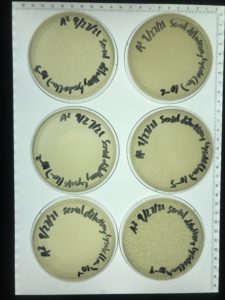
Title: Serial Dilution 2
Date: 09/20/21 Redo: No Sample: 10^-4 plate from prior dilution
Purpose: to isolate the phage through serial dilution.
Notes:
1. From the dilution before, we chose the 10^-4 plaque to do another serial dilution on.
2. Using a micropipette, we aspirated 100ul of phage buffer into the first microcentrifuge tube and labelled it “1”.
2a. We got 5 more microcentrifuge tubes and added 90ul of phage buffer to each of them using the micropipette.
3. A micropipette with a sterile tip was placed perpendicular to the surface of the 10^-4 agar plate from the first dilution, and then gently placed in the center of our chosen phage plaque.
3a. The pipette tip was then placed into the first microcentrifuge labeled “1” and tapped along the inside to try and dislodge the phage sample within the tip. The phage buffer with the phage sample was aspirated a few times to make sure that it was mixed together.
4. We then started the serial dilution protocol. We began by setting up the 6 microcentrifuge tubes in order labelled, 1, 10^-1, 10^-2, 10^-3, 10^-4, 10^-5.
4a. We started with 10ul of the undiluted phage sample from the first microcentrifuge tube, and added it to the 10^-1 tube and then vortexing it. This process continued all the way through to the 10^-5 tube. We vortexed and changed pipette tips each time after putting 10ul of solution into the microcentrifuge tubes.
5. The next step is plating the dilutions.
5a. We took the 100uL pipette and pipette tips, and got 10uL of solution from each of the microcentrifuge tubes and added the 10ul to 250ul of bacteria.
5b. We waited for 5 minutes for the bacteriophage to attach to the bacteria in the tube.
5c. After waiting for the isolate to attach to the bacteria in the tube, we began the plating process.
5d. With a serological pipette, we got 3mL of warm agar, and put it in the tube with the bacteria and isolate together.
5e. Right away, we drew up the mixture of warm agar, bacteria, and isolate back into the serological pipette.
5f. we dispensed the mixture onto a plate immediately, and tilted the plate slightly to ensure that the top agar was a uniform depth around the plate.
5g. We let it sit out for 20 minutes to let the top agar settle.
step 5 was repeated for each dilution, 1 – 10^-5.
The plates were put in the incubator 9/20/2021 at 29 degrees Celsius.
Results:
The plates were taken out on 9/22/2021.
The undiluted plate was completely covered with bacteriophage.
10^-1 plate was completely covered with bacteriophage.
10^-2 plate had too many plaques to count >500
10^-3 plate had roughly 100 plaques
10^-4 plate had ~20 plaques
10^-5 plate had no visible plaques

Conclusions and Next Steps:
Our plates were good, so we decided to go forth with the low lysate concentration step.
Collecting Low Volume Lysate
Date: 9/25/2021 Redo: No Sample: 10^-2 plate from prior dilution
Purpose: To create a low concentration of liquid phage sample.
Notes:
1. Using plate 10^-2 from the second serial dilution, we aspirated 8ml of liquid phage buffer and flooded the plate. We let it sit for 2 hours.
2. After sitting, phage lysate was collected using a 5mL syringe. The liquid phage lysate was drawn up.
3. We attached a .22 micrometer filter to the syringe and the phage lysate was pushed through into a 15ml conifer tube.
4. The tube was labelled, and ready to go for the full plate titer.
Results:
We collected about 7.5mL of phage lysate solution.
Conclusions and Next Steps:

The next step is to move forward onto a full plate titer.
Full Plate Titer
Date: 9/27/2021 Redo: No Sample: Low Volume Lysate
Purpose: To determine the concentration of phage particles in the low concentration lysate that will then be used to make webbed plates.
Notes:
1. We used the low volume lysate collected from plate 10^-3 from the second serial dilution. We performed a 6-fold serial dilutions. we had 6 microcentrifuge tubes each filled with 90ul of phage buffer. We labeled each tube from 10^-1 to 10^-6
1a. It started with taking 10 microliters of the undiluted low volume lysate phage sample and adding it to the 10^-1 tube and then vortexed it. This process continued all the way through the 10^-6 microcentrifuge tube.
2. We followed plaque assay protocol as normal.
2a. We took the 100uL pipette and pipette tips, and got 10uL of solution from each of the microcentrifuge tubes and added the 10ul to 250ul of bacteria.
2b. We waited for 5 minutes for the bacteriophage to attach to the bacteria in the tube.
2c. After waiting for the isolate to attach to the bacteria in the tube, we began the plating process.
2d. With a serological pipette, we got 3mL of warm agar, and put it in the tube with the bacteria and isolate together.
2e. Right away, we drew up the mixture of warm agar, bacteria, and isolate back into the serological pipette.
2f. we dispensed the mixture onto a plate immediately, and tilted the plate slightly to ensure that the top agar was a uniform depth around the plate.
2g. We let it sit out for 20 minutes to let the top agar settle.
3. the plates were put into the incubator on 9/27/2021 for 48 hours at 29 degrees celsius.
Results:
10^-1, 10^-2, and 10^-1 plates had too many bacteriophage to count.
10^-4 plate had many, >2000 plaques
10^-5 plate had ~ 200 plaques
10^-6 plate ~20 plaques
Conclusions and Next Steps:
The next step is to create high volume lysate using the 10^4 dilution since it was a good webbed plate.
Amplification
Title: Webbed Plates for High Volume Lysate
Date: 10/06/21 Redo: No Sample: Low Volume Lysate
Purpose: This procedure is to create multiple webbed plates to collect lysate and produce high volume lysate.
Notes:
1. We used the low volume lysate. We performed a 4-fold serial dilution. We had 4 microcentrifuge tubes each filled with 90ul of phage buffer. We labeled each tube from 10^-1 to 10^-4
1a. It started with taking 10 microliters of the undiluted low volume lysate phage sample and adding it to the 10^-1 tube and then vortexed it. This process continued all the way through the 10^-4 microcentrifuge tube.
2. We followed plaque assay protocol as normal.
2a. We took the 100uL pipette and pipette tips, and got 10uL of solution from the 10^-4 microcentrifuge tube and added the 10ul to 250ul of bacteria.
2b. We repeated this for three more tubes of bacteria.
2c. We waited for 5 minutes for the bacteriophage to attach to the bacteria in the tubes.
2d. After waiting for the phage to attach to the bacteria in the tube, we began the plating process.
2e. With a serological pipette, we got 3mL of warm agar, and put it in the tube with the bacteria and phage together.
2f. Right away, we drew up the mixture of warm agar, bacteria, and isolate back into the serological pipette.
2g. we dispensed the mixture onto a plate immediately, and tilted the plate slightly to ensure that the top agar was a uniform depth around the plate.
2h. We repeated this for the other three plates.
2i. We let them sit out for 20 minutes to let the top agar settle.
3. the plates were put into the incubator on 10/06/2021 for 48 hours at 29 degrees celsius.
Results:
Three out of the four plates produced good webbed plates. The third had less plaques than optimal but can still be used.
Conclusions and Next Steps:
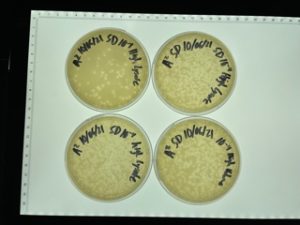
We will collect lysate from all four plates and create high volume lysate.
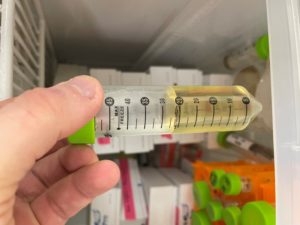
Title: Collect High Volume Lysate
Date: 10/11/21 Redo: No Plate: Webbed Plates
Purpose: This procedure is to collect lysate from multiple plates to create high volume lysate.
Notes:
1. Using the webbed plates, we aspirated 8ml of liquid phage buffer and flooded each plate. We let them sit for 2 hours.
2. After sitting, phage lysate was collected using a 5mL syringe. The liquid phage lysate was drawn up.
3. We attached a .22 micrometer filter to the syringe and the phage lysate was pushed through into a 50ml conifer tube.
4. The tube was labelled, and ready to use for DNA extraction and future procedures.
Results:
We collected about 25mL of phage lysate solution.
Conclusions and Next Steps:
We collected our high volume lysate and will use this to procede with serial dilution and DNA extraction.
Full Plate Titer
Date: 10/18/2021 Redo: No Sample: High Volume Lysate
Purpose: To determine the concentration of phage particles in the High Volume concentration lysate that will then be used to make webbed plates.
Notes:
1. We used the High volume lysate collected from plate. We performed a 6-fold serial dilutions. we had 6 microcentrifuge tubes each filled with 90ul of phage buffer. We labeled each tube from 10^-1 to 10^-6
1a. It started with taking 10 microliters of the undiluted high volume lysate phage sample and adding it to the 10^-1 tube and then vortexed it. This process continued all the way through the 10^-6 microcentrifuge tube.
2. We followed plaque assay protocol as normal.
2a. We took the 100uL pipette and pipette tips, and got 10uL of solution from each of the microcentrifuge tubes and added the 10ul to 250ul of bacteria.
2b. We waited for 5 minutes for the bacteriophage to attach to the bacteria in the tube.
2c. After waiting for the isolate to attach to the bacteria in the tube, we began the plating process.
2d. With a serological pipette, we got 3mL of warm agar, and put it in the tube with the bacteria and isolate together.
2e. Right away, we drew up the mixture of warm agar, bacteria, and isolate back into the serological pipette.
2f. we dispensed the mixture onto a plate immediately, and tilted the plate slightly to ensure that the top agar was a uniform depth around the plate.
2g. We let it sit out for 20 minutes to let the top agar settle.
3. the plates were put into the incubator on 10/18/2021 for 48 hours at 29 degrees celsius.
Results:
Plate 10^-1 had an uncountable number of plaques
Plate 10^-2 had an uncountable number of plaques
Plate 10^-3 had an uncountable number of plaques
Plate 10^-4 had >1000 plaques
Plate 10^-5 had >400 plaques
Plate 10^-6 had about 8 plaques
Conclusions and Next Steps:
The next step is to continue on to DNA extraction with our high volume lysate.
DNA Extraction
Title: DNA Isolation Protocol with ZnCl2
Date: 10/20/21 Redo: No Sample: #6
Purpose: To isolate and collect DNA from the phage
Notes:
1. After putting on gloves and setting up our workspace, we mixed our High Volume Lysate (HVL) and then we aliquot 5mL of the HVL into a 15mL conical tube.
1a. We had our TA add 20uL of nuclease into the 15mL conical tube with our HVL.
4. To each tube 20uL of ZnCl2 was added and mixed gently by inversion, then incubated at 37°C for 5min.
Day 2:
1. Our day 2 started about 5 days after we left our tubes in ice.
2. We centrifuged the 5 tubes for 10 minutes at 12,000 rpm to pellet the DNA. After, we discarded the supernant into a waste tube.
3. we added 250ul of 70% ethanol in each microcentrifuge tube, and spin again for 1 minute at top speed. This is to wash the pellets. We discarded the supernant again afterward.
4. we dried the DNA pellets at room temperature by turning the tubes upside down on a paper towel. We waited about 15 minutes for the tubes to dry completely.
5. We suspended the pellet in 50uL of nuclease free water. We used the same 50uL to suspend each of the 5 pellets until they were all suspended in the same 50uL.
6. We checked the concentrations in the nanodrop
Results:
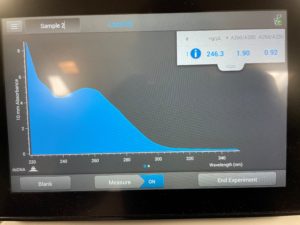
Conclusions and Next Steps:
The numbers here were not satisfacory, so we decided to try again.
Title: DNA isolation
Date: 10/27/2021 Redo: Yes Sample: #6
Purpose: This procedure is to isolate and collect DNA from phage.
Notes:
1. After putting on gloves and setting up our workspace, we mixed our High Volume Lysate (HVL) and then we aliquot 5mL of the HVL into a 15mL conical tube.
1a. We had our TA add 20uL of nuclease into the 15mL conical tube with our HVL.
4. To each tube 20uL of ZnCl2 was added and mixed gently by inversion, then incubated at 37°C for 5min.
Day 2:
1. Our day 2 started about 5 days after we left our tubes in ice.
2. We centrifuged the 5 tubes for 10 minutes at 12,000 rpm to pellet the DNA. After, we discarded the supernant into a waste tube.
3. we added 250ul of 70% ethanol in each microcentrifuge tube, and spin again for 1 minute at top speed. This is to wash the pellets. We discarded the supernant again afterward.
4. we dried the DNA pellets at room temperature by turning the tubes upside down on a paper towel. We waited about 15 minutes for the tubes to dry completely.
5. We suspended the pellet in 50uL of nuclease free water. We used the same 50uL to suspend each of the 5 pellets until they were all suspended in the same 50uL.
6. We checked the concentrations in the nanodrop
Results:

Conclusions and Next Steps:
We still didn’t acquire the numbers we want, so we will try again.
Title: DNA isolation
Date: 11/4/2021 Redo: Yes Sample: #6
Purpose: This procedure is to isolate and extract DNA from phage
Notes:
1. After putting on gloves and setting up our workspace, we mixed our High Volume Lysate (HVL) and then we aliquot 5mL of the HVL into a 15mL conical tube.
1a. We had our TA add 20uL of nuclease into the 15mL conical tube with our HVL.
4. To each tube 20uL of ZnCl2 was added and mixed gently by inversion, then incubated at 37°C for 5min.
Day 2:
1. Our day 2 started about 4 days after we left our tubes in ice.
2. We centrifuged the 5 tubes for 10 minutes at 12,000 rpm to pellet the DNA. After, we discarded the supernatant into a waste tube.
3. we added 250ul of 70% ethanol in each microcentrifuge tube, and spin again for 1 minute at top speed. This is to wash the pellets. We discarded the supernatant again afterward.
4. we dried the DNA pellets at room temperature by turning the tubes upside down on a paper towel. We waited about 15 minutes for the tubes to dry completely.
5. We suspended the pellet in 50uL of nuclease free water. We used the same 50uL to suspend each of the 5 pellets until they were all suspended in the same 50uL.
6. We checked the concentrations in the nanodrop
Results:
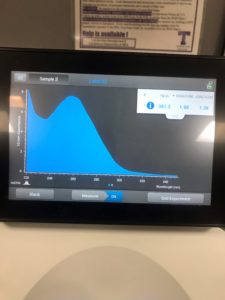
Conclusions and Next Steps:
The numbers are still not where we need them, so we will go on to do an Ethanol precipitation of RNA/DNA.
Title: Ethanol DNA precipitation
Date: 11/10/2021 Redo: No Sample: #6
Purpose: This procedure is to precipitate and purify the DNA
Notes:
1. After cleaning our workspace, we started the DNA precipitation procedure. Using the DNA extraction from the step above, we figured out how many uL were in the microcentrifuge tube by way of aspirating it into a micropipette, counting the uL, and putting it into another microcentrifuge tube until it was gone. We had 125uL of DNA extraction sample.
2. We calculated how much Sodium Acetate and 100% ethanol to use by multiplying the 125uL by .1, and 2.5 respectively. Once we got our calculations, we added 12.5uL of Sodium acetate to the microcentrifuge tube, and 312.5uL of ice cold 100% ethanol into the tube. We vortexed to mix thoroughly.
3. We put it in the -80 degree C freezer for 1 hour for it to precipitate.
4. After 1 hour, centrifuged it at 4 degrees C for another 30 minutes.
5. Next, we took it out of the centrifuge and dumped the supernatant. We washed it with ice cold 75% ethanol by putting .5mL of it in with the pellet, and centrifuged it for a 10 minutes at 4 degrees C on 10,000rpm. We repeated this step twice.
6. Once all the ethanol is dumped out, we let the pellet dry in the fume hood for 20 minutes.
7. After the pellet was dried, and all traces of ethanol were gone, we suspended the pellet in 50uL of nuclease free water.
8. to test the concentration, we tested it with the nanodrop and the Qubit.
Results:
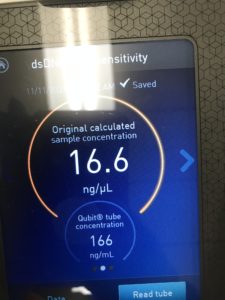

Conclusions and Next Steps:
We conclude based on the results that we have about 75ng/uL of DNA. This will be further used in characterization.
Characterization
d Mounting Phage Samples for TEM and Staining with Uranyl Acetate
Date: 10/13/21 Redo: No
- Using gloves, the bench area was disinfected with CiDecon and spread with Kimwipes followed by 70% EtOH, also spread with Kimwipes.
- 1 mL of our high-volume lysate was transferred to a new microcentrifuge tube.
- We placed our microcentrifuge tube in the centrifuge for 1 hour at 4 degrees C at 13,000 rpm to concentrate the phage particles at the bottom of the tube.
- When it was finished, we removed the supernatant with a micropipette without disturbing the pellet.
- We added 100 ul of phage buffer to the tube, and the pellet was resuspended for an hour in a 4ºC fridge.
The rest of the protocol was done immediately to avoid damaging the phage heads
- The work area was already prepared by the instructor.
- Under a fume hood, a 5cm x 5cm peice of parafilm was obtained and the parafilm was placed in the center of a Petri dish lid.
- A PELCO Tab was placed in the center of the parafilm and the adhesive side was exposed.
- Using EM forceps, a fresh grid was removed by its edge.
- The grid was placed right against the side of the tab with the dark and shiny side facing Up.
- Using a micropipette, 10 ul of our lysate mixed with phage buffer was placed on the grid without touching the micropiptette tip to the grid. We achieved this by making a ball of liquid on the tip of the pipette, and gently transferring the drop of liquid to the grid.
- We let it sit on the grid for 2 minutes.
- Next, Excess fluid was wicked off with a small wedge of filter paper.
- The grid was rinsed two more times by carefully pipetting 10 uL of water onto the grid and allowing it to sit for 2 minutes each time. Water was wicked off both times with a fresh wedge of filter paper.
- Next, 10 ul of 1% uranyl acetate was added to the grid and allowed to sit for 2 minutes.
- The excess stain was wicked off using a fresh wedge of filter paper until the surface looked like an oil slick.
- The grid was allowed to air dry and placed safely into a grid box.
Conclusions and Next Steps:
We will continue with our DNA extraction.
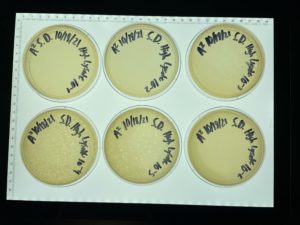
Setting up Restriction Enzyme Digests
Date: 11/10/21 Redo: No
Purpose: This procedure is to cut the phage genome into multiple fragments based in its DNA sequence.
Notes:
1. For the calculations, we used our 75ng/uL that we calculated in the DNA extraction procedure. In order to calculate how many uL we need per microcentrifuge tube, this is the formula we used. .5ug(ml/75)(1000ul/1ml) = roughly 7 ul.
2. For setting up the enzyme digests, we got 5 microcentrifuge tubes, and filled each with the required materials. 4 of the tubes got 2.5uL of 10X reaction Buffer, .5 ul of Restriction enzyme (each tube got a different enzyme, HaeIII, SacII, SaII, NspI), 7uL of genomic DNA, and 15uL of nuclease free water. The last tube got 2.5ul of 10X reaction Buffer, 7ul of genomic DNA, and 15.5ul of nuclease free water.
3. We mixed each, and micro centrifuged it for 1 minute at 10,000 rpm. We put it in the heating block set at 37 degrees Celsius for 1 hour.
4. After the hour, I took the tubes out of the heating block and put them into the -20 degree Celsius freezer to stay overnight, or until further use.
Results:
I got 5 microcentrifuge tubes with enzyme, buffer, and DNA.
Conclusions and Next Steps:
We conclude that the next steps to be taken is Analyzation by doing electrophoresis gels.
Casting Agarose Gels & Gel Electrophoresis
Date: 11/11/21 Redo: No Sample: #6
Purpose: To prepare an agarose gel for electrophoresis, and perform the gel electrophoresis.
Notes:
1. To make a .8& w/v agarose gel, we mixed 30mL of 1x TBE Buffer and .24g of agarose powder. We mixed them both in an Erlenmeyer flask. We put it in the microwave for 1 minute.
2. After taking it out of the microwave with a heat resistant glove, we let it cool for about 5 minutes, then we added 1.5uL of Ethidium Bromide and mixed.
3. Next, we poured the contents of the flask into the prepared gel apparatus. Next, we added the comb to cast the wells. We let it sit for 30 minutes to solidify.
4. Once solidified, we took out the comb carefully by pulling it straight up. We took out the casting tray, rotated it 90 degrees, and placed it where the wells are on the same side as the negative cathode.
5. We added 1X TBE Buffer until it covered the gel about 1/4 an inch.
USING THE 5 MICROCENTRIFUGE TUBES FROM THE ENZYME DIGEST PROTOCOL ABOVE
6. We took our DNA samples mixed with Restricting enzyme out of the -20 degree freezer. We added 5ul of 6x loading dye to each tube. Right after, we put them in the heating block set at 65 degrees celcius for 5 minutes.
7. While the DNA samples sat, we made our ladder which consists of 24uL of nuclease free water, 5ul of 6x loading dye, and 1ul of HindiIII-digest. We put all 3 in another microcentrifuge tube using a micropipette.
8. Once our 5 microcentrifuge tubes were done incubating after 5 minutes, we placed them on ice immediately to prevent the annealing of the cohesive ends of DNA.
9. Next, we loaded our gels by placing the contents of our microcentrifuge tubes into the wells in this order: Ladder, Uncut DNA, HaeII, SaII, SacII, and NspI.
9a. Using a fresh pipette tip for each sample, We aspirated 20ul of the Ladder.
9b. carefully placing the pipette tip into the well, we depressed the plunger slowly allowing the solution to sink into the well.
9c. This step was repeated 5 more times with the other samples. Each time, a new tip was used.
10. The electrodes were plugged in and placed on the gel apparatus. The voltage was set to 100V, and it ran for 1 hour and 15 minutes. We waited until the line of dye was between 5 and 6.
Results:
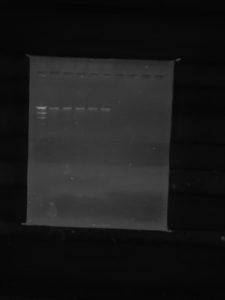
Conclusions and Next Steps:
The DNA electrophoresis was successful. The lines are all the same because our virus has protection against the restricting enzymes that we used with it.