Discovery of Rowley
September 3, 2018
Sample Collection
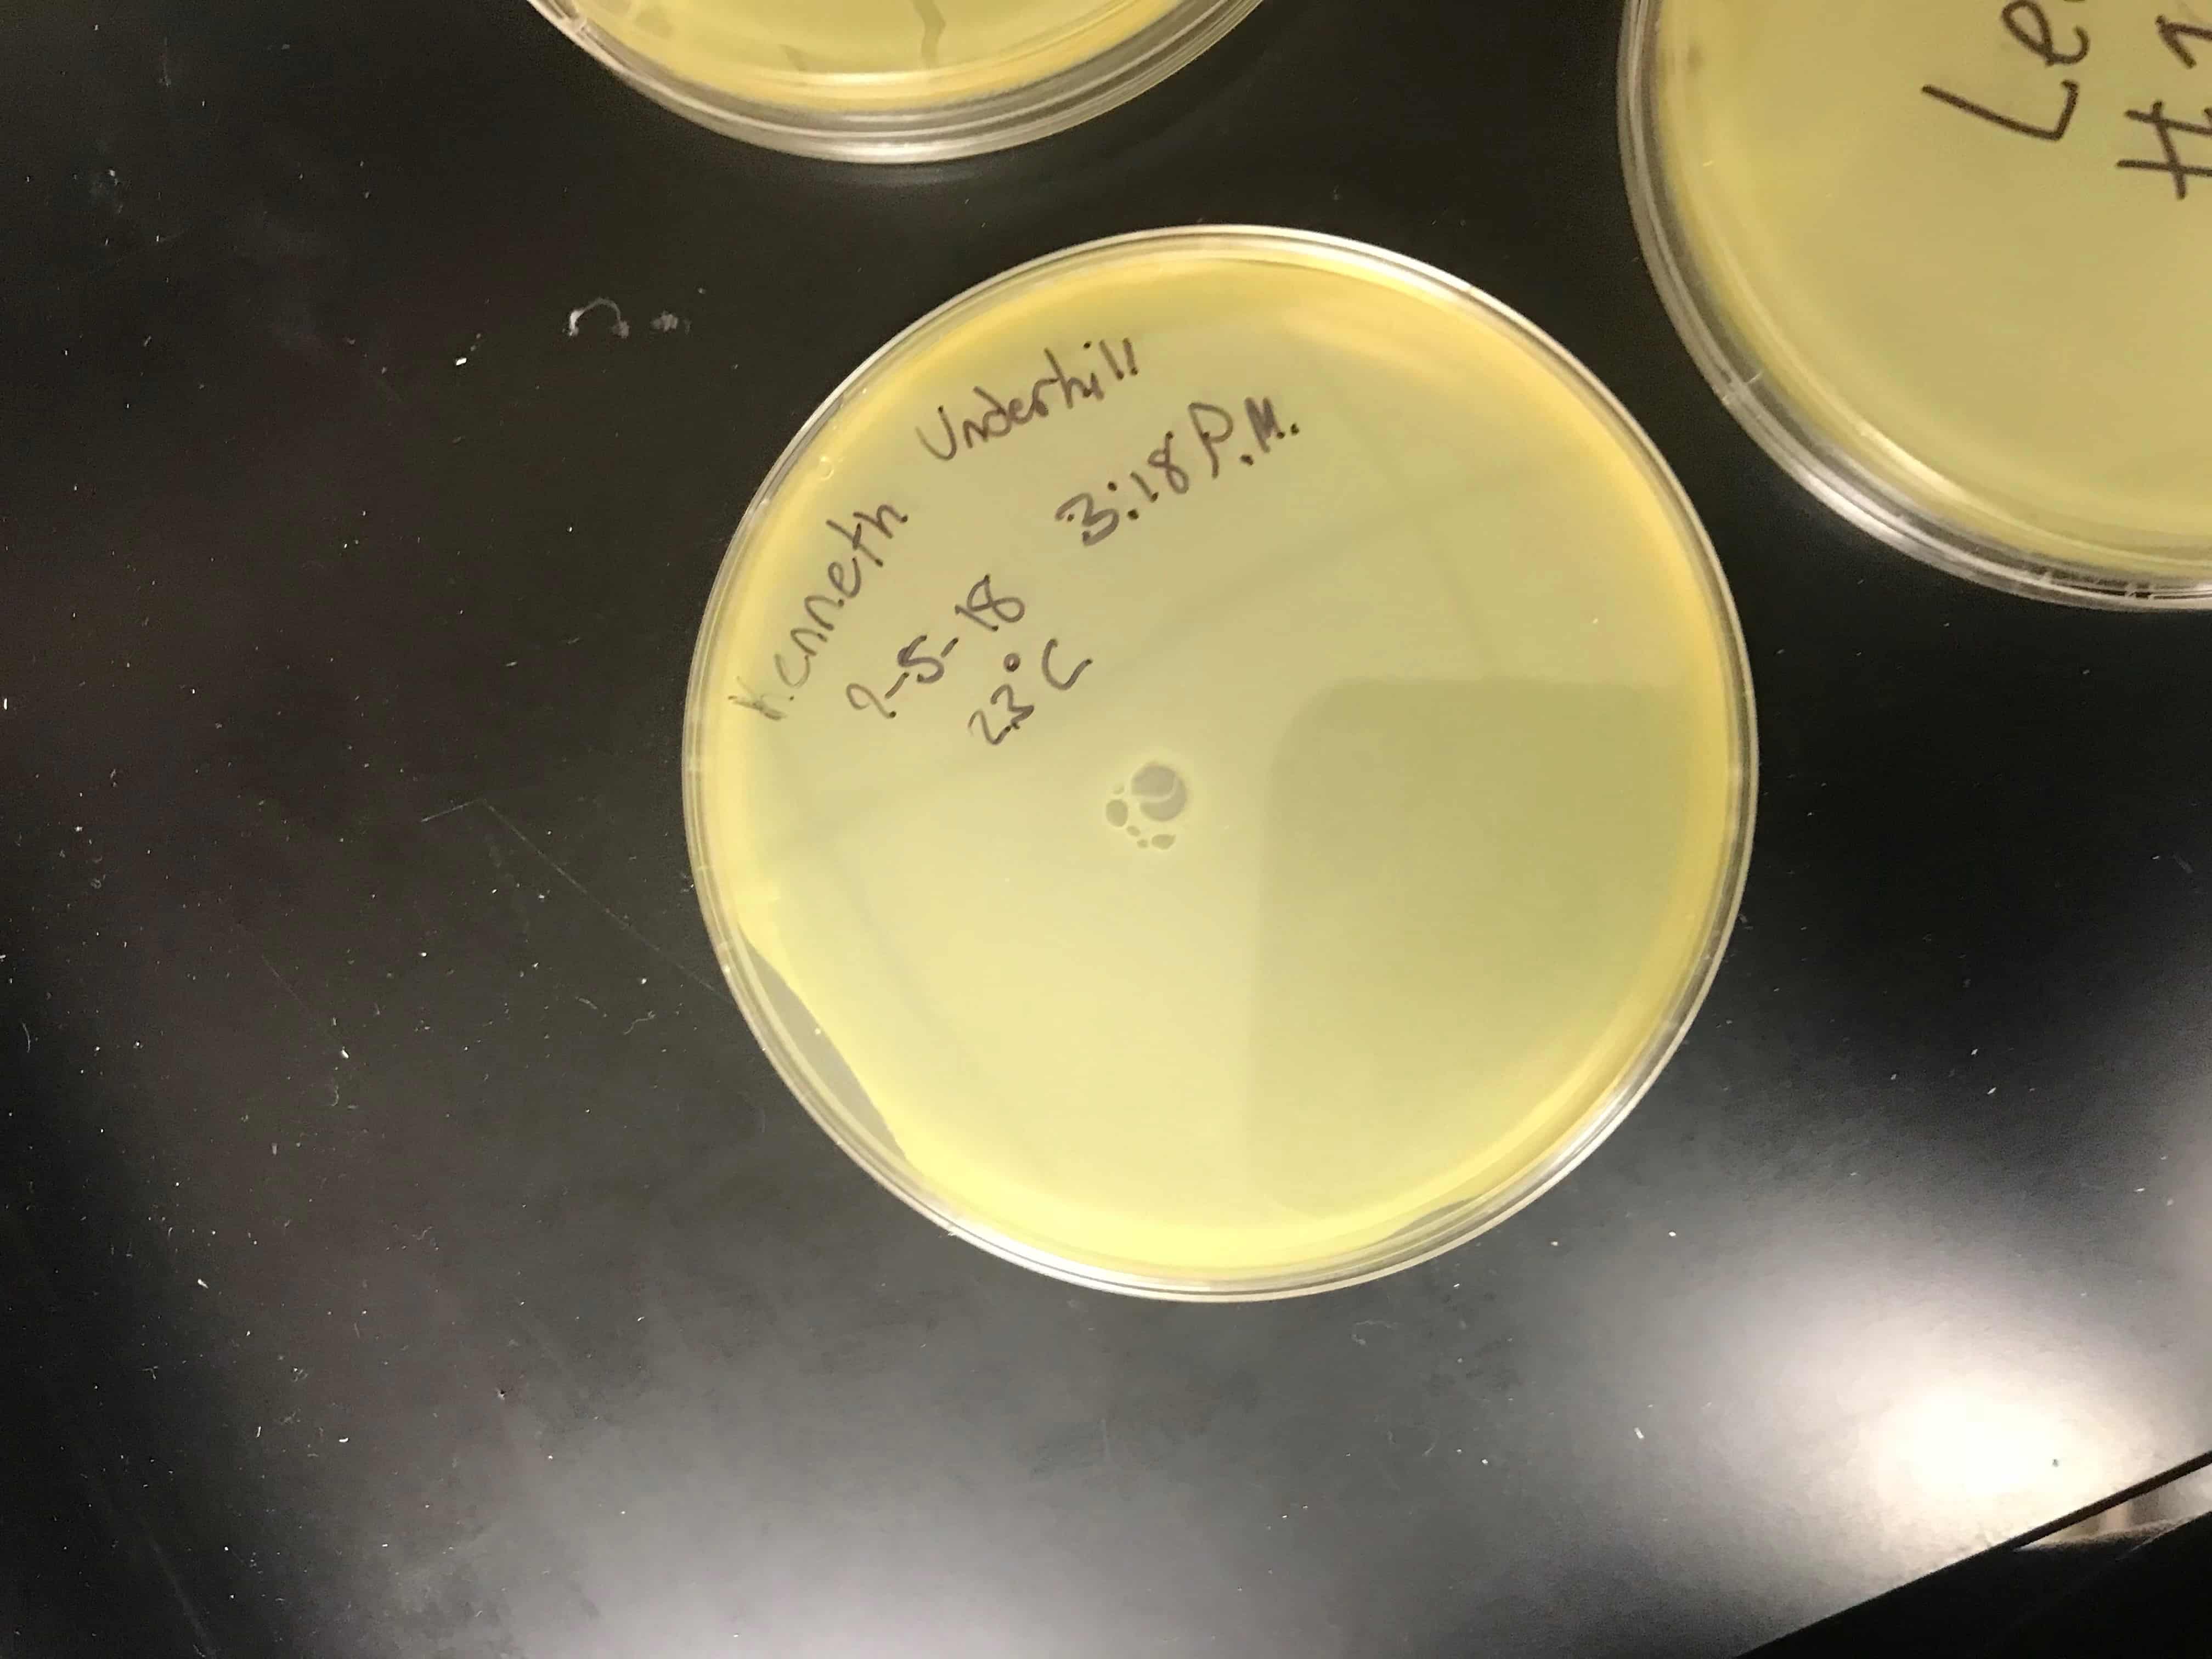
The sample was collected on September 3, 2018 in a residential house’s garden bed in Stephenville, Texas (32.2236, -98.2400). The ambient temperature was 72 F. The sample was then refrigerated to ensure it remained viable until further use.
September 5, 2018
Direct and Enriched Isolation and Plaque Assay on Samples 1 and 2
Purpose: Isolate and confirm potential phages for future infection of host bacteria
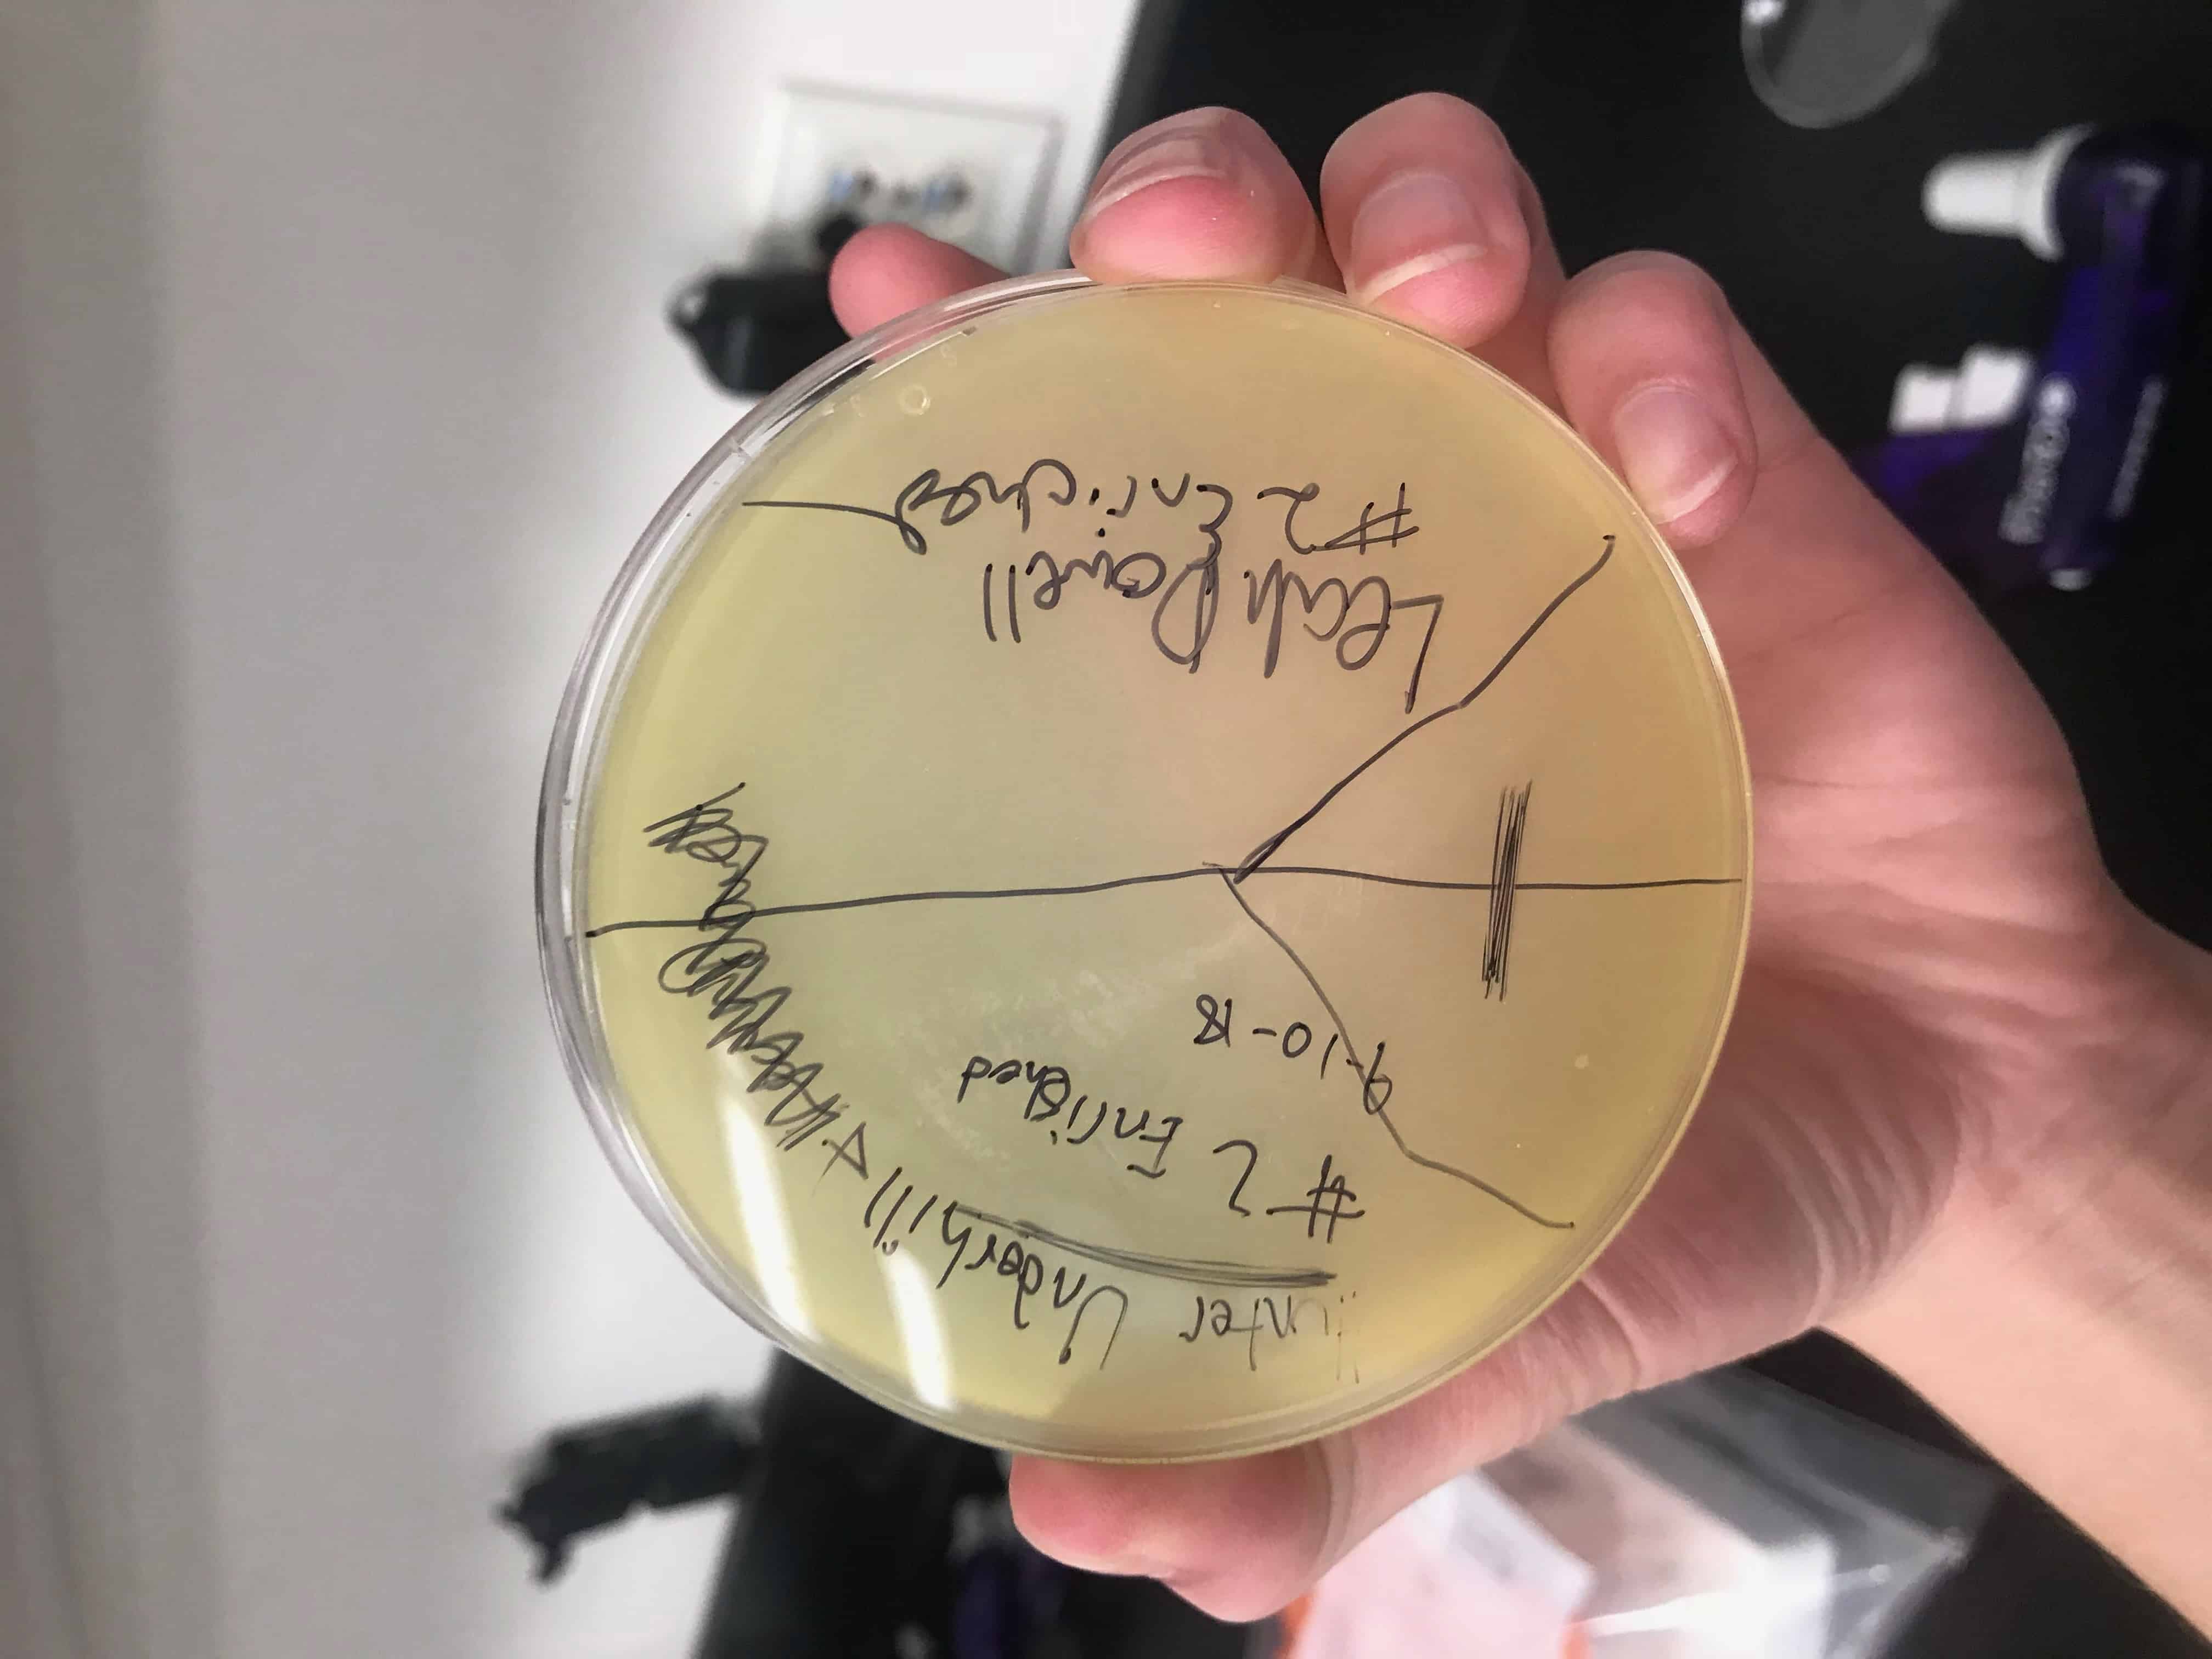
The samples in which direct isolation was performed on were collected on September 3, 2018. Liquid media was added until the samples were submerged beneath 3 ml of liquid. Afterwards, they were inverted several times to ensure it was well mixed. They were then incubated in a shaking incubator for 2 hours at 250 rpm. After, they were allowed to rest for 10 minutes until the particulate matter had mostly settled to create two distinct layers. After the matter had settled they were filtered using a .22 µL filter and a syringe in which about 1 mL of filtrate per sample was filtered into a microcentrifuge tube.Then for plaque assay, .5 mL of filtrate was placed into tubes containing .25 ml of host bacteria and allowed to sit for 10 minutes for attachment. A 5 ml pipette was then used to transfer 3 ml of top agar into the tubes containing .25 ml of host bacteria and phage sample, immediately drawn back up, then dispersed evenly onto the room temperature agar plate. They were then left to solidify for approximately 20 minutes. The plates were then inverted and left to incubate for 2 days at 29.5 C. Enriched Isolation was started on samples 3 and 4. A 50 ml conical tube was filled to approximately 13 mL with soil sample and liquid media was added to the 35 mL mark for each sample. They were then briefly vortexed. The samples were then shook at 250 rpm for 2 hours. The supernatant was then filtered through a 0.22 µm vacuum filter to remove unwanted bacteria and soil particles and was collected into two new 50 mL conical tubes. 22 ml was recovered from sample 3 and 19 ml from sample 4. Both cultures were seeded with .5 ml of host bacteria and then incubated for 2 days shaking at 220 rpm and 29.5 C with the caps slightly loose to arete. Enriched isolation will continue after incubation is complete.
September 10, 2018
Enriched Isolation
Purpose: Visually confirm the presence of phage and isolate potential phages while amplifying the number of phages.
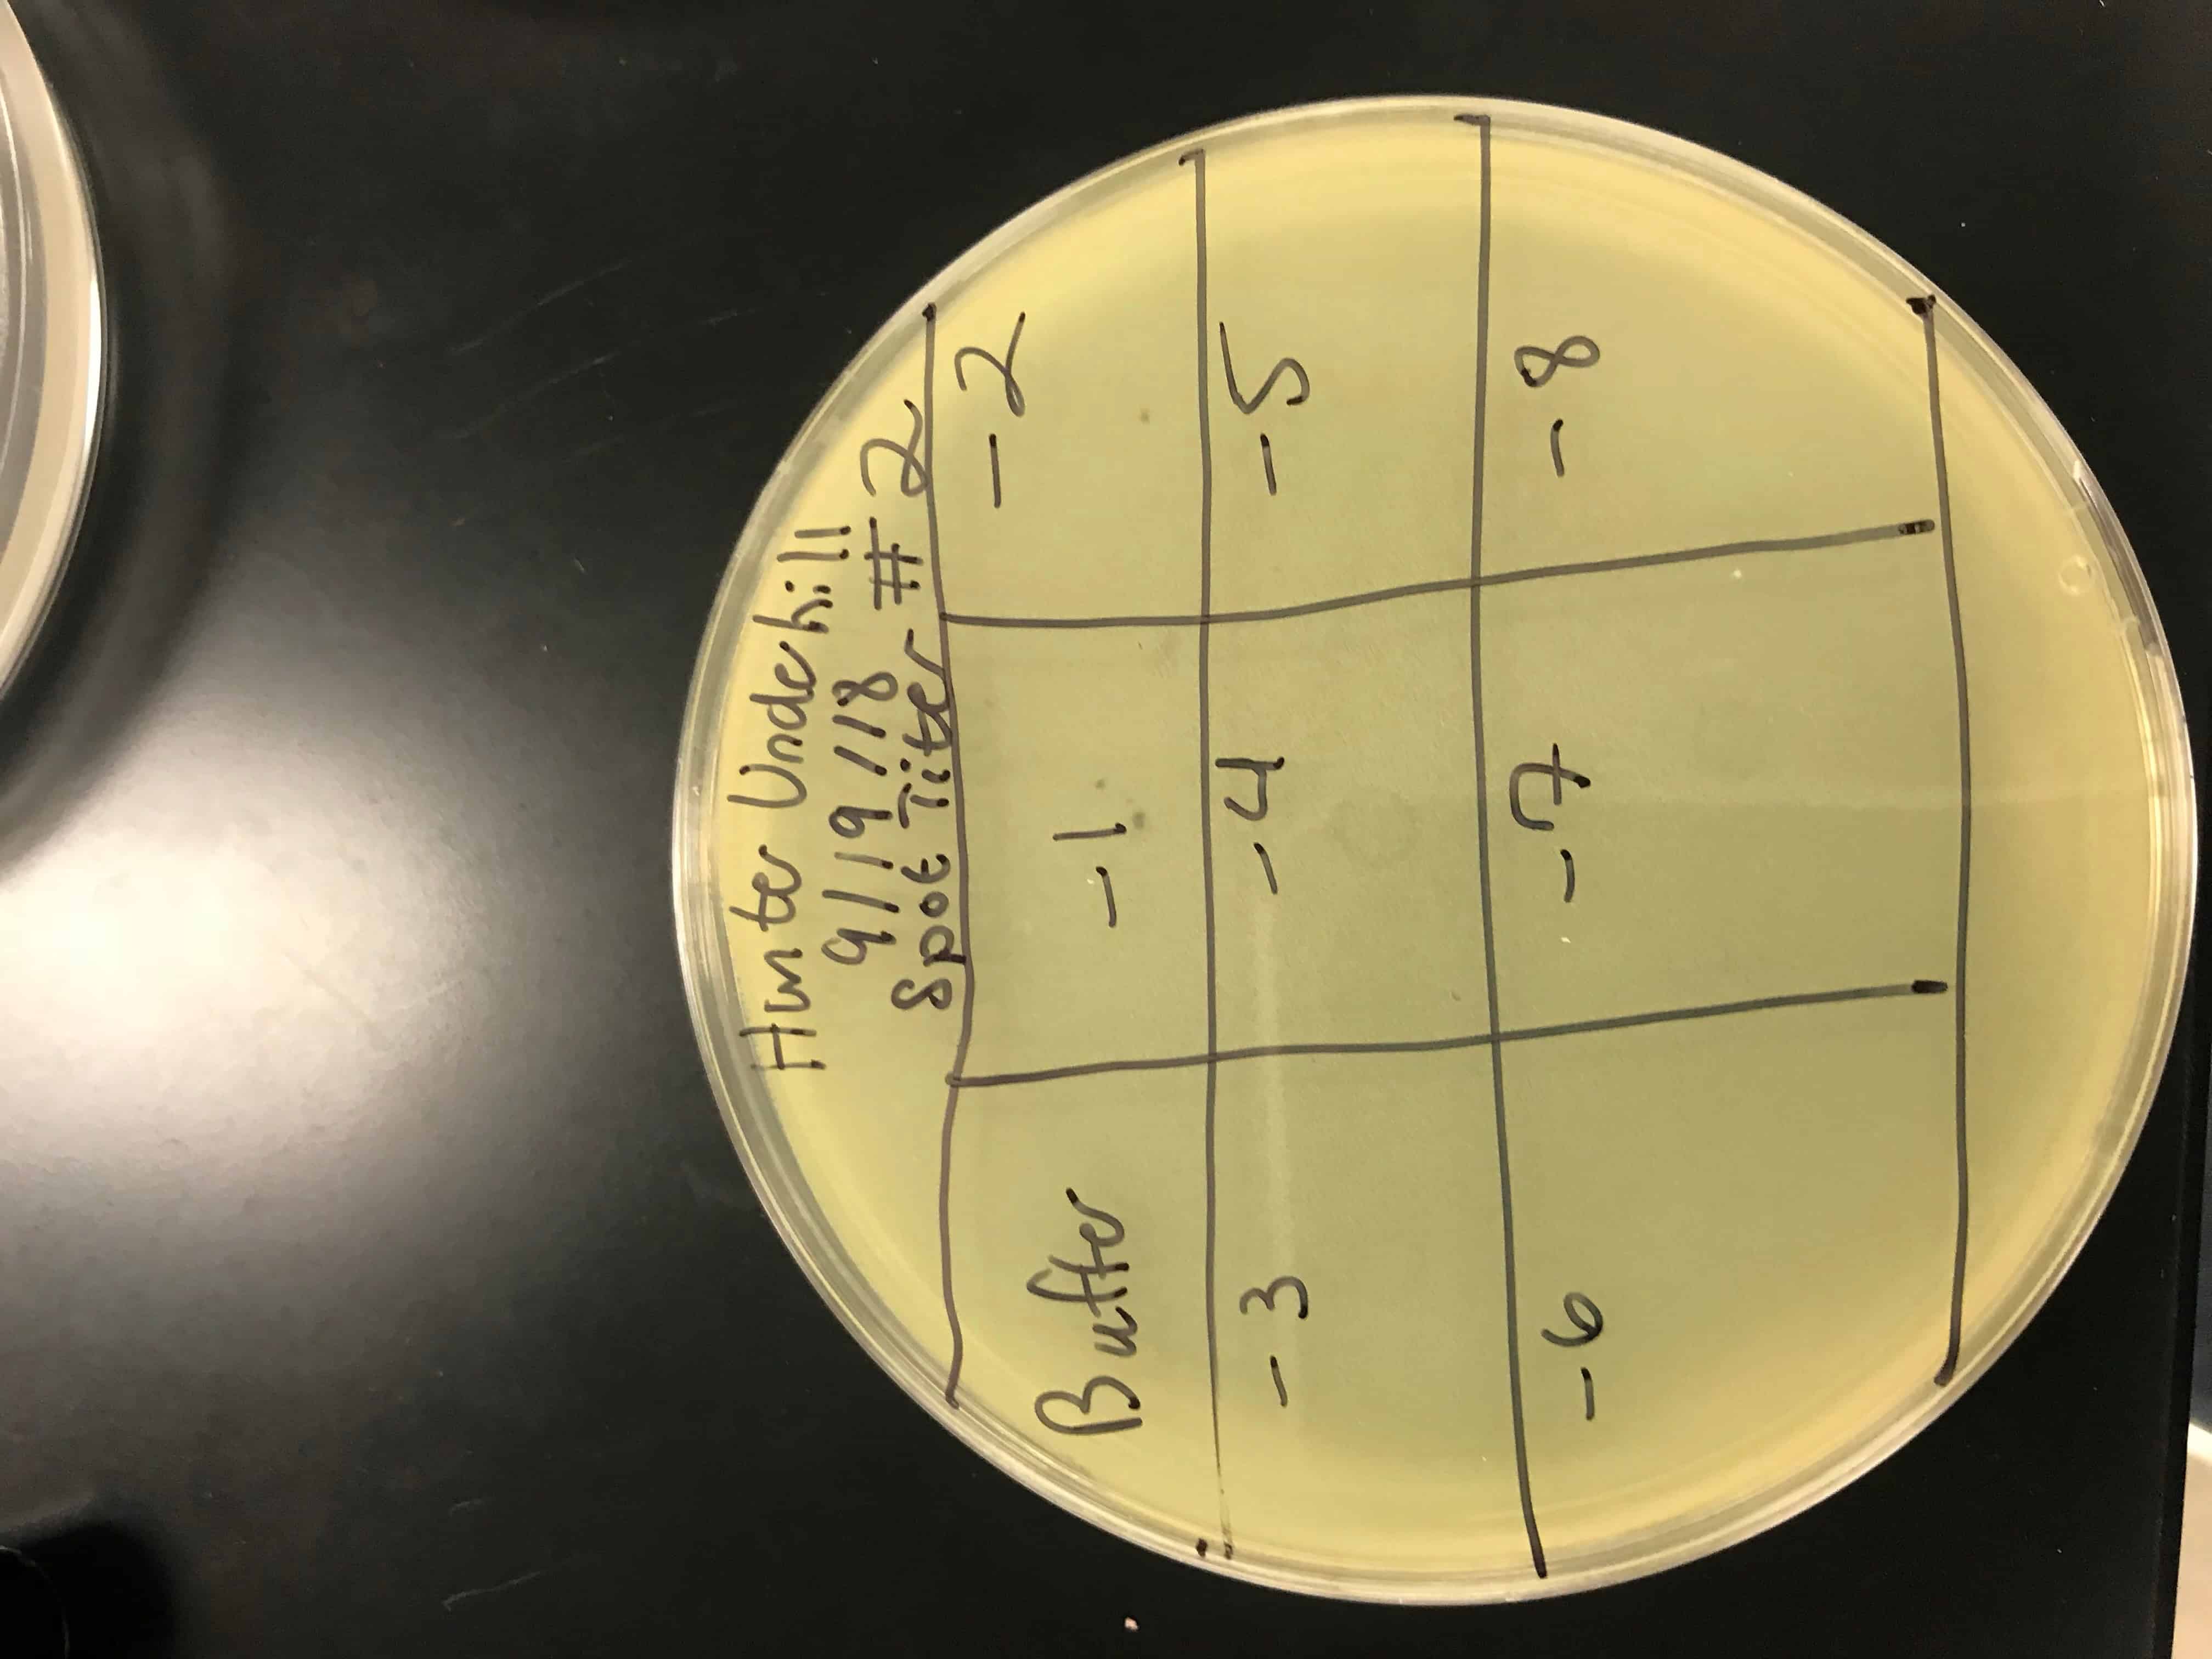
No plaques were seen on sample 1. There were 4 small fuzzy plaques found on sample 2. Both samples were discarded. Continuing enriched isolation with samples 3 and 4, they were removed from the incubator. For each sample, 2 microcentrifuge tubes were filled with 1.4 ml of enriched culture. Each tube was then spun at 6 for 1 minute to pellet the bacteria. Supernatant was clear for all samples. Spot test was then conducted. An agar plate was labeled and divided into 3 sections: one for sample 3, one for sample 4, and one to act as a negative control. Using a 5 ml pipette, 3 ml of top agar was transferred into a tube containing 250 μl of host bacteria, immediately drawn back up, then dispersed evenly onto the plate. It was then left to solidify for approximately 20 minutes.10 μl of each sample was then spotted onto its location on the lawn with phage buffer used for the negative control. They were then incubated at 29.5 C for 2 days. If the samples are positive for phage, serial dilutions will occur. If not, samples 5 and 6 will undergo direct isolation.
September 12, 2018
The Waiting Game/Incubation
The samples were both negative for phage. However, in case of slower growing phage, we are going to wait 2 more days for incubation to ensure it’s negative. If so, we will have to directly isolate samples 5 and 6.
September 14, 2018
Check in on phage. There has been no growth so we will start direct isolation of samples 5 & 6 on Monday.
September 17, 2018
Direct Isolation and Plaque Assay for Samples 5 and 6
Purpose: Isolate and confirm potential phages for future infection of host bacteria
Liquid media was added until the samples were submerged beneath 3 ml of liquid. Afterwards, they were inverted several times to ensure it was well mixed. They were then incubated in a shaking incubator for 2 hours at 250 rpm. After, they were allowed to rest for 10 minutes until the particulate matter had mostly settled to create two distinct layers. After the matter had settled they were filtered using a .22 µl filter and a syringe in which about 1 mL of filtrate per sample was filtered into a microcentrifuge tube. Then, .5 ml of filtrate was placed into tubes containing 250 μl of host bacteria and allowed to sit for 10 minutes for attachment. A 5 ml pipette was then used to transfer 3 ml of top agar into the tubes containing 250 μl of host bacteria and phage sample, immediately drawn back up, then dispersed evenly onto the room temperature agar plate. They were then left to solidify for approximately 20 minutes. The plates were then inverted and left to incubate for 2 days at 29.5 C. The next step will be spot titers/serial dilutions for both, assuming they contain phage.
September 19, 2018
Picking A Plaque and Spot Titer
Purpose: To retrieve phage particles from a plaque and create a liquid sample and to determine the concentration of phage particles in a lysate using a spot test
A spot titer was performed for each of the samples. Two bacterial lawns were made by using a 5 ml pipette to transfer 3 ml of top agar into the tubes containing 250 μl of host bacteria and phage sample, immediately drawn back up, then dispersed evenly onto the room temperature agar plate. As this solidified, a plaque was picked to make a liquid sample. It was clear, medium, and had sharp edges. To start, .1 ml of phage buffer was added to the microcentrifuge tube, then using a micropipette, the plaque was gently stabbed and tapped into the tube. It was then vortexed. Serial dilutions were then performed. .9 ml of phage buffer was added to 8 tubes. 10 μl of the phage sample was added to the 10^-1 dilution. It was then vortexed. This was repeated until all dilutions had been completed by using 10 μl from the tube before it. The prepared agar plate was then labeled for each dilution and 3 μl was dispersed onto the proper area and allowed to absorb for 30 minutes. The plate was then incubated for two days. If everything is normal and positive, we will continue to full plate titers.
September 21, 2018
Full Plate Titer
Purpose: To determine the concentration of phage particles in a lysate by using a plaque assay
Eight plates were labeled according to each serial dilution. Using the previously serial dilutions, each were were plated according to usual plaque assay protocol (allowing 10 μl of each to attach to 250 μl of bacteria, then transferring to the plate with 3 ml of top agar). They were then incubated for 3 days. Next step will be to determine the titer and create webbed plates.
September 24, 2018
Titer Calculation
Purpose: Determination of titer is needed to create higher titer plates
We calculated our own titer using the formula, titer (pfu/ml) = (# pfu/ volume used in μl) x (103 μl/ml) x dilution factor, to get 4.876*10^-2. However, because this is not a high enough titer, we decided to replate a full plate titer.
September 26, 2018
Full Plate Titer
In order to try and increase the lysate titer, eight new plates were labeled according to each serial dilution. Using the serial diluted phage, each were were plated according to usual plaque assay protocol (allowing 10 μl of each to attach to 250 μl of bacteria, then transferring to the plate with 3 ml of top agar). They were then incubated for 3 days. Next step will be to redetermine the titer and create webbed plates.
October 1, 2018
Webbed Plates
Purpose: To create a plate with a very high density of plaques from a lysate of known titer
After obtaining the filtered lysate that we prepared we estimated the number of plaques that was needed to fill a plate. Then we diluted the filtered lysate according to the Serial Dilutions (6.2) protocol according to the calculated volume of lysate needed to create a webbed plate. Then we plated the dilutions according to the Plaque Assay (5.3) protocol. We incubated them for ~48 hours. After that we will flood the webbed plates.
October 3, 2018
Flooding Webbed Plates (Probable Contamination)
Purpose: To generate a highly concentrated liquid phage sample
After allowing the webbed plates to incubate for ~48 hours we applied 8 mL of sterile phage buffer to the webbed plates and allowed them to sit at room temperature for 2-4 hours. (Note: Unknown bacterial contamination occurred on webbed plates) Then we tilted the plates to allow for the lysate to pool at one side. We then obtained multiple 0.22 µL filters and 5 mL syringes for filtering the lysate from the webbed plates into a 30 mL conical tube. (Note: This also filtered out the unknown bacterial contamination) For future use, in order to allow the filtered lysate to remain viable, we stored it at 4 °C.
October 8, 2018
Serial Dilutions for Full Plate Titer
Purpose: To determine the concentration of phage particles in a lysate by using a plaque assay
We diluted our filtered lysate according to the Serial Dilutions (6.2) protocol. Although, we only diluted the filtered lysate to 10^-1 and 10^-2. We then plated the dilutions according to the Plaque Assay (5.3) protocol.
October 10, 2018
Full Plate Titers and Serial Dilutions
Purpose: To determine the concentration of phage particles in a lysate by using a plaque assay
After allowing the plates to incubate for ~48 hours we checked the plates and calculated the titer. Our 10^-1 plate contained too much phage while our 10^-2 contained too little. Therefore, we diluted our 10^-1 plate by 5^-1 using a slight variation to the Serial Dilutions (6.2) protocol so our resulting dilution would contain half as much phage as the 10^-1 plate. This is so we can flood the resulting plate and filter that lysate for DNA Extraction.
October 15, 2018
Serial Dilutions
Purpose: To prepare liquid phage samples of decreasing concentrations
The resulting 5^-1 diluted plate was too concentrated due to the extended incubation time. Therefore, we had to use the remaining diluted lysate to plate another sample. We plated this according to the Plaque Assay (5.3) protocol.
October 17, 2018
Flooding Webbed Plates
Purpose: To generate a highly concentrated liquid phage sample
After allowing the webbed plates to incubate for ~48 hours we applied 8 mL of sterile phage buffer to the webbed plates and allowed them to sit at room temperature for 2-4 hours. Then we tilted the plates to allow for the lysate to pool at one side. We then obtained multiple 0.22 µL filters and 5 mL syringes for filtering the lysate from the webbed plates into a 30 mL conical tube. For DNA Extraction, in order to allow the filtered lysate to remain viable, we stored it at 4 °C.
October 22, 2018
DNA Extraction
Purpose: Obtain a pure sample of DNA to study
We took out 1 ml of high titer lysate and put it into a microcentrifuge tube. We then added 5 µl of nuclease mix to the lysate and mix it gently by inversion. It was then incubated for 10 minutes in a heating block at 37 °C. Then, in order to inactivate the nucleases, we added 15 µl EDTA, 0.5 µl proteinase K and 50 µl SDS to the lysate and incubated it again at 37 °C for 10 minutes in the heating block. The lysate was then put into the freezer for storage and continued DNA extraction in the next lab.
October 24, 2018
DNA Extraction
To continue with DNA extraction, the lysate was removed from the freezer. We added 2 ml of DNA clean-up resin to a 15 ml conical tube and then added all of the lysate from the microcentrifuge tube into the conical tube. To mix, it was then gently inverted for two minutes. The plungers were then removed from two 3 ml syringes and each attached to a column on the syringe barrel. The columns and syringe barrels were then put on two microcentrifuge tubes and 1.5 ml of phage DNA/resin solution was transferred to each tube. The plungers were then added and the liquid pushed through and captured in the 15 ml conical tube and the column dried by gently touching it to a paper towel. The columns were then unscrewed and set into new microcentrifuge tubes. The plungers were then removed and the syringes reattached to the column. 2 ml 80 % isopropanol was added to each syringe barrel/column and pushed through the column and captured in the conical tube. This was done three times for each column. The columns were then put into new microcentrifuge tubes and spun at 10,000 × g for 5 minutes. The columns were again put into new microcentrifuge tubes and spun at 10,000 × g for one additional minute to remove any isopropanol. To ensure its removal, the columns were then put directly into a 90 °C heating block for one minute. The columns were then added to new tubes and 50 μl of 90 °C sterile ddH2O was added directly to each column. The columns were then kept out at room temperature for one minute and then spun at 10,000 × g for one minute. The products in the tubes were then added together into one tube, the phage DNA. Because of time constraints, the DNA was then put into the fridge for short term storage and the concentration will be determined in the next lab.
October 29, 2018
DNA Concentration Determination
The DNA concentration was attempted to be determined; however the read out was too low. Because of this, a new protocol will need to be used. The plans are to wait until the third protocol is available for use because we do not have quite enough high titer lysate for both the Baylor protocol and the microscopy. We will do the microscopy on Wednesday and the DNA extraction on Friday and Saturday.
October 31, 2018
Microscopy
Purpose: To prepare the phage sample for viewing
1 ml of high titer lysate was transferred into 4 microcentrifuge tubes and centrifuged for one hour at 4 °C on 14,000 × g. The supernatant was removed and what remained was concentrated into one tube and spun again under the same settings. Afterwards, the supernatant was removed and replaced with 100 μl of phage buffer. The concentrated phage was then resuspended at 4 °C for 30 minutes. Then, in the lid of a Petri dish, a small piece of parafilm was placed down. In the center, a PELCO Tab was placed down. Using EM forceps, a grid was transferred dark side up onto the very edgy of the PELCO Tab. 10 μl of the phage was then dropped onto the grid and left to sit for five minutes. The remaining liquid was then absorbed using the tip of a piece of filter paper. It was then washed with the same method twice with 10 μl of sterile water. 10 μl of 1 % uranyl acetate was then dropped onto the grid and allowed to sit for 2 minutes. It was then wicked off. The grid was then stored in a vacuum sealed container. DNA extraction will be performed on Friday and Saturday.
November 2, 2018
DNA Extraction
Using the new DNA Extraction protocol we gently mixed our HVL then pipetted 5 mL of our lysate into a 15 mL conical tube and then we added 20 μL of nuclease mix. Then we gently inverted the tube and incubated at 37°C for 5 minutes. The we pipetted the lysate into 5 microfuge tubes, 1 mL each. Then we added 20 μl of ZnCl2 and mixed gently by inversion and incubated at 37°C for 5 minutes. Then we centrifuged it at 10,000 rpm for 1 min to pellet the phage. Afterwards, we removed the supernatants by aspiration, then resuspended the pellets in 500 μl of TES Buffer per tube and incubated them at 60°C for 15 minutes. Then we added 1 μl of PRoteinase K and mixed gently and incubated at 37°C for 10 minutes to completely eliminate any residual nuclease activity. Then we added 60 μl of potassium acetate, mixed well and left on ice for 15 minutes. Then we centrifuged at 4°C for 1 minute at 12,000 rpm to pellet the capsids. Then we placed the supernatants into new microfuge tubes and added 500 mL of isopropanol to each of the tubes with the supernatants and left on ice until further use.
November 3, 2018
DNA Extraction
The DNA solution was taken off of the ice and spun at 10,000 × g for ten minutes. The supernatant was then removed and the pellets left in the tubes. 250 μl of 70% ethanol was then added to the tubes which were then spun again at the same speed for one minute. The supernatant was removed again and the tubes/pellets were allowed to dry until the pellets started to turn clear. Then 50 μl of PCR water was added to the first tube to resuspend the pellet. Then continuously using the same water, each of the other four pellets were suspended. Then using 5 μl of the water, the concentration was determined to be 787.2 μl/mL. During the next lab, we will be doing restriction enzyme digests.
November 5, 2018
Setting Up Restriction Enzyme Digests
To prepare for the restriction enzyme digests we vortexed our sample on low and incubated the tube at 65°C for 10 minutes and quickly placed it on ice then spun the tube in a microcentrifuge for less than 1 minute to move all of the liquid to the bottom of the tube. Then we calculated how many mL of DNA was needed to obtain .5 mg of DNA. Then we added 2.5 mL of 10X Reaction Buffer, 0.5 μl of the respected restriction enzymes (except for sacII because it wasn’t available at the time) for the bacteria we worked with, and added the equivalency of 0.5 μg of our phage genomic DNA, and sterile ddH2O up to the final volume of 25 μl. Then we mixed the contents of each tube in a microcentrifuge for less than 1 minute and incubated at 37°C for ~1 hour then spun it in a microcentrifuge for less than 1 minute and incubated at 65°C for minutes to deactivate the restriction enzyme digests and then stored at -20°C for further use.
November 7, 2018
Gel Electrophoresis
We took our restriction enzyme digest samples for electrophoresis and added 5 μl of concentrated 6x loading dye to each 25 μl restriction enzyme sample. Then we placed the samples in a heat block set to 65°C for 5 minutes then placed them on ice to immediately cool and then spun them in a microcentrifuge for ~15 seconds at 10,000 rpm. We then cast an agarose gel according to Protocol 10.2 and pipetted 10 μl in each well in their specified order and ran the gel for ~1 hour. The results were less than acceptable so we prepared to retry again soon.
November 14, 2018
Setting Up Restriction Enzyme Digests
To prepare for the restriction enzyme digests we vortexed our sample on low and incubated the tube at 65°C for 10 minutes and quickly placed it on ice then spun the tube in a microcentrifuge for less than 1 minute to move all of the liquid to the bottom of the tube. Then we calculated how many mL of DNA was needed to obtain .5 mg of DNA. Then we added 2.5 mL of 10X Reaction Buffer, 0.5 μl of the respected restriction enzymes for the bacteria we worked with, and added the equivalency of 0.5 μg of our phage genomic DNA, and sterile ddH2O up to the final volume of 25 μl. Then we mixed the contents of each tube in a microcentrifuge for less than 1 minute and incubated at 37°C for ~1 hour then spun it in a microcentrifuge for less than 1 minute and incubated at 65°C for minutes to deactivate the restriction enzyme digests and then stored at -20°C for later use.
November 16, 2018
Archiving and Gel Electrophoresis
In preparing to archive our phage sample we retrieved the two barcoded tubes for storage at the University of Pittsburgh and a third tube for personal storage at the home institution. We then proceeded to label and fill each tube with sterile beads to 1.5 cm from the top of the tube. We then dispensed 2.8 mL of our high-titer lysate into a sterile 15mL conical tube and added 200 μl of DMSO to the tube and capped and vortexed the mixture. Then we pipetted the mixture into each of the labeled tubes so that the beads were covered completely. We then placed the barcoded tubes in the storage box provided in the same order as shown on the archive list.
Then we took our restriction enzyme digest samples for electrophoresis and added 5 μl of concentrated 6x loading dye to each 25 μl restriction enzyme sample. Then we placed the samples in a heat block set to 65°C for 5 minutes then placed them on ice to immediately cool and then spun them in a microcentrifuge for ~15 seconds at 10,000 rpm. We then cast an agarose gel according to Protocol 10.2 and pipetted 10 μl in each well in their specified order and ran the gel for ~1 hour.
September 3, 2018
Sample Collection
The sample was collected on September 3, 2018 in a residential house’s garden bed in Stephenville, Texas (32.2236, -98.2400). The ambient temperature was 72 F. The sample was then refrigerated to ensure it remained viable until further use.
September 5, 2018
Direct and Enriched Isolation and Plaque Assay on Samples 1 and 2
Purpose: Isolate and confirm potential phages for future infection of host bacteria
The samples in which direct isolation was performed on were collected on September 3, 2018. Liquid media was added until the samples were submerged beneath 3 ml of liquid. Afterwards, they were inverted several times to ensure it was well mixed. They were then incubated in a shaking incubator for 2 hours at 250 rpm. After, they were allowed to rest for 10 minutes until the particulate matter had mostly settled to create two distinct layers. After the matter had settled they were filtered using a .22 µL filter and a syringe in which about 1 mL of filtrate per sample was filtered into a microcentrifuge tube.Then for plaque assay, .5 mL of filtrate was placed into tubes containing .25 ml of host bacteria and allowed to sit for 10 minutes for attachment. A 5 ml pipette was then used to transfer 3 ml of top agar into the tubes containing .25 ml of host bacteria and phage sample, immediately drawn back up, then dispersed evenly onto the room temperature agar plate. They were then left to solidify for approximately 20 minutes. The plates were then inverted and left to incubate for 2 days at 29.5 C. Enriched Isolation was started on samples 3 and 4. A 50 ml conical tube was filled to approximately 13 mL with soil sample and liquid media was added to the 35 mL mark for each sample. They were then briefly vortexed. The samples were then shook at 250 rpm for 2 hours. The supernatant was then filtered through a 0.22 µm vacuum filter to remove unwanted bacteria and soil particles and was collected into two new 50 mL conical tubes. 22 ml was recovered from sample 3 and 19 ml from sample 4. Both cultures were seeded with .5 ml of host bacteria and then incubated for 2 days shaking at 220 rpm and 29.5 C with the caps slightly loose to arete. Enriched isolation will continue after incubation is complete.
September 10, 2018
Enriched Isolation
Purpose: Visually confirm the presence of phage and isolate potential phages while amplifying the number of phages.
No plaques were seen on sample 1. There were 4 small fuzzy plaques found on sample 2. Both samples were discarded. Continuing enriched isolation with samples 3 and 4, they were removed from the incubator. For each sample, 2 microcentrifuge tubes were filled with 1.4 ml of enriched culture. Each tube was then spun at 6 for 1 minute to pellet the bacteria. Supernatant was clear for all samples. Spot test was then conducted. An agar plate was labeled and divided into 3 sections: one for sample 3, one for sample 4, and one to act as a negative control. Using a 5 ml pipette, 3 ml of top agar was transferred into a tube containing 250 μl of host bacteria, immediately drawn back up, then dispersed evenly onto the plate. It was then left to solidify for approximately 20 minutes.10 μl of each sample was then spotted onto its location on the lawn with phage buffer used for the negative control. They were then incubated at 29.5 C for 2 days. If the samples are positive for phage, serial dilutions will occur. If not, samples 5 and 6 will undergo direct isolation.
September 12, 2018
The Waiting Game/Incubation
The samples were both negative for phage. However, in case of slower growing phage, we are going to wait 2 more days for incubation to ensure it’s negative. If so, we will have to directly isolate samples 5 and 6.
September 14, 2018
Check in on phage. There has been no growth so we will start direct isolation of samples 5 & 6 on Monday.
September 17, 2018
Direct Isolation and Plaque Assay for Samples 5 and 6
Purpose: Isolate and confirm potential phages for future infection of host bacteria
Liquid media was added until the samples were submerged beneath 3 ml of liquid. Afterwards, they were inverted several times to ensure it was well mixed. They were then incubated in a shaking incubator for 2 hours at 250 rpm. After, they were allowed to rest for 10 minutes until the particulate matter had mostly settled to create two distinct layers. After the matter had settled they were filtered using a .22 µl filter and a syringe in which about 1 mL of filtrate per sample was filtered into a microcentrifuge tube. Then, .5 ml of filtrate was placed into tubes containing 250 μl of host bacteria and allowed to sit for 10 minutes for attachment. A 5 ml pipette was then used to transfer 3 ml of top agar into the tubes containing 250 μl of host bacteria and phage sample, immediately drawn back up, then dispersed evenly onto the room temperature agar plate. They were then left to solidify for approximately 20 minutes. The plates were then inverted and left to incubate for 2 days at 29.5 C. The next step will be spot titers/serial dilutions for both, assuming they contain phage.
September 19, 2018
Picking A Plaque and Spot Titer
Purpose: To retrieve phage particles from a plaque and create a liquid sample and to determine the concentration of phage particles in a lysate using a spot test
A spot titer was performed for each of the samples. Two bacterial lawns were made by using a 5 ml pipette to transfer 3 ml of top agar into the tubes containing 250 μl of host bacteria and phage sample, immediately drawn back up, then dispersed evenly onto the room temperature agar plate. As this solidified, a plaque was picked to make a liquid sample. It was clear, medium, and had sharp edges. To start, .1 ml of phage buffer was added to the microcentrifuge tube, then using a micropipette, the plaque was gently stabbed and tapped into the tube. It was then vortexed. Serial dilutions were then performed. .9 ml of phage buffer was added to 8 tubes. 10 μl of the phage sample was added to the 10^-1 dilution. It was then vortexed. This was repeated until all dilutions had been completed by using 10 μl from the tube before it. The prepared agar plate was then labeled for each dilution and 3 μl was dispersed onto the proper area and allowed to absorb for 30 minutes. The plate was then incubated for two days. If everything is normal and positive, we will continue to full plate titers.
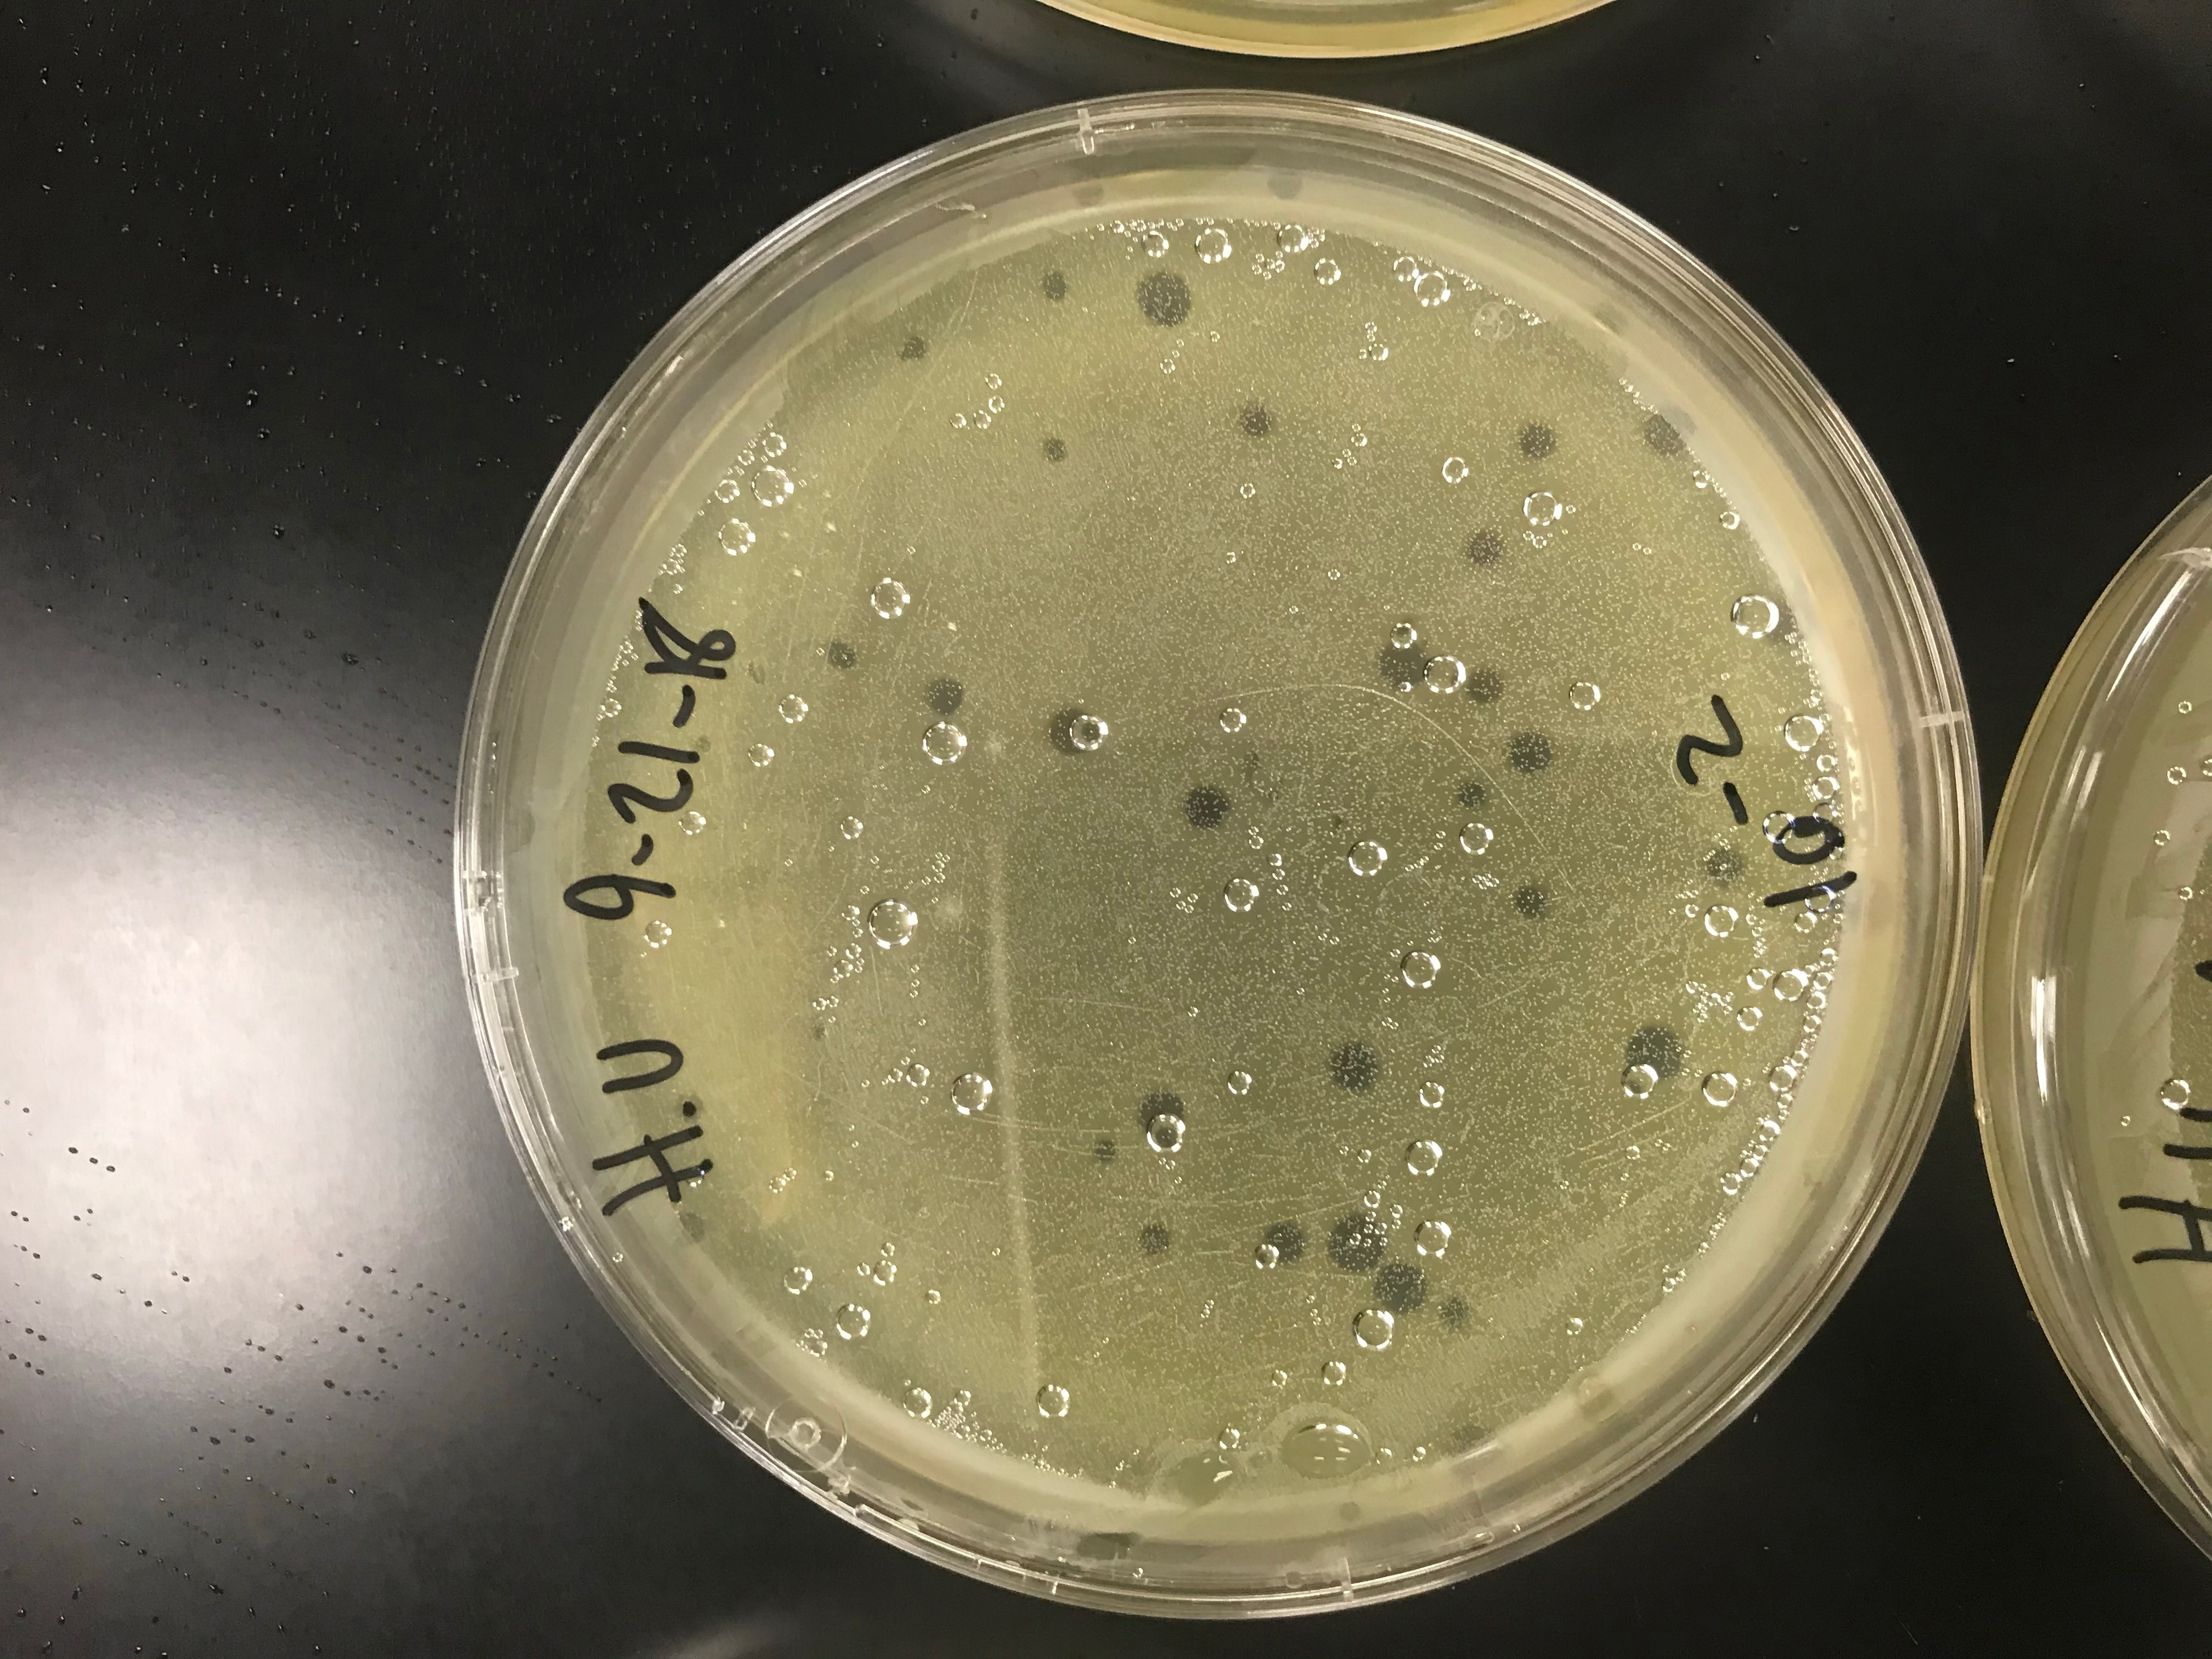
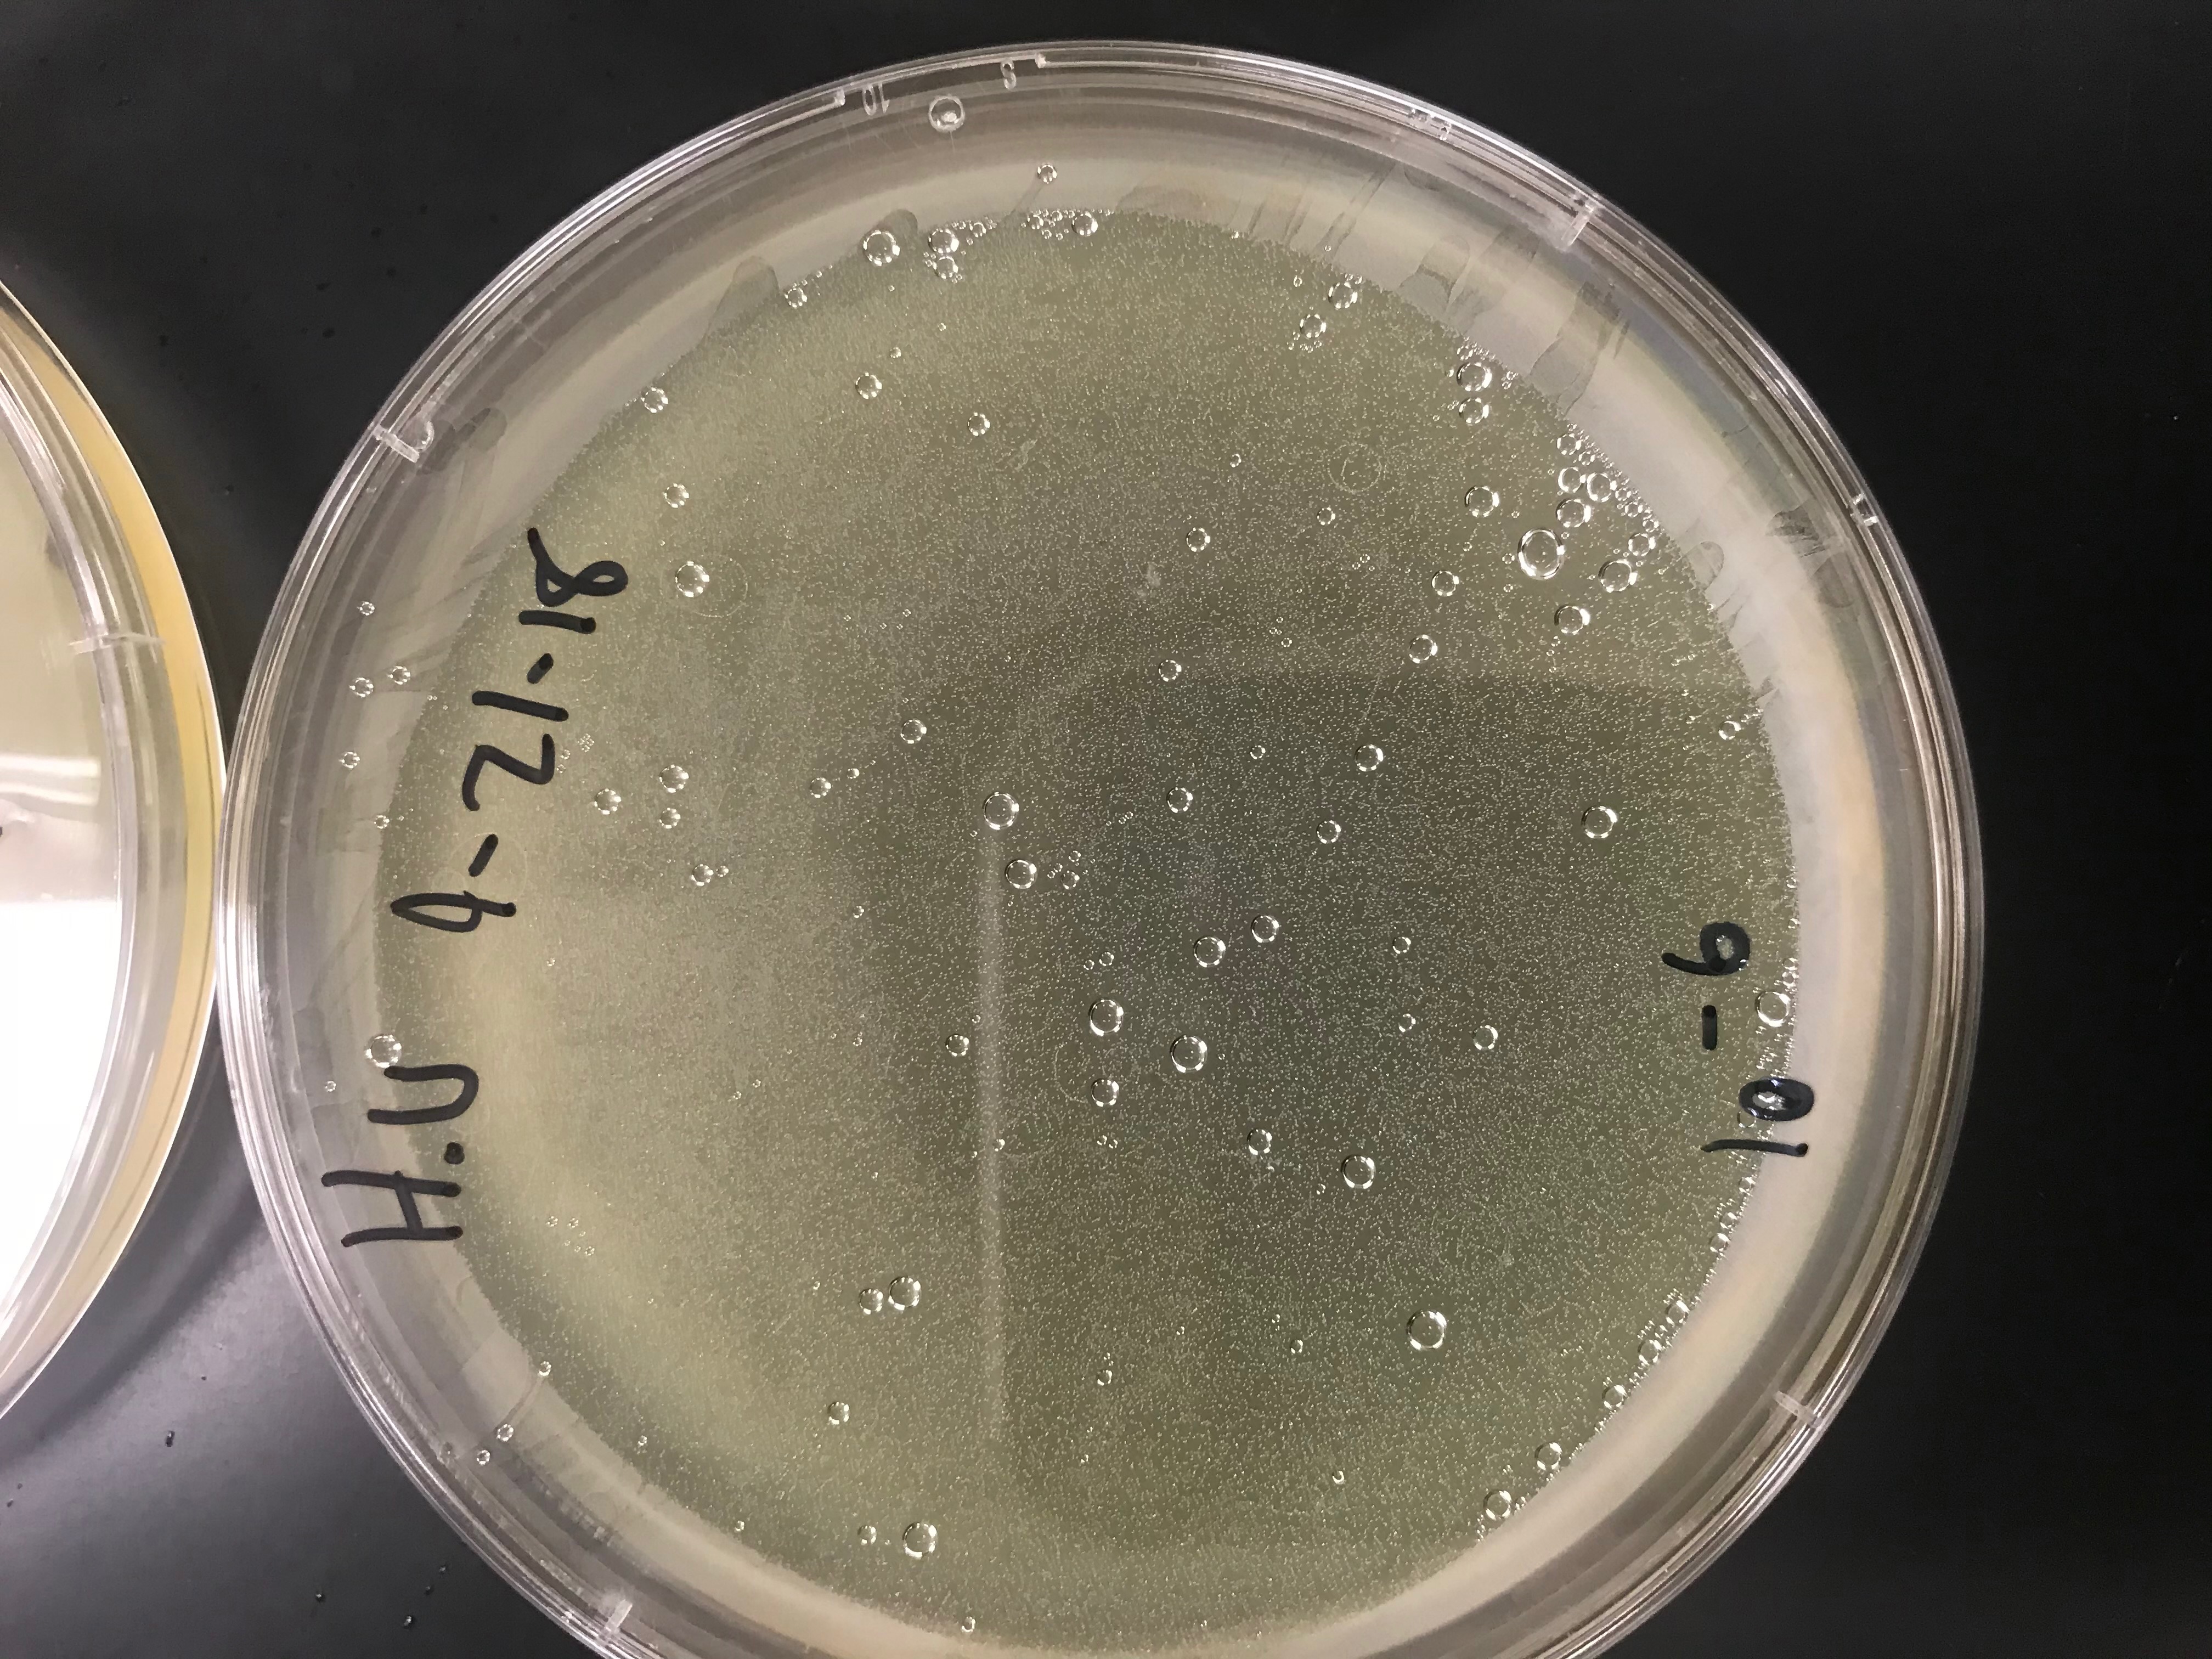
September 21, 2018
Full Plate Titer
Purpose: To determine the concentration of phage particles in a lysate by using a plaque assay
Eight plates were labeled according to each serial dilution. Using the previously serial dilutions, each were were plated according to usual plaque assay protocol (allowing 10 μl of each to attach to 250 μl of bacteria, then transferring to the plate with 3 ml of top agar). They were then incubated for 3 days. Next step will be to determine the titer and create webbed plates.
September 24, 2018
Titer Calculation
Purpose: Determination of titer is needed to create higher titer plates
We calculated our own titer using the formula, titer (pfu/ml) = (# pfu/ volume used in μl) x (103 μl/ml) x dilution factor, to get 4.876*10^-2. However, because this is not a high enough titer, we decided to replate a full plate titer.
September 26, 2018
Full Plate Titer
In order to try and increase the lysate titer, eight new plates were labeled according to each serial dilution. Using the serial diluted phage, each were were plated according to usual plaque assay protocol (allowing 10 μl of each to attach to 250 μl of bacteria, then transferring to the plate with 3 ml of top agar). They were then incubated for 3 days. Next step will be to redetermine the titer and create webbed plates.
October 1, 2018
Webbed Plates
Purpose: To create a plate with a very high density of plaques from a lysate of known titer
After obtaining the filtered lysate that we prepared we estimated the number of plaques that was needed to fill a plate. Then we diluted the filtered lysate according to the Serial Dilutions (6.2) protocol according to the calculated volume of lysate needed to create a webbed plate. Then we plated the dilutions according to the Plaque Assay (5.3) protocol. We incubated them for ~48 hours. After that we will flood the webbed plates.
October 3, 2018
Flooding Webbed Plates (Probable Contamination)
Purpose: To generate a highly concentrated liquid phage sample
After allowing the webbed plates to incubate for ~48 hours we applied 8 mL of sterile phage buffer to the webbed plates and allowed them to sit at room temperature for 2-4 hours. (Note: Unknown bacterial contamination occurred on webbed plates) Then we tilted the plates to allow for the lysate to pool at one side. We then obtained multiple 0.22 µL filters and 5 mL syringes for filtering the lysate from the webbed plates into a 30 mL conical tube. (Note: This also filtered out the unknown bacterial contamination) For future use, in order to allow the filtered lysate to remain viable, we stored it at 4 °C.
October 8, 2018
Serial Dilutions for Full Plate Titer
Purpose: To determine the concentration of phage particles in a lysate by using a plaque assay
We diluted our filtered lysate according to the Serial Dilutions (6.2) protocol. Although, we only diluted the filtered lysate to 10^-1 and 10^-2. We then plated the dilutions according to the Plaque Assay (5.3) protocol.
October 10, 2018
Full Plate Titers and Serial Dilutions
Purpose: To determine the concentration of phage particles in a lysate by using a plaque assay
After allowing the plates to incubate for ~48 hours we checked the plates and calculated the titer. Our 10^-1 plate contained too much phage while our 10^-2 contained too little. Therefore, we diluted our 10^-1 plate by 5^-1 using a slight variation to the Serial Dilutions (6.2) protocol so our resulting dilution would contain half as much phage as the 10^-1 plate. This is so we can flood the resulting plate and filter that lysate for DNA Extraction.
October 15, 2018
Serial Dilutions
Purpose: To prepare liquid phage samples of decreasing concentrations
The resulting 5^-1 diluted plate was too concentrated due to the extended incubation time. Therefore, we had to use the remaining diluted lysate to plate another sample. We plated this according to the Plaque Assay (5.3) protocol.
October 17, 2018
Flooding Webbed Plates
Purpose: To generate a highly concentrated liquid phage sample
After allowing the webbed plates to incubate for ~48 hours we applied 8 mL of sterile phage buffer to the webbed plates and allowed them to sit at room temperature for 2-4 hours. Then we tilted the plates to allow for the lysate to pool at one side. We then obtained multiple 0.22 µL filters and 5 mL syringes for filtering the lysate from the webbed plates into a 30 mL conical tube. For DNA Extraction, in order to allow the filtered lysate to remain viable, we stored it at 4 °C.
October 22, 2018
DNA Extraction
Purpose: Obtain a pure sample of DNA to study
We took out 1 ml of high titer lysate and put it into a microcentrifuge tube. We then added 5 µl of nuclease mix to the lysate and mix it gently by inversion. It was then incubated for 10 minutes in a heating block at 37 °C. Then, in order to inactivate the nucleases, we added 15 µl EDTA, 0.5 µl proteinase K and 50 µl SDS to the lysate and incubated it again at 37 °C for 10 minutes in the heating block. The lysate was then put into the freezer for storage and continued DNA extraction in the next lab.
October 24, 2018
DNA Extraction
To continue with DNA extraction, the lysate was removed from the freezer. We added 2 ml of DNA clean-up resin to a 15 ml conical tube and then added all of the lysate from the microcentrifuge tube into the conical tube. To mix, it was then gently inverted for two minutes. The plungers were then removed from two 3 ml syringes and each attached to a column on the syringe barrel. The columns and syringe barrels were then put on two microcentrifuge tubes and 1.5 ml of phage DNA/resin solution was transferred to each tube. The plungers were then added and the liquid pushed through and captured in the 15 ml conical tube and the column dried by gently touching it to a paper towel. The columns were then unscrewed and set into new microcentrifuge tubes. The plungers were then removed and the syringes reattached to the column. 2 ml 80 % isopropanol was added to each syringe barrel/column and pushed through the column and captured in the conical tube. This was done three times for each column. The columns were then put into new microcentrifuge tubes and spun at 10,000 × g for 5 minutes. The columns were again put into new microcentrifuge tubes and spun at 10,000 × g for one additional minute to remove any isopropanol. To ensure its removal, the columns were then put directly into a 90 °C heating block for one minute. The columns were then added to new tubes and 50 μl of 90 °C sterile ddH2O was added directly to each column. The columns were then kept out at room temperature for one minute and then spun at 10,000 × g for one minute. The products in the tubes were then added together into one tube, the phage DNA. Because of time constraints, the DNA was then put into the fridge for short term storage and the concentration will be determined in the next lab.
October 29, 2018
DNA Concentration Determination
The DNA concentration was attempted to be determined; however the read out was too low. Because of this, a new protocol will need to be used. The plans are to wait until the third protocol is available for use because we do not have quite enough high titer lysate for both the Baylor protocol and the microscopy. We will do the microscopy on Wednesday and the DNA extraction on Friday and Saturday.
October 31, 2018
Microscopy
Purpose: To prepare the phage sample for viewing
1 ml of high titer lysate was transferred into 4 microcentrifuge tubes and centrifuged for one hour at 4 °C on 14,000 × g. The supernatant was removed and what remained was concentrated into one tube and spun again under the same settings. Afterwards, the supernatant was removed and replaced with 100 μl of phage buffer. The concentrated phage was then resuspended at 4 °C for 30 minutes. Then, in the lid of a Petri dish, a small piece of parafilm was placed down. In the center, a PELCO Tab was placed down. Using EM forceps, a grid was transferred dark side up onto the very edgy of the PELCO Tab. 10 μl of the phage was then dropped onto the grid and left to sit for five minutes. The remaining liquid was then absorbed using the tip of a piece of filter paper. It was then washed with the same method twice with 10 μl of sterile water. 10 μl of 1 % uranyl acetate was then dropped onto the grid and allowed to sit for 2 minutes. It was then wicked off. The grid was then stored in a vacuum sealed container. DNA extraction will be performed on Friday and Saturday.
November 2, 2018
DNA Extraction
Using the new DNA Extraction protocol we gently mixed our HVL then pipetted 5 mL of our lysate into a 15 mL conical tube and then we added 20 μL of nuclease mix. Then we gently inverted the tube and incubated at 37°C for 5 minutes. The we pipetted the lysate into 5 microfuge tubes, 1 mL each. Then we added 20 μl of ZnCl2 and mixed gently by inversion and incubated at 37°C for 5 minutes. Then we centrifuged it at 10,000 rpm for 1 min to pellet the phage. Afterwards, we removed the supernatants by aspiration, then resuspended the pellets in 500 μl of TES Buffer per tube and incubated them at 60°C for 15 minutes. Then we added 1 μl of PRoteinase K and mixed gently and incubated at 37°C for 10 minutes to completely eliminate any residual nuclease activity. Then we added 60 μl of potassium acetate, mixed well and left on ice for 15 minutes. Then we centrifuged at 4°C for 1 minute at 12,000 rpm to pellet the capsids. Then we placed the supernatants into new microfuge tubes and added 500 mL of isopropanol to each of the tubes with the supernatants and left on ice until further use.
November 3, 2018
DNA Extraction
The DNA solution was taken off of the ice and spun at 10,000 × g for ten minutes. The supernatant was then removed and the pellets left in the tubes. 250 μl of 70% ethanol was then added to the tubes which were then spun again at the same speed for one minute. The supernatant was removed again and the tubes/pellets were allowed to dry until the pellets started to turn clear. Then 50 μl of PCR water was added to the first tube to resuspend the pellet. Then continuously using the same water, each of the other four pellets were suspended. Then using 5 μl of the water, the concentration was determined to be 787.2 μl/mL. During the next lab, we will be doing restriction enzyme digests.
November 5, 2018
Setting Up Restriction Enzyme Digests
To prepare for the restriction enzyme digests we vortexed our sample on low and incubated the tube at 65°C for 10 minutes and quickly placed it on ice then spun the tube in a microcentrifuge for less than 1 minute to move all of the liquid to the bottom of the tube. Then we calculated how many mL of DNA was needed to obtain .5 mg of DNA. Then we added 2.5 mL of 10X Reaction Buffer, 0.5 μl of the respected restriction enzymes (except for sacII because it wasn’t available at the time) for the bacteria we worked with, and added the equivalency of 0.5 μg of our phage genomic DNA, and sterile ddH2O up to the final volume of 25 μl. Then we mixed the contents of each tube in a microcentrifuge for less than 1 minute and incubated at 37°C for ~1 hour then spun it in a microcentrifuge for less than 1 minute and incubated at 65°C for minutes to deactivate the restriction enzyme digests and then stored at -20°C for further use.
November 7, 2018
Gel Electrophoresis
We took our restriction enzyme digest samples for electrophoresis and added 5 μl of concentrated 6x loading dye to each 25 μl restriction enzyme sample. Then we placed the samples in a heat block set to 65°C for 5 minutes then placed them on ice to immediately cool and then spun them in a microcentrifuge for ~15 seconds at 10,000 rpm. We then cast an agarose gel according to Protocol 10.2 and pipetted 10 μl in each well in their specified order and ran the gel for ~1 hour. The results were less than acceptable so we prepared to retry again soon.
November 14, 2018
Setting Up Restriction Enzyme Digests
To prepare for the restriction enzyme digests we vortexed our sample on low and incubated the tube at 65°C for 10 minutes and quickly placed it on ice then spun the tube in a microcentrifuge for less than 1 minute to move all of the liquid to the bottom of the tube. Then we calculated how many mL of DNA was needed to obtain .5 mg of DNA. Then we added 2.5 mL of 10X Reaction Buffer, 0.5 μl of the respected restriction enzymes for the bacteria we worked with, and added the equivalency of 0.5 μg of our phage genomic DNA, and sterile ddH2O up to the final volume of 25 μl. Then we mixed the contents of each tube in a microcentrifuge for less than 1 minute and incubated at 37°C for ~1 hour then spun it in a microcentrifuge for less than 1 minute and incubated at 65°C for minutes to deactivate the restriction enzyme digests and then stored at -20°C for later use.
November 16, 2018
Archiving and Gel Electrophoresis
In preparing to archive our phage sample we retrieved the two barcoded tubes for storage at the University of Pittsburgh and a third tube for personal storage at the home institution. We then proceeded to label and fill each tube with sterile beads to 1.5 cm from the top of the tube. We then dispensed 2.8 mL of our high-titer lysate into a sterile 15mL conical tube and added 200 μl of DMSO to the tube and capped and vortexed the mixture. Then we pipetted the mixture into each of the labeled tubes so that the beads were covered completely. We then placed the barcoded tubes in the storage box provided in the same order as shown on the archive list.
Then we took our restriction enzyme digest samples for electrophoresis and added 5 μl of concentrated 6x loading dye to each 25 μl restriction enzyme sample. Then we placed the samples in a heat block set to 65°C for 5 minutes then placed them on ice to immediately cool and then spun them in a microcentrifuge for ~15 seconds at 10,000 rpm. We then cast an agarose gel according to Protocol 10.2 and pipetted 10 μl in each well in their specified order and ran the gel for ~1 hour.
file
file3

file4
file5
file6

file7

file8
file9

file10
file11

file12
