Discovery of Lahey
Sample Collection 1
| Collector Name | Kristin Sefcik | Kristin Sefcik | Kristin Sefcik | Kristin Sefcik |
| Sample No. | Sample 1 | Sample 2 | Sample 3 | Sample 4 |
| Date of Collection | 9/3/19 | 9/3/19 | 9/1/19 | 9/10/19 |
| Sample Type | Soil | Soil | soil | soil |
| General Location | Public parking lot | Dog park | Restaurant in Union Valley, Tx | On a ranch in Stephenville, tx |
| Location Description | In grass next to water sprinkler | Moist clay like soil | Moist Dirt pile | Next to a mossy pond |
| GPS Coordinates | (32.21, -98.24) | (32.21, -98.24) | (33.12, -96.20) | (32.17, -98.20) |
| Sample Depth | 1.6cm | 2.3cm | 3cm | 2.7cm |
| Ambient Temperature | 34.41 C | 26.67 C | 36.6 C | 33.33 C |
Sample Collection 2
| Collector Name | Kristin Sefcik | Kristin Sefcik | Kristin Sefcik | Kristin Sefcik |
| Sample No. | Sample 5 | Sample 6 | Sample 7 | Sample 8 |
| Date of Collection | 9/14/19 | 9/14/19 | 9/15/19 | 9/15/19 |
| Sample Type | Soil | Soil | Soil | soil |
| General Location | Next to a pond in Weir, Tx | In a coral in Weir, Tx | Creek located in Weir, Tx | In a garden in Georgetown, Tx |
| Location Description | In thick mud with cow feces | Dirt taken from where cows eat | In soil located in creek with worms in it | In a moist tomato garden |
| GPS Coordinates | (30.71, -97.56) | (30.71, -97.56) | (30.71, -97.56) | (30.68, -97.69) |
| Sample Depth | 6.3cm | 5cm | 4cm | 3.5cm |
| Ambient Temperature | 33.45 C | 33.45 C | 35.56 C | 36.71 C |
Isolation/Purification
Title: Direct Isolation Sample 1
Date Started:Sep. 04, 2019 Redo? yes
Purpose: I am performing direct isolation on my dirt sample 1 to extract phages.
Notes:
1. I cleaned my work station
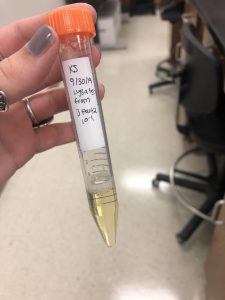
2. I Filled my sample tube with liquid media submerging 3mL of my sample.
3. Put my sample in the shaking incubator for about 2 hours. After taking the sample out i let it sit for about 15 minutes before starting aseptic technique.
4. Next i prepared my sample for aseptic technique by getting a .22 um syringe filter. I then used the syringe to take out approximately 2ml of liquid from the top of the sample. I then attach the syringe to the filter and filtered out a minimum of .5ml of filtrate into a microcentrifuge tube.
Results:
Conclusions and Next Steps: The next step will be to proceed with day one of plaque assay.
Plaque Assay:
Date Started: September 04, 2019 Redo? No
Purpose: Allows me to see the presence of phages in my sample.
Notes:
1. After my direct isolation I began the first step of plaque assay by inoculating my host bacteria with my phage sample. A micropipettor and aseptic technique will be used to dispense the phage sample into the appropriate tube containing 250 ul of host bacteria. After dispensing 500 ul of the phage sample into the host bacteria I gently mixed the sample by dragging the tube around In circles on my table. After mixing the tube i allowed it to sit for about six minutes to let the host bacteria attach.
2. Next I plated my sample with top agar. First i removed my top agar from the 55 C hot bath and used a 5ml pipette to transfer 3ml of top agar to an inoculated host tube. I then sucked up the mixture into the pipette and transferred it to the plate and evenly distributed the mixture in plate by gently tilting the plate and letting it sit in the incubator for 24-48 hours to allow phage infection
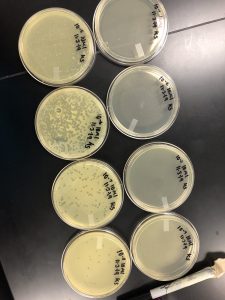
Results: There were no plaques spotted therefore it was discarded.

Title: Direct Isolation Sample 2
Date Started:Sep. 04, 2019 Redo? No
Purpose: I am performing direct isolation on my dirt sample 2 to extract phages.
Notes:
1. I cleaned my work station
2. I Filled my sample tube with liquid media submerging 3mL of my sample.
3. Put my sample in the shaking incubator for about 2 hours. After taking the sample out i let it sit for about 15 minutes before starting aseptic technique.
4. Next i prepared my sample for aseptic technique by getting a .22 um syringe filter. I then used the syringe to take out approximately 2ml of liquid from the top of the sample. I then attach the syringe to the filter and filter out a minimum of .5ml of filtrate into a microcentrifuge tube.
Conclusions and Next Steps:
The next step will be to proceed with day one of plaque assay.
Plaque Assay:
Date Started: September 04, 2019 Redo? No
Purpose: Allows me to see the presence of phages in my sample.
Notes:
1. After my direct isolation I began the first step of plaque assay by inoculating my host bacteria with my phage sample. A micropipettor and aseptic technique will be used to dispense the phage sample into the appropriate tube containing 250 ul of host bacteria. After dispensing 500 ul of the phage sample into the host bacteria I gently mixed the sample by dragging the tube around In circles on my table. After mixing the tube i allowed it to sit for about six minutes to let the host bacteria attach.
2. Next I plated my sample with top agar. First i removed my top agar from the 55 C hot bath and used a 5ml pipette to transfer 3ml of top agar to an inoculated host tube. I then sucked up the mixture into the pipette and transferred it to the plate and evenly distributed the mixture in plate by gently tilting the plate and letting it sit in the incubator for 24-48 hours to allow phage infection
Results: There were no plaques spotted therefore it was discarded.

Direct Isolation sample 3
Date Started:Sep. 04, 2019 Redo? no
Purpose: I will be performing direct isolation on my dirt sample 3 to extract phages
Notes:
1. I cleaned my work station
2. I Filled my sample tube with liquid media submerging 3mL of my sample.
3. Put my sample in the shaking incubator for about 2 hours. After taking the sample out i let it sit for about 15 minutes before starting aseptic technique.
4. Next i prepared my sample for aseptic technique by getting a .22 um syringe filter. I then used the syringe to take out approximately 2ml of liquid from the top of the sample. I then attach the syringe to the filter and filter out a minimum of .5ml of filtrate into a microcentrifuge tube.
Conclusions and Next Steps:
Next i will start the plaque assay
Plaque Assay for sample 3:
Date Started: September 04, 2019 Redo? No
Purpose: Allows me to see the presence of phages in my sample.
Notes:
1. After my direct isolation I began the first step of plaque assay by inoculating my host bacteria with my phage sample. A micropipettor and aseptic technique will be used to dispense the phage sample into the appropriate tube containing 250 ul of host bacteria. After dispensing 500 ul of the phage sample into the host bacteria I gently mixed the sample by dragging the tube around In circles on my table. After mixing the tube i allowed it to sit for about six minutes to let the host bacteria attach.
2. Next I plated my sample with top agar. First i removed my top agar from the 55 C hot bath and used a 5ml pipette to transfer 3ml of top agar to an inoculated host tube. I then sucked up the mixture into the pipette and transferred it to the plate and evenly distributed the mixture in plate by gently tilting the plate and letting it sit in the incubator for 24-48 hours to allow phage infection
Results: No plaques found therefore the sample was discarded.

Sample 1 redo direct isolation:
Date started: September 09, 2019
Purpose: I am redoing direct isolation to try and extract phages again.
Notes:
1. I cleaned my work station
2. I added about 2 more mL of liquid media to my sample and shook it and let it sit for about five minutes.
3. After letting it sit for five minutes i prepared my sample for aseptic technique by getting a .22 um syringe filter. I then used the syringe to take out approximately 2mL of liquid from the top of the sample. I then attached the syringe to the filter and filtered out a minimum of .5mL of filtrate into a microcentifuge tube.
Plaque Assay for sample 1 redo:
Date Started: September 09, 2019
Purpose: Allows me to see the presence of phages in my sample.
Notes:
1. After my direct isolation I began the first step of plaque assay by inoculating my host bacteria with my phage sample. A micropipettor and aseptic technique will be used to dispense the phage sample into the appropriate tube containing 250 ul of host bacteria. After dispensing 500 ul of the phage sample into the host bacteria I gently mixed the sample by dragging the tube around In circles on my table. After mixing the tube i allowed it to sit for about six minutes to let the host bacteria attach.
2. Next I plated my sample with top agar. First i removed my top agar from the 55 C hot bath and used a 5ml pipette to transfer 3ml of top agar to an inoculated host tube. I then sucked up the mixture into the pipette and transferred it to the plate and evenly distributed the mixture in plate by gently tilting the plate and letting it sit in the incubator for 24-48 hours to allow phage infection
Results: There were no plaques spotted therefore it was discarded.

Direct Isolation sample 4:
Date Started: Sept 11, 2019 Redo? No
Purpose: I am performing direct isolation on my dirt sample 4 to extract phages.
Notes:
1. I cleaned my work station
2. I Filled my sample tube with liquid media submerging 3mL of my sample.
3. Put my sample in the shaking incubator for about 2 hours. After taking the sample out i let it sit for about 15 minutes before starting aseptic technique.
4. Next i prepared my sample for aseptic technique by getting a .22 um syringe filter. I then used the syringe to take out approximately 2ml of liquid from the top of the sample. I then attach the syringe to the filter and filter out a minimum of .5ml of filtrate into a microcentrifuge tube.
Conclusions and Next Steps:
The next step will be to proceed with day one of plaque assay.
Plaque Assay for sample 4:
Date Started: September 11, 2019 Redo? No
Purpose: Allows me to see the presence of phages in my sample.
Notes:
1. After my direct isolation I began the first step of plaque assay by inoculating my host bacteria with my phage sample. A micropipettor and aseptic technique will be used to dispense the phage sample into the appropriate tube containing 250 ul of host bacteria. After dispensing 500 ul of the phage sample into the host bacteria I gently mixed the sample by dragging the tube around In circles on my table. After mixing the tube i allowed it to sit for about six minutes to let the host bacteria attach.
2. Next I plated my sample with top agar. First i removed my top agar from the 55 C hot bath and used a 5ml pipette to transfer 3ml of top agar to an inoculated host tube. I then sucked up the mixture into the pipette and transferred it to the plate and evenly distributed the mixture in plate by gently tilting the plate and letting it sit in the incubator for 24-48 hours to allow phage infection
Results: No plaques found therefore the sample was discarded.
Direct Isolation sample 5:
Date Started: Sept 16, 2019 Redo? No
Purpose: I am performing direct isolation on my dirt sample 5 to extract phages.
Notes:
1. I cleaned my work station
2. I Filled my sample tube with liquid media submerging 3mL of my sample.
3. Put my sample in the shaking incubator for about 2 hours. After taking the sample out i let it sit for about 15 minutes before starting aseptic technique.
4. Next i prepared my sample for aseptic technique by getting a .22 um syringe filter. I then used the syringe to take out approximately 2ml of liquid from the top of the sample. I then attach the syringe to the filter and filter out a minimum of .5ml of filtrate into a microcentrifuge tube.
Conclusions and Next Steps:
The next step will be to proceed with day one of plaque assay.
Plaque Assay for sample 5:
Date Started: September 16, 2019 Redo? No
Purpose: Allows me to see the presence of phages in my sample.
Notes:
1. After my direct isolation I began the first step of plaque assay by inoculating my host bacteria with my phage sample. A micropipettor and aseptic technique will be used to dispense the phage sample into the appropriate tube containing 250 ul of host bacteria. After dispensing 500 ul of the phage sample into the host bacteria I gently mixed the sample by dragging the tube around In circles on my table. After mixing the tube i allowed it to sit for about six minutes to let the host bacteria attach.
2. Next I plated my sample with top agar. First i removed my top agar from the 55 C hot bath and used a 5ml pipette to transfer 3ml of top agar to an inoculated host tube. I then sucked up the mixture into the pipette and transferred it to the plate and evenly distributed the mixture in plate by gently tilting the plate and letting it sit in the incubator for 24-48 hours to allow phage infection
Results: No plaques found therefore the sample was discarded.
Direct Isolation sample 6:
Date Started: Sept 16, 2019 Redo? No
Purpose: I am performing direct isolation on my dirt sample 2 to extract phages.
Notes:
1. I cleaned my work station
2. I Filled my sample tube with liquid media submerging 3mL of my sample.
3. Put my sample in the shaking incubator for about 2 hours. After taking the sample out i let it sit for about 15 minutes before starting aseptic technique.
4. Next i prepared my sample for aseptic technique by getting a .22 um syringe filter. I then used the syringe to take out approximately 2ml of liquid from the top of the sample. I then attach the syringe to the filter and filter out a minimum of .5ml of filtrate into a microcentrifuge tube. During this part of the experiment the micro pipettor got clogged with dirt so I added more liquid media to my syringe to help unclog it.
Conclusions and Next Steps:
The next step will be to proceed with day one of plaque assay.
Plaque Assay for sample 6:
Date Started: September 16, 2019 Redo? No
Purpose: Allows me to see the presence of phages in my sample.
Notes:
1. After my direct isolation I began the first step of plaque assay by inoculating my host bacteria with my phage sample. A micropipettor and aseptic technique will be used to dispense the phage sample into the appropriate tube containing 250 ul of host bacteria. After dispensing 500 ul of the phage sample into the host bacteria I gently mixed the sample by dragging the tube around In circles on my table. After mixing the tube i allowed it to sit for about six minutes to let the host bacteria attach.
2. Next I plated my sample with top agar. First i removed my top agar from the 55 C hot bath and used a 5ml pipette to transfer 3ml of top agar to an inoculated host tube. I then sucked up the mixture into the pipette and transferred it to the plate and evenly distributed the mixture in plate by gently tilting the plate and letting it sit in the incubator for 24-48 hours to allow phage infection
Results: No plaques found therefore the sample was discarded.
Title: Direct Isolation sample 7:
Date Started: Sept 16, 2019 Redo? No
Purpose: I am performing direct isolation on my dirt sample 2 to extract phages.
Notes:
1. I cleaned my work station
2. I Filled my sample tube with liquid media submerging 3mL of my sample.
3. Put my sample in the shaking incubator for about 2 hours. After taking the sample out i let it sit for about 15 minutes before starting aseptic technique.
4. Next i prepared my sample for aseptic technique by getting a .22 um syringe filter. I then used the syringe to take out approximately 2ml of liquid from the top of the sample. I then attach the syringe to the filter and filter out a minimum of .5ml of filtrate into a microcentrifuge tube.
Conclusions and Next Steps:
The next step will be to proceed with day one of plaque assay.
Plaque Assay for sample 7:
Date Started: September 16, 2019 Redo? No
Purpose: Allows me to see the presence of plaques in my sample.
Notes:
1. After my direct isolation I began the first step of plaque assay by inoculating my host bacteria with my phage sample. A micropipettor and aseptic technique will be used to dispense the phage sample into the appropriate tube containing 250 ul of host bacteria. After dispensing 500 ul of the phage sample into the host bacteria I gently mixed the sample by dragging the tube around In circles on my table. After mixing the tube i allowed it to sit for about six minutes to let the host bacteria attach.
2. Next I plated my sample with top agar. First i removed my top agar from the 55 C hot bath and used a 5ml pipette to transfer 3ml of top agar to an inoculated host tube. I then sucked up the mixture into the pipette and transferred it to the plate and evenly distributed the mixture in plate by gently tilting the plate and letting it sit in the incubator for 24-48 hours to allow phage infection
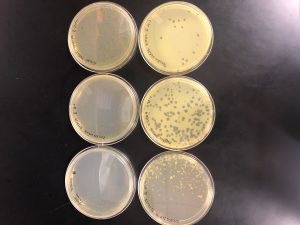
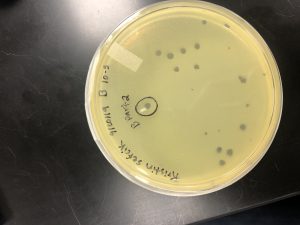
Results: Multiple plaques were found on my dish therefore, i will pick plaques to work with.

Direct Isolation sample 8:
Date Started: Sept 16, 2019 Redo? No
Purpose: I am performing direct isolation on my dirt sample 2 to extract phages.
Notes:
1. I cleaned my work station
2. I Filled my sample tube with liquid media submerging 3mL of my sample.
3. Put my sample in the shaking incubator for about 2 hours. After taking the sample out i let it sit for about 15 minutes before starting aseptic technique.
4. Next i prepared my sample for aseptic technique by getting a .22 um syringe filter. I then used the syringe to take out approximately 2ml of liquid from the top of the sample. I then attach the syringe to the filter and filter out a minimum of .5ml of filtrate into a microcentrifuge tube.
Conclusions and Next Steps:
The next step will be to proceed with day one of plaque assay.
Plaque Assay for sample 8:
Date Started: September 16, 2019 Redo? No
Purpose: Allows me to see the presence of phages in my sample.
Notes:
1. After my direct isolation I began the first step of plaque assay by inoculating my host bacteria with my phage sample. A micropipettor and aseptic technique will be used to dispense the phage sample into the appropriate tube containing 250 ul of host bacteria. After dispensing 500 ul of the phage sample into the host bacteria I gently mixed the sample by dragging the tube around In circles on my table. After mixing the tube i allowed it to sit for about six minutes to let the host bacteria attach.
2. Next I plated my sample with top agar. First i removed my top agar from the 55 C hot bath and used a 5ml pipette to transfer 3ml of top agar to an inoculated host tube. I then sucked up the mixture into the pipette and transferred it to the plate and evenly distributed the mixture in plate by gently tilting the plate and letting it sit in the incubator for 24-48 hours to allow phage infection
Results: There were bubbles on my plate and plaques spread out around the bubbles.

Picking a plaque from sample 7:
Date started: September 18, 2019 Redo? No
Purpose: To retrieve phage from a plaque
Notes:
1. I will first prepare and clean my work station.
2. I will be picking 2 plaques and label them A and B.
3. Morphology of each plaque:
A- This plaque is circular, measure:!!!, clear, and larger in size compared to the rest of the plaques on the plate.
B- This plaque is circular, MEASURE, clear, and the same size as plaque A.
4. I labeled 2 microcentrifuge tubes alphabetically and used aseptic technique to add 100 ul of phage buffer into each microcentrifuge tube.
5. I placed a sterile tip onto a p200 micropipettor holding the pipettor perpendicular to the agar surface, gently stabbed the top agar in the center of the plaque avoid touching the bacteria surrounding the plaque
6. I placed the end of the tip into the phage buffer in the corresponding microcentrifuge tube Then tapped the tip on the wall of the tube and pipette up and down to dislodge phageparticles. Repeating this for each plaque.
Conclusion and next steps:
My next step will be performing serial dilutions on both plaques A and B.
Serial Dilutions Sample 7:
Date Started: September 18, 2019 Redo? No
Purpose:
To prepare liquid phage samples of descreasing concentrations.
Notes:
1. I prepare my work bench to begin Serial dilutions for my plaque A.
2. Gathered 5 microcentrifuge tubes labeled 10^-1 A, 10^-2 A, 10^-3 A, 10^-4 A, 10^-5 A.
3. I then added 90 ul of phage buffer to each one of the labeled microcentrifuge tubes.
4. Next I began 10-fold serial dilutions by taking 10ul of the undiluted phage sample to the 10^-1 A microcentrifuge tube then vortexing it. Then I add 10ul from 10^-1 A microcentrifuge tube and adding it to the 10^-2 A microcentrifuge tube and vortexing it to repeat this for the rest of my labeled microcentrifuge tubes.
5. I repeated this process for my B plaque on September 20, 2019.
Next step: Plaque assay
Plaque Assay for plaque B from sample 7:
Date Started: September 20, 2019 Redo? No
Purpose: Allows me to see the presence of plaques in my sample.
Notes:
1. After my serial dilutions I began the first step of plaque assay by inoculating my host bacteria with my phage sample. A micropipettor and aseptic technique will be used to dispense the phage sample into the appropriate tube containing 250 ul of host bacteria. After dispensing 10 ul of each phage sample into the host bacteria I gently mixed the sample by dragging the tube around In circles on my table. After mixing the tube i allowed it to sit for about six minutes to let the host bacteria attach.
2. Next I plated my sample with top agar. First i removed my top agar from the 55 C hot bath and used a 5ml pipette to transfer 3ml of top agar to an inoculated host tube. I then sucked up the mixture into the pipette and transferred it to the plate and evenly distributed the mixture in plate by gently tilting the plate and letting it sit in the incubator for 24-48 hours to allow phage infection.
Results:
My plaque A serial dilutions did not have any good plaques to pick from. My plaque B serial dilutions had multiple plaques that are perfect to start with.

Conclusion and Next step:
I will be picking a plaque from my Plaque B serial dilution 10^-5 B.
Picking a plaque on B 10^-5:
Date started: September 23, 2019 Redo? No
Purpose: To retrieve phage from the plaque B serial dilution 10^-5 B.
Notes:
1. I will first prepare and clean my work station.
2. I will be picking one plaque and label it B part 2.
3. Morphology of each plaque:
B part 2- This plaque is circular, measure:!!!, clear, and larger in size compared to the rest of the plaques on the plate.
4. I labeled 1 tube B part 2 and used aseptic technique to add 100 ul of phage buffer into the microcentrifuge tube.
5. I placed a sterile tip onto a p200 micropipettor holding the pipettor perpendicular to the agar surface, gently stabbed the top agar in the center of the plaque avoid touching the bacteria surrounding the plaque
6. I placed the end of the tip into the phage buffer in the corresponding microcentrifuge tube Then tapped the tip on the wall of the tube and pipette up and down to dislodge phageparticles.
Results:
Conclusion and next steps:
My next step will be performing serial dilution on plaque B part 2.
Serial dilution on Plaque B part 2:
Date Started: September 25, 2019 Redo? No
Purpose:
To prepare liquid phage samples of descreasing concentrations.
Notes:
1. I prepare my work bench to begin Serial dilutions for my plaque B part 2.
2. Gathered 5 microcentrifuge tubes labeled 10^-1 B, 10^-2 B, 10^-3 B, 10^-4 B, 10^-5 B.
3. I then added 90 ul of phage buffer to each one of the labeled microcentrifuge tubes.
4. Next I began 10-fold serial dilutions by taking 10ul of the undiluted phage sample to the 10^-1 B microcentrifuge tube then vortexing it. Then I add 10ul from 10^-1 B microcentrifuge tube and adding it to the 10^-2 B microcentrifuge tube and vortexing it to repeat this for the rest of my labeled microcentrifuge tubes.
Next step: Plaque assay
Plaque Assay for plaque B part 2 from sample 7:
Date Started: September 25, 2019 Redo? No
Purpose: Allows me to see the presence of phages in my sample.
Notes:
1. After my serial dilutions I began the first step of plaque assay by inoculating my host bacteria with my phage sample. A micropipettor and aseptic technique will be used to dispense the phage sample into the appropriate tube containing 250 ul of host bacteria. After dispensing 10 ul of each phage sample into the host bacteria I gently mixed the sample by dragging the tube around In circles on my table. After mixing the tube i allowed it to sit for about six minutes to let the host bacteria attach.
2. Next I plated my sample with top agar. First i removed my top agar from the 55 C hot bath and used a 5ml pipette to transfer 3ml of top agar to an inoculated host tube. I then sucked up the mixture into the pipette and transferred it to the plate and evenly distributed the mixture in plate by gently tilting the plate and letting it sit in the incubator for 24-48 hours to allow phage infection.
Results:
After my final serial dilutions my plaques came out perfectly to the 10^5 plate.
Next step: Collecting Plate Lysates
Collecting Plate Lysates from B part 2 10^-1:
Date started: September 30, 2019 Redo? No
Purpose: To generate a highly concentrated liquid phage sample.
Notes:
1. I chose the plate B part 2 10^-1 for lysate collection.
2. Then i flooded my webbed plate by applying 8mL of phage buffer to the webbed plate with a pipetor and let it sit for about 4 hours at room temperature.
3. Next I harvested the plate lysates by tilting the plate and sucking up the lysates with a 5ml syringe and attaching it to a .22um filter to filter out the lysates into a 15ml conical tube.
4. Lastly, i will leave it in the fridge to cool until i begin serial dilutions.
Results:
Next step: Serial Dilutions
Serial Dilutions on collected Lysates:
Date started: October 2, 2019 Redo? Yes
Purpose:
To prepare liquid phage samples of descreasing concentrations.
Notes:
1. I prepare my work bench to begin Serial dilutions for my plaque B part 2 10^-1.
2. Gathered 5 microcentrifuge tubes labeled 10^-1 B part 2, 10^-2 B part 2, 10^-3 B part 2, 10^-4 B part 2, 10^-5 B part 2.
3. I then added 90 ul of phage buffer to each one of the labeled microcentrifuge tubes.
4. Next I began 10-fold serial dilutions by taking 10ul of the undiluted phage sample to the 10^-1 B part 2 microcentrifuge tube then vortexing it. Then I add 10ul from 10^-1 B part 2 microcentrifuge tube and adding it to the 10^-2 B part 2 microcentrifuge tube and vortexing it to repeat this for the rest of my labeled microcentrifuge tubes.
Next step: Plaque assay
Plaque Assay for collected lysates:
Date Started: October 2, 2019 Redo? Yes
Purpose: Allows me to see the presence of phages in my sample.
Notes:
1. After my serial dilutions I began the first step of plaque assay by inoculating my host bacteria with my phage sample. A micropipettor and aseptic technique will be used to dispense the phage sample into the appropriate tube containing 250 ul of host bacteria. After dispensing 10 ul of each phage sample into the host bacteria I gently mixed the sample by dragging the tube around In circles on my table. After mixing the tube i allowed it to sit for about six minutes to let the host bacteria attach.
2. Next I plated my sample with top agar. First i removed my top agar from the 55 C hot bath and used a 5ml pipette to transfer 3ml of top agar to an inoculated host tube. I then sucked up the mixture into the pipette and transferred it to the plate and evenly distributed the mixture in plate by gently tilting the plate and letting it sit in the incubator for 24-48 hours to allow phage infection.
Results: Contamination in everyones samples including mine was found in the dishes therefore, it will have to be redone.
Next Step: Redo of serial dilutions.
Redo of Serial Dilutions on collected Lysates:
Date started: October 7, 2019 Redo? Yes
Purpose:
To prepare liquid phage samples of descreasing concentrations.
Notes:
1. I prepare my work bench to begin Serial dilutions for my plaque B part 2 10^-1.
2. Gathered 5 microcentrifuge tubes labeled 10^-1 B part 2, 10^-2 B part 2, 10^-3 B part 2, 10^-4 B part 2, 10^-5 B part 2.
3. I then added 90 ul of phage buffer to each one of the labeled microcentrifuge tubes.
4. Next I began 10-fold serial dilutions by taking 10ul of the undiluted phage sample to the 10^-1 B part 2 microcentrifuge tube then vortexing it. Then I add 10ul from 10^-1 B part 2 microcentrifuge tube and adding it to the 10^-2 B part 2 microcentrifuge tube and vortexing it to repeat this for the rest of my labeled microcentrifuge tubes.
Next step: Plaque assay
Redo of Plaque Assay for collected Lysates:
Date Started: October 7, 2019 Redo? Yes
Purpose: Allows me to see the presence of phages in my sample.
Notes:
1. After my serial dilutions I began the first step of plaque assay by inoculating my host bacteria with my phage sample. A micropipettor and aseptic technique will be used to dispense the phage sample into the appropriate tube containing 250 ul of host bacteria. After dispensing 10 ul of each phage sample into the host bacteria I gently mixed the sample by dragging the tube around In circles on my table. After mixing the tube i allowed it to sit for about six minutes to let the host bacteria attach.
2. Next I plated my sample with top agar. First i removed my top agar from the 55 C hot bath and used a 5ml pipette to transfer 3ml of top agar to an inoculated host tube. I then sucked up the mixture into the pipette and transferred it to the plate and evenly distributed the mixture in plate by gently tilting the plate and letting it sit in the incubator for 24-48 hours to allow phage infection.
Results: Contamination in everyones samples including mine was found in the dishes therefore, it will have to be redone again after cause of contamination is found.
Redo of Serial Dilutions on collected Lysates:
Date started: October 14, 2019 Redo? No
Purpose:
To prepare liquid phage samples of descreasing concentrations.
Notes:
1. I prepare my work bench to begin Serial dilutions for my plaque B part 2 10^-1.
2. Gathered 5 microcentrifuge tubes labeled 10^-1 B part 2, 10^-2 B part 2, 10^-3 B part 2, 10^-4 B part 2, 10^-5 B part 2.
3. I then added 90 ul of phage buffer to each one of the labeled microcentrifuge tubes.
4. Next I began 10-fold serial dilutions by taking 10ul of the undiluted phage sample to the 10^-1 B part 2 microcentrifuge tube then vortexing it. Then I add 10ul from 10^-1 B part 2 microcentrifuge tube and adding it to the 10^-2 B part 2 microcentrifuge tube and vortexing it to repeat this for the rest of my labeled microcentrifuge tubes.
Next step: Plaque assay
Redo of Plaque Assay for collected Lysates:
Date Started: October 14, 2019 Redo? No
Purpose: Allows me to see the presence of phages in my sample.
Notes:
1. After my serial dilutions I began the first step of plaque assay by inoculating my host bacteria with my phage sample. A micropipettor and aseptic technique will be used to dispense the phage sample into the appropriate tube containing 250 ul of host bacteria. After dispensing 10 ul of each phage sample into the host bacteria I gently mixed the sample by dragging the tube around In circles on my table. After mixing the tube i allowed it to sit for about six minutes to let the host bacteria attach.
2. Next I plated my sample with top agar. First i removed my top agar from the 55 C hot bath and used a 5ml pipette to transfer 3ml of top agar to an inoculated host tube. I then sucked up the mixture into the pipette and transferred it to the plate and evenly distributed the mixture in plate by gently tilting the plate and letting it sit in the incubator for 24-48 hours to allow phage infection.
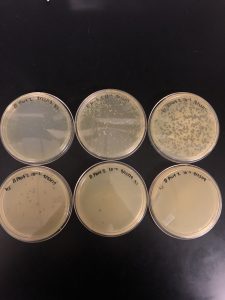
Results: Plaques were found on my plates but there were two different plaque morphologies located on plates 10^-6 and 10^-3.


Next step: Picking plaques
Title: Picking plaques from 10^-6 and 10^-3 to test for contamination.
Date: October 14, 2019 Redo? No
Purpose:
1. I will first prepare and clean my work station.
2. I will be picking one plaque from two seperate plates with two different morphologies to test for contamination.
3. Morphology of each plaque:
10^-6 A- This plaque is circular, measure:!!!, clear, and larger in size compared to the rest of the plaques on the plate.
10^-3 A- This plaque is circular, MEASURE, clear, and the same size as plaque A.
4. I labeled 2 microcentrifuge tubes 10^-6 A and 10^-3 A and used aseptic technique to add 100 ul of phage buffer into each microcentrifuge tube.
5. I placed a sterile tip onto a p200 micropipettor holding the pipettor perpendicular to the agar surface, gently stabbed the top agar in the center of the plaque avoid touching the bacteria surrounding the plaque
6. I placed the end of the tip into the phage buffer in the corresponding microcentrifuge tube Then tapped the tip on the wall of the tube and pipette up and down to dislodge phageparticles. Repeating this for each plaque.
Conclusion and next steps: will be performing serial dilutions on both plaques 10^-6 A and 10^-3 A.


Next Step: Lysate math.
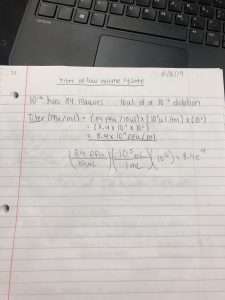
Title: Lysate math
Date: October 16, 2019 Redo? No
Purpose: To create a plate with a very high densiity of plaques from my lysate.
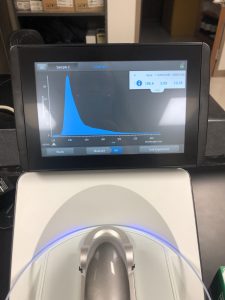
Results: The titer of my low volume lysate is 8.4×10^9

Title: Serial dilutions on 10^-6 A and 10^-3 A
Date started: October 21, 2019 Redo? No
Purpose:
To prepare liquid phage samples of descreasing concentrations.
Notes:
1. I prepare my work bench to begin Serial dilutions for my plaque 10^-3 A.
2. Gathered 4 microcentrifuge tubes labeled 10^-3A 10^-1 , 10^-3A 10^-2 , 10^-3A 10^-3 , 10^-3A 10^-4 .
3. I then added 90 ul of phage buffer to each one of the labeled microcentrifuge tubes.
4. Next I began 10-fold serial dilutions by taking 10ul of the undiluted phage sample to the 10^-1 microcentrifuge tube then vortexing it. Then I add 10ul from 10^-1 microcentrifuge tube and adding it to the 10^-2 microcentrifuge tube and vortexing it to repeat this for the rest of my labeled microcentrifuge tubes.
5. I repeated this process for my 10^-6 A plaque also using 4 microcentrifuge tubes.
Next step: Plaque assay
Title: Microscopy
Date started: October 21, 2019 Redo? Yes
Purpose: To prepare my phage sample for viewing with a transmission electron microscope.
Notes:
1. Aseptically transfered 1 mL of my of my high-titer lysate into a sterile microcentrifuge tube. Afterwards I placed my microcentrifuge tube into a centrifuge for one hour at 4C at top speed to concentrate my phage particlesto the bottom of the tube.
2. After an hour of centrifuging i removed my microcentrifuge tube and used a micropipetor to remove as much supernanent without disrupting the phage particles at the bottom. Then i added 100ul of phage buffer and let resuspend at 4C for 30 minutes to an hour.
3.Once my phage sample is done resuspending for thirty minutes I prepared my work area for microscopy first by putting on a pair of gloves. I covered my work area with bench paper and places a 5×5 peice of parafilm in the middle of a petri dish. Then i places a PELCO tab in the middle of the parafilm and used EM forceps to remove a fresh grid from a box of unused grids and attached it to the very edge of the PELCFO tab with my EM forceps with the dark shiny side up.
4. Using a micropipetor i placed 10ul of my lysate sample onto the grid and left on for 2 minutes. After 2 minutes I used filter paper to wick off the excess fluid then disposed of the filter paper.
5. 10ul of water is added to the grid and left on for 2 minutes ande wicked off with filter paper to rinse the grid and repeated again in order to rinse the grid 2 times.
6. After the grid is washed twice i add 10ul of 1% uranyl acetate to the grid and leave it on for 2 minutes then wick off the excess acetate with filter paper.
7. Once my grid is air dried i placed it in the grid box for storage.
Title: Plaque assay
Date Started: October 21, 2019 Redo? No
Purpose: Allows me to see the presence of phages in my sample.
Notes:
1. After my serial dilutions I began the first step of plaque assay by inoculating my host bacteria with my phage sample. A micropipettor and aseptic technique will be used to dispense the phage sample into the appropriate tube containing 250 ul of host bacteria. After dispensing 10 ul of each phage sample into the host bacteria I gently mixed the sample by dragging the tube around In circles on my table. After mixing the tube i allowed it to sit for about six minutes to let the host bacteria attach.
2. Next I plated my sample with top agar. First i removed my top agar from the 55 C hot bath and used a 5ml pipette to transfer 3ml of top agar to an inoculated host tube. I then sucked up the mixture into the pipette and transferred it to the plate and evenly distributed the mixture in plate by gently tilting the plate and letting it sit in the incubator for 24-48 hours to allow phage infection.
Results: I have found from my results that someone elses phage contaminated mine. Therefore, i will be re flooding a plate to collect my un contaminated lysates from to redo my microscopy.


Title: Collecting Plate Lysates from plate 10^-3A 10^-2:
Date started:October 21, 2019 Redo? No
Purpose: To generate a highly concentrated liquid phage sample.
Notes:
1. I chose the plate 10^-3A 10^-2 for lysate collection.
2. Then i flooded my webbed plate by applying 8mL of phage buffer to the webbed plate with a pipetor and let it sit for about 4 hours at room temperature.
3. Next I harvested the plate lysates by tilting the plate and sucking up the lysates with a 5ml syringe and attaching it to a .22um filter to filter out the lysates into a 15ml conical tube.
4. I will store my lysates in fridge t cool until i am ready to begin Microscopy.
Next step: I will use my new collected Lysates to redo my Microscopy.
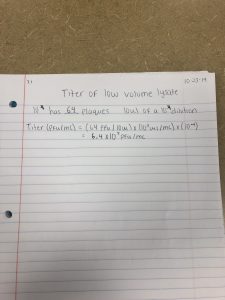
Title: Lysate math:
Date: October 23, 2019 Redo? No
Purpose: To create a plate with a very high densiity of plaques from my lysate.
Results: The titer of my low volume lysate is 6.4×10^7.
Title: Microscopy
Date started: October 23, 2019 Redo? No
Purpose: To prepare my phage sample for viewing with a transmission electron microscope.
Notes:
1. Aseptically transfered 1 mL of my of my high-titer lysate into a sterile microcentrifuge tube. Afterwards I placed my microcentrifuge tube into a centrifuge for one hour at 4C at top speed to concentrate my phage particlesto the bottom of the tube.
2. After an hour of centrifuging i removed my microcentrifuge tube and used a micropipetor to remove as much supernanent without disrupting the phage particles at the bottom. Then i added 100ul of phage buffer and let resuspend at 4C for 30 minutes to an hour.
3.Once my phage sample is done resuspending for thirty minutes I prepared my work area for microscopy first by putting on a pair of gloves. I covered my work area with bench paper and places a 5×5 peice of parafilm in the middle of a petri dish. Then i places a PELCO tab in the middle of the parafilm and used EM forceps to remove a fresh grid from a box of unused grids and attached it to the very edge of the PELCFO tab with my EM forceps with the dark shiny side up.
4. Using a micropipetor i placed 10ul of my lysate sample onto the grid and left on for 7 minutes. After 7 minutes I used filter paper to wick off the excess fluid then disposed of the filter paper.
5. 10ul of water is added to the grid and left on for 2 minutes ande wicked off with filter paper to rinse the grid and repeated again in order to rinse the grid 2 times.
6. After the grid is washed twice i add 10ul of 1% uranyl acetate to the grid and leave it on for 2 minutes then wick off the excess acetate with filter paper.
7. Once my grid is air dried i placed it in the grid box for storage.
Title: Plaque Assay for high volume lysate.
Date Started: October 28, 2019 Redo? No
Purpose: Allows me to see the presence of phages in my sample.
Notes:
1. I began the first step of plaque assay by inoculating my host bacteria with my phage sample. A micropipettor and aseptic technique will be used to dispense the phage sample into the appropriate tube containing 250 ul of host bacteria. After dispensing 12,13, and 14 ul of my lysate sample into the host bacterias I gently mixed the sample by dragging the tube around In circles on my table. After mixing the tube i allowed it to sit for about six minutes to let the host bacteria attach.
2. Next I plated my sample with top agar. First i removed my top agar from the 55 C hot bath and used a 5ml pipette to transfer 3ml of top agar to an inoculated host tube. I then sucked up the mixture into the pipette and transferred it to the labeled plates and evenly distributed the mixture in plate by gently tilting the plate and letting it sit in the incubator for 24 hours to allow phage infection.
Results: None of my plates were webbed enough for DNA extraction. Therefore I will be repeating plaque assay by taking the microcentrifuge tube that made my first webbed plate i took lysates from.
Title: Plaque assay on 10^-3A, 10^-2 (10-21-19)
Date Started: October 30, 2019 Redo? Yes
Purpose: Allows me to see the presence of phages in my sample.
Notes:
1. I began the first step of plaque assay by inoculating my host bacteria with my phage sample. A micropipettor and aseptic technique will be used to dispense the phage sample into the appropriate tube containing 250 ul of host bacteria. After dispensing 10 ul of my lysate sample into the host bacterias I gently mixed the sample by dragging the tube around In circles on my table. After mixing the tube i allowed it to sit for about six minutes to let the host bacteria attach.
2. Next I plated my sample with top agar. First i removed my top agar from the 55 C hot bath and used a 5ml pipette to transfer 3ml of top agar to an inoculated host tube. I then sucked up the mixture into the pipette and transferred it to the 3 labeled plates and evenly distributed the mixture in plate by gently tilting the plate and letting it sit in the incubator for 24 hours to allow phage infection.
Redults: There were no plaques on my plates so I will be starting plaque assay over again.
Title: Redo of Plaque assay on 10^-3A, 10^-2 (10-21-19)
Date Started: October 31, 2019 Redo? Yes
Purpose: Allows me to see the presence of phages in my sample.
Notes:
1. I began the first step of plaque assay by inoculating my host bacteria with my phage sample. A micropipettor and aseptic technique will be used to dispense the phage sample into the appropriate tube containing 250 ul of host bacteria. After dispensing 10 and 15 ul of my lysate sample into the host bacterias I gently mixed the sample by dragging the tube around In circles on my table. After mixing the tube i allowed it to sit for about six minutes to let the host bacteria attach.
2. Next I plated my sample with top agar. First i removed my top agar from the 55 C hot bath and used a 5ml pipette to transfer 3ml of top agar to an inoculated host tube. I then sucked up the mixture into the pipette and transferred it to the 6 labeled plates and evenly distributed the mixture in plate by gently tilting the plate and letting it sit in the incubator for 24 hours to allow phage infection.
Results: Although they are difficult to view plaques were found and I will be flooding plate 10^-2 15 ul to later transfer to my next webbed plate I will make.
Title: Collecting Plate Lysates from plate 10^-2 15ul:
Date started:November 1, 2019 Redo? No
Purpose: To generate a highly concentrated liquid phage sample.
Notes:
1. I chose the plate 10^-2 15 ul for lysate collection.
2. Then i flooded my webbed plate by applying 4.5mL of my lysate and 3.5mL of phage buffer to the webbed plate with a pipetor and let it sit for about 2 hours at room temperature.
3. Next I harvested the plate lysates by tilting the plate and sucking up the lysates with a 5ml syringe and attaching it to a .22um filter to filter out the lysates into a 15ml conical tube.
4. I will store my lysates in fridge while I create two more webbed plates to flood with my new collected lysate.
Results:
Title: Plaque Assay
Date Started: November 1, 2019 Redo? Yes
Purpose: Allows me to see the presence of phages in my sample.
Notes:
1. I began the first step of plaque assay by inoculating my host bacteria with my phage sample. A micropipettor and aseptic technique will be used to dispense the phage sample into the appropriate tube containing 250 ul of host bacteria. After dispensing 10ul and 15ul of my lysate sample into the host bacterias I gently mixed the sample by dragging the tube around In circles on my table. After mixing the tube i allowed it to sit for about six minutes to let the host bacteria attach.
2. Next I plated my sample with top agar. First i removed my top agar from the 55 C hot bath and used a 5ml pipette to transfer 3ml of top agar to an inoculated host tube. I then sucked up the mixture into the pipette and transferred it to the 2 labeled plates and evenly distributed the mixture in plate by gently tilting the plate and letting it sit in the incubator for 24 hours to allow phage infection.
Results:

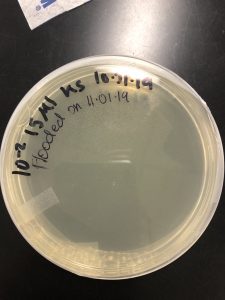
Title: Collecting Plate Lysates from plate 10^-1 15ul:
Date started:November 2, 2019 Redo? No
Purpose: To generate a highly concentrated liquid phage sample.
Notes:
1. I chose the plate 10^-1 15 ul for lysate collection.
2. Then i flooded my webbed plate by applying 5.5mL of my lysate from 10^-2 15ul and 2.5mL of phage buffer to the webbed plate with a pipetor and let it sit for about 2 hours at room temperature.
3. Next I harvested the plate lysates by tilting the plate and sucking up the lysates with a 5ml syringe and attaching it to a .22um filter to filter out the lysates into a 15ml conical tube.
4. I will flood my second plate with my collected Lysates next.
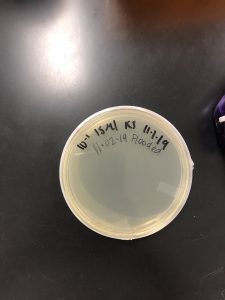
Title: Collecting Plate Lysates from plate 10^-1 10ul:
Date started:November 2, 2019 Redo? No
Purpose: To generate a highly concentrated liquid phage sample.
Notes:
1. I chose the plate 10^-1 10 ul for lysate collection.
2. Then i flooded my webbed plate by applying 8mL of my lysates collected from 10^-1 15ul plate to the webbed plate with a pipetor and let it sit for about 2 hours at room temperature.
3. Next I harvested the plate lysates by tilting the plate and sucking up the lysates with a 5ml syringe and attaching it to a .22um filter to filter out the lysates into a 15ml conical tube.
Next step: Serial Dilutions
Date started: November 3, 2019 Redo? No
Purpose:
To prepare liquid phage samples of descreasing concentrations.
Notes:
1. I prepare my work bench to begin Serial dilutions from my collected lysates.
2. Gathered 4 microcentrifuge tubes labeled 10^-1 , 10^-2 ,10^-3 , 10^-4 , 10^-5, 10^-6. 10^-7, 10^-8.
3. I then added 90 ul of phage buffer to each one of the labeled microcentrifuge tubes.
4. Next I began 10-fold serial dilutions by taking 10ul of the undiluted phage sample to the 10^-1 microcentrifuge tube then vortexing it. Then I add 10ul from 10^-1 microcentrifuge tube and adding it to the 10^-2 microcentrifuge tube and vortexing it to repeat this for the rest of my labeled microcentrifuge tubes.
5. I repeated this process for my 10^-6 plaque also using 4 microcentrifuge tubes.
Next step: Plaque assay
Plaque Assay:
Date Started: November 3, 2019 Redo? No
Purpose: Allows me to see the presence of phages in my sample.
Notes:
1. After my serial dilutions I began the first step of plaque assay by inoculating my host bacteria with my phage sample. A micropipettor and aseptic technique will be used to dispense the phage sample into the appropriate tube containing 250 ul of host bacteria. After dispensing 10 ul of each phage sample into the host bacteria I gently mixed the sample by dragging the tube around In circles on my table. After mixing the tube i allowed it to sit for about six minutes to let the host bacteria attach.
2. Next I plated my sample with top agar. First i removed my top agar from the 55 C hot bath and used a 5ml pipette to transfer 3ml of top agar to an inoculated host tube. I then sucked up the mixture into the pipette and transferred it to the plate and evenly distributed the mixture in plate by gently tilting the plate and letting it sit in the incubator for 24-48 hours to allow phage infection.
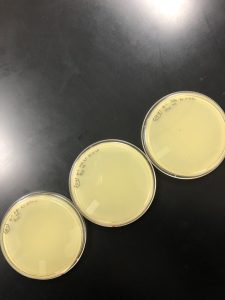
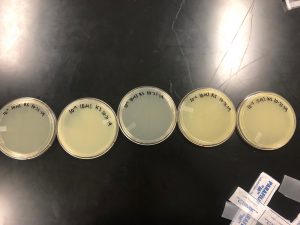
Results: I made multiple webbed plates that i can create my high volume lysate with and use to get more lysates from if i run out during DNA extractions.
Next step: Lysate Math
Date: November 4, 2019 Redo? No
Purpose: To create a plate with a very high densiity of plaques from my lysate.
Results: The titer of my high volume lysate is 1.05×10^11 pfu/mL. I added an overall amount of 9mL of phage buffer to my lysates bringing the titer down to 1.05×10^9 to have enough lysates for DNA extraction.
Next step: DNA extraction
Amplification
Title: Procedure
Date Started:Sep. 04, 2019 Redo? yes/no
Purpose: State in a couple of sentences what you are trying to do and why you are doing it.
Notes:
What did you do? Type out the protocols that you are doing, how you did them, and when you did them. Make notes to remind you of what you did, or what you need to do. If you did something different than normal, it is important to write that down.
Results:
Add the date(s) that the results were obtained. Describe the results and make a table, create a figure, or add an image. This is important because this is your data.
Conclusions and Next Steps:
What can be determined from your data? What should you do next?
DNA Extraction
Title: DNA extraction
Date: November 5-6, 2019 Redo? Yes
Purpose: To isolate my phages DNA
Notes:


Title: DNA extraction redo
Date: November 6-7, 2019 Redo? No
Purpose: To isolate my phages DNA
Notes:


Title: Restriction Enzyme digest and Gel Electrophoresis
Date Started: November 07, 2019 Redo? no
Purpose: I will be cutting my phage’s genome into multiple fragments so that i can place them on a gel to see them clearly.
Notes:
1. I started by gently mixing my DNA by flicking the microcentrifuge tube and dragging it on the table and incubated it for 10 minutes at 65 degrees Celsius then put it in freezer overnight.
2. (November 8, 2019) I took my microcentrifuge tube out of the freezer and incubated it to warm it and then centrifuged at top speed for less than a minute.
3. Then I took three microcentrifuge tubes and labeled them “Uncut”, “NSPI”, and the last one “SacII”. Since my cubit reading came out to 88ng/uL, I calculated the amount of DNA and water needed to be added to each of the tubes. The numbers came out to be 5.7 uL of H2O and 2.3uL of DNA. Then I transferred 5.7 uL of H2O and 1 uL of 10x Buffer.
4. In the “NSPI” tube I added 1 uL of the NSPI restrictive enzyme, In the “SacII” tube I added 1 uL of the SacII restrictive enzyme, and in the “Uncut” tube I didn”t add any enzyme because that was my negative control. Then I added 2.6 ul of dye to each of the three tubes.
5. After adding the dye I gently mixed and placed the microcentrifuge tubes in a microcentrifuge for less than a minute.
6. Once the microcentrifuge was done I incubated the three tubes at 37 degrees Celsius for 1 hour.
7. An hour later I began the Casting Agarose Gels protocol. First I made the agarose gel by measuring out 0.32g of agrose and pouring it into an Erlenmyer flask. Then I poured 50 mL of of TBE buffer and 150 mL of DI water to the flask. Next I swirled the glass to mix everything and clogged the top of the flask with a paper towel to placed it in the microwave for 30 seconds.
8. Once the mixture was done in the microwave I took the flask out of the microwave and removed the paper towel and mixed everything in the flask by swirling it and letting it cool.
9. Next I slowly added the gel dye to the mixture.
10. To make the ladder, I used 2 uL of the 100ng/uL ladder, 8 uL of H2O, and 1 uL of loading dye.
11. I took the comb out of the gel and started filling the wells with my solutions. First put 1 uL of the ladder to the first well, 1 uL of the “Uncut” to the next well, 1 uL of the NSPI to the third well, and 1 uL of SacII to the fourth well. Lastly I added TBE Buffer to the gel apparatus until the gel was submerged by 1/4 inch of buffer and plugged in the electrodes to turn the power on to leave for an hour to see the results under a UV light.
Results: My DNA from my phage seems to be heavy by having no clear cuts.

Characterization
Title: Procedure
Date Started:Sep. 04, 2019 Redo? yes/no
Purpose: State in a couple of sentences what you are trying to do and why you are doing it.
Notes:
What did you do? Type out the protocols that you are doing, how you did them, and when you did them. Make notes to remind you of what you did, or what you need to do. If you did something different than normal, it is important to write that down.
Results:
Add the date(s) that the results were obtained. Describe the results and make a table, create a figure, or add an image. This is important because this is your data.
Conclusions and Next Steps:
What can be determined from your data? What should you do next?