Discovery of PurpleGoat
PurpleGoat Information
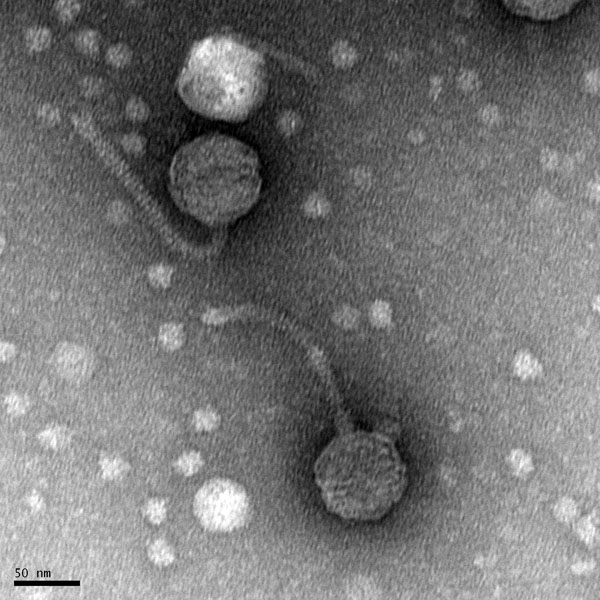
Morphology: Siphoviridae
Sample Collection
| Collector Name |
Marlee Goppert | Marlee Goppert | Marlee Goppert | Marlee Goppert | Jessica Lee |
| Sample No. | M1 | M2 | M3 | M4 | J1 |
| Date of Collection | 08/24/2020 | 08/24/2020 | 08/26/2020 | 08/26/2020 | 08/25/2020 |
| Sample Type | Water | Water | Soil | Soil | Water |
| General Location | River | River | Farm | Farm | Surrounding a tree |
| Location Description | Shoreline of the Bosque River | Shoreline of the Bosque River | Cowpin at a dairy farm | Cow poop | Stephenville city park |
| GPS Coordinates | 32.2141 N -98.2039 W | 32.2144 N -98.2031 W | 32.2566 N -98.1960 W | 32.2564 N -98.1957 W | 32.2163 N -98.2011 W |
| Sample Depth | About 0.5 inches | Surface Level | About 1 inch | Surface Level | Surface Level |
| Ambient Temperature | 35 °C | 35 °C | 32 °C | 32 °C | 32 °C |
| Collector Name |
Jessica Lee | Jessica Lee |
| Sample No. | J2 | J3 |
| Date of Collection | 08/25/2020 | 8/27/2020 |
| Sample Type | Water | Soil |
| General Location | River | Ant Pile |
| Location Description | Shoreline of the Bosque River | In the grass next to a restaurant |
| GPS Coordinates | 32.2142 N -98.2030 W |
32.2315 N -98.1830 W |
| Sample Depth | Surface Level | Surface level |
| Ambient Temperature | 32 °C | 36 °C |
Isolation/Purification
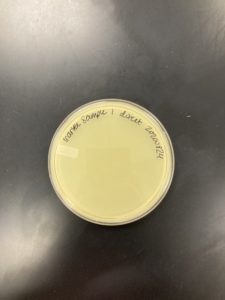
Title: Direct Isolation
Date: 08/24/2020 Redo: No Sample: M1
Purpose: This procedure is to isolate bacteriophages from an environmental sample to grow and infect the host bacteria using a plaque assay.
Notes:
1.) After putting on gloves, we created an aseptic workspace by spraying CiDecon on the counter top, and then wiped it down with paper towels. After using the CiDecon, 70% Ethanol was then sprayed and then smeared using a chem wipe. After being properly sanitized, gloves were removed, and then a Bunsen burner was lit.
2.) Before removing any of our samples, we opened the 0.22um syringe filter making sure to leave it in the package. We then attached a 5mL syringe to the top of the filter, making sure the filter remains sterile the entire time. We removed the plunger from the syringe to make it easier to transfer liquids.
3.) After our prep work, our 15mL conical tube containing the liquid sample was opened, and using a serological pipette 2mL of our sample was removed.
4.) The removed sample was then transferred to the 5mL syringe, where the syringe plunger was then depressed to suspense the filtered liquid into a microcentrifuge tube and the tube was capped.
This is where we then proceeded onto creating the plaque assay.
5.) An agar plate was removed from the refrigerator and then placed in an incubator, set at 38°C, for 10 minutes.
6.) Using a 100uL micropipette, 500 microliters of the isolated phage sample were dispensed into a test tube containing 250 microliters of our host bacteria.
Before our phage sample was dispensed, we had to break up the bacteria sample, because it was clumped together. We used the figure 8 method, the grate, and a quick vortex spin to make the bacteria homogeneous.
7.) The tube was then tilted to make sure that both the phage and bacteria samples were mixed together. They were then set to sit for 10 minutes to make sure that the phage and bacteria bind together.
8.) After the 10 minutes, using a serological syringe 3mL of Top Agar was dispensed into the bacteria and phage test tube, and then immediately aspirated back into the syringe.
9.) The top agar mixture was then dispensed onto the agar plate, making sure not to avoid creating bubbles, and then distributed across the top of the plate, making sure to cover the whole surface.
10.) The plate was left to set for 10 minutes to solidify, and was then placed in an incubator at 7:09 pm. The sample will sit for about 24-48 hours.
Results:
Negative Results
The plate was removed from the incubator to check the status of phage development at 5:10 on 08/25/2020.
Conclusions and Next Steps:
08/25/2020: Will get another environmental sample, and will see if I can get a bacteriophage.
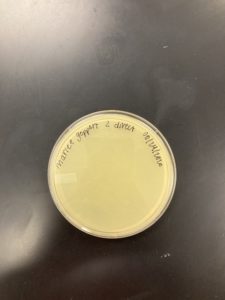
Title: Direct Isolation
Date: 08/24/2020 Redo: No Sample: M2
Purpose: This procedure is to isolate bacteriophages from an environmental sample to grow and infect the host bacteria using a plaque assay.
Notes:
1.) After putting on gloves, we created an aseptic workspace by spraying CiDecon on the counter top, and then wiped it down with paper towels. After using the CiDecon, 70% Ethanol was then sprayed and then smeared using a chem wipe. After being properly sanitized, gloves were removed, and then a Bunsen burner was lit.
2.) Before removing any of our samples, we opened the 0.22um syringe filter making sure to leave it in the package. We then attached a 5mL syringe to the top of the filter, making sure the filter remains sterile the entire time. We removed the plunger from the syringe to make it easier to transfer liquids.
3.) After our prep work, our 15mL conical tube containing the liquid sample was opened, and using a serological pipette 2mL of our sample was removed.
4.) The removed sample was then transferred to the 5mL syringe, where the syringe plunger was then depressed to suspense the filtered liquid into a microcentrifuge tube and the tube was capped.
This is where we then proceeded onto creating the plaque assay.
5.) An agar plate was removed from the refrigerator and then placed in an incubator, set at 38°C, for 10 minutes.
6.) Using a 100uL micropipette, 500 microliters of the isolated phage sample were dispensed into a test tube containing 250 microliters of our host bacteria.
Before our phage sample was dispensed, we had to break up the bacteria sample, because it was clumped together. We used the figure 8 method, the grate, and a quick vortex spin to make the bacteria homogeneous.
7.) The tube was then tilted to make sure that both the phage and bacteria samples were mixed together. They were then set to sit for 10 minutes to make sure that the phage and bacteria bind together.
8.) After the 10 minutes, using a serological syringe 3mL of Top Agar was dispensed into the bacteria and phage test tube, and then immediately aspirated back into the syringe.
9.) The top agar mixture was then dispensed onto the agar plate, making sure not to avoid creating bubbles, and then distributed across the top of the plate, making sure to cover the whole surface.
10.) The plate was left to set for 10 minutes to solidify, and was then placed in an incubator at 7:09 pm. The sample will sit for about 24-48 hours.
Results:
Negative Results
The plate was removed from the incubator to check the status of phage development at 5:10 on 08/25/2020.
Conclusions and Next Steps:
08/25/2020: Will get another environmental sample, and will see if I can get a bacteriophage.
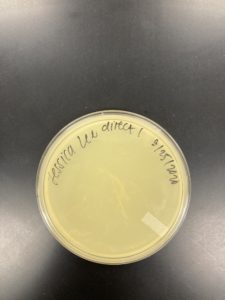
Title: Direct Isolation
Date: 08/25/2020 Redo: Yes Sample: J1
Purpose: This procedure is to isolate bacteriophages from an environmental sample to grow and infect the host bacteria using a plaque assay.
Notes:
1.) After putting on gloves, we created an aseptic workspace by spraying CiDecon on the counter top, and then wiped it down with paper towels. After using the CiDecon, 70% Ethanol was then sprayed and then smeared using a chem wipe. After being properly sanitized, gloves were removed, and then a Bunsen burner was lit.
2.) Before removing any of our samples, we opened the 0.22um syringe filter making sure to leave it in the package. We then attached a 5mL syringe to the top of the filter, making sure the filter remains sterile the entire time. We removed the plunger from the syringe to make it easier to transfer liquids.
3.) After our prep work, our 15mL conical tube containing the liquid sample was opened, and using a serological pipette 2mL of our sample was removed.
4.) The removed sample was then transferred to the 5mL syringe, where the syringe plunger was then depressed to suspense the filtered liquid into a microcentrifuge tube and the tube was capped.
This is where we then proceeded onto creating the plaque assay.
5.) An agar plate was removed from the refrigerator and then placed in an incubator, set at 38°C, for 10 minutes.
6.) Using a 100uL micropipette, 500 microliters of the isolated phage sample were dispensed into a test tube containing 250 microliters of our host bacteria.
Before our phage sample was dispensed, we had to break up the bacteria sample, because it was clumped together. We used the figure 8 method, the grate, and a quick vortex spin to make the bacteria homogeneous.
7.) The tube was then tilted to make sure that both the phage and bacteria samples were mixed together. They were then set to sit for 10 minutes to make sure that the phage and bacteria bind together.
8.) After the 10 minutes, using a serological syringe 3mL of Top Agar was dispensed into the bacteria and phage test tube, and then immediately aspirated back into the syringe.
9.) The top agar mixture was then dispensed onto the agar plate, making sure not to avoid creating bubbles, and then distributed across the top of the plate, making sure to cover the whole surface.
10.) The plate was left to set for 10 minutes to solidify, and was then placed in an incubator at 6:10 pm. The sample will sit for about 24-48 hours.
This sample was redone, because the bacteria sample we used was not homogeneous before our phage sample was added. So, we tried this sample again with a new bacteria sample to see if it made a difference in our results. The redone sample J1 was placed in the incubator at 9:50 pm on 08/26/2020.
Results:
Negative Result Sample J1:
Was removed from the incubator to check the phage growth at 6:17 pm on 08/26/2020.
Negative Result Sample J1 REDO:
Was removed from the incubator to check the phage growth at 4:31 pm on 08/27/2020.
Conclusions and Next Steps:
08/27/2020: Will get more environmental samples, and will try to get soil samples this time to see if it has more success.
Title: Direct Isolation
Date: 08/25/2020 Redo: No Sample: J2
Purpose: This procedure is to isolate bacteriophages from an environmental sample to grow and infect the host bacteria using a plaque assay.
Notes:
1.) After putting on gloves, we created an aseptic workspace by spraying CiDecon on the counter top, and then wiped it down with paper towels. After using the CiDecon, 70% Ethanol was then sprayed and then smeared using a chem wipe. After being properly sanitized, gloves were removed, and then a Bunsen burner was lit.
2.) Before removing any of our samples, we opened the 0.22um syringe filter making sure to leave it in the package. We then attached a 5mL syringe to the top of the filter, making sure the filter remains sterile the entire time. We removed the plunger from the syringe to make it easier to transfer liquids.
3.) After our prep work, our 15mL conical tube containing the liquid sample was opened, and using a serological pipette 2mL of our sample was removed.
4.) The removed sample was then transferred to the 5mL syringe, where the syringe plunger was then depressed to suspense the filtered liquid into a microcentrifuge tube and the tube was capped.
This is where we then proceeded onto creating the plaque assay.
5.) An agar plate was removed from the refrigerator and then placed in an incubator, set at 38°C, for 10 minutes.
6.) Using a 100uL micropipette, 500 microliters of the isolated phage sample were dispensed into a test tube containing 250 microliters of our host bacteria.
Before our phage sample was dispensed, we had to break up the bacteria sample, because it was clumped together. We used the figure 8 method, the grate, and a quick vortex spin to make the bacteria homogeneous.
7.) The tube was then tilted to make sure that both the phage and bacteria samples were mixed together. They were then set to sit for 10 minutes to make sure that the phage and bacteria bind together.
8.) After the 10 minutes, using a serological syringe 3mL of Top Agar was dispensed into the bacteria and phage test tube, and then immediately aspirated back into the syringe.
9.) The top agar mixture was then dispensed onto the agar plate, making sure not to avoid creating bubbles, and then distributed across the top of the plate, making sure to cover the whole surface.
10.) The plate was left to set for 10 minutes to solidify, and was then placed in an incubator at 6:10 pm. The sample will sit for about 24-48 hours.
While the bacteria sample was not completely homogeneous, we did not redo this sample.
Results:
Negative Result:
Was removed from the incubator to check the phage growth at 6:10 pm on 08/26/2020.
Conclusions and Next Steps:
08/27/2020: Will get more environmental samples, and will try to get soil samples this time to see if it has more success.
Title: Direct Isolation
Date: 08/26/2020 Redo: No Sample: M3
Purpose: This procedure is to isolate bacteriophages from an environmental sample to grow and infect the host bacteria using a plaque assay.
Notes:
1.) After putting on gloves, we created an aseptic workspace by spraying CiDecon on the counter top, and then wiped it down with paper towels. After using the CiDecon, 70% Ethanol was then sprayed and then smeared using a chem wipe. After being properly sanitized, gloves were removed, and then a Bunsen burner was lit.
2.) Liquid media was added to the soil sample, in the conifer tube, until the sample was submerged under 2-3 mL of liquid. It was then tilted to make sure that it was mixed together.
3.) The sample was then placed in an ~250 rpm shaking incubator for 2 hours.
4.) After the soil sample was taken out of the incubator it still was not as separated as we wanted, so it was placed in the microcentrifuge at 2000 rpm for 10 minutes.
5.) Then 2ml of the liquid from the top of my soil sample was removed using a serological syringe, and then dispensed into a 5ml syringe attached to a 0.22 micrometer filter.
6.) The liquid was then depressed through the filter and into a microcentrifuge tube.
There were particles in the liquid that clogged the filter, so it had to be changed out.
This is where we then proceeded onto creating the plaque assay.
7.) An agar plate was removed from the refrigerator and then placed in an incubator, set at 38°C, for 10 minutes.
8.) Using a 100uL micropipette, 500 microliters of the isolated phage sample were dispensed into a test tube containing 250 microliters of our host bacteria.
Before our phage sample was dispensed, we had to break up the bacteria sample, because it was clumped together. We used the figure 8 method and a quick vortex spin to make the bacteria homogeneous.
9.) The tube was then tilted to make sure that both the phage and bacteria samples were mixed together. They were then set to sit for 10 minutes to make sure that the phage and bacteria bind together.
10.) After the 10 minutes, using a serological syringe 3mL of Top Agar was dispensed into the bacteria and phage test tube, and then immediately aspirated back into the syringe.
11.) The top agar mixture was then dispensed onto the agar plate, making sure not to avoid creating bubbles, and then distributed across the top of the plate, making sure to cover the whole surface.
12.) The plate was left to set for 10 minutes to solidify, and was then placed in an incubator at 8:56 pm. The sample will sit for about 24-48 hours.
Results:
Negative Results:
Was removed from the incubator to check the status of phage development at 1:28 pm on 08/28/2020.
Conclusions and Next Steps:
08/28/2020: Will continue to try and collect soil samples to try and find a bacteriophage.
Title: Direct Isolation
Date: 08/26/2020 Redo: No Sample: M4
Purpose: This procedure is to isolate bacteriophages from an environmental sample to grow and infect the host bacteria using a plaque assay.
Notes:
1.) After putting on gloves, we created an aseptic workspace by spraying CiDecon on the counter top, and then wiped it down with paper towels. After using the CiDecon, 70% Ethanol was then sprayed and then smeared using a chem wipe. After being properly sanitized, gloves were removed, and then a Bunsen burner was lit.
2.) Liquid media was added to the soil sample, in the conifer tube, until the sample was submerged under 2-3 mL of liquid. It was then tilted to make sure that it was mixed together.
3.) The sample was then placed in an ~250 rpm shaking incubator for 2 hours.
4.) After the soil sample was taken out of the incubator it still was not as separated as we wanted, so it was placed in the microcentrifuge at 2000 rpm for 10 minutes.
5.) Then 2ml of the liquid from the top of my soil sample was removed using a serological syringe, and then dispensed into a 5ml syringe attached to a 0.22 micrometer filter.
6.) The liquid was still too viscous for the filter, so 2mL of Phage Buffer was added to the liquid sample, and was then transferred into another conifer tube using a derological syringe.
7.) Using a serological syringe, the liquid from the soil sample was then evenly divided into four microcentrifuge tubes.
8.) They were then placed into a smaller centrifuge and set to spin on max speed for 10 minutes.
9.) After the centrifuge, the microcentrifuge tubes were then placed on a rack and the settled liquid was micropipetted into a new conifer tube.
10.) Then 2ml of the newly thinned sample was removed using a serological syringe, and then dispensed into a 5ml syringe attached to a 0.22 micrometer filter.
11.) The liquid still wasn’t completely going through the filter, so a new filter was prepped with Phage Buffer before filtering the rest of the sample into a microcentrifuge tube.
Since the filter was prepped with Phage Buffer, the sample was filtered through an extra time to make sure that all the bacteria was gone.
This is where we then proceeded onto creating the plaque assay.
12.) An agar plate was removed from the refrigerator and then placed in an incubator, set at 38°C, for 10 minutes.
13.) Using a 100uL micropipette, 500 microliters of the isolated phage sample were dispensed into a test tube containing 250 microliters of our host bacteria.
Before our phage sample was dispensed, we had to break up the bacteria sample, because it was clumped together. We used the figure 8 method, the grate, and a quick vortex spin to make the bacteria homogeneous.
14.) The tube was then tilted to make sure that both the phage and bacteria samples were mixed together. They were then set to sit for 10 minutes to make sure that the phage and bacteria bind together.
15.) After the 10 minutes, using a serological syringe 3mL of Top Agar was dispensed into the bacteria and phage test tube, and then immediately aspirated back into the syringe.
16.) The top agar mixture was then dispensed onto the agar plate, making sure not to avoid creating bubbles, and then distributed across the top of the plate, making sure to cover the whole surface.
17.) The plate was left to set for 10 minutes to solidify, and was then placed in an incubator at 8:56 pm. The sample will sit for about 24-48 hours.
Results:
Negative Results:
Was removed from the incubator to check the status of phage development at 1:28 pm on 08/28/2020.
Conclusions and Next Steps:
08/28/2020: Will continue to try and collect soil samples to try and find a bacteriophage.
Title: Direct Isolation
Date: 08/28/2020 Redo: No Sample: J3
Purpose: This procedure is to isolate bacteriophages from an environmental sample to grow and infect the host bacteria using a plaque assay.
Notes:
1.) After putting on gloves, we created an aseptic workspace by spraying CiDecon on the counter top, and then wiped it down with paper towels. After using the CiDecon, 70% Ethanol was then sprayed and then smeared using a chem wipe. After being properly sanitized, gloves were removed, and then a Bunsen burner was lit.
2.) Liquid media was added to the soil sample, in the conifer tube, until the sample was submerged under 2-3 mL of liquid. It was then tilted to make sure that it was mixed together.
3.) The sample was then placed in an ~250 rpm shaking incubator for an hour and a half.
4.) After the soil sample was taken out of the incubator it still was not as separated as we wanted, so the liquid evenly divided into two microcentrifuge tubes using a serological syringe.
5.) They were then placed into the smaller centrifuger at max speed for 10 minutes.
6.) After the centrifuge, the microcentrifuge tubes were then placed on a rack and the settled liquid was micropipetted into a new conifer tube.
7.) Then 2ml of the newly thinned sample was removed using a serological syringe, and then dispensed into a 5ml syringe attached to a 0.22 micrometer filter.
8.) It was then filtered into a microcentrifuge tube where it was ready for the plaque assay.
This is where we then proceeded onto creating the plaque assay.
9.) An agar plate was removed from the refrigerator and then placed in an incubator, set at 38°C, for 10 minutes.
10.) Using a 100uL micropipette, 500 microliters of the isolated phage sample were dispensed into a test tube containing 250 microliters of our host bacteria.
11.) The tube was then tilted to make sure that both the phage and bacteria samples were mixed together. They were then set to sit for 10 minutes to make sure that the phage and bacteria bind together.
12.) After the 10 minutes, using a serological syringe 3mL of Top Agar was dispensed into the bacteria and phage test tube, and then immediately aspirated back into the syringe.
13.) The top agar mixture was then dispensed onto the agar plate, making sure not to avoid creating bubbles, and then distributed across the top of the plate, making sure to cover the whole surface.
14.) The plate was left to set for 10 minutes to solidify, and was then placed in an incubator at 11:10 am. The sample will sit for about 24-48 hours.
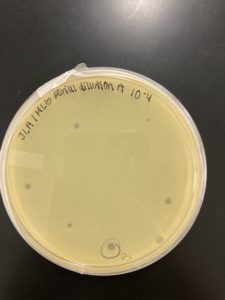
Results:
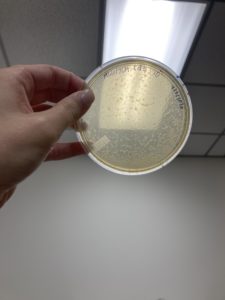
Positive Result:
Was removed from the incubator to check the status of phage development at 9:36 am on 08/31/2020.

The plate shows 4 plaques formed.
Conclusions and Next Steps:
08/31/2020: We will next pick a plaque and start our first serial dilution.
Title: Plaque Assay for Purification
Date: 08/31/2020 Redo: No Sample: J3 Plaque: A
Purpose: To …
Notes:
1.) A circle was drawn around the plaque that we intend to use for our first serial dilution and labeled it Plaque A. The details of Plaque A’s morphology are recorded below:
Plaque A: clear ring with a slightly turbid inside, a defined circular boarder, and a diameter of 0.3 cm:
1a. 100 microliters of Phage Buffer was dispensed into a microcentrifuge tube labeled “A”.
1b. Using a micropipettor with a sterile tip was placed perpendicular to the surface of the agar, and then gently placed in the center of the phage plaque. The bacteria that surrounds was avoided.
1c. The pipette tip was then placed into the microcentrifuge labeled “A” and tapped along the inside to try and dislodge the phage sample within the tip. The phage buffer with the phage sample was aspirated a few times to make sure that it was mixed together.
2.) Next, we followed the serial dilution protocol.
2a. We set up 8 microcentrifuge tubes in a rack and labeled them 10-1 through 10-8.
2b. Then 90 microliters of Phage Buffer was dispensed into each one.
2c. Then we performed the 10-fold serial dilutions. It started with taking 10 microliters of the undiluted phage sample and adding it to the 10-1 tube and then vortexing it. This process continued all the way through the 10-8 tube. We made sure to vortex after each dilution and switch pipette tips after each one as well.
3.) The 10-1 through 10-8 serial dilutions now had to be plated just like the above plaque assay protocol. We got eight agar plates and labeled with their corresponding serial dilution. Each plate followed the according protocol below:
3a. 10 microliters of phage solution was micropipetted into 250 microliters of the host bacteria. The diluted phage and bacteria set for 10 minutes.
3b. After the phage and bacteria bind together, using a serological syringe 3mL of top agar was dispensed into the solution and then immediately aspirated back into the syringe.
3c. The agar was then dispersed onto the agar plates and then distributed making sure it covers the whole top surface of the plate.
Steps 3a-3c were repeated eight times, for each dilution.
4.) All eight plates were set for 10 minutes before being placed into the incubator at 11:10 am, and they stay in there for 24-48 hours.
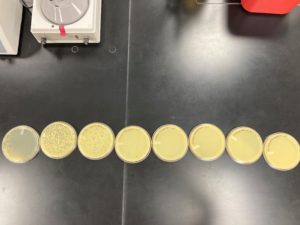
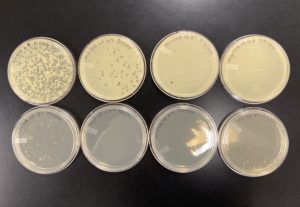
Results:
The plates were removed from the incubator at 8:55 am on 09/02/2020.
The results were positive for this first set of serial dilutions. The morphology of each of the plates were mostly the same size and shape. Only half of our plates showed any plaque formation, while the last half were completely without any plaque formations. For the majority of the plaques they followed the same morphology as the original Plaque A.
10^-1 had an uncountable number of plaques.
10^-2 had ~200 plaques.
10^-3 had ~100 plaques.
10^-4 had ~7 plaques.
10^-5 had no plaques.
10^-6 had no plaques.
10^-7 had no plaques.
10^-8 had no plaques.
Conclusions and Next Steps:
For the second set of serial dilutions, we will use the 10^-4 dilution and pick a plaque from that plate. The other seven plates were para-filmed and refrigerated. I think that our plates only showed one type of phage, but if there are different types hopefully it will be isolated after the second set of serial dilutions.
Title: Serial Dilution 2
Date: 09/2/2020 Redo: No Sample: J3 Plaque: B
Purpose: To…
Notes:
1.) A circle was drawn around the plaque that we intend to use for our second serial dilutions and labeled it Plaque B. The details of Plaque B’s morphology are recorded below:
Plaque B: clear ring with a slightly turbid inside, a defined circular boarder, and a diameter of 0.3 cm:
1a. 100 microliters of Phage Buffer was dispensed into a microcentrifuge tube labeled “B”.
1b. Using a micropipettor with a sterile tip was placed perpendicular to the surface of the agar, and then gently placed in the center of the phage plaque. The bacteria that surrounds was avoided.
1c. The pipette tip was then placed into the microcentrifuge labeled “B” and tapped along the inside to try and dislodge the phage sample within the tip. The phage buffer with the phage sample was aspirated a few times to make sure that it was mixed together.
2.) Next, we followed the serial dilution protocol.
2a. We set up 5 microcentrifuge tubes in a rack and labeled them 10^-1 through 10^-5.
2b. Then 90 microliters of Phage Buffer was dispensed into each one.
2c. Then we performed the 10-fold serial dilutions. It started with taking 10 microliters of the undiluted phage sample and adding it to the 10^-1 tube and then vortexing it. This process continued all the way through the 10^-5 tube. We made sure to vortex after each dilution and switch pipette tips after each one as well.
We also had a 10^0 plate which contained the original plaque B solution, undiluted.
3.) The 10^0 through 10^-5 serial dilutions now had to be plated just like the above plaque assay protocol. We got six agar plates and labeled with their corresponding serial dilution, and one for the original Plaque B dilution. Each plate followed the according protocol below:
3a. 10 microliters of phage solution was micropipetted into 250 microliters of the host bacteria. The diluted phage and bacteria set for 10 minutes.
3b. After the phage and bacteria bind together, using a serological syringe 3mL of top agar was dispensed into the solution and then immediately aspirated back into the syringe.
3c. The agar was then dispersed onto the agar plates and then distributed making sure it covers the whole top surface of the plate.
Steps 3a-3c were repeated six times, for each dilution.
4.) All six plates were set for 10 minutes before being placed into the incubator at 10:20 am, and they stay in there for 24-48 hours.
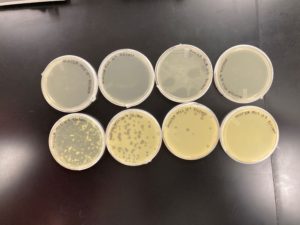
Results:
The plates were removed from the incubator at 12:25 pm on 09/03/2020.
The results were positive for the second set of serial dilutions. The morphology of each of the plates were mostly the same size and shape. The plates followed the normal serial dilution pattern, where all of our plates expect for the 10^-5 plate had plaques. The plaques that did present, they followed the same morphology as the original Plaque B.
10^-0 had an uncountable number of plaques.
10^-1 had an uncountable number of plaques.
10^-2 had ~200 plaques.
10^-3 had ~40 plaques.
10^-4 had ~4 plaques.
10^-5 had no plaques.
Conclusions and Next Steps:
The next step is to make a low concentration lysate solution, and for that we will be using the 10^-1 plate since it was our best webbed plate. The other five plates were para-filmed and refrigerated. I think that we successfully isolated only one phage with our serial dilutions, because all the plaques in the second set of dilutions all presented the same morphology.
Title: Collecting Plate Lysates
Date: 09/03/2020 Redo: No Sample: J3 Plaque B Plate: 10^-1
Purpose: To create a low concentration of liquid phage sample.
Notes:
1.) Using plate 10^-1, from our second set of serial dilutions, we flooded the sample with 8mL of sterile Phage Buffer at 12:33 pm, and let it sit until 4:40pm.
2.) After sitting, phage lysate was then collected by propping one end of the plate on its lid, and using a 5mL syringe the liquid phage lysate was drawn up.
3.) the syringe was then attached to a 0.22 micrometer filter, and then the fluid was then pushed into a 15mL conifer tube.
We were able to collect 6.5mL of lystate from out plate sample.
4.) The tube was labeled and was then ready for the full plate titer.
Results:
Collected lysate from sample J3 plaque B.

Conclusions and Next Steps:
The collected phage lysate will be used to create a full plate titer, and determine at which concentration a webbed plate can be created, to then make a high concentration lysate.
Title: Full Plate Titer
Date: 09/03/2020 Redo: No Sample: J3 plaque B plate 10^-1 lysate
Purpose: To determine the concentration of phage particles in the low concentration lysate, which will then determine at what concentration webbed plates can be created.
Notes:
1.) Using the low concentration lysate collected from the plaque B’s plate 10^-1, we then performed a 10-fold serial dilutions. It started with taking 10 microliters of the undiluted phage sample and adding it to the 10^-1 tube and then vortexing it. This process continued all the way through the 10^-8 tube. We made sure to vortex after each dilution and switch pipette tips after each one as well.
2.) Then following the same plaque assay protocols as the two previous serial dilutions, 10 mL of each of the dilutions were then dispensed into a test tube containing 250mL of our host bacteria. They were left to sit for 10 minutes.
3.) After the bacteria and phage settle, 3mL of top agar was dispensed into the test tubes and then immediately aspirated back into the syringe. The agar was then dispersed onto the agar plates and then distributed making sure it covers the whole top surface of the plate.
Note: The top agar got a little cold so on some of the plates bubbles formed from the hardened agar.
4.) All eight plates were set for 10 minutes before being placed into the incubator at 6:06 pm, and they stay in there for 24-48 hours.
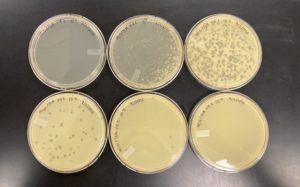
Results:
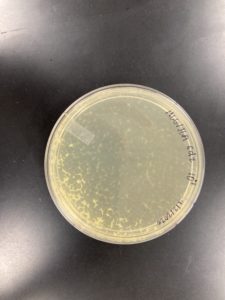
The plates were removed from the incubator at 2:40 pm on 09/04/2020.
The results were positive for the full plate titer. The morphology of each of the plates were mostly the same size and shape. The plates followed the normal serial dilution pattern, where all of our plates decreasing amounts of plaques compared to the plate before it. We also successfully created a webbed plate.
10^-1 had an uncountable number of plaques.
10^-2 had an uncountable number of plaques.
10^-3 had an uncountable number of plaques.
10^-4 had an uncountable number of plaques.
10^-5 had ~500 plaques.
10^-6 had ~130 plaques.
10^-7 had ~2 plaques.
10^-8 had ~1 plaques.
Conclusions and Next Steps:
Since we successfully created a webbed plate from our low concentration lysate, we will use our 10^-4 full titer plate to create more webbed plates for our high concentration lysate.
Amplification
Title: Creating Webbed Plates
Date: 09/04/2020 Redo: No Plate: FPT 10^-4
Purpose: To create a high density of phages on a plate.
Notes:
a.) Using plate 10^-6 from our full plate titer, we counted the number of plaques and then used that to calculate how many plaques we needed to create a webbed plate:
(132 pfu/10 μl) x (10^3 μl/ml) x (10^6) =1.32 x 10^10 pfu/ml for a webbed plate
Since we actually had a webbed plate from our previous dilutions these calculations were not necessary.
1.) Identified plate 10^-4 from our full plate titer as a webbed plate that we would like to replicate.

2.) Using the 10^-4 sample, we created 6 more plates with the same phage dilution.
3.) 10 mL of the 10^-4 concentration phage lysate sample were dispensed into six test tubes containing 250mL of our host bacteria. They were left to sit for 10 minutes.
4.) After the bacteria and phage settle, 3mL of top agar was dispensed into the test tubes and then immediately aspirated back into the syringe. The agar was then dispersed onto the agar plates and then distributed making sure it covers the whole top surface of the plate. The plates were labeled A-F.
Note: The top agar got a little cold so on some of the plates bubbles formed from the hardened agar.
5.) All six plates, A-F, were set for 10 minutes before being placed into the incubator at 4:16 pm, and they stay in there for 24-48 hours.
Results:
The Results were Negative:
The plates was removed from the incubator at 10:20 am on 09/08/2020.
Over the weekend the plates were taken out and set at room temperate for a day to try and speed up the webbing process, but then they were placed back in the incubator for the remainder of the weekend.

Conclusions and Next Steps:
Even though we did not the the webbed plates we had hoped for, we are going to continue and flood the plates we have to try and make a high concentrated lyaste. We are also going to use the original 10^-4 plate when making the high concentration lysate.
Title: Collecting High Concentration Lysate
Date: 09/08/2020 Redo: No Sample: 10^-4 Webbed Plates
Purpose: To create a high concentration of liquid phage sample.
Notes:
1.) Using the 10^-4 webbed plates, we took five of the seven plates and flooded them with 8mL of sterile Phage Buffer at 10:45 pm, and let it sit until (4:40pm).
2.) After sitting, we transferred the lysate on plates 10^-4 F and E onto plates 10^-4 B and C, and let them sit for another 2-4 hours. We did this to try and increase the density of phages for our high concentration lysate.
3.) While plates B and C are sitting, the phage lysate from the other 3 plates were then collected by propping one end of the plate on its lid, and using a 5mL syringe the liquid phage lysate was drawn up.
4.) the syringe was then attached to a 0.22 micrometer filter, and then the fluid was then pushed into a 15mL conifer tube.
Steps 3-4 were then repeated with plates B and C.
We were able to collect 30mL of lystate from our plate samples.
5.) The tube was labeled and was then ready for a full plate titer.
Results:
Lysate collected from 10^-4 webbed plates.

Conclusions and Next Steps:
Using this new high concentrate lysate, we will make a full plate titer set to try and see if this lystate has a high enough concentration.
Title: Full Plate Titer
Date: 09/09/2020 Redo: No Sample: 10^-4 HCL
Purpose: To determine the concentration of phage particles in the high concentration lysate, which will then determine at what concentration webbed plates can be created.
Notes:
1.) Using the high concentration lysate collected from all the plates we then performed a 10-fold serial dilution. It started with taking 10 microliters of the undiluted phage sample and adding it to the 10^-1 tube and then vortexing it. This process continued all the way through the 10^-10 tube. We made sure to vortex after each dilution and switch pipette tips after each one as well.
2.) Then following the same plaque assay protocols as the two previous serial dilutions, 10 mL of each of the dilutions were then dispensed into a test tube containing 250mL of our host bacteria. They were left to sit for 10 minutes.
3.) After the bacteria and phage settle, 3mL of top agar was dispensed into the test tubes and then immediately aspirated back into the syringe. The agar was then dispersed onto the agar plates and then distributed making sure it covers the whole top surface of the plate.
Note: The top agar got a little cold so on some of the plates bubbles formed from the hardened agar.
4.) All ten plates were set for 10 minutes before being placed into the incubator at 10:30 am, and they stay in there for 24-48 hours.
Results:
The plates was removed from the incubator at 6:24 pm on 09/10/2020.
The results were positive for the full plate titer. The morphology of each of the plates were mostly the same size and shape. The plates followed the normal serial dilution pattern, where all of our plates decreasing amounts of plaques compared to the plate before it. We also successfully created a webbed plate.
10^-1 had an uncountable number of plaques.
10^-2 had an uncountable number of plaques.
10^-3 had an uncountable number of plaques.
10^-4 had ~500 plaques
10^-5 had ~49 plaques.
10^-6 had ~4 plaques.
10^-7 had ~1 plaques.
10^-8 had 0 plaques.
10^-9 had 0 plaques.
10^-10 had 0 plaques.

Conclusions and Next Steps:
When calculating our phage concentration we found that we only had 4.9 x 10^8 when we needed a concentration of 5 x 10^9. Since we did not reach that goal to move on we now have to make more webbed plates from this full plate titer set, and try to get a higher concentration.
Title: Creating Webbed Plates
Date: 09/10/2020 Redo: Yes Sample: HCL 10^-3
Purpose: To create a high density of phages on a plate.
Notes:
1.) Identified plate 10^-3 from our full plate titer as a webbed plate that we would like to replicate.
2.) Using the 10^-3 sample, we created 8 more plates with the same phage dilution.
3.) 10 mL of the 10^-3 concentration phage lysate sample were dispensed into eight test tubes containing 250mL of our host bacteria. They were left to sit for 10 minutes.
4.) After the bacteria and phage settle, 3mL of top agar was dispensed into the test tubes and then immediately aspirated back into the syringe. The agar was then dispersed onto the agar plates and then distributed making sure it covers the whole top surface of the plate. The plates were labeled A-H.
Note: The top agar got a little cold so on some of the plates bubbles formed from the hardened agar.
5.) All eight plates, A-H, were set for 10 minutes before being placed into the incubator at 4:16 pm, and they stay in there for 24-48 hours.
Results:
Positive Results:
The plates was removed from the incubator at 10:30 am on 09/11/2020.

Conclusions and Next Steps:
Next we will flood these plates and try and create a new high concentrate lysate.
Title: Collecting High Concentration Lysate
Date: 09/11/2020 Redo: No Sample: 10^-3 Webbed Plates
Purpose: To create a high concentration of liquid phage sample.
Notes:
1.) Using the 10^-3 webbed plates, we took the seven plates, one plate didn’t solidify properly so we were not able to use it, flooded them with 8mL of sterile Phage Buffer, and let them sit for 3 hours.
2.) After the three hours we then were ready to collect the lystate from the seven flooded plates. We collected the lysate by propping one end of the plate on its lid, and using a 5mL syringe the liquid phage lysate was drawn up.
4.) the syringe was then attached to a 0.22 micrometer filter, and then the fluid was then pushed into a 15mL conifer tube.
We were able to collect 40mL of lystate from our plate samples.
5.) The tube was labeled and was then ready for a full plate titer.
Results:
Lystate collected from 10^-3 webbed plates.

Conclusions and Next Steps:
Using this new lysate we will make a new full plate titer to see if we have a high enough phage concentration to move onto archiving.
Title: Full Plate Titer
Date: 09/011/2020 Redo: No Sample: 10^-3 HCL
Purpose: To determine the concentration of phage particles in the high concentration lysate, which will then determine at what concentration webbed plates can be created.
Notes:
1.) Using the high concentration lysate collected from all the plates we then performed a 10-fold serial dilution. It started with taking 10 microliters of the undiluted phage sample and adding it to the 10^-1 tube and then vortexing it. This process continued all the way through the 10^-8 tube. We made sure to vortex after each dilution and switch pipette tips after each one as well.
2.) Then following the same plaque assay protocols as the two previous serial dilutions, 10 mL of each of the dilutions were then dispensed into a test tube containing 250mL of our host bacteria. They were left to sit for 10 minutes.
3.) After the bacteria and phage settle, 3mL of top agar was dispensed into the test tubes and then immediately aspirated back into the syringe. The agar was then dispersed onto the agar plates and then distributed making sure it covers the whole top surface of the plate.
Note: The top agar got a little cold so on some of the plates bubbles formed from the hardened agar.
4.) All ten plates were set for 10 minutes before being placed into the incubator at 10:30 am, and they stay in there for 24-48 hours.
Results:
The plates were removed from the incubator at 12:10 am on 09/12/2020.
The results were positive for the full plate titer. The morphology of each of the plates were mostly the same size and shape. The plates followed the normal serial dilution pattern, where all of our plates decreasing amounts of plaques compared to the plate before it. We also successfully created a webbed plate.
10^-1 had an uncountable number of plaques.
10^-2 had an uncountable number of plaques.
10^-3 had an uncountable number of plaques.
10^-4 had an uncountable number of plaques.
10^-5 had an uncountable number of plaques.
10^-6 had ~150 plaques.
10^-7 had ~15 plaques.
10^-8 had ~X plaques.
Conclusions and Next Steps:
Using the 10^-7 plate we calculated and found that the plate had a concentration of 1.5×10^10, which above the recommenced level of concentration. Since we had a high enough concentration of phage we can now move on to archiving our phage.
Title: Entering the Phage into Actinobacteriophage Database
Date: 09/14/2020 Redo: No
Purpose: This procedure is to include our phage in the Actinobacteriophage Database to make it available for other scientists
Notes
1. First we named our phage according to the rules found in the “Phages” dropdown menu and “Naming Rules” on phagesdb.org. We named it PurpleGoat.
2. Next we logined ontophagesdb.org and clicked the register button.
3. We then entered the phage name on PhagesDB.
4. Next we selected the “Data” drowndown menu and clicked “add phage.”
- If you did not use the SEA-PHAGES App when you collected your soil sample, you can add phages directly from PhagesDB by selecting the “Data” dropdown menu and clicking on “Add Phage.”
- We were then directed to the resgiater page, and we registered with the site.
- We then filled in as many fields as possible, paying special attention to the following:
- GPS coordinates:
- Program
- Institution
- Bacterial host
- Name.
5. We filled in the Discovery Notes to explain where the sample was collected and the soil conditions, etc. Then we completedthe Naming Notes to explain where your phage name came from and why you chose the name.
6. We entered the titer of the sample in which was 1.5×10^10 and added a picture of our plaques.
7. Once the form was complete we clicked submit.
Conclusion:
After submitting we are waiting on approval and are now able to move onto archiving our sample.
Title: Archiving our sample
Date: 09/14/2020 Redo: No
Purpose: This procedure is to prepare a high-titer lysate for long-term storage.
Notes
1. First we prepared the bench for aseptic work and assembled our supplies.
2. Next we certified the phage sample on Phagesdb.org and made sure the details of our phage had been recorded.
3We then retrieved two barcoded tubes for storage at the University of Pittsburgh and a third tube for storage at our institution. This third tube was not barcoded
4. The tubes were properly labeled with our phage’s name.
5. We then used aseptic technique to carefully fill each tube with sterile beads to 1.5 cm from the top of the tube.
6. The flame was turned off and a DMSO/lysate mixture was made by dispensing 2.8 ml of high lysate into a sterile 15 ml tube and then adding 200 μl DMSO to the tube and vortexed.
7. The mixture was then aliquoted into the storage tubes by pipetting the lysate/DMSO mixture into each of the labeled tubes so that the beads were just covered and the tubes were closed.
8. The tubes were then placed in a storage box and stored at 4 °C so they they could be shipped to the University of Pittsburgh. The sample stored at Tarleton could be frozen immediately.
DNA Extraction
Title: DNA Extraction- Day 1
Date: 09/09/2020 Redo: No Protocol: Alternate 3.5
Purpose: The purpose of this procedure is to extract DNA from the phage.
Notes:
Conclusions and Next Steps:
We will come back the next day to finish the second part of the extraction protocol.
Title: DNA Extraction- Day 2
Date: 09/10/2020 Redo: No Protocol: Alternate 3.5
Purpose: The purpose of this procedure is to extract DNA from the phages so it can be used in future procedures.
Notes:
1. The tubes were removed from the ice and centrifuged at top speed for 10min to pellet DNA, the supernatant was discarded into a WASTE tube.
2. Next 250uL of 70% ethanol was added to each tube, and spun again for 1min, at top speed. This washed the DNA pellet. The supernatants were discarded into a WASTE tube.
3. The DNA was then dried at room temperature by turning the tubes upside down onto paper towels and tapping out excess liquid. The tubes were left upside down for 2 1/2 hours.
4. Once completely dry the first tube with DNA was resuspended in 50uL nuclease-free water. Then that solution was used to resuspend the next pellet. This was continued until all 5 pellets had been resuspended in the same 50uL of water.
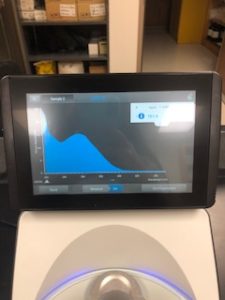
5. Then the DNA concentration and quality was checked with Nanodrop.
Results:
Note: There was salt contamination in our DNA sample so our A260/A230 numbers were off

ng/uL #: 2076.2
A260/A280 #: 2.04
A260/A230 #: 1.22
Conclusions and Next Steps:
The quality (A260:280 and A260:230) numbers were not what we wanted, and showed high salt contamination so we decided to try to precipitate the DNA.
Title: DNA Extraction- Reprecipitation
Date: 09/11/2020 Redo: Yes Protocol: Alternate 3.5
Purpose: The purpose of this procedure is to extract DNA from the phages so it can be used in future procedures.
Notes:
09/10/2020
1. We calculated that we needed about 35 uL of 70% ethanol to resuspend our DNA sample in, and then we left it on a bed of ice over night.
09/11/2020
2. The tube was then removed from the ice and centrifuged at top speed for 10min to pellet DNA, the supernatant was discarded into a WASTE tube.
3. Next 250uL of 70% ethanol was added to the tube, and spun again for 1min, at top speed. This washed the DNA pellet. The supernatants were discarded into a WASTE tube.
4. The DNA was then dried in an incubator at 30°C with the tube lid open, and it stayed there for about 40 minutes.
5. Once completely dry the tube was resuspended in 50uL nuclease-free water. Then the solution was aspirated in and out of the pipette tip a few times to make sure that it was completely mixed together, doing this gently to make sure that the DNA was not harmed.
6. Then the DNA concentration and quality was checked with Nanodrop.
Results:
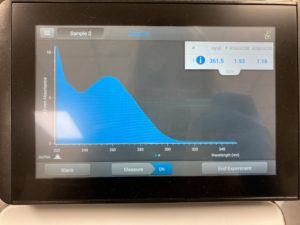
ng/uL #: 361.5
A260/A280 #: 1.93
A260/A230 #: 1.16
Conclusions and Next Steps:
The A260/A230 numbers were still of, because of the salt contamination, so we decided to try and reprecipitate our DNA one last time.
Title: DNA Extraction- Reprecipitation
Date: 09/16/2020 Redo: Yes Protocol: Alternate 3.5
Purpose: The purpose of this procedure is to extract DNA from the phages so it can be used in future procedures.
Notes:
1. We calculated that we needed about 116.6uL of 70% ethanol to resuspend our DNA sample in, and then we left it on a bed of ice for about 5 hours.
2. The tube was then removed from the ice and centrifuged at top speed for 10min to pellet DNA, the supernatant was discarded into a WASTE tube.
3. Next 250uL of 70% ethanol was added to the tube, and spun again for 1min, at top speed. This washed the DNA pellet. The supernatants were discarded into a WASTE tube.
4. The DNA was then dried in an incubator at 30°C with the tube lid open, and it stayed there for about 40 minutes.
5. Once completely dry the tube was resuspended in 50uL nuclease-free water. Then the solution was aspirated in and out of the pipette tip a few times to make sure that it was completely mixed together, doing this gently to make sure that the DNA was not harmed.
6. Then the DNA concentration and quality was checked with Nanodrop.
Results:
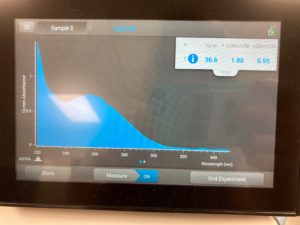
ng/uL #: 36.6
A260/A280 #: 1.80
A260/A230 #: 0.95
Conclusions and Next Steps:
This time our A260/A230 numbers were way off, so we decided that we are going to make another DNA extraction, and hope that we don’t get a high salt contamination.
Title: DNA Extraction- Day 1
Date: 09/21/2020 Redo: Yes Protocol: Alternate 3.5
Purpose: The purpose of this procedure is to extract DNA from the phage.
Notes:
Conclusions and Next Steps:
We will come back the next day to finish the second part of the extraction protocol.
Title: DNA Extraction- Day 2
Date: 09/22/2020 Redo: Yes Protocol: Alternate 3.5
Purpose: The purpose of this procedure is to extract DNA from the phages so it can be used in future procedures.
Notes:
1. The tubes were removed from the ice and centrifuged at top speed for 10min to pellet DNA, the supernatant was discarded into a WASTE tube.
2. Next 250uL of 70% ethanol was added to each tube, and spun again for 1min, at top speed. This washed the DNA pellet. The supernatants were discarded into a WASTE tube.
3. The DNA was then dried at room temperature by turning the tubes upside down onto paper towels and tapping out excess liquid. The tubes were left upside down for 2 1/2 hours.
4. Once completely dry the first tube with DNA was resuspended in 50uL nuclease-free water. Then that solution was used to resuspend the next pellet. This was continued until all 5 pellets had been resuspended in the same 50uL of water.
5. Then the DNA concentration and quality was checked with Nanodrop.
Since the results were not as pruified as we had wanted, becuase of salt contamination, we decided to dilute our sample with nuclease free water.
6. Since we had 17uL of our DNA sample we diluted it with 68uL of nuclease free water.
7. Then the DNA concentration and quality was re-checked with Nanodrop.
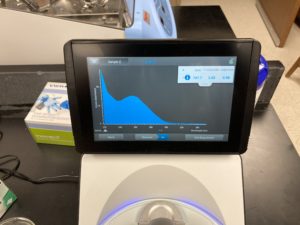
Results:
Note: There was salt contamination in our DNA sample so our A260/A230 numbers were off
Original

ng/uL #: 1164.6
A260/A280 #: 2.01
A260/A230 #: 1.02
Diluted
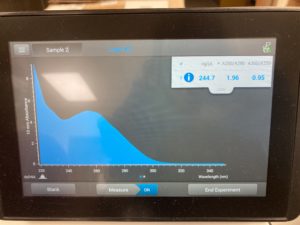
ng/uL #: 244.7
A260/A280 #: 1.96
A260/A230 #: 0.95
Conclusions and Next Steps:
The quality (A260:280 and A260:230) numbers were not what we wanted, and showed high salt contamination so we decided to try again with a new DNA extraction sample.
Title: DNA Extraction
Date: 09/23/2020 Redo: Yes Protocol: Alternate 3.5
Purpose: The purpose of this procedure is to extract DNA from the phage.
Notes:
Part 1
1. The tubes were removed from the ice and centrifuged at top speed for 10min to pellet DNA, the supernatant was discarded into a WASTE tube.
2. Next 250uL of 70% ethanol was added to each tube, and spun again for 1min, at top speed. This washed the DNA pellet. The supernatants were discarded into a WASTE tube.
3. The DNA was then dried at room temperature by turning the tubes upside down onto paper towels and tapping out excess liquid. The tubes were left upside down for 2 1/2 hours.
4. Once completely dry the first tube with DNA was resuspended in 50uL nuclease-free water. Then that solution was used to resuspend the next pellet. This was continued until all 5 pellets had been resuspended in the same 50uL of water.
5. Then the DNA concentration and quality was checked with Nanodrop.
Results:
Note: There was salt contamination in our DNA sample so our A260/A230 numbers were off
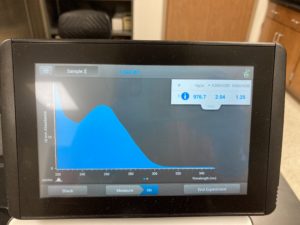
ng/uL #: 976.7
A260/A280 #: 2.04
A260/A230 #: 1.25
Conclusions and Next Steps:
We decided that the qualities we got were the best so far, so we are going to move onto the Enzyme Digest.
Title: DNA Extraction- Day 1
Date: 10/01/2020 Redo: yes Protocol: Alternate 3.5
Purpose: The purpose of this procedure is to extract DNA from the phage.
Notes:
Conclusions and Next Steps:
We will come back the next day to finish the second part of the extraction protocol.
Title: DNA Extraction- Day 2
Date: 10/02/2020 Redo: yes Protocol: Alternate 3.5
Purpose: The purpose of this procedure is to extract DNA from the phages so it can be used in future procedures.
Notes:
1. The tubes were removed from the ice and centrifuged at top speed for 10min to pellet DNA, the supernatant was discarded into a WASTE tube.
2. Next 250uL of 70% ethanol was added to each tube, and spun again for 1min, at top speed. This washed the DNA pellet. The supernatants were discarded into a WASTE tube.
3. The DNA was then dried at room temperature by turning the tubes upside down onto paper towels and tapping out excess liquid. The tubes were left upside down for 2 1/2 hours.
4. Once completely dry the first tube with DNA was resuspended in 50uL nuclease-free water. Then that solution was used to resuspend the next pellet. This was continued until all 5 pellets had been resuspended in the same 50uL of water.
5. Then the DNA concentration and quality was checked with Nanodrop.
Results:
Note: There was salt contamination in our DNA sample so our A260/A230 numbers were off
ng/uL #: 751.6
A260/A280 #: 2.03
A260/A230 #: 1.06
Conclusion:
We decided to reprecipitate the DNA.
Title: DNA Extraction- Reprecipitation
Date: 10/05/2020 Redo: Yes
Purpose: The purpose of this procedure is to extract DNA from the phages so it can be used in future procedures.
Notes:
1. We calculated that we needed about XuL of 70% ethanol and XuL of Potatassium Acactate to resuspend our DNA sample in, and then we left it on a bed of ice for overnight.
2. The tube was then removed from the ice and centrifuged at top speed for 10min to pellet DNA, the supernatant was discarded into a WASTE tube.
3. Next 250uL of 70% ethanol was added to the tube, and spun again for 1min, at top speed. This washed the DNA pellet. The supernatants were discarded into a WASTE tube.
4. The DNA was then dried in an incubator at 30°C with the tube lid open, and it stayed there for about 40 minutes.
5. Once completely dry the tube was resuspended in 50uL nuclease-free water. Then the solution was aspirated in and out of the pipette tip a few times to make sure that it was completely mixed together, doing this gently to make sure that the DNA was not harmed.
6. Then the DNA concentration and quality was checked with Nanodrop.
Results:

ng/uL #: 87.4
A260/A280 #: 1.83
A260/A230 #: 1.14
Conclusions and Next Steps:
This time our A260/A230 numbers were way off, so we decided that we are going to make another DNA extraction, and hope that we don’t get a high salt contamination.
Title: DNA Extraction
Date: 10/12/2020 Redo: No Protocol: 9.1
Purpose: The purpose of this procedure is to extract DNA from the phages so it can be used in future procedures.
Notes:
1. Aseptically transferred 1 ml of phage lysate into a microcentrifuge tube.
2. Then we added 5 µl nuclease mix to the lysate
3. We mixed gently but thoroughly by repeated inversions
4. Incubated at 37 °C for 10 minutes
5. Added 0.5 µl Proteinase K and 50 µl SDS to the nuclease-treated lysate and mix gently. Incubate at 37 °C for 10 minutes.
6. We then denatured the protein capsid to release phage DNA by adding 2 ml of DNA clean-up resin to a 15 ml conical tube.
We made sure that the bottle of resin is well mixed, the precipitate dissolved by heating to 37 °C, and the beads resuspended before we aliquoted our 2 ml.
7. Next we transferred the nuclease-treated phage lysate from the microcentrifuge tube to the 15 ml conical tube containing resin. Then we mixed the solution by gently inverting the tube repeatedly for 2 minutes.
8. After that we moved onto isolating the phage genomic DNA.
- Labeled two Wizard Kit columns with our initials.
- Removed the plungers from two 3 ml syringes and attached a column to each syringe barrel.
- Followed the steps below for each column at the same time:
- Set the column and syringe barrel on a new microcentrifuge tube.
- Transferred 1.5 ml of phage DNA/resin solution to the column using a pipette.
- We made sure not to discard the empty 15 ml conical tube.
- Inserted a plunger into the syringe and carefully pushed all the liquid through, collecting the flow-through in the used 15 ml conical tube from above.
- Once the liquid is expelled, we maintained pressure on the plunger as we dried residual liquid by touching the tip of the column to a paper towel.
- Unscrewed the column from the syringe barrel before releasing the plunger and set the column into a clean microcentrifuge tube.
- Removed the plunger from the syringe barrel, and then reattached the syringe barrel to the column.
9. Next we washed the salts from the DNA (now in the column) with the following steps for each column:
- Added 2 ml 80 % isopropanol to each syringe barrel/column and push the liquid through the column, repeating steps 3(4)–3(7).
- Repeated twice, for a total of three isopropanol washes.
10. Then we removed the residual isopropanol.
- With each column in a fresh 1.5 ml microcentrifuge tube, it was spun at 10,000 × g for 5 minutes. We made sure that the lids of the microcentrifuge tubes were facing the inside of the rotator.
11. Elute the phage DNA from the columns.
-
- We placed each column in a clean microcentrifuge tube and apply 50 μl of 90 °C sterile ddH2O directly to each column.
We made sure that the ddH2O was in the heating block so that it remained at 90 °C. - Then we incubated the columns for 1 minute at room temperature.
- Spun them at 10,000 × g for 1 minute in a microcentrifuge.
- Combined the products from both microcentrifuge tubes into one tube; this is your eluted phage DNA.
- We placed each column in a clean microcentrifuge tube and apply 50 μl of 90 °C sterile ddH2O directly to each column.
12. We then determined the concentration of our phage DNA by using the Nanodrop. After we figured out the concentration we then put it in the freezer for storage.
Results:
Note: There was salt contamination in our DNA sample so our A260/A230 numbers were off

ng/uL #: 109.4
A260/A280 #: 1.79
A260/A230 #: 0.21
Conclusions and Next Steps:
The quality (A260:280 and A260:230) numbers were not what we wanted, and showed high salt contamination so we decided to try to precipitate the DNA.
Title: DNA Extraction – Day 1
Date: 10/14/2020 Redo: Yes Protocol: Alternate 3.5
Purpose: The purpose of this procedure is to extract DNA from the phage.
Notes:
Conclusions and Next Steps:
We will come back the next day to finish the second part of the extraction protocol.
Title: DNA Extraction- Day 2
Date: 10/15/2020 Redo: yes Protocol: Alternate 3.5
Purpose: The purpose of this procedure is to extract DNA from the phages so it can be used in future procedures.
Notes:
1. The tubes were removed from the ice and centrifuged at top speed for 10min to pellet DNA, the supernatant was discarded into a WASTE tube.
2. Next 250uL of 70% ethanol was added to each tube, and spun again for 1min, at top speed. This washed the DNA pellet. The supernatants were discarded into a WASTE tube.
3. The DNA was then dried at room temperature by turning the tubes upside down onto paper towels and tapping out excess liquid. The tubes were left upside down for 2 1/2 hours.
4. Once completely dry the first tube with DNA was resuspended in 50uL nuclease-free water. Then that solution was used to resuspend the next pellet. This was continued until all 5 pellets had been resuspended in the same 50uL of water.
5. Then the DNA concentration and quality was checked with Nanodrop.
Results:
Note: There was salt contamination in our DNA sample so our A260/A230 numbers were off
ng/uL #: 747.7
A260/A280 #: 2.05
A260/A230 #: 0.98
Conclusion:
Sadly our DNA still has salt contamination, so Dr. Edwards is going to supervise our next DNA extraction.
Title: DNA Extraction
Date: 10/14/2020 Redo: Yes Protocol: Alternate 3.5
Purpose: The purpose of this procedure is to extract DNA from the phage.
Notes:
Part 1:
1. The tubes were removed from the ice and centrifuged at top speed for 10min to pellet DNA, the supernatant was discarded into a WASTE tube.
2. Next 250uL of 70% ethanol was added to each tube, and spun again for 1min, at top speed. This washed the DNA pellet. The supernatants were discarded into a WASTE tube.
3. The DNA was then dried at room temperature by turning the tubes upside down onto paper towels and tapping out excess liquid. The tubes were left upside down for 2 1/2 hours.
4. Once completely dry the first tube with DNA was resuspended in 50uL nuclease-free water. Then that solution was used to resuspend the next pellet. This was continued until all 5 pellets had been resuspended in the same 50uL of water.
5. Then the DNA concentration and quality was checked with Nanodrop.
Results:
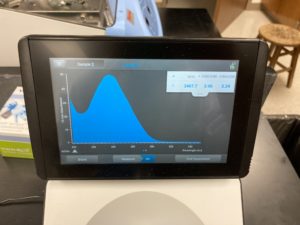
ng/uL #: 2467.7
A260/A280 #: 2.06
A260/A230 #: 2.24
Conclusion:
FINALLY, we get DNA that has little to no salt conatmination. Since our numbers and graph look good we will move onto gel electrophoresis to see if our DNA cuts.
Characterization
Title: Mounting Phage Samples for TEM and Staining with Uranyl Acetate
Date: 09/16/2020 Redo: No
Purpose: This procedure is to prepare our phage sample for viewing with a transmission electron microscope.
Notes
1.The first thing we did was clean and prepare our station for aseptic technique.
2. When then prepared our phage sample by aseptically transferring 1 ml of high lysate into a sterile microcentrifuge tube.
3.Then we balanced a second tube with water and placed them into a centrifuge for 1 hour at 4°C at top speed, this concentrated the phage particles at the bottom of the tube.
3. Once centrifuged we used a micropipette to carefully remove the supernatant without disrupting the pellet.
4. Next, 100 μl of phage buffer was added to the tube and resuspended at 4 °C for 30 minutes to one hour.
The rest of the protocol was done immediately to avoid damaging the phage heads.
5. The work area was already prepared by our instructor.
6. A fresh pair of gloves were put on, the work area was covered with bench paper to create a clean work surface.
7. The cover of a 5×5 cm piece of parafilm was removed and the parafilm was placed into the lid of a Petri dish.
8. A PELCO tab was then placed onto the parafilm and the adhesive was exposed.
9. Using EM forceps a fresh grid was removed, only touching the very edge of the grid, from a box of unused grids. The grid was placed dark-and-shiny side UP on the edge of the tab.
Mount and stain phage.
1. This was done by using a micropipette to place 10 μl of lysate onto the grid without touching the tip of the grid itself.
2. The phage was allowed to settle and attach to the grid for 5 minutes
3. After 5 minutes a small wedge paper was used to wick off the excess fluid.
4. Next the grid was rinsed twice by the following method. Carefully pipetting 10 μl of sterile water onto the grid and allowing it to sit for 2 minutes then wicking off the water with a fresh piece of wedge paper.
5. Once rinsed twice 10 μl of 1 % uranyl acetate was added to the grid and allowed to sit for 2 minutes.
6. The excess stain was then wicked off using the edge of a wedged filter paper until the grid looked like a rainbow oil slick.
7. The grid was then allowed to air dry and put safely back into the grid box.
Conclusions and Next Steps:
We will continue with DNA extraction.
Title: Restriction Enzyme Digest
Date: 09/24/2020 Redo: No Samples: DNA sample 2 and 3
Purpose: This procedure is to add enzymes to our DNA to breakdown, which will make it easier too see how our virus’s genes are coded.
Notes:
For our host bacteria we have to use the restrictive enzymes: Haelll, Nspl, Sacll, and SalI.
Below is a picture of our calaculation worksheet.

Preparing genomic DNA
1. After we gently mixed our DNA sample by lightly vortexing the tube, we incubated our sample at 65C for 10 minutes.
2. After incubating we quickly placed it on ice and the microcentrifuge for less than a minute.
3. Using our phage concentration of our DNA samples we determined the volume of each of our DNA needed to obtain 0.5ug. We used the formula:
uL DNA= 0.5 ug (mL/125 ug)(1000 uL/1 mL)
We diluted our DNA-3 to get to the same concentration as DNA 2 by adding 3 uL of nuclease free water to 1 uL of our DNA sample.
4. Using our calculations and dilutions, we calculated that we needed 2 uL of each DNA sample.
Setting up restriction enzyme digest reactions
5. We set out 4 tubes for each DNA sample, one tube for each restrictive enzyme, and used the table and our previous calculations to determine the volume needed to be added to each tube:
Both samples of DNA had the same volume of each solution.
2 uL of DNA
2.5 uL of 10X Reaction Buffer
Haelll, Nspl, and Sacll required CutSmart Buffer. SalI required 3.1 Buffer
0.5 uL Restrictive Enzyme
20 uL Sterile ddH2O
Everything was calculated to make sure that each tube had a finale volume of 25 uL
6. The contents of each tube were gently mixed and quickly spun in the microcentrifuge for less than a minute.
7. The tubes were then incubated at 37C for an hour.
8. After the hour the tubes were then quickly spun again for less than a minute and stored in the freezer at -20C.
Conclusions and Next Steps:
We will come in tomorrow to cast the agarose gel and do the gel electrophoresis.
Title: Casting Agarose Gel and Gel Electrophoresis
Date: 09/25/2020 Redo: No
Purpose: This procedure is to prepare a gel for electrophoresis in order to view our restrictive enzyme digest DNA.
Notes:
PART 1- Making and Casting Agarose Gel
1. We set up the apparatus and then prepared enough 0.8% agarose gel to cover the tips of the gel combs by approximately 2-3 mm.
a.) We calculated and found that we needed 0.24 g of agarose poser, so we weighted that out and the transferred the powered into an Erlenmeyer flask.
b.) We added 30 mL of 1X TAE Buffer to the agarose powered and gently swirled to mix.
We used 1X TAE Buffer instead of 1X TBE Buffer, and this is was a mistake.
c.) We then heat the mixture in the microwave for about 1-2 minutes or until it turned white. We took it our of the microwave to gently swirl about every 30 seconds.
d.) After taking it out of the microwave we allowed the flask to cool for about 15 minutes.
2. Once it was sufficiently cooled down, we put on our gloves and added 1.5 uL of ethidium bromide (EtBr) as our gel dye. The mixture was gently swirled to make sure it was properly mixed together.
3. We then poured the agarose/EtBr mixture into the prepared gel apparatus, being careful not to create any bubbles.
We realized after we put the agarose/EtBr mixture in to harden that the comb we had was not going to have enough wells for all our samples. The comb was going to create 10 wells but we have 11 samples that we needed to place. So we tossed out the gel and created more, and we also used a 12 well comb.
4. We let the gel sit for about 20 minutes to cool and solidify.
5. Once the gel had solidified, we carefully removed the comb and once removed we gently lifted the gel platform out of the casting tray.
6. We placed the platform with the solidified gel into the gel box. The wells were at the (-) cathode end of the box.
8. We then poured 1X TAE Buffer into the gel apparatus until out gel was submerged in about 1/4 inch of buffer.
Below is a picture of how we calculated our agarose gel and buffer mixture.

Part 2- Gel Electrophoresis
1. With the gel already oriented where the wells are closest to the cathode, we prepared our restriction enzyme digest samples for electrophoresis.
a.) We added 5 uL of concentrated 6x loading dye to each 25 uL restriction enzyme sample.
b.) In order to not ruin our DNA samples with the loading dye we transferred 2 uL of each sample into their own tubes. Then we filled each tube with 23 uL of nuclease free water and 5 uL of loading dye.
c.) Also we made our ladder by taking 1 uL ladder and then added 5 uL of loading dye and 24 uL of nuclease free water.
d.) After we made all our samples, we placed them in a 65C incubator for 5 minutes. After the 5 minutes we immediately placed the samples on ice and then spun them in a microcentrifuge tube for about 15 seconds at 10,000 rpm.
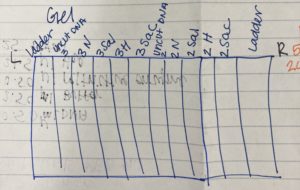
2. We loaded our gel in the following order:
Ladder 1 – Uncut DNA 3 – Nspl3 – SalI3 – Hael3 – Sacl3 – Uncut DNA 2 – Nspl2 – SalI2 – Hael2 – Sacl2 – Ladder2
We did a second ladder at the end because we weren’t sure if our first ladder had messed up.
3. Using a fresh tip we micropipetted each sample into the wells. We loaded 20 uL of each sample, but we only filled the wells until they full. We made sure that when we were filling the well to make sure not to puncture the agarose gel.
4. Below is the picture we drew of our wells so we knew what sample was in each well.
5. Once the gel was all set up, we plugged in the electrodes into the proper locations in the power supply. We then turned on the power and set the voltage to 100 V.
6. We ran the gel until the dye had migrated to the 5 marker on the gel box.
7. After it reached the 5 marker, we turned off the power and took the gel box out of the container. We then moved the gel to the storage room where we looked at it under the UV light.
Results:
Since we used 1X TAE Buffer instead of 1X TBE Buffer none of our DNA showed up.
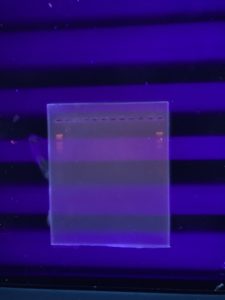
Conclusions and Next Steps:
Since nothing showed up, except the ladder, on the gel we are going to try it again from the restriction enzyme digest. This next time we are going to make sure we use 1X TBE Buffer, and see if that fixes the problem.
Title: Restriction Enzyme Digest
Date: 09/28/2020 Redo: Yes Samples: DNA 2 and 3
Purpose: This procedure is to add enzymes to our DNA to breakdown, which will make it easier too see how our virus’s genes are coded.
Notes:
For our host bacteria we have to use the restrictive enzymes: Haelll, Nspl, Sacll, and SalI.
Preparing genomic DNA
1. After we gently mixed our DNA sample by lightly vortexing the tube, we incubated our sample at 65C for 10 minutes.
2. After incubating we quickly placed it on ice and the microcentrifuge for less than a minute.
3. Using our phage concentration of our DNA samples we determined the volume of each of our DNA needed to obtain 0.5ug. We used the formula:
uL DNA= 0.5 ug (mL/125 ug)(1000 uL/1 mL)
We did not dilute DNA 3 this time, we just followed the formula to find what volume of DNA we needed for each sample.
4. Using our calculations and dilutions, we calculated that we needed 0.5ul of DNA-3 and 2 uL of DNA-2.
Setting up restriction enzyme digest reactions
5. We set out 4 tubes for each DNA sample, one tube for each restrictive enzyme, and used the table and our previous calculations to determine the volume needed to be added to each tube:
Everything was calculated to make sure that each tube had a finale volume of 25 uL
DNA-2
2 uL of DNA
2.5 uL of 10X Reaction Buffer
Haelll, Nspl, and Sacll required CutSmart Buffer. SalI required 3.1 Buffer
0.5 uL Restrictive Enzyme
20 uL Sterile ddH2O
DNA-3
0.5 uL of DNA
2.5 uL of 10X Reaction Buffer
Haelll, Nspl, and Sacll required CutSmart Buffer. SalI required 3.1 Buffer
0.5 uL Restrictive Enzyme
21.5 uL Sterile ddH2O
6. The contents of each tube were gently mixed and quickly spun in the microcentrifuge for less than a minute.
7. The tubes were then incubated at 37C for an hour.
8. After the hour the tubes were then quickly spun again for less than a minute and stored in the freezer at -20C.
Conclusions and Next Steps:
They will stay in the freezer until we are ready to re-do the agarose gel and gel electrophoresis.
Title: Casting Agarose Gel and Gel Electrophoresis
Date: 09/28/2020 Redo: Yes
Purpose: This procedure is to prepare a gel for electrophoresis in order to view our restrictive enzyme digest DNA.
Notes:
PART 1- Making and Casting Agarose Gel
1. We set up the apparatus and then prepared enough 0.8% agarose gel to cover the tips of the gel combs by approximately 2-3 mm.
a.) We calculated and found that we needed 0.24 g of agarose poser, so we weighted that out and the transferred the powered into an Erlenmeyer flask.
b.) We added 30 mL of 1X TBE Buffer to the agarose powered and gently swirled to mix.
c.) We then heat the mixture in the microwave for about 1-2 minutes or until it turned white. We took it our of the microwave to gently swirl about every 30 seconds.
d.) After taking it out of the microwave we allowed the flask to cool for about 15 minutes.
2. Once it was sufficiently cooled down, we put on our gloves and added 1.5 uL of ethidium bromide (EtBr) as our gel dye. The mixture was gently swirled to make sure it was properly mixed together.
3. We then poured the agarose/EtBr mixture into the prepared gel apparatus, being careful not to create any bubbles.
We used the 12 well comb.
4. We let the gel sit for about 20 minutes to cool and solidify.
5. Once the gel had solidified, we carefully removed the comb and once removed we gently lifted the gel platform out of the casting tray.
6. We placed the platform with the solidified gel into the gel box. The wells were at the (-) cathode end of the box.
8. We then poured 1X TBE Buffer into the gel apparatus until out gel was submerged in about 1/4 inch of buffer.
Part 2- Gel Electrophoresis
1. With the gel already oriented where the wells are closest to the cathode, we prepared our restriction enzyme digest samples for electrophoresis.
a.) We added 5 uL of concentrated 6x loading dye to each 25 uL restriction enzyme sample.
b.) In order to not ruin our DNA samples with the loading dye we transferred 2 uL of each sample into their own tubes. Then we filled each tube with 23 uL of nuclease free water and 5 uL of loading dye.
c.) Also we made our ladder by taking 1 uL ladder and then added 5 uL of loading dye and 24 uL of nuclease free water.
d.) After we made all our samples, we placed them in a 65C incubator for 5 minutes. After the 5 minutes we immediately placed the samples on ice and then spun them in a microcentrifuge tube for about 15 seconds at 10,000 rpm.
2. We loaded our gel in the following order:
Ladder 2 – Sacl2 – Hael2 – SalI2 – Nspl2 – Uncut DNA 2 – Sacl3 – Hael3 – SalI3 – Nspl3 – Uncut DNA 3 – Ladder 1
We did a second ladder at the end because we weren’t sure if our first ladder had messed up. We also went right to left instead of left to right.
3. Using a fresh tip we micropipetted each sample into the wells. We loaded 20 uL of each sample, but we only filled the wells until they full. We made sure that when we were filling the well to make sure not to puncture the agarose gel.
4. Below is the picture we drew of our wells so we knew what sample was in each well.
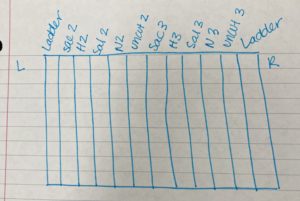

5. Once the gel was all set up, we plugged in the electrodes into the proper locations in the power supply. We then turned on the power and set the voltage to 100 V.
6. We ran the gel until the dye had migrated to the 5 marker on the gel box.
7. After it reached the 5 marker, we turned off the power and took the gel box out of the container. We then moved the gel to the storage room where we looked at it under the UV light.
Here is a picture of the gel:
Results:
The gel seemed to work but there was not enough DNA added show it was very hard to see.
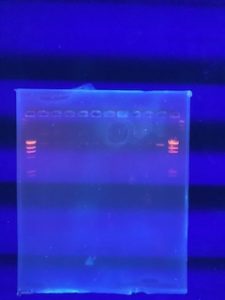
Conclusions and Next Steps:
We decided to re-try the restriction enzyme test.
Title: Restriction Enzyme Digest
Date: 10/05/2020 Redo: Yes Samples: DNA 4
Purpose: This procedure is to add enzymes to our DNA to breakdown, which will make it easier too see how our virus’s genes are coded.
Notes:
For our host bacteria we have to use the restrictive enzymes: Haelll, Nspl, Sacll, and SalI.
Preparing genomic DNA
1. After we gently mixed our DNA sample by lightly vortexing the tube, we incubated our sample at 65C for 10 minutes.
2. After incubating we quickly placed it on ice and the microcentrifuge for less than a minute.
3. Using our phage concentration of our DNA samples we determined the volume of each of our DNA needed to obtain 0.5ug. We used the formula:
uL DNA= 0.5 ug (mL/125 ug)(1000 uL/1 mL)
We did not dilute DNA 3 this time, we just followed the formula to find what volume of DNA we needed for each sample.
4. Using our calculations and dilutions, we calculated that we needed 0.7ul of DNA 4 and then we did one with 1 uL of DNA-4 as well.
Setting up restriction enzyme digest reactions
5. We set out 4 tubes for each DNA sample, one tube for each restrictive enzyme, and used the table and our previous calculations to determine the volume needed to be added to each tube:
Everything was calculated to make sure that each tube had a finale volume of 25 uL
DNA-4; 0.7
0.7 uL of DNA
2.5 uL of 10X Reaction Buffer
Haelll, Nspl, and Sacll required CutSmart Buffer. SalI required 3.1 Buffer
0.5 uL Restrictive Enzyme
21.3 uL Sterile ddH2O
DNA-4: 1.0
1.0 uL of DNA
2.5 uL of 10X Reaction Buffer
Haelll, Nspl, and Sacll required CutSmart Buffer. SalI required 3.1 Buffer
0.5 uL Restrictive Enzyme
21 uL Sterile ddH2O
6. The contents of each tube were gently mixed and quickly spun in the microcentrifuge for less than a minute.
7. The tubes were then incubated at 37C for an hour.
8. After the hour the tubes were then quickly spun again for less than a minute and stored in the freezer at -20C.
Conclusions and Next Steps:
They will stay in the freezer until we are ready to re-do the agarose gel and gel electrophoresis.
Title: Casting Agarose Gel and Gel Electrophoresis
Date: 10/07/2020 Redo: Yes
Purpose: This procedure is to prepare a gel for electrophoresis in order to view our restrictive enzyme digest DNA.
Notes:
PART 1- Making and Casting Agarose Gel
1. We set up the apparatus and then prepared enough 0.8% agarose gel to cover the tips of the gel combs by approximately 2-3 mm.
a.) We calculated and found that we needed 0.24 g of agarose poser, so we weighted that out and the transferred the powered into an Erlenmeyer flask.
b.) We added 30 mL of 1X TBE Buffer to the agarose powered and gently swirled to mix.
c.) We then heat the mixture in the microwave for about 1-2 minutes or until it turned white. We took it our of the microwave to gently swirl about every 30 seconds.
d.) After taking it out of the microwave we allowed the flask to cool for about 15 minutes.
2. Once it was sufficiently cooled down, we put on our gloves and added 1.5 uL of ethidium bromide (EtBr) as our gel dye. The mixture was gently swirled to make sure it was properly mixed together.
3. We then poured the agarose/EtBr mixture into the prepared gel apparatus, being careful not to create any bubbles.
We used the 12 well comb.
4. We let the gel sit for about 20 minutes to cool and solidify.
5. Once the gel had solidified, we carefully removed the comb and once removed we gently lifted the gel platform out of the casting tray.
6. We placed the platform with the solidified gel into the gel box. The wells were at the (-) cathode end of the box.
8. We then poured 1X TBE Buffer into the gel apparatus until out gel was submerged in about 1/4 inch of buffer.
Part 2- Gel Electrophoresis
1. With the gel already oriented where the wells are closest to the cathode, we prepared our restriction enzyme digest samples for electrophoresis.
a.) We added 5 uL of concentrated 6x loading dye to each 25 uL restriction enzyme sample.
b.) In order to not ruin our DNA samples with the loading dye, we transferred 0.7 uL and 1.0 uL of the sample into their own tubes. Then we filled the 0.7 with 24.3 uL of nuclease-free water and the 1.0 uL DNA with 24 uL of nuclease-free water and 5 uL of loading dye was added to both tubes.
c.) Also we made our ladder by taking 1 uL ladder and then added 5 uL of loading dye and 24 uL of nuclease free water.
d.) After we made all our samples, we placed them in a 65C incubator for 5 minutes. After the 5 minutes we immediately placed the samples on ice and then spun them in a microcentrifuge tube for about 15 seconds at 10,000 rpm.
2. We loaded our gel in the following order:
Ladder – Sacl1.0 – Hael1.0 – SalI1.0 – Nspl1.0 – Uncut DNA 1.0 – Sacl0.7- Hael0.7 – SalI 0.7 – Nspl 0.7 – Uncut DNA 0.7- Ladder
We did a second ladder at the end because we weren’t sure if our first ladder had messed up. We also went right to left instead of left to right.
3. Using a fresh tip we micropipetted each sample into the wells. We loaded 20 uL of each sample, but we only filled the wells until they full. We made sure that when we were filling the well to make sure not to puncture the agarose gel.
4. Below is the picture we drew of our wells so we knew what sample was in each well.
5. Once the gel was all set up, we plugged in the electrodes into the proper locations in the power supply. We then turned on the power and set the voltage to 100 V.
6. We ran the gel until the dye had migrated to the 5 marker on the gel box.
7. After it reached the 5 marker, we turned off the power and took the gel box out of the container. We then moved the gel to the storage room where we looked at it under the UV light.
Results:
The DNA did not show up. The only thing that showed up was the Ladder
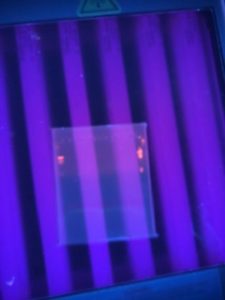
Conclusion:
We will redo are DNA extraction in order to get more DNA for restriction enzyme digest.
Title: Restriction Enzyme Digest
Date: 10/19/2020 Redo: No Samples: DNA 8!!
Purpose: This procedure is to add enzymes to our DNA to breakdown, which will make it easier too see how our virus’s genes are coded.
Notes:
For our host bacteria we have to use the restrictive enzymes: Haelll, Nspl, Sacll, and SalI.
Preparing genomic DNA
1. After we gently mixed our DNA sample by lightly vortexing the tube, we incubated our sample at 65C for 10 minutes.
2. After incubating we quickly placed it on ice and the microcentrifuge for less than a minute.
3. Using our phage concentration of our DNA samples we determined the volume of each of our DNA needed to obtain 0.5ug. We used the formula:
uL DNA= 0.5 ug (mL/2467.7 ug)(1000 uL/1 mL)
4. Using our calculations and dilutions, we calculated that we needed 0.2 uL of each DNA sample, but since that seemed like too little, we decided to add 0.5 uL of our DNA.
Setting up restriction enzyme digest reactions
5. We set out 4 tubes for each DNA sample, one tube for each restrictive enzyme, and used the table and our previous calculations to determine the volume needed to be added to each tube:
0.5 uL of DNA
2.5 uL of 10X Reaction Buffer
Haelll, Nspl, and Sacll required CutSmart Buffer. SalI required 3.1 Buffer
0.5 uL Restrictive Enzyme
21.5 uL Sterile ddH2O
Everything was calculated to make sure that each tube had a finale volume of 25 uL
6. The contents of each tube were gently mixed and quickly spun in the microcentrifuge for less than a minute.
7. The tubes were then incubated at 37C for an hour.
8. After the hour the tubes were then quickly spun again for less than a minute and stored in the freezer at -20C.
Conclusions and Next Steps:
We will come in tomorrow to cast the agarose gel and do the gel electrophoresis.
Title: Casting Agarose Gel and Gel Electrophoresis
Date: 10/20/2020 Redo: Yes Sample: DNA 8!!
Purpose: This procedure is to prepare a gel for electrophoresis in order to view our restrictive enzyme digest DNA.
Notes:
PART 1- Making and Casting Agarose Gel
1. We set up the apparatus and then prepared enough 0.8% agarose gel to cover the tips of the gel combs by approximately 2-3 mm.
a.) We calculated and found that we needed 0.24 g of agarose poser, so we weighted that out and the transferred the powered into an Erlenmeyer flask.
b.) We added 30 mL of 1X TBE Buffer to the agarose powered and gently swirled to mix.
c.) We then heat the mixture in the microwave for about 1-2 minutes or until it turned white. We took it our of the microwave to gently swirl about every 30 seconds.
d.) After taking it out of the microwave we allowed the flask to cool for about 15 minutes.
2. Once it was sufficiently cooled down, we put on our gloves and added 1.5 uL of ethidium bromide (EtBr) as our gel dye. The mixture was gently swirled to make sure it was properly mixed together.
3. We then poured the agarose/EtBr mixture into the prepared gel apparatus, being careful not to create any bubbles.
We used the 10 well comb.
4. We let the gel sit for about 20 minutes to cool and solidify.
5. Once the gel had solidified, we carefully removed the comb and once removed we gently lifted the gel platform out of the casting tray.
6. We placed the platform with the solidified gel into the gel box. The wells were at the (-) cathode end of the box.
8. We then poured 1X TBE Buffer into the gel apparatus until out gel was submerged in about 1/4 inch of buffer.
Part 2- Gel Electrophoresis
1. With the gel already oriented where the wells are closest to the cathode, we prepared our restriction enzyme digest samples for electrophoresis.
a.) We added 5 uL of concentrated 6x loading dye to each 25 uL restriction enzyme sample.
b.) In order to not ruin our DNA samples with the loading dye, we transferred 0.5 uL of the DNA sample into its own tube. Then we filled the 0.5 with 24.5 uL of nuclease-free water and 5 uL of loading dye was added to the uncut DNA tube.
c.) Also we made our ladder by taking 1 uL ladder and then added 5 uL of loading dye and 24 uL of nuclease free water.
d.) After we made all our samples, we placed them in a 65C incubator for 5 minutes. After the 5 minutes we immediately placed the samples on ice and then spun them in a microcentrifuge tube for about 15 seconds at 10,000 rpm.
2. We loaded our gel in the following order:
Ladder – Uncut DNA – Hael – Nspl – Sacl – SalI
We did a second ladder at the end because we weren’t sure if our first ladder had messed up. We also went right to left instead of left to right.
3. Using a fresh tip we micropipetted each sample into the wells. We loaded 20 uL of each sample, but we only filled the wells until they full. We made sure that when we were filling the well to make sure not to puncture the agarose gel.
5. Once the gel was all set up, we plugged in the electrodes into the proper locations in the power supply. We then turned on the power and set the voltage to 100 V.
6. We ran the gel until the dye had migrated to the 5 marker on the gel box.
7. After it reached the 5 marker, we turned off the power and took the gel box out of the container. We then moved the gel to the storage room where we looked at it under the UV light.
Results:
The DNA did not show up. The only thing that showed up was the Ladder
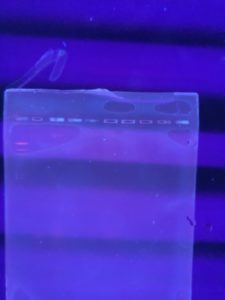
Conclusion:
We will try it again, but we will put a higher concentration on DNA in our restrictive enzymes.
Title: Restriction Enzyme Digest
Date: 10/21/2020 Redo: Yes Samples: DNA 8!!
Purpose: This procedure is to add enzymes to our DNA to breakdown, which will make it easier too see how our virus’s genes are coded.
Notes:
For our host bacteria we have to use the restrictive enzymes: Haelll, Nspl, Sacll, and SalI.
Preparing genomic DNA
1. After we gently mixed our DNA sample by lightly vortexing the tube, we incubated our sample at 65C for 10 minutes.
2. After incubating we quickly placed it on ice and the microcentrifuge for less than a minute.
3. This time we did not use the equation to figure out our DNA concentration for the restrictive enzymes. We just decided that to try and put 2uL, because our previous trials had too little DNA concentration so nothing showed up.
Setting up restriction enzyme digest reactions
4. We set out 4 tubes for each DNA sample, one tube for each restrictive enzyme, and used the table and our previous calculations to determine the volume needed to be added to each tube:
2.0 uL of DNA
2.5 uL of 10X Reaction Buffer
Haelll, Nspl, and Sacll required CutSmart Buffer. SalI required 3.1 Buffer
0.5 uL Restrictive Enzyme
20.0 uL Sterile ddH2O
Everything was calculated to make sure that each tube had a finale volume of 25 uL
5. The contents of each tube were gently mixed and quickly spun in the microcentrifuge for less than a minute.
6. The tubes were then incubated at 37C for an hour.
7. After the hour the tubes were then quickly spun again for less than a minute and stored in the freezer at -20C.
Conclusions and Next Steps:
We will come in tomorrow to cast the agarose gel and do the gel electrophoresis.
Title: Casting Agarose Gel and Gel Electrophoresis
Date: 10/25/2020 Redo: Yes Sample: DNA 8!!
Purpose: This procedure is to prepare a gel for electrophoresis in order to view our restrictive enzyme digest DNA.
Notes:
PART 1- Making and Casting Agarose Gel
1. We set up the apparatus and then prepared enough 0.8% agarose gel to cover the tips of the gel combs by approximately 2-3 mm.
a.) We calculated and found that we needed 0.24 g of agarose poser, so we weighted that out and the transferred the powered into an Erlenmeyer flask.
b.) We added 30 mL of 1X TBE Buffer to the agarose powered and gently swirled to mix.
c.) We then heat the mixture in the microwave for about 1-2 minutes or until it turned white. We took it our of the microwave to gently swirl about every 30 seconds.
d.) After taking it out of the microwave we allowed the flask to cool for about 15 minutes.
2. Once it was sufficiently cooled down, we put on our gloves and added 1.5 uL of ethidium bromide (EtBr) as our gel dye. The mixture was gently swirled to make sure it was properly mixed together.
3. We then poured the agarose/EtBr mixture into the prepared gel apparatus, being careful not to create any bubbles.
We used the 10 well comb.
4. We let the gel sit for about 20 minutes to cool and solidify.
5. Once the gel had solidified, we carefully removed the comb and once removed we gently lifted the gel platform out of the casting tray.
6. We placed the platform with the solidified gel into the gel box. The wells were at the (-) cathode end of the box.
8. We then poured 1X TBE Buffer into the gel apparatus until out gel was submerged in about 1/4 inch of buffer.
Part 2- Gel Electrophoresis
1. With the gel already oriented where the wells are closest to the cathode, we prepared our restriction enzyme digest samples for electrophoresis.
a.) We added 5 uL of concentrated 6x loading dye to each 25 uL restriction enzyme sample.
b.) In order to not ruin our DNA samples with the loading dye, we transferred 0.5 uL of the DNA sample into its own tube. Then we filled the 0.5 with 24.5 uL of nuclease-free water and 5 uL of loading dye was added to the uncut DNA tube.
c.) Also we made our ladder by taking 1 uL ladder and then added 5 uL of loading dye and 24 uL of nuclease free water.
d.) After we made all our samples, we placed them in a 65C incubator for 5 minutes. After the 5 minutes we immediately placed the samples on ice and then spun them in a microcentrifuge tube for about 15 seconds at 10,000 rpm.
2. We loaded our gel in the following order:
Ladder – Uncut DNA – Hael – Nspl – Sacl – SalI
We did a second ladder at the end because we weren’t sure if our first ladder had messed up. We also went right to left instead of left to right.
3. Using a fresh tip we micropipetted each sample into the wells. We loaded 20 uL of each sample, but we only filled the wells until they full. We made sure that when we were filling the well to make sure not to puncture the agarose gel.
4. Below is the picture we drew of our wells so we knew what sample was in each well.

5. Once the gel was all set up, we plugged in the electrodes into the proper locations in the power supply. We then turned on the power and set the voltage to 100 V.
6. We ran the gel until the dye had migrated to the 5 marker on the gel box.
7. After it reached the 5 marker, we turned off the power and took the gel box out of the container. We then moved the gel to the storage room where we looked at it under the UV light.
Results:
The DNA did show up, but in the distal end of the gel there was smearing.

Conclusion:
After talking with Dr. Edwards, he says that the smearing is probably due to the presence of a methyl group so that is why it might not be cutting as clear. With that being said, he also told us we were done and that our DNA is ready for sequencing!!