Discovery of Leia
Collecting Environmental Samples
Date: 9/5/2017
Purpose: Collect environmental samples that will be utilized for the Direct Isolation, and Enriched Isolation experiments. The primary objective is to collect samples of soil in various places. Ensure that the soil is free from large debris and organic material. A small portion of the soil was collected, well below the topsoil. The sample depth was measured, and the sample type, location description, general location, specific location (GPS coordinates), sample depth, ambient temperature and elevation were recorded.
Environmental Sample Data Sheet:
| Sample | 1 | 2 | 3 |
| Collector Name | Miranda Fuentes | Miranda Fuentes | Miranda Fuentes |
| Date of Collection | 9/5/2017 | 9/5/2017 | 9/5/2017 |
| Sample Type | Soil; slightly damp, contains some organic matter. | Soil: contains some organic matter, slightly wet/damp | Soil; very wet, some organic material |
| Location Description | Pasture (used for livestock) | Garden | Near Bosque River (33cm away from river) |
| General Location | Country (rural); area outside city limits | Within city limits (neighborhood) | Within city limits |
| Specific Location | 32° 14’ 1” N
98° 15’ 53” W |
32° 12’ 49” N
98° 13’ 133” W |
32° 12’ 54” N
98° 12’ 9” W |
| Sample Depth | 3.7 cm (1.45in) | 8 cm (3.14in) | 16 cm (6.29 in) |
| Ambient Temperature | 72° F | 72° F | 72° F |
| Elevation | 1360 ft | 1320 ft | 1340 ft |
Analysis & Interpretations: To ensure the diversity of environmental samples, soil was collected from various locations and of various soil types.
Future Plans: Within the immediate future, an Enriched Isolation and Direct Isolation (followed by a Plaque Assay) will be performed, to determine if any bacteriophage were present within the collected environmental samples.
Date: 9/6/2017
Title: Direct and Enriched Isolation of Environmental Samples & Plaque Assays
Purpose: The primary objective of this experiment is to prepare the collected environmental samples by using the Direct and Enriched Isolation protocol, outlined within the laboratory manual, pages 28-29, and 35-37, respectively. These isolations with then be followed by either the plaque assay or spot test protocol.
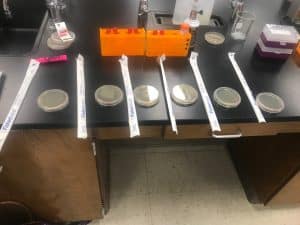
Procedures/Protocols:
- The bench was prepared with aseptic technique, hands were washed, and supplies were assembled.
- Out of the three collected environmental samples, two of the samples were assigned to either be prepared with the Direct Isolation protocol, or the Enriched Isolation protocol. The following samples were assigned as follows:
- Sample One: Direct Isolation
- Sample Three: Enriched Isolation
- Reference the notebook entry from September 5, 2017 for more information regarding the environmental samples.
- The Direct Isolation protocol (5.2), with Sample One:
- Pages 28-29 were used as a reference. Note: each procedure was completed near the Bunsen burner, within the aseptic zone. If a micropipette was used to transfer liquids, then new micropipette tips were used for each new transfer to avoid cross contamination.
- Extracting phage from environmental sample (procedure C).
- 10:27 AM: Approximately 7.5 ml of soil was transferred to a 15 ml conical tube.
- 10:29 AM: 3 ml of enrichment broth was transferred to the conical tube containing soil, so that the soil was entirely submerged under the enrichment broth.
- The tube was capped and inverted three times to ensure that the soil and enrichment broth were mixed thoroughly.
- 10:34 AM- 12:45 PM: The conical tube was incubated in a shaking incubator set at 250 rpm.
- While the Direct Isolation sample was incubating, the Enriched Isolation protocol, with Sample 3 had been started.
- 12:45 PM-12:52 PM: The sample was allowed to settle.
- 12:53 PM: The conical tube was centrifuged at 2000 rpm and 22°C, to further separate the solid material located within the soil sample from the liquid (the supernatant).
- Preparing the sample for filtration (procedure D).
- A sterile package containing a syringe was opened. A sterile package containing a 0.22 µm filter was opened.
- Filtration apparatus: the plunger was removed from the syringe.
- The tip of the syringe was attached to the 0.22 µm filter, by rotating the syringe clockwise. Once the filtration apparatus was properly connected, then the apparatus was placed over a labeled microcentrifuge tube.
- Approximately 2ml of supernatant was transferred to the open syringe. Then the plunger was properly inserted into the body of the syringe and pressed down until the filtrate was collected into the labeled microcentrifuge tube.
- It was expected that the majority of the 2 ml liquid sample would be located within the 1.5 ml microcentrifuge tube, however only 1ml of filtrate were actually collected from the first filtration apparatus. It is recommended that a minimum of 0.5 ml of filtrate be collected.
- Filtration apparatus: the plunger was removed from the syringe.
- 1:32 PM: The conical tube was centrifuged again at 2000 rpm at 22°C, to ensure that more filtrate was collected. A second filtration apparatus, by using the protocol outlined previously was established.
- The supernatant was transferred to the second filtration apparatus, and the filtrate was collected by using the protocol for filtration.
- Approximately 2 ml of filtrate was then collected.
- The supernatant was transferred to the second filtration apparatus, and the filtrate was collected by using the protocol for filtration.
- A sterile package containing a syringe was opened. A sterile package containing a 0.22 µm filter was opened.
- A total of 0.3 ml of filtrate were actually collected, noting that the suggested minimum volume of filtrate was 0.5 ml.
- Direct Isolation (Sample One): Plaque Assay
- Pages 30-31 were used as a reference. Note: each procedure was completed near the Bunsen burner, within the aseptic zone. If a micropipette was used to transfer liquids, then new micropipette tips were used for each new transfer to avoid cross contamination.
- Inoculating the host bacteria with phage samples (Procedure C).
- 1:58 PM: Two culture tubes, containing 250 µl of host bacteria, Mycobacterium Smegmatis, strain mc2 155 were obtained.
- Referencing table 5.3-1:
- 500 µl of the Direct Isolation sample was suggested, however only 300 µl were used (since 0.3 ml of sample were actually collected). The 300 µl of filtered Direct Isolation sample was transferred to a labeled culture tube, containing the 250 µl of host bacteria.
- As suggested by the table, 10 µl of phage buffer was transferred to a labeled culture tube, containing the 250 µl of host bacteria. This culture tubes is assigned for the Negative Control.
- The culture tubes were allowed to settle for several minutes.
- 2:06 PM: the Direct Isolation culture tube was placed on the tube rack.
- 2:18 PM: the Negative Control culture tube was placed on the tube rack.
- Plating the samples with molten top agar (Procedure D).
- Two sterile agar plates were obtained, and properly labeled for the Direct Isolation sample and Negative Control.
- Protocol for using top agar:
- The top agar was taken from the 55°C bath, and by using a sterile 5ml pipette, 1.5 ml of molten top agar was transferred to the Negative Control tube, and was quickly aspirated, and directly transferred to the agar plate labeled for the Negative Control. The same protocol was followed for the Direct Isolation sample. It was noted, that the neck of the container of top agar was not properly passed through the flame after being uncapped and before being capped. This technique ensures that the neck is free from microorganisms and avoids cross contamination.
- The plates were allowed to sit undisturbed until the molten top agar properly solidified.
- Note: that the laboratory manual had suggested to use 3 ml of molten top agar, however 1.5 ml of molten top agar were used and as a result, the agar plate was not completely covered.
- Once confirmed that they were solidified, the agar plates were placed in an incubator.
- The Enriched Isolation protocol (5.5), with Sample Three- Day One:
- Pages 35-37 were used as a reference. Note: each procedure was completed near the Bunsen burner, within the aseptic zone. If a micropipette was used to transfer liquids, then new micropipette tips were used for each new transfer to avoid cross contamination.
- Extracting phage from environmental sample (procedure B).
- 10:44 AM: 15ml of soil from Sample 3 was transferred into a 50 ml conical tube.
- 10:54 AM: 20 ml of enrichment broth was added to the 50ml conical tube, and vortex for 30 seconds.
- 10:55 AM-1:07 PM: the sample was placed in a shaking incubator.
- 1:24 PM: The conical tube was centrifuged, for 10 minutes at 2000 rpm, , to further separate any solid material located within the soil sample from the liquid (the supernatant), and then placed in a conical tube holder. It was around this time that the incubation period for the Direct Isolation sample protocol had been completed, and the protocol was resumed.
- 2:50 PM: A sterile package containing a sterile baffled Erlenmeyer flask
- Filtration apparatus: the parts of the filtration apparatus was contained within a plastic package. The package was opened and the filtration apparatus was assembled. The filtration apparatus was connected to a vacuum tube which was then connected to the vacuum spout. The vacuum was turned on, and the supernatant was poured over the filter, which was collected into another 50 ml conical tube.
- 3:01 PM: Approximately, 15.2 ml of filtrate had been collected.
- Inoculating the 50 ml conical tube with host bacteria (Procedure D).
- Host bacteria: Mycobacterium Smegmatis, strain mc2 155.
- Approximately 0.5ml of “smeg” was transferred to the 50 ml conical tube containing the filtered Enriched Isolation sample.
- 3:11 PM: The tube was placed in the incubator.
- Note: procedure D states to ensure that the conical tube was properly aerated, however the 50 ml conical tube used within the experiment was not ensured if it was properly aerated which may or may not affect the host bacteria in later protocol.
Results: The results of properly following the protocol outlined in the laboratory manual, were that the Enriched Isolation and Direct Isolation samples were properly filtered and prepared for the use in other experimental protocol, such as a Plaque Assay for the Direct Isolation sample.
Analysis and Interpretations: The quality of the agar plates are based on a student’s prior experience with plating molten top agar, therefore careful technique must be used to properly prepare agar plates. Therefore, the quality of the agar plates prepared by the end of the Plaque Assay could be better, however given by the limited experience with plating top agar, they were prepared with the best of abilities. Aseptic techniques throughout the day were imperative, such as using different micropipette tips in between transfers, and working within the aseptic zone to ensure that other microorganism contaminate any part of the protocol used during the preparation of the Enriched Isolation, and Direct Isolation samples, which was followed by a Plaque Assay. Since aeration was not properly ensured at the end of the Enriched Isolation protocol, then future use may or may not be affected for following protocol, such as a Spot Test.
Future Plans: Within the following day (9/7/2017), the Direct Isolation Plaque Assays will be removed from the incubator to visualize any progress that is made by possible bacteriophages. Pictures and descriptions are to be taken and written.
Date: 9/7/2017
Title: Follow up of the Plaque Assays
Purpose: The primary objective of the experiment is to follow up on the Plaque Assays prepared using the Direct Isolation sample (Sample One), and a Negative Control (Phage Buffer).
Protocol and Procedures:
- 2:31 PM: the bench was prepared with aseptic technique, hands were washed, and supplies were assembled.
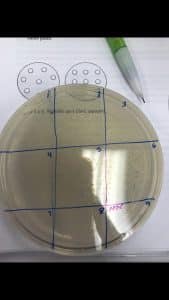
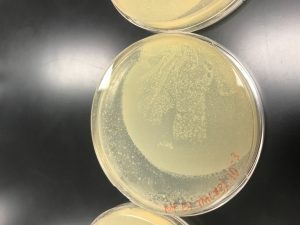
- 2:38 PM: the agar plates were removed and were inspected the following details for each agar plate were recorded as follows:
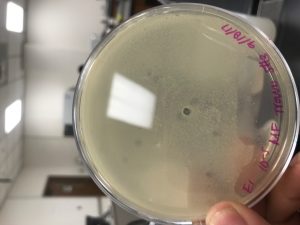
- Direct Isolation agar plate: small aggregated clusters of microscopic ‘spots’, were located throughout the areas of the plate that contained agar.
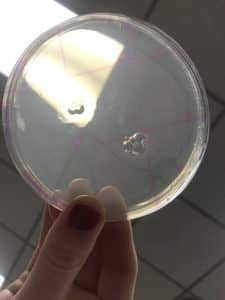
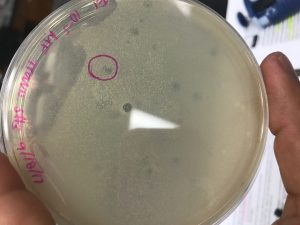
- Negative Control: No visual data was present, the plate was clear (free from microorganisms), and slight condensation on the lid. Photos were taken as a way to record the visual data.
- 2:43 PM: the agar plates were placed back to incubate.
Results: There was nothing to visually indicate that bacteriophage were present within the sample, however the plate was placed back in the incubator for further incubation. The absences of plaques within the Negative Control could mean that cross contamination was not a factor with regarding on completing the protocol for the Plaque Assays or when preparing the Direct Isolation sample.
Analysis and Interpretations: The absence of plaques within the agar plate for the Negative Control ensures that aseptic technique was used during the protocol, and that further protocol from additional experiments must be completed with aseptic technique to ensure that contamination does not negatively affect the results. If located within the sample, additional incubation time might result in the presence of plaques on the agar plate.
Future Plans: With further incubation, the agar plate for the Direct Isolation sample will be visualized again to determine if allowing additional incubation time resulted in plaques.
Visual Data:

Direction Isolation Sample Plaque Assay

Negative Control Plaque Assay
Date: 9/11/2017
Title: Continuation of the Enriched Isolation Protocol and Spot Test
Purpose: The primary objective of the experiment is to continue the Enriched Isolation protocol to prepare Sample Three for a Spot Test.
Protocol and Procedures:
- The Enriched Isolation protocol (5.5), with Sample Three- Day 2:
- Pages 36-37 were used as a reference. Note: each procedure was completed near the Bunsen burner, within the aseptic zone. If a micropipette was used to transfer liquids, then new micropipette tips were used for each new transfer to avoid cross contamination.
- The Enriched Isolation 50 ml conical tubes incubated for 2 days and then placed in the fridge for 48 hours.
- Filtration of the Enriched Isolation sample (Procedure B).
- 9:13 AM: the bench was prepared with aseptic technique, hands were washed, and supplies were assembled.
- The agar plate from the Direct Isolation was obtained, and even with further incubation, there was nothing to visually indicate that bacteriophage was present on the agar plate, with Sample One.
- 9:31 AM: 1.4 ml of the Enriched Isolation sample, inoculated with host bacteria, was transferred to a labeled microcentrifuge tube.
- The procedure was repeated so that two microcentrifuge tubes would contain 1.4 ml each.
- 9:13 AM: the bench was prepared with aseptic technique, hands were washed, and supplies were assembled.
- Pages 36-37 were used as a reference. Note: each procedure was completed near the Bunsen burner, within the aseptic zone. If a micropipette was used to transfer liquids, then new micropipette tips were used for each new transfer to avoid cross contamination.
- 9:40 AM: the microcentrifuge tubes were centrifuged for 1 minute to pellet the bacteria.
- 9:47 AM: the microcentrifuge tubes were filtered, following the protocol with the 0.22 µm filter, outlined from previous experiments.
- After both tubes of supernatant were filtered, only 1 ml of filtrate were collected (the suggested volume is 2 ml).
- 10:03-10:07 AM: An additional two microcentrifuge tubes were prepared by the protocol outlined by Procedure B, and an additional 1.30 ml of filtrate were collected
- 10:14 AM- the protocol for the Spot Test was started.
- Spot Test protocol (5.6), with Sample Three:
- Pages 38-39 were used as a reference. Note: each procedure was completed near the Bunsen burner, within the aseptic zone. If a micropipette was used to transfer liquids, then new micropipette tips were used for each new transfer to avoid cross contamination. If plating a plate with top agar, then the neck of the flask containing the top agar is passed through the flame after being uncapped and before being capped.
- Preparation of Bacterial Lawn (Procedure C).
- A sterile agar plate was obtained and labeled. The bottom of the agar plated was then sectioned according to the samples that would be used.
- A culture tube containing 250 µl of host bacteria was obtained.
- 10:22 AM: The top agar was taken from the 55°C bath, and by using a sterile 5ml pipette, 3 ml of molten top agar was transferred to the culture tube, and then quickly aspirated and transferred to the agar plate.
- After 20 minutes of allowing the agar plate to solidify, it became apparent that the top agar had solidified in waves, therefore two more attempts were made to plate a top agar, by using the same protocol as outline before, with an additional culture tubes of 250 µl of host bacteria. By the third attempt, the agar plate was successfully plated and allowed to solidify from 11:10-11:30 AM. Each agar plate was labeled in the same manner as the original plate with nine quadrants.
- Spotting the prepared bacterial lawn (Procedure D):
- 10 µl of phage sample was transferred in its respective quadrant.
- New micropipette tips were used between each transfer.
- Since Direct Isolation plaque assays did not result in any plaques, then only 10 µl of the filtrate collected from the Enriched Isolation sample was spotted, as well as 10 µl of Phage Buffer for a negative control.
- The following diagram is the labeled quadrants, with their respective samples. 4.11:57 AM: the agar plate was placed in the incubator.
- 10 µl of phage sample was transferred in its respective quadrant.
Results: Even with further incubation, there was nothing to visually indicate that bacteriophage was present in Sample One on the agar plate from Direct Isolation. From previous experience, the Spot Test with Sample Three was carefully prepared with aseptic technique within the protocol.
Analysis and Interpretations: The technique of preparing the top agar, and plating it onto the agar plate is improving with each experience.
Future Plans: The agar plate will be visually analyzed after it has been incubated for an adequate amount of time.
Visual Data:

50 ml Conical Tube containg Enriched Isolation Phage Sample
Spot Test with Nine Quadrants
Date: 9/13/2017
Title: Continuation of Protocol for the Spot Test
Purpose: The primary objective of the experiment is to visually analyzed, and it will be from there if additional experiments are needed with Sample Two or if a bacteriophage is needed to be adopted.
Protocol and Procedures:
- 9:16 AM: The bench was prepared with aseptic technique, hands were washed, and supplies were assembled.
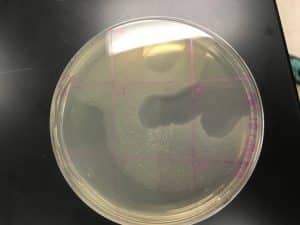
- The agar plate prepared with Sample Three, containing the spot test was visually analyzed. Photos were taken as a way to record the visual data. There was no visual indication of plaques, therefore these factors were considered, before moving on:
- Was the suggested 10 µl of either the phage sample or buffer (negative control) too much for the quadrants? If so, this would result in the samples to cross into other quadrants. Does 5 µl need to be used spotting additional bacterial lawns?
- Is the 20 minutes allowed for the agar plate to solidify not enough time. Does it need to be lengthen to 30-35 minutes?
- How can the quality control of the top agar be improved?
- Does the nature of the top agar used, and its consistency affect the way it solidifies?
- With careful consideration of these factors, the executive decision was made to adopt bacteriophages.
- By using the Spot Test protocol (Procedures B, C and D) two new agar plates were prepared with the following changes:
- 5 µl of phage sample or buffer was used to spot the quadrants (instead of the laboratory manual’s suggested volume of 10 µl).
- The solidifying time was lengthened to 30 minutes (instead of the lab manual’s suggested time of 20 minutes).
- By using the Spot Test protocol (Procedures B, C and D) two new agar plates were prepared with the following changes:
- Agar Plate One:
- Sample was taken by Travis Miller.
- Solidifying time of agar plate (9:56 AM- 10:27 AM).
- Agar Plate Two:
- Sample was taken by Esperanza Sandoval.
- Solidifying time of agar plate (10:08 AM- 10:42 AM).
Results: There was no visual indication that plaques were located on the agar plate prepared with the Enriched Isolation (Sample Three), therefore the executive decision was made to prepare two additional plates from other student’s Enriched Isolation samples, and adopting either bacteriophage.
Analysis and Interpretations: The technique of preparing the top agar, and plating it onto the agar plate is improving with each experience. Changes, such as decreasing the volume of phage sample or buffer used to spot the quadrants, as well as lengthening the time of solidifying the top agar, were made as a result of considering factors that could affect the original agar plate.
Future Plans: The agar plates will be visually analyzed after it has been incubated for an adequate amount of time, and additional decisions will be made to determine which student’s bacteriophage is to be adopted. Photos will be taken as a way to record the visual data.
Visual Data:

Spot Test Results of Sample Three
Agar Plate of Adopted Phage (Travis Miller)
Date: 9/14/2017
Title: Follow up of the Adopted Enriched Isolation Agar Plates
Purpose: The primary objective of the experiment is to follow up on the agar plates made with the samples from other students, to determine which bacteriophage is to be adopted.
Protocol and Procedures:
- 1:03 PM: the bench was prepared with aseptic technique, hands were washed, and supplies were assembled.
- The agar plates were removed and were inspected the following details for each agar plate were recorded as follows:
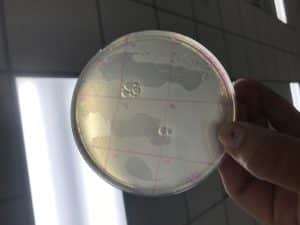
- Agar Plate One (Travis Miller): there is clearing in quadrants 2, 3, 4, 5, 6, slightly 8, and 9 (were the negative control was spotted).
- Clearing in quadrant 9 (negative control), could likely mean that phage sample still moved around and cross other quadrants. Could it be the consistency of the agar plate, when decreasing the volume from 10 µl to 5 µl did not improve the outcome of the agar plate as much as it was to be expected?
- Agar Plate Two (Esperanza Sandoval): there is clearing in quadrants 5, 6, 8, and 9 (were the negative control was spotted).
- Clearing in quadrant 9 (negative control), could likely mean that phage sample still moved around and cross other quadrants. As seen with Agar Plate One, could it be the consistency of the agar plate?
- Photos were taken as a way to record the visual data.
- Agar Plate One (Travis Miller): there is clearing in quadrants 2, 3, 4, 5, 6, slightly 8, and 9 (were the negative control was spotted).
Results: There was bacteriophage located in both samples, as visually reinforced with the analysis of either agar plate. Within the next laboratory day, it will be determined witch bacteriophage is to be adopted, for used in the serial dilutions protocol.
Analysis and Interpretations: Even with the changes made when preparing each agar plate, phage sample still moved into other quadrants. The consistency of the top agar may need to be reevaluated to determine if a new batch of molten top agar is needed, when plating the serial dilutions of the phage sample that is to be adopted.
Future Plans: Within the next laboratory day, it will be decided which phage sample is to be adopted. Once determined, the phage sample will then be used for two rounds of serial dilutions.
Visual Data:
Results of Agar Plate of Adopted Phage (Travis Miller)
Results of Agar Plate (Esperanza Sandoval)
Date: 9/18/2017
Title: Serial Dilutions of Adopted Phage Sample
Purpose: The primary objective of this experiment is to determine which bacteriophage sample is to be adopted, and use it for two rounds of serial dilutions, to further isolate the bacteriophage.
Protocol and Procedures:
- 9:48 AM: the bench was prepared with aseptic technique, hands were washed, and supplies were assembled.
- It was officially determined that the bacteriophage sample collected by Travis Miller was to be adopted.
- Environmental Data Sheet from adopted bacteriophage sample:
| Sample 3: Home Depot |
| Collected by: Travis Miller |
| Date of Collection: 9/4/2017 |
| Sample Type: Peaty |
| Location Description: Kellogg Potting Mix- Premium Mix for Outdoor Containers |
| General Location: Stacked on a pellet of soil in the garden section of Home Depot, outside within the direct sunlight. |
| Specific Location:
32° 25’ 57” N 97° 46’ 56” W |
| Sample Depth: 1 in within bag |
| Ambient Temperature: 93 °F |
- Serial Dilutions Protocol (6.2), with Adopted sample:
- Pages 45-46 were used as a reference. Note: each procedure was completed near the Bunsen burner, within the aseptic zone. If a micropipette was used to transfer liquids, then new micropipette tips were used for each new transfer to avoid cross contamination. If plating a plate with top agar, then the neck of the flask containing the top agar is passed through the flame after being uncapped and before being capped.
- Preparing Microcentrifuge Tubes for Serial Dilutions (Procedure B).
- Six sterile microcentrifuge tubes were labeled as follows: 10-1…. 10-6, and placed in order on a rack.
- 90 µl of phage buffer were aseptically transferred to each microcentrifuge tube. New micropipette tips were used in between each transfer.
- Preforming 10-fold Serial Dilutions with Adopted Sample (Procedure C).
- 10:52 AM: 10 µl of undiluted phage sample were transferred to the microcentrifuge tube labeled 10-1, and then vortexed for 10 seconds. This tube contained 1/10th of the phage particles of the undiluted phage sample, and is referred to as the 1:100 dilution.
- 10:53 AM- 10:57 AM: each successive dilution (10-2….10-6) was completed with the following protocol, ensuring that new micropipette tips were used in between each transfer.
- 10: 59 AM: the prepared dilutions were ready to be plated by following the Plaque Assay protocol.
- Plaque Assays of Serial Dilutions (5.3):
- By following the Plaque Assay protocol (Procedures B, C, and D) six agar plates were prepared.
- To ensure that the agar plates were properly made, the following were labeled to match each serial dilution (10-1….10-6): six culture tubes, six 5ml pipettes, and six agar plates.
- According to table 5.3-1, 10 µl of each serial dilution was used in combination with the molten top agar to plate each agar plate.
- By following the Plaque Assay protocol (Procedures B, C, and D) six agar plates were prepared.
- 11:22 AM-11:29 AM: six plates were made, and allowed to solidify for 30 minutes.
- The plates were collected, taped together and placed in the incubator.
Results: With careful preparation, six agar plates were properly prepared by using aseptic technique to ensure that cross contamination is not a factor in affecting the results of the agar plates.
Analysis and Interpretations: The technique of preparing the top agar, and plating it onto the agar plate is improving with each experience.
Future Plans: Within the next laboratory day, it will be decided which serial dilution is to be used for the second round of serial dilutions.
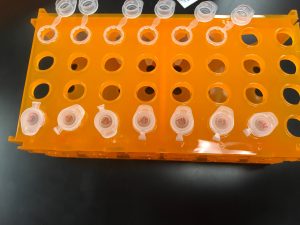
Visual Data:

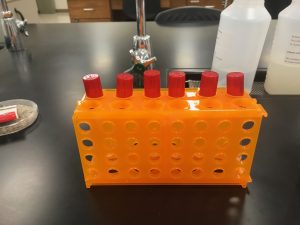
Six Microcentrifuge Tubes Labeled from 10-1to 10-6
Set Up for Serial Dilutions
Date: 9/20/2017
Title: Second Round of Serial Dilutions
Purpose: The primary objective of this experiment is to determine which serial dilution is to be used for the second round of serial dilutions to further isolate the bacteriophage.
Protocol and Procedures:
- The bench was prepared with aseptic technique, hands were washed, and supplies were assembled.
- The agar plates were taken from the incubator, and placed on the bench top. The tape was carefully unravel and each agar plate was examined for plaques.
- There were no plaques observed on agar plates 10-1 , 10-2 , 10-3, 10-4 and 10-6 therefore 10-5 was selected for the second round of serial dilutions.
- Before the serial dilutions were to be completed then the protocol for picking a plaque was completed to create a liquid sample for the serial dilutions.
- Picking a Plaque Protocol (5.4), from 10-5 dilution:
- Pages 33-34 were used as a reference. Note: each procedure was completed near the Bunsen burner, within the aseptic zone. If a micropipette was used to transfer liquids, then new micropipette tips were used for each new transfer to avoid cross contamination. If plating a plate with top agar, then the neck of the flask containing the top agar is passed through the flame after being uncapped and before being capped.
- Labeling the Plaques (Procedure B).
- The 10-5 agar plate was examined and approximately seven plaques were visual. Out of the seven plaques, one plaque was identified and labeled by drawing a circle around it with a permanent marker. The plaque was isolated from the other located at the central bottom portion of the agar plate. The plaque seemed to be opaque, which could describe the nature of the bacteriophage. It may be determined that the bacteriophage is classified as a temperate bacteriophage.
- Picking a Plaque (Procedure C).
- 9: 42 AM: 100 µl of phage buffer was transferred to a sterile 1.5 ml microcentrifuge tube, which was then labeled to indicate that it was the original sample.
- A sterile micropipette tip was placed gently on the agar surface in the center of the chosen plaque, careful not to touch the surrounding bacteria.
- The end of the tip was placed in the microcentrifuge tube and pipetted up and down to dislodge any phage particles.
- The following serial dilutions protocol was ready to be completed.
- Serial Dilutions Protocol (6.2), with Adopted sample:
- Pages 45-46 were used as a reference. Note: each procedure was completed near the Bunsen burner, within the aseptic zone. If a micropipette was used to transfer liquids, then new micropipette tips were used for each new transfer to avoid cross contamination. If plating a plate with top agar, then the neck of the flask containing the top agar is passed through the flame after being uncapped and before being capped.
- Preparing Microcentrifuge Tubes for Serial Dilutions (Procedure B).
- Six sterile microcentrifuge tubes were labeled as follows: 10-1…. 10-6, and placed in order on a rack.
- 90 µl of phage buffer were aseptically transferred to each microcentrifuge tube. New micropipette tips were used in between each transfer.
- Preforming 10-fold Serial Dilutions with Adopted Sample (Procedure C).
- 10 µl of the undiluted phage sample (prepared by picking a plaque protocol) were transferred to the microcentrifuge tube labeled 10-1, and then vortexed for 10 seconds. This tube contained 1/10th of the phage particles of the undiluted phage sample, and is referred to as the 1:100 dilution.
- 9:52 AM- 9:59 AM: each successive dilution (10-2….10-6) was completed with the following protocol, ensuring that new micropipette tips were used in between each transfer.
- 10: 04 AM: the prepared dilutions were ready to be plated by following the Plaque Assay protocol.
- Plaque Assays of Serial Dilutions (5.3):
- By following the Plaque Assay protocol (Procedures B, C, and D) six agar plates were prepared.
- To ensure that the agar plates were properly made, the following were labeled to match each serial dilution (10-1….10-6): six culture tubes, six 5ml pipettes, and six agar plates.
- According to table 5.3-1, 10 µl of each serial dilution was used in combination with the molten top agar to plate each agar plate.
- By following the Plaque Assay protocol (Procedures B, C, and D) six agar plates were prepared.
- 11:22 AM-11:29 AM: six plates were made, and allowed to solidify for 30 minutes.
- The plates were collected, taped together and placed in the incubator.
Results: With careful preparation, six agar plates were properly prepared by using aseptic technique to ensure that cross contamination is not a factor in affecting the results of the agar plates.
Analysis and Interpretations: The technique of preparing the top agar, and plating it onto the agar plate is improving with each experience.
Future Plans: Within the next laboratory day, the six agar plates will be visually analyzed to determine which serial dilution is to be used for further experiments.
Visual Data:
First Round of Serial Dilutions Plaque Results

10-1 agar plate: no plaques observed

10-2 agar plate: no plaques observed

10-3 agar plate: no plaques observed

10-4 agar plate: no plaques observed
10-5 agar plate: 10 plaques observed

10-6 agar plate: no plaques observed
10-5 agar plate: selected plaque for second serial dilutions

Set Up for Second Round of Serial Dilutions
Date: 9/25/2017
Title: Follow Up on the Second Round of Serial Dilutions (peformed on 9/20/2017)
Purpose: The primary objective of this experiment is to determine which serial dilution, from the second round of serial dilutions, is to be used in additional experiments that further isolates the bacteriophage.
Protocol and Procedures:
- The bench was prepared with aseptic technique, hands were washed, and supplies were assembled.
- The agar plates were taken from the incubator, and placed on the bench top. The tape was carefully unraveled and each agar plate was examined for plaques. Photos were taken as a way to record the visual data.
- It was determined and visually confirmed by other peers that there were no plaques located on any of the six plates from the second round of serial dilutions that was performed on 9/20/2017.
- It was then decided that a second attempt of second serial dilutions was to be performed, by using another plaque on the 10-5 agar plate that was a result of the first round (performed on 9/18/2017) of serial dilutions which was successful.
- The protocol for picking a plaque, and performing serial dilutions was followed, which is previously outline from previous experiments.
- 10:00 AM: Picking a plaque and serial dilutions were performed.
- 10:14 AM: Culture tubes were inoculated with phage samples (six serial dilution microcentrifuge tubes, to their respective culture tube of 250 µl of host bacteria, properly labeled).
- The protocol for picking a plaque, and performing serial dilutions was followed, which is previously outline from previous experiments.
- 10:19-10:24: Culture tubes were allowed to sit.
- 10:25: The process of making agar plates begin. Protocol outlined previously was followed.
- 11:15 AM: After allowing the plates to solidify for approximately 30 minutes, they were compiled together with tape, labeled and set in the incubator.
Results: Since phage was not present after the incubation of the second serial dilutions performed on 9/20/2017, the decision to continue with another round of serial dilutions was made, but by using another plaque from the 10-5 , plate obtained from the first round of serial dilutions. With careful preparation, six agar plates were properly prepared by using aseptic technique to ensure that cross contamination is not a factor in affecting the results of the agar plates.
Analysis and Interpretations: The technique of preparing the top agar, and plating it onto the agar plate is improving with each experience. Picking a plaque might be an underlying factor as to why the second serial dilutions was not successful.
Future Plans: Within the next laboratory day, the six agar plates will be visually analyzed to determine if the second attempt of the second serial dilutions was successful, and if so which agar plates will be used for further experiments.
Date: 9/27/2017
Title: Follow Up on the Second Attempt of the Second Serial Dilutions ( performed on 9/25/2017)
Purpose: The primary objective of this experiment is to determine which serial dilution, from the second attempt of the second serial dilutions (performed on 9/25/2017), is to be used in additional experiments that further isolates the bacteriophage.
Protocol and Procedures:
- The bench was prepared with aseptic technique, hands were washed, and supplies were assembled.
- The agar plates were taken from the incubator, and placed on the bench top. The tape was carefully unraveled and each agar plate was examined for plaques. Photos were taken as a way to record the visual data.
- It was determined and visually confirmed by other peers that there were no plaques located on any of the six plates from the second attempt of the second serial dilutions that was performed on 9/25/2017.
- It was then decided that a third attempt of second serial dilutions was to be performed, by using another plaque (third to be identified) on the 10-5 agar plate that was a result of the first round of serial dilutions (performed on 9/18/2017) which was successful.
- The protocol for picking a plaque, and performing serial dilutions was followed, which is previously outline from previous experiments.
- 9:16 AM: Picking a plaque and serial dilutions were performed.
- As the third attempt of this protocol, it was imperative that picking the plaque was successful. To ensure this, another peer observed as the protocol of picking a plaque was performed, with careful observation when the micropipette tip was placed in the center of the plaque to obtain phage. The key difference was that in the past two attempts, the micropipette tip was inserted at an angle rather than from the directly above. Therefore on this third attempt, the tip was inserted from above into the center of the plaque. This may be a factor in why the previous attempts were unsuccessful.
- 9:41 AM: Culture tubes were inoculated with phage samples (six serial dilution microcentrifuge tubes, to their respective culture tube of 250 µl of host bacteria, properly labeled).
- 9:16 AM: Picking a plaque and serial dilutions were performed.
- The protocol for picking a plaque, and performing serial dilutions was followed, which is previously outline from previous experiments.
- 9:47 AM: Culture tubes were allowed to sit, for 5 minutes, followed by the process of making agar plates begin. Protocol outlined previously was followed.
- 10:24 AM: Agar plates were set to solidify.
- 11:00 AM: After allowing the plates to solidify, they were compiled together with tape, labeled and set in the incubator.
Results: Since phage was not present after the incubation of the second attempt of the second serial dilutions performed on 9/25/2017, the decision to continue with another round of serial dilutions was made. Since the last two attempts were unsuccessful, the decision was also made to recruit a peer and perform the protocol under their careful observation. When selecting the agar, the micropipette tip was inserted from above rather than at an angle which was done from past attempts. With careful preparation, six agar plates were properly prepared by using aseptic technique to ensure that cross contamination is not a factor in affecting the results of the agar plates.
Analysis and Interpretations: The technique of preparing the top agar, and plating it onto the agar plate is improving with each experience. Picking a plaque might be an underlying factor as to why the second attempt of second serial dilutions was not successful.
Future Plans: Within the next laboratory day, the six agar plates will be visually analyzed to determine if the third attempt of the second serial dilutions was successful, and if so which agar plates will be used for further experiments.
Visual Data:
Results of Second Attempt at Second Round of Serial Dilutions Plaque
10-1 agar plate: no plaques observed
10-2 agar plate: no plaques observed
10-3 agar plate: no plaques observed
10-4 agar plate: no plaques observed
10-5 agar plate: 10 plaques observed
10-6 agar plate: no plaques observed
Set Up of Third Attempt of Seond Serial Dilutions
Date: 9/29/2017
Title: Follow Up on the Third Attempt of the Second Serial Dilutions (9/27/2017)
Purpose: The primary objective of this experiment is to determine which serial dilution, from the third attempt of the second round of serial dilutions, is to be used in additional experiments that further isolates the bacteriophage.
Protocol and Procedures:
- The bench was prepared with aseptic technique, hands were washed, and supplies were assembled.
- The agar plates were taken from the incubator, and placed on the bench top. The tape was carefully unraveled and each agar plate was examined for plaques. Photos were taken as a way to record the visual data.
- 1:54 PM: It was visually confirmed that plaques were located on agar plates. The morphology and characteristics of the plaques will be outlined in detail within the following laboratory day (10/02/2017).
Results: Due to the modifications made during the third attempt of the second serial dilutions (performed on 9/27/2017), the resulting agar plates were successful. Plaques were visually confirmed several of the agar plates.
Analysis and Interpretations: Since modifications to the way that a plaque was chosen had resulted in successful agar plates, then it may be concluded that the way the phage is obtained by the manner at which the micropipette is inserted into the plaque significantly affects the results of the agar plates. It is advisable to insert the tip from directly above into the center of the plaque (the modification that had been made in the third attempt), rather than at an angle (which was performed during previous attempts).
Future Plans: Within the next laboratory day it will be determined which agar plate is selected to be used for further experiments on 10/02/2017.
Date: 10/02/2017
Title: Visualization of the Agar Plates & Collection of the Lysate
Purpose: The primary objective of this experiment is to visualize the agar plates (created on 9/27/2017), and determine which agar plate is used for following experiments (collection of the lysate and spot titer).
Protocol and Procedures:
- The bench was prepared with aseptic technique, hands were washed, and supplies were assembled.
- The agar plates were taken from the incubator, and placed on the bench top. The tape was carefully unraveled and each agar plate was examined for plaques. Photos were taken as a way to record the visual data.
- Visualization:
- 10-1: No plaques were observed on this agar plate.
- 10-2: Numerous plaques were observed on this agar plate.
- Visualization:
- 10-3: Approximately 20 plaques were observed on this agar plate.
- 10-4: Approximately 4 plaques were observed on this agar plate.
- 10-5: No plaques were observed on this agar plate.
- 10-6: No plaques were observed on this agar plate.
- Collecting Plate Lysates (6.3):
- Pages 47-48 were used as a reference. Note: each procedure was completed near the Bunsen burner, within the aseptic zone. If a micropipette was used to transfer liquids, then new micropipette tips were used for each new transfer to avoid cross contamination.
- Identifying Agar Plate for Lysate Collection (Procedure B).
- The 10-2 agar plate was selected to be used for the collection of a lysate.
- Flood a Webbed Plate (Procedure C).
- 9:04 AM: 8ml of phage buffer was transferred into the agar plate (10-2), and allowed to incubate for approximately 2 hours.
- 11:17 AM: After incubating on the bench top (room temperature), for approximately 2 hours, the lysate was prepared to be collected. However, upon collection, it seemed that the lysate absorbed into the agar therefore at 11:25 AM, an additional 8ml of phage buffer was transferred to the agar plate.
- Harvesting the Plate Lysate (Procedure D).
- 5:50 PM: After the lysate was allowed to incubate (room temperature), the lysate was ready to be collected.
- A sterile package containing a 5ml syringe was opened. A sterile package containing a 0.22 µm filter was opened.
- Using a 5ml syringe lysate was aspirated from the agar plate.
- The 5ml syringe was then carefully attached to the 0.22 µm filter, and then placed over a 15ml sterile conical tube.
- Approximately 3ml of lysate was collected.
- The 15ml conical tube, with 3 ml of filtered lysate, was placed in the refrigerator for further experiments.
Results: After today’s experiment, 3ml of filtered lysate were successfully collected.
Analysis and Interpretations: The selection of the agar plate to be used for the collection of the lysate, depends on the amount of plaques observed on the plate. 10-2 was selected, and used for the collection of the plate lysate.
Future Plans: Within the next laboratory day the Spot Titer protocol will be started.
Date: 10/04/2017-10/06/2017
Title: Spot Titer Protocol
Purpose: The primary objective of this experiment is to use the filtered lysate for a spot titer protocol.
Protocol and Procedures:
- The bench was prepared with aseptic technique, hands were washed, and supplies were assembled.
- 9:04 AM: the filtered lysate (3ml collected from 10/04/2017), were used for the Serial Dilutions (6.2) protocol to create dilutions that would be used to spot the plate in their respective quadrants. As a result eight microcentrifuge tubes were prepared and labeled from 10-1 to 10-8.
- Spot Titer (6.4) with Plate Lysate (collected from 10-2 agar plate).
- Pages 49-51 were used as a reference. Note: each procedure was completed near the Bunsen burner, within the aseptic zone. If a micropipette was used to transfer liquids, then new micropipette tips were used for each new transfer to avoid cross contamination. If plating a plate with top agar, then the neck of the flask containing the top agar is passed through the flame after being uncapped and before being capped.
- Selecting and Labeling Plate for Spot Titer (Procedure B).
- 9:20 AM: The agar plate was successfully labeled for a spot titer, and divided into 9 quadrants.
- Preparing a Bacterial Lawn (Procedure C).
- A sterile 5ml pipette was used to transfer 3ml of molten top agar to a tube containing 250 µl of host bacteria, and immediately aspirated to then be transferred to an agar plate.
- 9:24 AM: the agar plate was set to solidify, after two hours the agar had not properly solidified.
- 11:09 AM: the plate was left to continue solidifying throughout the remainder of the day, and would be checked the following day (10/05/2017) to ensure that it was properly solidified to continue the spot titer protocol.
- 10/05/2017: at 9:00 AM, the plate had been moved and could not be located therefore at 9:15 AM, a new agar plate was created under the same protocol as previously completed the day before. The plate was left to continue solidifying throughout the remainder of the day, and would be checked the following day (10/06/2017) to ensure that it was properly solidified to continue the spot titer protocol.
- 10/06/2017: at 1:09 PM, the plate agar was located, was properly solidified and the spot titer protocol was continued.
- 10/06/2017: Spotting Dilutions and Negative Control (Phage Buffer) on the Prepare Bacterial Lawn (Procedure E).
- 3 µl of each serial dilutions samples (10-1 to 10-8), as well as 3 µl of phage buffer (negative control) were aseptically transferred onto their proper locations on the bacterial lawn.
- 1:23 PM: the liquid spots were allowed to absorb into the agar for at least 30 minutes.
- 1:54 PM: the agar plate was carefully lifted to the incubator for proper incubation.
Results: By 10/06/2017, a spot titer was successfully prepared to incubate for further experimental protocol.
Analysis and Interpretations: Allowing the spot liquid to properly absorb into the agar will ensure that the liquid does not cross to other quadrants.
Future Plans: Within the next laboratory day (10/09/2017) the Spot Titer will be observed to determine which serial dilutions should be plated for the Full Plate Titer protocol.
Date: 10/09/2017-10/11/2017
Title: The Continuation of the Spot Titer Protocol 10/11/2017)
Purpose: The primary objective of this experiment is to examine the spot titer that was created on 10/05/2017.
Protocol and Procedures:
- The bench was prepared with aseptic technique, hands were washed, and supplies were assembled.
- The agar plate (prepared on 10/05/2017) was removed from the refrigerator to be examined. There seemed nothing to have indicated that anything grew. The professor informed students that the plates placed in the incubator on Friday (10/05/2017) had been placed in the refrigerator by the evening, therefore it was suggested that the agar plate be placed back into the incubator to allow for further incubation.
- 9:31 AM: the spot titer agar plate was placed in the incubator, and will be examined the following laboratory day (10/11/2017).
- 10/11/2017: The agar plate that had to be further incubated (on 10/09/2017), was removed from the incubator and examined.
- Under visual examination, the individual spots seemed to have been contaminate, therefore suggesting that the filtered lysate used to create the serial dilutions that were spotted may also be contaminated. The microcentrifuge tubes used to create the serial dilutions were carefully examined, and it was visually confirmed that white particulate matter was located at the bottom of each microcentrifuge tube (10-1 to 10-8). It was suggested to re-filter the lysate using a sterile 0.22µm filter, collected into another sterile 15ml conical tube. Photos of one of the contaminated microcentrifuge tubes, and the contaminated spot titer were taken to record this visual data.
- The collected lysate was re-filtered using another 0.22µm filter, and collected into another sterile 15ml conical tube.
- 10:00 AM: Following the serial dilutions protocol as stated from previous experiments (new micropipette tips were used between each transfer), eight microcentrifuge tubes were prepared and labeled from 10-1 to 10-8.
- 10:17 AM: Top agar was successfully plated, and the agar plate was allowed to further solidify and the serial dilutions, prepared with the re-filtered lysate were placed in the refrigerator.
- 7:31 PM: 3 µl of each serial dilutions samples (10-1 to 10-8), as well as 3 µl of phage buffer (negative control) were aseptically transferred onto their proper locations on the bacterial lawn.
- 7:41-8:13 PM: the liquid spots were allowed to absorb into the agar. The agar plate was placed in the incubator.
Results: By 10/11/2017, a spot titer was successfully prepared to incubate for further experimental protocol, since the previous spot titer (prepared on 10/05/2017) was contaminated.
Analysis and Interpretations: Re-filtering the lysate and creating additional serial dilutions from it and spotting them on an agar plate (spot titer) should absolve the contamination issue that was visually confirmed on 10/09/2017. On 10/13/2017, it will be determined whether re-filtering the lysate absolved this issue.
Future Plans: Within the following day (10/13/2017) the second Spot Titer (prepared with the re-filtered lysate) will be observed to determine which serial dilutions should be plated for the Full Plate Titer protocol.
Date: 10/13/2017
Title: The Continuation of the Spot Titer Protocol and Start of the Full Plate Titer
Purpose: The primary objective of this experiment is to examine the spot titer that was created on 10/11/2017, and determine which serial dilutions should be plated under the Full Plate Titer protocol.
Protocol and Procedures:
- The bench was prepared with aseptic technique, hands were washed, and supplies were assembled.
- 10:55 AM: the spot titer agar plate was carefully removed from the incubator.
- Under visual examination, the spot titer was successful. No contamination was evident.
- The serial dilutions that were selected for the full plate titer were 10-6, 10-7, and 10-8.
- Full Plate Titer (6.5) with Re-filtered Plate Lysate.
- Pages 52-53 were used as a reference. Note: each procedure was completed near the Bunsen burner, within the aseptic zone. If a micropipette was used to transfer liquids, then new micropipette tips were used for each new transfer to avoid cross contamination. If plating a plate with top agar, then the neck of the flask containing the top agar is passed through the flame after being uncapped and before being capped.
- The quadrant for the negative control seemed to have phage plaques, therefore it was decided to also plate a negative control to determine if the phage buffer is contaminated to prevent from being used in further experimental protocol.
- The titer was calculated for 10-6, 10-7, and 10-8, using the formula: Titer (pfu/ml) = (#pfu/volume used in µl) x (103 µl/ml) x dilution factor (the reciprocal of the dilution used).
- The following values were calculated:
- 10-6 titer: 5.00 x 10⁹ pfu/ml
- 10-7 titer: 1.33 x 10⁹ pfu/ml
- 10-8 titer: 1.33 x 10¹¹ pfu/ml
- Perform Plaque Assay Protocol with Selected Dilutions (Procedure 2)
- 11:27 AM: The plaque assay protocol was started to create four agar plates labeled: negative control (phage buffer), 10-6, 10-7, and 10-8.
- 11:31 AM: four culture tubes were labeled negative control (phage buffer), 10-6, 10-7, and 10-8 and inoculate with their respective phage samples and phage buffer (10 µl of each).
- 11:42 AM: the culture tubes were allowed to sit for six minutes to ensure adherence.
- 11:50 AM: six agar plates were successfully created under the plaque assay protocol outline in previous experiments, and then at 11:59 AM were allowed to solidify for an additional 30 minutes.
- 12:30 AM: the four agar plates were carefully wrapped together and placed in the incubator for further incubation.
Results: The spot titer that was prepared with the re-filtered lysate was successful, which allowed the beginning of the Full Plate Titer protocol. Four agar plates (labeled negative control (phage buffer), 10-6, 10-7, and 10-8) were successfully prepared and incubate.
Analysis and Interpretations: Re-filtering the lysate seemed absolve the contamination issue that was visually confirmed on 10/09/2017, which allowed for the continuation on to the Full Plate Titer protocol
Future Plans: Within the following day (10/16/2017) the second Full Plate Titer will be observed to determine which serial dilutions should be plated used in further experimental protocol.
Date: 10/13/2017
Title: The Continuation of the Spot Titer Protocol and Start of the Full Plate Titer
Purpose: The primary objective of this experiment is to examine the spot titer that was created on 10/11/2017, and determine which serial dilutions should be plated under the Full Plate Titer protocol.
Protocol and Procedures:
- The bench was prepared with aseptic technique, hands were washed, and supplies were assembled.
- 10:55 AM: the spot titer agar plate was carefully removed from the incubator.
- Under visual examination, the spot titer was successful. No contamination was evident.
- The serial dilutions that were selected for the full plate titer were 10-6, 10-7, and 10-8.
- Full Plate Titer (6.5) with Re-filtered Plate Lysate.
- Pages 52-53 were used as a reference. Note: each procedure was completed near the Bunsen burner, within the aseptic zone. If a micropipette was used to transfer liquids, then new micropipette tips were used for each new transfer to avoid cross contamination. If plating a plate with top agar, then the neck of the flask containing the top agar is passed through the flame after being uncapped and before being capped.
- The quadrant for the negative control seemed to have phage plaques, therefore it was decided to also plate a negative control to determine if the phage buffer is contaminated to prevent from being used in further experimental protocol.
- The titer was calculated for 10-6, 10-7, and 10-8, using the formula: Titer (pfu/ml) = (#pfu/volume used in µl) x (103 µl/ml) x dilution factor (the reciprocal of the dilution used).
- The following values were calculated:
- 10-6 titer: 5.00 x 10⁹ pfu/ml
- 10-7 titer: 1.33 x 10⁹ pfu/ml
- 10-8 titer: 1.33 x 10¹¹ pfu/ml
- Perform Plaque Assay Protocol with Selected Dilutions (Procedure 2)
- 11:27 AM: The plaque assay protocol was started to create four agar plates labeled: negative control (phage buffer), 10-6, 10-7, and 10-8.
- 11:31 AM: four culture tubes were labeled negative control (phage buffer), 10-6, 10-7, and 10-8 and inoculate with their respective phage samples and phage buffer (10 µl of each).
- 11:42 AM: the culture tubes were allowed to sit for six minutes to ensure adherence.
- 11:50 AM: six agar plates were successfully created under the plaque assay protocol outline in previous experiments, and then at 11:59 AM were allowed to solidify for an additional 30 minutes.
- 12:30 AM: the four agar plates were carefully wrapped together and placed in the incubator for further incubation.
Results: The spot titer that was prepared with the re-filtered lysate was successful, which allowed the beginning of the Full Plate Titer protocol. Four agar plates (labeled negative control (phage buffer), 10-6, 10-7, and 10-8) were successfully prepared and set to incubate.
Analysis and Interpretations: Re-filtering the lysate seemed absolve the contamination issue that was visually confirmed on 10/09/2017, which allowed for the continuation on to the Full Plate Titer protocol
Future Plans: Within the following day (10/16/2017) the second Full Plate Titer will be observed to determine which serial dilutions should be plated and used in further experimental protocol.
Date: 10/16/2017
Title: Follow Up on The Spot Titer Protocol
Purpose: The primary objective of the experiment is to visually observe the Full Plate Titers created on 10/13/2017.
Protocol and Procedures:
- The bench was prepared with aseptic technique, hands were washed, and supplies were assembled.
- 9:00 AM; the agar plates were carefully obtained from the incubator.
- Visual observations of Full Plate Titers:
- Negative control (phage buffer): 20 plaques were observed
- 10-6 Full Plate Titer: 9 plaques were observed.
- Estimated titer was calculated to be 9.0 x 10⁸ pfu/ml and used in the calculation to estimate the volume of lysate needed to create a webbed plate, which was calculated to be 3.33 x 10⁻³ ml. The equations are outlined in previous experimental protocol and can be located in detail of pages 53 and 57 in the laboratory manual. It would be planned to create six webbed plates (2 of 1µl of the 10-3 serial dilution, 2 of 3.3 µl of the 10-3 serial dilution, and 2 of 10µl of the 10-3 serial dilution) for the collection of lysate of a known titer.
- 10-7 Full Plate Titer: 1 plaque was observed.
- 10-8 Full Plate Titer: No plaques were observed.
- 11:00 AM: at the recommendation of the professor, an additional negative control was created by following the Plaque Assay protocol to determine whether the phage buffer can be used in additional experiments or whether it needs to be appropriately discarded. The continuation of the Webbed Plate protocol cannot be continued in the possibility of the phage buffer, used to create the previous serial dilutions is contaminated with phage resulting in the 20 observed plaques on the negative control (plaques will not normally be observed on a negative control). If there are observed plaques on the second negative control then calculations and agar plates calculated and made from serial dilutions involved with this phage buffer may need to be disregarded and discarded, respectively.
- 11:18 AM: new serial dilutions were created with the filtered lysate, but used with a different sterile phage buffer in case if the current phage buffer is contaminated with phage.
- 11:35AM: The negative control agar plate was placed in the incubator.
Results: Plaques were observed on the 10-6, 10-7, and 10-8 full plate titers as well as the negative control (phage buffer). It may be possible that the phage buffer is contaminated with phage therefore an additional negative control was created to determine so.
Analysis and Interpretations: Plaques were observed on the spot titers, however the presence of plaques on the negative control may be an indication that the phage buffer is contaminated with phage.
Future Plans: Within the following laboratory day (10/18/2017) the second negative control will be observed to determine if the phage buffer used to create the full plate titers on 10/13/2017 is contaminated with phage.
Date: 10/18/2017
Title: Follow Up on Second Negative Control
Purpose: The primary objective of the experiment is to visually observe the Full Plate Titers created on 10/13/2017.
Protocol and Procedures:
- The bench was prepared with aseptic technique, hands were washed, and supplies were assembled.
- The negative control was obtained from the incubator and visually observed. There were three plaques located on the agar plate, an indication that the phage buffer was contaminated with phage. Agar plates created from serial dilutions with this contaminated phage buffer will be properly discarded, as well as any calculations reported for the estimated volume of lysate needed for webbed plates (calculated on 10/16/2017) should be
- Full Plate Titers were created from the new serial dilutions made with another sterile phage buffer, and plated with the Plaque Assay protocol used in previous experiments.
- The following Full Plate Titers were created and labeled: 10-5, 10-6, 10-7, and 10-8.
- 10:13 AM: culture tubes with 250µl of host bacteria were inoculated with 10µl of serial dilution phage sample.
- 10:22 AM-10:27AM: the inoculated culture tubes were allowed to sit undisturbed for phage attachment.
- 3ml of molten top agar was used to plate each serial dilution to its respective agar plate, for a total of four plates labeled from 10-5 to 10-8. New sterile 5ml pipettes were used between each transfer.
- 10:39 AM: the agar plates were allowed to solidify.
- 11:15AM: the agar plates were carefully transferred to the incubator, and allowed to further incubate.
Results: Full plate titers for new serial dilutions (made from another sterile phage buffer) were created since the second negative control was evident with plaques, suggesting that the phage buffer was contaminated with phage.
Analysis and Interpretations: As a result of the negative control observed with plaques, the phage buffer was properly discarded.
Future Plans: Within the following laboratory day (10/20/2017) the plated full plate titers of 10-6, 10-7, and 10-8 will be observed to further determine which serial dilutions will be used to estimate the titer needed to create webbed plates.
Date: 10/20/2017
Title: Follow Up on Full Plate Titers (created 10/18/2017).
Purpose: The primary objective of the experiment is to visually observe the Full Plate Titers created on 10/18/2017.
Protocol and Procedures:
- The bench was prepared with aseptic technique, hands were washed, and supplies were assembled.
- 1:10 PM: plaques were not observed on any of the full plate titers (labeled from 10-5 to 10-8) created 10/18/2017.
- Following the professor’s suggestion, full plate titers were created for the lower serial dilutions of 10-1, 10-2, 10-3, and 10-4.
- 1:31 PM: labeled culture tubes were inoculated with serial dilutions of phage buffer, and allowed to sit for 7 minutes.
- 1:48 PM: top agar had not yet been created, therefore it must be waited upon before continuing with the protocol.
- 4:50 PM: the full plate titers were created by 3ml of molten top agar, transferred to each culture tube, aspirated and then plated on a labeled agar plate. New sterile 5ml pipettes were used between each transfer.
- 5:33 PM: the agar plates were transferred to the incubator for further incubation.
Results: There were no observed plaques on the agar plates labeled from 10-5 to 10-8. Therefore, additional full plate titers were created for the lower serial dilutions of 10-1 to 10-4.
Analysis and Interpretations: Plaques were not evident on the agar plates of 10-5 to 10-8, and it may be that the lower dilutions will result in plaques.
Future Plans: Within the following laboratory day (10/22/2017) the plated full plate titers of 10-1, 10-2,10-3. and10-4 will be observed to further determine which serial dilutions will be used to estimate the titer needed to create webbed plates.
Date: 10/22/2017
Title: Follow Up on Full Plate Titers (created 10/20/2017).
Purpose: The primary objective of the experiment is to visually observe the Full Plate Titers created on 10/20/2017.
Protocol and Procedures:
- The bench was prepared with aseptic technique, hands were washed, and supplies were assembled.
- 2:00 PM: the agar plates were carefully obtained from the incubator, and visually examined for plaques. There were no plaques observed on any of the agar plates labeled 10-1, 10-2, 10-3, and 10-4.
- The lysate, collected on 10/02/2017 and re-filtered on 10/11/2017, may no longer contain active phage which is a result of why the full plated titers of 10-1 to 10-8 are not evident with plaques. The professor suggested to select a new plaque, create additional serial dilutions with it and make full plate titers from them. Picking the Plaque protocol, outline in previous experiments was followed.
- 3:11 PM: a new plaque was identified and selected. 100µl of sterile phage buffer was aseptically transferred to a 1.5 ml microcentrifuge tube labeled “S”. A new micropipette tip was inserted from directly above into the center of the plaque, and then placed into the microcentrifuge tube labeled “S” and pipetted in and out to dislodge phage into the phage buffer. The serial dilution protocol was proceeded creating serial dilutions labeled 10-1 to 10-8 with a 10 second vortex of each microcentrifuge tube in between each transfer, using new micropipette tips each time.
- 3:32 PM: the Plaque Assay protocol was followed to create full plate titers of each new serial dilutions to result into a total of eight agar plates.
- 3:34 PM: culture tubes with 250µl of host bacteria were inoculated with 10µl of serial dilution phage sample.
- 3:42 PM- 3:52: the culture tubes were allowed to sit for 10 minutes to ensure phage attachment.
- Following the Plaque Assay protocol, 3ml of molten top agar were used to plate each serial dilution onto agar plates respectively labeled.
- 4:16 PM: the agar plates, labeled 10-1 to 10-8, were allowed to solidify for 30 minutes.
- 4:20 PM: it was decided to create an agar plate with lysate (collected from 10/02, and re-filtered on 10/11) to fully determine if active were present. This agar plate was labeled as a positive control.
- 4:24 PM: a culture tube (labeled as “+ control) with 250µl of host bacteria was inoculated with 10µl of undiluted lysate.
- 4:34 PM: the agar plate was created (following the plaque assay protocol).
- 4:46 PM: all agar plates were carefully placed in the incubator for further incubation.
Results: There were no observed plaques on the agar plates labeled from 10-1 to 10-4. Therefore, additional full plate titers were by serial dilutions created from a new plaque.
Analysis and Interpretations: Plaques were not evident on the agar plates of 10-5 to 10-8, and it may be that the lysate (collected on 10/02/2017 and re-filtered on 10/11/2017), may not contain any active phage. A positive control was created to determine if this may be the case.
Future Plans: Within the following laboratory day (10/25/2017) the plated full plate titers of 10-1 to10-8 (created from serial dilutions with a new plaque) will be observed to further determine which serial dilutions will be used to estimate the titer needed to create webbed plates, if plaques are observed.
Date: 10/25/2017
Title: Follow Up on Full Plate Titers (created 10/22/2017).
Purpose: The primary objective of the experiment is to visually observe the Full Plate Titers created on 10/22/2017.
Protocol and Procedures:
- The bench was prepared with aseptic technique, hands were washed, and supplies were assembled.
- The agar plates were carefully obtained from the incubator, and visually examined for plaques. There was slight clearing on the positive control agar plate however it was not evident with well-defined plaques. There no plaques observed on any of the agar plates of 10-1 to 10-8 (created from plating serial dilutions of a new plaque), with the 10-2 having slight clearing but not evident with well-defined plaques which would be characteristic of the phage.
- Students suggested that mixing the host bacteria culture tubes by lightly tapping the tube increases the likelihood of well-defined plaques forming on the agar plate.
- Following the suggestion of the professor, a new plaque was selected (from three possible plaques that were identified and labeled 1, 2, and 3) and Picking a Plaque protocol was followed for the first plaque identified.
- 9:50 AM: 90µl of sterile phage buffer was aseptically transferred to a 1.5 ml microcentrifuge tube.
- 11:12 AM: A new micropipette tip was inserted into plaque 1 and then carefully placed into the phage buffer and aspirated in and out to dislodge phage into the phage buffer.
- Instead of completing serial dilutions, a plaque assay was performed and 10µl of this undiluted phage sample (from plaque 1) was used to inoculate a culture tube containing 250µl of host bacteria. After allowing the culture tube to sit for phage attachment, 3ml of molten top agar was used to plate the inoculated host bacteria onto an agar plate. This agar plate will be used if an undiluted phage sample (from plaque 1) results in well-define plaques. The agar plate was allowed to solidify.
- 11:26 AM: the agar plate was carefully transferred to the incubator for further incubation and solidification.
Results: There were no observed plaques on the agar plates labeled from 10-1 to 10-8 created from plating serial dilutions of a new plaque. Therefore, three plaques were identified (labeled 1, 2, and 3) and a plaque assay was completed for the first identified plaque. The Picking a Plaque protocol was followed but no serial dilutions were performed.
Analysis and Interpretations: Well-defined plaques were not located on any of the agar plates or positive control therefore a new plaque was identified and following the Plaque Assay protocol an agar plate was created and placed in the incubator. The lysate (collected on 10/02/2017 and re-filtered on 10/11/2017) was plated and observed. There were no well-defined plaques observed on the agar plate, which may further indicate that the lysate does not contain any active phage.
Future Plans: Within the following laboratory day (10/30/2017) the agar plate created with an undiluted phage sample will be observed.
Date: 10/30/2017-11/06/2017
Title: Follow Up on Full Plate Titer (created 10/25/2017) and Adoption of a New Phage Followed by Five Attempts at DNA Extraction (Protocol 9.1)
Purpose: The primary objective of the experiment is to visually observe the Full Plate Titers created on 10/25/2017.
Protocol and Procedures:
- The bench was prepared with aseptic technique, hands were washed, and supplies were assembled.
- The agar plate was carefully obtained from the incubator, and visually examined for plaques. Under observation, there was no plaques that had formed.
- After careful consideration, and with the advice from others, the decision was made to pair with a graduating student (Brandi Mc Elroy) and assist in further isolating the bacteriophage, ultimately adopting another bacteriophage to continue on with.
- Environmental Sample Data Sheet for Adopted Phage:
| Sample | 3 |
| Collector Name | Morgan Gaitan (adopted by Brandi Mc Elroy) |
| Date of Collection | 9/4/2017 |
| Sample Type | Soil |
| Location Description | Compost Bed |
| General Location | (Residential) Subdivision |
| Specific Location | 29° 34′ 36.480″ N,
98° 15′ 54.360″ W |
| Sample Depth | 1.5 inches |
| Ambient Temperature | 82° F |
| High Titer Lysate Concentration | 4.2 x 10¹¹ titer (pfu/ml). |
- 10/30/2017: At this time, Brandi Mc Elroy was about to begin measuring the concentration of the bacteriophage’s genomic DNA using the Quibit™ 3.0 Fluorometer.
- Prior to this, Brandi conducted the Protocol 9.1: Phage DNA Extraction.
- Based upon the Quibit™ 3.0 Fluorometer User Manual and Guide, Standard One, Standard Two, and bacteriophage DNA samples were successfully prepared.
- The measured concentration was 66.3 ng/μL. The measured concentration was a low yield, therefore it was decided to redo the Protocol 9.1: Phage DNA Extraction with a modification of adding 15μl of EDTA within the next laboratory day (10/31/2017)
- 10/31/2017: Second Attempt at Protocol 9.1 with Modification of Adding 15 μl of EDTA:
- Protocol 9.1: Phage DNA Extraction was adhered to, but with a slight modification in Procedure B, step 6 (p.74):
- To obtain higher yields 15μl of EDTA was added.
- By the end of the protocol, the genomic DNA concentration was measured at 76.0 ng/μL, which was a higher yield than the concentration obtained from 10/30/2017 (66.3 ng/μL).
- During the first and second attempt at extracting DNA, the yields were 66.3 ng/μL, and 76.0 ng/μL respectively, which is considerably lower than the standard of 100 ng/μL required for restrictive enzyme digests and gel electrophoresis.
- Therefore it was decided to redo the Protocol 9.1: Phage DNA Extraction with a modification of adding 10μl of Nuclease Mix (instead of the suggested 5μl) within the following laboratory day (11/1/2017).
- Protocol 9.1: Phage DNA Extraction was adhered to, but with a slight modification in Procedure B, step 6 (p.74):
- 11/1/2017: Third Attempt at Protocol 9.1 with Modification of Adding 10 μl of Nuclease Mix:
- Protocol 9.1: Phage DNA Extraction was adhered to, but with a slight modification in Procedure B, step 2 (p.74):
- To obtain higher yields 10μl of Nuclease Mix (instead of the suggested 5μl), in addition to the modification of adding 15μl of EDTA.
- By the end of the protocol, the genomic DNA concentration was measured at 13.9 ng/μL, which was a lower yield than the concentrations obtained from 10/30/2017 (66.3 ng/μL) and 10/31/2017 (76.0 ng/μL).
- This considerably lower than the standard of 100 ng/μL required for restrictive enzyme digests and gel electrophoresis.
- Therefore it was decided to redo the Protocol 9.1: Phage DNA Extraction with a modification of adding 10μl of Nuclease Mix (instead of the suggested 5μl) in addition to the 15μl of EDTA but with a longer inverting time of 6 minutes (more time than the suggested 2 minutes) within the following laboratory day (11/6/2017). This was suggested by other students who obtained higher DNA concentration yields by lengthening the inversion time (Protcol 9.1, Procedure C, step 4).
- Protocol 9.1: Phage DNA Extraction was adhered to, but with a slight modification in Procedure B, step 2 (p.74):
- 11/6/2017: Fourth Attempt at Protocol 9.1 with Modification of a Longer Inverting Time:
- Protocol 9.1: Phage DNA Extraction was adhered to, but with a slight modification in Procedure C, step 4 (p.74):
- To obtain higher yields 6 minutes of inversion time was completed, in addition to the modifications of adding 10μl of Nuclease Mix (instead of the suggested 5μl), and 15μl of EDTA.
- By the end of the protocol, the genomic DNA concentration was measured at 12.9 ng/μL, which was a lower yield than the concentrations obtained from 10/30/2017 (66.3 ng/μL) and 10/31/2017 (76.0 ng/μL), and 11/01/2017 (13.9 ng/μL).
- This considerably lower than the standard of 100 ng/μL required for restrictive enzyme digests and gel electrophoresis.
- Before continuing on a fifth attempt at extracting DNA, advice from another, suggested that an additional approach to DNA extraction could be taken.
- Suggestion:
- Centrifuge 6ml of the high titer lysate by using four 1.5 ml microcentrifuge tubes, at a specified rpm and temperature. Then aspirate 1.75 ml of supernatant from each tube, which would then leave a total volume of 1ml in total, which would contain a more concentrated DNA before attempting the Protocol 9.1 for the fifth time.
- Within the following laboratory day (11/8/2017) it will be determined if the suggestion, or on other’s advice will be used to prepare the lysate for Protocol 9.1
- Suggestion:
- Protocol 9.1: Phage DNA Extraction was adhered to, but with a slight modification in Procedure C, step 4 (p.74):
Results: There were no observed plaques on the agar plate on 10/30/ 2017, therefore it was decided to pair with another student who was beginning Protocol 9.1: Phage DNA Extraction. Therefore four additional attempts have been made with modifications each time, however the DNA extraction yields were 66.3 ng/μL (10/30/2017) and 76.0 ng/μL (10/31/2017), 13.9 ng/μL (11/01/2017), and 12.9 ng/μL (11/06/2017). None of these concentration yield met the standard of 100 ng/μL, which is high enough to continue on with restrictive enzyme digests and gel electrophoresis
Analysis and Interpretations: Although these modifications were made and followed, the DNA concentration yield is not high enough to continue on in the experimental protocol.
Future Plans: Within the following laboratory day (11/08/2017), it will be decided how to continue forwards based on the suggestions of the instructor and other students.
Date: 11/08/2017-11/16/2017
Title: The Continuation (Fifth Attempt) of DNA Extraction (Baylor Protocol) and Attempt to Create Webbed Plates for More Lysate
Purpose: The primary objective of the experiment is to determine how to continue on to restrictive enzyme digests, and gel electrophoresis, after four prior attempts at DNA extraction.
Protocol and Procedures:
- The bench was prepared with aseptic technique, hands were washed, and supplies were assembled.
- From the previous laboratory notebook entry, it was suggested to use approximately 6ml of lysate to create a concentrated DNA sample prior to attempting Protocol 9.1, however it was also suggested to centrifuge two 1.5ml microcentrifuge tubes of high titer lysate, to achieve a similar effect of concentrating the DNA.
- Two 1.5ml of high titer lysate was centrifuged at 10,000 rpm (4° C) for one hour. After centrifugation, another student stored it in the -20 °C refrigerator for overnight, until the following laboratory day (11/13/2018).
- 11/13/2017: upon arriving to the laboratory, the lysate (3ml in total volume) had been incorrectly stored in the wrong refrigerator (which was supposed to be the 4° C refrigerator).
- Therefore two webbed plates must be created to collect additional lysate in order to continue on with DNA extraction. The webbed plates were incubated until the following laboratory day (11/15/2017), when lysate collection will be completed.
- 11/15/2017: Fifth Attempt at DNA Extraction
- 9:25 AM: 8ml of sterile phage buffer was used for one plate, while 7.5 ml (remaining volume) was used for the other plate. Allowed to incubate in room temperature.
- For a sufficient supply of high titer lysate 3 additional webbed plates were created while waiting for the incubation of webbed plates.
- 9:30 AM- 9:54 AM: serial dilutions of the high titer lysate were completed, and 3 host bacteria culture tubes were inoculated with 5 μl of the 10-4 serial dilution each tube.
- At 10:03 AM: three webbed plates were created and set to incubate until 11/19/17, when lysate would be collected.
- At 1:25 PM: the lysate was collected, and the Baylor Protocol for DNA Extraction was used (protocol can be located at the following link; file:///T:/VIRAL%20ISOLATION/DNA%20Extraction%20Protocol%20-%20Baylor.pdf)
- At 4:41 PM: the lysate was properly stored in the 4° C (Procedure B, step 3) until the continuation of the protocol on 11/16/2017.
- 11/16/2017: continue on with Procedure B, step 4 (Fifth Attempt at DNA Extraction):
- The nuclease-treated lysate was transferred to two smaller tubes (15 ml conical tubes), and placed in the centrifuge for 3,500 g (4,100 rpm) for 60 minutes.
- After centrifugation the supernatant was removed, and the pellet was suspended with 0.5ml of sterile ddH2
- 2mL of 37˚C DNA Clean Up Resin was added to the re-suspended pellet, and the solution was pipetted in and out for further mixing.
- Procedure E (isolate the phage genomic DNA) was carefully followed with the modification of centrifuging the lysate at 10,000 rpm for 5 minutes, in between each isopropanol wash.
- After the completion of the remaining protocol, the Quibit™ 3.0 Fluorometer read “too low: out of range.”
- Due to the failed attempts at DNA extraction, the executive decision was made to continue on with the DNA sample of 76.0 ng/μL (obtained 10/31/2017) for restrictive enzyme digests and gel electrophoresis on the following laboratory day (11/20/2017).
- Note: on 11/17/2017: the three agar plates were inspected, but no plaques had formed and could not be used for lysate collection.
Results: After the fifth attempt of DNA extraction, the concentration was too low to read and out of range. It was decided to continue on to the restrictive enzyme digests with the DNA concertation of 76.0 ng/μL (obtained 10/31/2017).
Analysis and Interpretations: Although these modifications were made and followed, the DNA concentration yield is not high enough to continue on in the experimental protocol.
Future Plans: Within the following laboratory day (11/20/2017), the DNA sample with the concentration of 76.0 ng/μL (obtained 10/31/2017), will be used.
Date: 11/20/2017
Title: Restriction Enzyme Digests (Protocol 10.1)
Purpose: The primary objective of the experiment is to continue on into Restriction Enzyme Digests.
Protocol and Procedures:
- The bench was prepared with aseptic technique, hands were washed, and supplies were assembled.
- Protocol 10.1 was followed to create RE reactions:
- Calculated μl of DNA needed: 6.58 μl. However, it was suggested to use 5 μl instead.
- The restriction enzyme digest reactions contained the following:
- 1μl of Restriction Enzyme
- 1μl of Buffer
- 3.5μl of Phage Genomic DNA
- 4.5μl of ddH2O
- Total Volume of RE reaction: 10μl
- For the uncut DNA (control): 24μl of ddH2O and 1μl of DNA.
- The restriction enzyme digests were allowed to incubate at 37° C for 1 hour, before being stored in the -20° C refrigerator until being used the following laboratory day (11/27/2017) for gel electrophoresis.
- The reactions were made for the following controls and RE digests: Ladder, Uncut, BAMHI, ClaI, EcoRI, HaeIII, HindIII (SalII was not included).
Results: It was decided to continue on to the restrictive enzyme digests with the DNA concertation of 76.0 ng/μL (obtained 10/31/2017). Therefore, 10μl reaction mixtures were prepared to be used in gel electrophoresis (11/27/2017).
Analysis and Interpretations: The restriction enzyme digests were prepared for gel electrophoresis.
Future Plans: Within the following laboratory day (11/20/2017) archiving high titer lysate will be completed, as well as gel electrophoresis (11/27/2017).
Date: 11/21/2017
Title: Archiving Bacteriophage Sample
Purpose: The primary objective of the experiment is to archive the high titer lysate for both the Tarleton at HHMI bacteriophage archives.
Protocol and Procedures:
- The bench was prepared with aseptic technique, hands were washed, and supplies were assembled.
- Protocol 7.3 (p. 62) was used to archive the high titer lysate by adding 1.4ml of high titer lysate with 100 μl of DMSO (cryoprotectant), and equally divided the solution into two archive tubes with 400 μl each tube (three tubes in all; two for HHMI, and one for Tarleton).
- 2:12PM: the tubes were placed -20° C refrigerator for short term storage.
Results: It was decided to continue on to the restrictive enzyme digests with the DNA concertation of 76.0 ng/μL (obtained 10/31/2017). Therefore, 10μl reaction mixtures were prepared to be used in gel electrophoresis (11/27/2017).
Analysis and Interpretations: High titer lysate has been successfully stored.
Future Plans: Within the following laboratory day (11/27/2017) gel electrophoresis will visually reveal the genetic characteristics of the extracted phage genomic DNA.
Date: 11/27/2017
Title: Gel Electrophoresis of Restriction Enzyme Digests
Purpose: The primary objective of the experiment is to continue on with the gel electrophoresis of restriction enzyme digests created 11/20/2017.
Protocol and Procedures:
- The bench was prepared with aseptic technique, hands were washed, and supplies were assembled.
- Protocol 10.2: Casting Agarose Gel was used to create an agarose gel by the following procedure:
- 10:08 AM: 0.2463 g of agarose powder was placed into an Erlenmeyer flask. 30 ml of 1x TBE buffer was then added. The solution was heated in a microwave for 30 second intervals until the precipitate was completely gone. The flask was allowed to cool to room temperature, and 1.5 μl of ethidium bromide (EtBr) red dye, while wearing gloves. A nine prong comb was inserted.
- 11:22 AM: the gel has completely solidified.
- Protocol 10.3: Gel Electrophoresis of RE digests:
- The gel electrophoresis chamber was filled with 1x TBE buffer.
- For the following controls and RE digests: Ladder, Uncut, BAMHI, ClaI, EcoRI, HaeIII, HindIII (SalII was not included), the amount that was placed in each well was:
- Ladder: 1 μl of ladder, 2 μl of loading dye.
- Uncut: 1 μl of Uncut, 2 μl of loading dye.
- BAMHI: 2 μl of BAMHI, 2 μl of loading dye.
- ClaI: 2 μl of ClaI, 2 μl of loading dye.
- EcoRI: 2 μl of EcoRI, 2 μl of loading dye.
- Hae III: 2 μl of HaeIII, 2 μl of loading dye.
- HindIII: 2 μl of HindiIII, 2 μl of loading dye.
- 12:04 PM: the wells were loaded with each respective volume, and the gel electrophoresis ran for 1 hr at 100 volts.
- At 12:50 PM: the gel was placed in a container with buffer, and placed on an inverting rocker to ensure that the gel remained mobile.
- 3:20 PM: the gel was obtained from the rocker and observed under UV light. Visual data was taken to analyze the genetic characteristics of the phage.
- The gel was not of high quality, therefore it was suggested to conduct a new set of RE digests and complete an addition gel electrophoresis.
Results: After the first attempt at the gel electrophoresis of RE digests, the visual observation of the gel suggested that it was not of high equality. Therefore, it was decided to continue on with an additional set of RE digests and gel electrophoresis.
Analysis and Interpretations: After the first attempt of gel electrophoresis, it was decided to continue on with an additional set of RE digests and another agarose gel to obtain a higher quality gel.
Future Plans: Within the following laboratory day (12/04/2017) an additional set of RE digests and gel electrophoresis will be attempted, in order to obtain a higher quality gel.
Date: 12/04/2017-12/06/2017
Title: Second Attempt at Gel Electrophoresis of Restriction Enzyme Digests
Purpose: The primary objective of the experiment is to try a second attempt at gel electrophoresis of RE digests to obtain a higher quality gel.
Protocol and Procedures:
- The bench was prepared with aseptic technique, hands were washed, and supplies were assembled.
- On 12/04/2016: Protocol 10.1 was followed to create reactions for the following controls and RE digests: Ladder, Uncut, BAMHI, ClaI, EcoRI, HaeIII, HindIII (SalII was not included).
- Calculated μl of DNA needed: 6.58 μl. However, it was suggested to use 5 μl instead.
- The restriction enzyme digest reactions contained the following:
- 1μl of Restriction Enzyme
- 1μl of Buffer
- 5μl of Phage Genomic DNA
- 5μl of ddH2O
- Total Volume of RE reaction: 10μl
- For the uncut DNA (control): 24μl of ddH2O and 1μl of DNA.
- The restriction enzyme digests were allowed to incubate at 37° C for 1 hour, before being stored in the -20° C refrigerator until being used the following laboratory day (12/06/2017) for gel electrophoresis.
- On 12/06/2017: Protocol 10.2 and 10.3 were followed to cast an agarose gel and complete gel electrophoresis:
- 2448 g of agarose powder was placed into an Erlenmeyer flask. 30 ml of 1x TBE buffer was then added. The solution was heated in a microwave for 30 second intervals until the precipitate was completely gone. The flask was allowed to cool to room temperature, and 1.5 μl of ethidium bromide (EtBr) red dye, while wearing gloves. A nine prong comb was inserted. Then gel was allowed to completely solidify.
- The amount that was placed in each well was:
- Ladder: 1 μl of ladder, 2 μl of loading dye.
- Uncut: 3.5 μl of Uncut, 2 μl of loading dye.
- BAMHI: 10 μl of BAMHI, 2 μl of loading dye.
- ClaI: 10 μl of ClaI, 2 μl of loading dye.
- EcoRI: 10 μl of EcoRI, 2 μl of loading dye.
- HindIII: 10 μl of HindiIII, 2 μl of loading dye.
- NOTE: the bolded details are modifications that have been made to the protocol to reflect the corrections to prior measurement errors made during the first attempt.
- ***HaeIII was not included.***
- 11:35 PM:the wells were loaded with each respective volume, and the gel electrophoresis ran for 1 hr at 100 volts.
- 12:35 PM: the gel electrophoresis was stopped.
- 12:46 PM: the gel was visually observed under UV light for band characteristics.
- It was noted that the second attempt at gel electrophoresis did not produce a higher quality gel, therefore within the next attempt, quality control must be ensured when completing each protocol.
Results: After the second attempt at the gel electrophoresis of RE digests, the visual observation of the gel suggested that it was not of high equality. Therefore, it was decided to continue on with an additional set of RE digests and gel electrophoresis within the immediate future (Spring 2018).
Analysis and Interpretations: After the second attempt of gel electrophoresis, it was decided to continue on with an additional set of RE digests and another agarose gel to obtain a higher quality gel.
Future Plans: Within the following semester (Spring 2018) an additional set of RE digests and gel electrophoresis will be attempted, in order to obtain a higher quality gel. It will be well noted to be meticulous with quality control during the completion of each protocol (10.1, 10.2 and 10.3).