Discovery of LemonZest
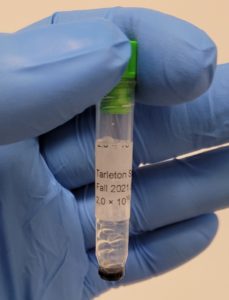
LemonZest Information
Morphology: Siphoviridae

Sample Collection
| Collector Name |
Dasire Brawley | Ivy Adame | Ivy Adame | Dasire Brawley | |
| Sample No. | 1 | 2 | 3 | 4 | |
| Date of Collection | 8/30/2021 | 8/29/2021 | 9/02/2021 | 9/08/2021 | |
| Sample Type | Soil | Soil | Soil | Soil | |
| General Location | Comanche, TX | Granbury, TX | Garland, TX | Dublin, TX | |
| Location Description | The front yard of a residence within city limits | Ant pile between a parking lot and bike trail | The backyard of a residence within city limits | The top layer of soil that is at an incline leading to the underside of a tree | |
| GPS Coordinates | 31.90340, -98.60686 | 32.4457626, -97.7867877 | 32.8599227, -96.5786044 | 32.0492406, -98.3859251 | |
| Sample Depth | 6 inches | 0-1 inches | 0-1 inches | 0-1 inches | |
| Ambient Temperature | 22°C | 29°C | 28°C | 22°C |
Isolation/Purification
Title: Direct Isolation
Date: August 30, 2021 Redo: No Sample: #1
Purpose: This procedure is to find bacteriophages within our collected soil sample through Direct Isolation.
Notes:
- The following materials were collected: environmental sample, liquid PYCa media, host bacteria (250μl), sterile 3ml or 5ml syringe, 0.22 μm syringe filter, 5ml serological pipette, microcentrifuge tubes, 15ml conical tube, and a bunsen burner.
- The student’s hands were washed and gloved prior to disinfecting the workstation.
- CiDecon was spread with Kim-Wipes to disinfect the workstation.
- 70% Ethanol alcohol was sprayed on the workstation and wiped after with Kim-Wipes to speed drying.
- Gloves were removed after disinfecting to prevent burns on the next step.
- A bunsen burner station was set up to prevent contamination.
- The original 15ml soil sample #1 was halved into another 15ml tube.
- The original soil sample #1 (now halved) was stored in the fridge.
- The microcentrifuge tube to be used for isolation was labeled “Direct Isolation” with the initials of the group members and the date of 8/30/2021.
- PYCa media was added to the 7.5ml (half of the original 15ml) soil sample via serological pipette until submerged and with about 2ml of media above the sample.
- The working soil sample was inverted a few times to get saturated with the media.
- The soil sample was added to a shaking incubator for 1-2 hours at 250rpm.
- The soil sample was moved to the fridge for a few hours.
- The workbench was cleaned and disinfected as described in Steps #2-4.
- The sample was placed in the centrifuge for 10 minutes at 4℃ to further separate the soil sample and liquid media containing bacteriophages before filtration.
- A 5ml syringe was attached to a 0.22μm filter.
- Approximately 3ml of the top of the flooded soil sample was removed from the tube via a serological pipette.
- Approximately 0.75ml of the flooded sample was filtered into a microcentrifuge tube with a 0.22μm filter.
- The microcentrifuge tube was immediately capped.
- 500μl of the filtrate was pipetted via micropipette into a tube containing 250μl of our bacterial host microbacterium foliorum.
- The tube of m. foliorum and filtrate was gently flicked with a finger and left to sit undisturbed for 10 minutes.
- At 10 minutes, 3ml of molten top agar was pipetted via a serological pipette into the tube of m. foliorum and filtrate.
- Immediately after releasing the top agar into the tube, the top agar and bacterial host/filtrate were aspirated and placed in a petri dish.
- The petri dish was slightly swirled to ensure the mixture covered the entire plate and was left to sit undisturbed for 20 minutes.
- Once the mixture solidified, the petri dish was flipped over and placed in the incubator for approximately 2 days.
- The workbench was cleaned and disinfected as described in Steps #2-4.
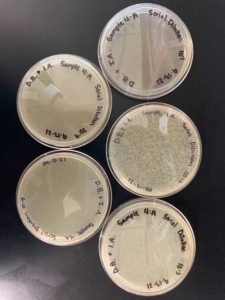
- After a photo and observations of the plate, Sample #1 was trashed in the autoclave.
Results:
Direct Isolation completed on Sample #1 wielded unsatisfactory results with no plaques formed.
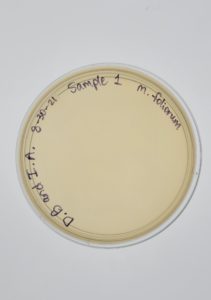
Conclusions and Next Steps:
A Serial Dilution 1:1000 will be performed to confirm or deny the presence of bacteriophages in the sample.
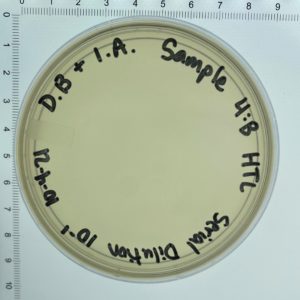
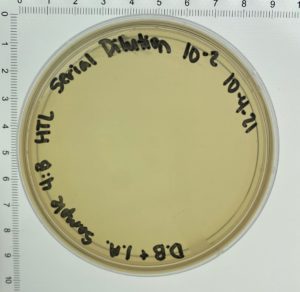
Title: Serial Dilution 1:1000
Date: September 1, 2021 Redo: Yes Sample: #1
Purpose: This procedure is to find bacteriophages within our collected soil sample through Serial Dilution 1:1000
Notes:
- The following materials were collected: phage samples for isolation, purification, or titering; host bacteria (250μl), agar plates, phage buffer, molten top agar (between 55 – 60 ˚C), microcentrifuge tubes, 5ml serological pipettes, and a bunsen burner.
- The student’s hands were washed and gloved prior to disinfecting the workstation.
- CiDecon was spread with Kim-Wipes to disinfect the workstation.
- 70% Ethanol alcohol was sprayed on the workstation and wiped after with Kim-Wipes to speed drying.
- Gloves were removed after disinfecting to prevent burns on the next step.
- A bunsen burner station was set up to prevent contamination.
- Three microcentrifuge tubes were each filled with 90μl of phage buffer via micropipette.
- The microcentrifuge tubes were labeled 1:10, 1:100, and 1:1000 respectively.10μl
- 10μl of the sample filtrate was pipetted via micropipette into the 1:10 labeled microcentrifuge and then flicked with a finger and inverted.
- 10μl of the sample filtrate/phage buffer was pipetted via micropipette from the 1:10 labeled microcentrifuge and placed in the 1:100 labeled microcentrifuge and then flicked with a finger and inverted. (a new pipette tip was used for this step)
- 10μl of the sample filtrate/phage buffer was pipetted via micropipette from the 1:100 labeled microcentrifuge and placed in the 1:1000 labeled microcentrifuge and then flicked with a finger and inverted. (a new pipette tip was used for this step)
- 10μl of the 1:1000 dilution was pipetted via micropipette into a tube containing 250μl of our bacterial host microbacterium foliorum.
- The tube of m. foliorum and filtrate were gently flicked with a finger and left to sit undisturbed for 10 minutes.
- At 10 minutes, 3ml of molten top agar was pipetted via a serological pipette into the tube of m. foliorum and filtrate.
- Immediately after releasing the top agar into the tube, the top agar and bacterial host/filtrate were aspirated and placed in a petri dish.
- The petri dish was slightly swirled to ensure the mixture covered the entire plate and was left to sit undisturbed for 20 minutes.
- Once the mixture solidified, the petri dish was flipped over and placed in the incubator for approximately 6 hours.
- The workbench was cleaned and disinfected as described in Steps #2-4.
- 6 hours after placing the petri dish into the incubator, Sample #1 through Serial Dilution was discovered to be contaminated.
- After a photo and observations of the plate, Sample #1 was trashed in the autoclave.
Results:
The Serial Dilution 1:1000 yielded contaminated results. The group members are currently unsure of what could have caused the contamination and will seek clarification from the TA.
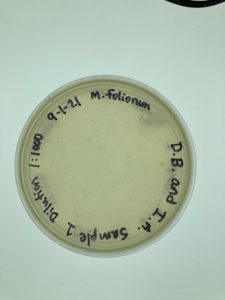
Conclusions and Next Steps:
Group members will collect a new sample and start the Direct Isolation phase. Group members will be more cautious with the next sample, carefully completing each step close to a burner flame to ensure contaminants are also not an issue.
Title: Direct Isolation
Date: August 30, 2021 Redo: No Sample: #2
Purpose: This procedure is to find bacteriophages within our collected soil sample through Direct Isolation.
Notes:
- The following materials were collected: environmental sample, liquid PYCa media, host bacteria (250μl), sterile 3ml or 5ml syringe, 0.22 μm syringe filter, 5ml serological pipette, microcentrifuge tubes, 15ml conical tube, and a bunsen burner.
- The student’s hands were washed and gloved prior to disinfecting the workstation.
- CiDecon was spread with Kim-Wipes to disinfect the workstation.
- 70% Ethanol alcohol was sprayed on the workstation and wiped after with Kim-Wipes to speed drying.
- Gloves were removed after disinfecting to prevent burns on the next step.
- A bunsen burner station was set up to prevent contamination.
- The original 15ml soil sample #2 was halved into another 15ml tube.
- The original soil sample #2 (now halved) was stored in the fridge.
- The microcentrifuge tube to be used for isolation was labeled “Direct Isolation” with the initials of the group members and the date of 8/30/2021.
- PYCa media was added to the 7.5ml (half of the original 15ml) soil sample via serological pipette until submerged and with about 2ml of media above the sample.
- The working soil sample was inverted a few times to get saturated with the media.
- The soil sample was added to a shaking incubator for 1-2 hours at 250rpm.
- The soil sample was moved to the fridge for a few hours.
- The workbench was cleaned and disinfected as described in Steps #2-4.
- The sample was placed in the centrifuge for 10 minutes at 4℃ to further separate the soil sample and liquid media containing bacteriophages before filtration.
- A 5ml syringe was attached to a 0.22μm filter.
- Approximately 3ml of the top of the flooded soil sample was removed from the tube via a serological pipette.
- Approximately 0.75ml of the flooded sample was filtered into a microcentrifuge tube with a 0.22μm filter.
- The microcentrifuge tube was immediately capped.
- 500μl of the filtrate was pipetted via micropipette into a tube containing 250μl of our bacterial host microbacterium foliorum.
- The tube of m. foliorum and filtrate was gently flicked with a finger and left to sit undisturbed for 10 minutes.
- At 10 minutes, 3ml of molten top agar was pipetted via a serological pipette into the tube of m. foliorum and filtrate.
- Immediately after releasing the top agar into the tube, the top agar and bacterial host/filtrate were aspirated and placed in a petri dish.
- The petri dish was slightly swirled to ensure the mixture covered the entire plate and was left to sit undisturbed for 20 minutes.
- Once the mixture solidified, the petri dish was flipped over and placed in the incubator for approximately 2 days.
- The workbench was cleaned and disinfected as described in Steps #2-4.
- After a photo and observations of the plate, Sample #2 was trashed in the autoclave.
Results:
Photo (soon to be added): Sample #2 After Direct Isolation Completed; No Plaques Formed.
Conclusions and Next Steps:
Direct Isolation completed on Sample #2 wielded unsatisfactory results with no plaques formed. The addition of molten agar too quickly resulted in the mixed agar and Sample #2 being unable to settle or solidify for approximately 45 minutes. Will Proceed with more caution with the next sample, carefully completing each step close to a burner flame to ensure contaminants are also not an issue.
The next steps include collecting a new soil sample and completing Direct Isolation and Serial Dilution 1:1000.
Title: Serial Isolation 1:1000
Date: September 1, 2021 Redo: Yes Sample: #2
Purpose: This procedure is to find bacteriophages within our collected soil sample through Serial Dilution 1:1000
Notes:
- The following materials were collected: phage samples for isolation, purification, or titering; host bacteria (250μl), agar plates, phage buffer, molten top agar (between 55 – 60 ˚C), microcentrifuge tubes, 5ml serological pipettes, and a bunsen burner.
- The student’s hands were washed and gloved prior to disinfecting the workstation.
- CiDecon was spread with Kim-Wipes to disinfect the workstation.
- 70% Ethanol alcohol was sprayed on the workstation and wiped after with Kim-Wipes to speed drying.
- Gloves were removed after disinfecting to prevent burns on the next step.
- A bunsen burner station was set up to prevent contamination.
- Three microcentrifuge tubes were each filled with 90μl of phage buffer via micropipette.
- The microcentrifuge tubes were labeled 1:10, 1:100, and 1:1000 respectively.10μl
- 10μl of the sample filtrate was pipetted via micropipette into the 1:10 labeled microcentrifuge and then flicked with a finger and inverted.
- 10μl of the sample filtrate/phage buffer was pipetted via micropipette from the 1:10 labeled microcentrifuge and placed in the 1:100 labeled microcentrifuge and then flicked with a finger and inverted. (a new pipette tip was used for this step)
- 10μl of the sample filtrate/phage buffer was pipetted via micropipette from the 1:100 labeled microcentrifuge and placed in the 1:1000 labeled microcentrifuge and then flicked with a finger and inverted. (a new pipette tip was used for this step)
- 10μl of the 1:1000 dilution was pipetted via micropipette into a tube containing 250μl of our bacterial host microbacterium foliorum.
- The tube of m. foliorum and filtrate were gently flicked with a finger and left to sit undisturbed for 10 minutes.
- At 10 minutes, 3ml of molten top agar was pipetted via a serological pipette into the tube of m. foliorum and filtrate.
- Immediately after releasing the top agar into the tube, the top agar and bacterial host/filtrate were aspirated and placed in a petri dish.
- The petri dish was slightly swirled to ensure the mixture covered the entire plate and was left to sit undisturbed for 20 minutes.
- Once the mixture solidified, the petri dish was flipped over and placed in the incubator for 24 hours.
- The workbench was cleaned and disinfected as described in Steps #2-4.
- On September 2, 2021, No Photo was taken of the Serial Isolation 1:1000 Sample #2.
- After observations of the plate, Sample #2 was trashed in the autoclave.
Results:
*no photo available for Sample #2 Serial Isolation. Sample #2 was trashed into the autoclave.*
Conclusions and Next Steps:
Serial Isolation 1:1000 completed on Sample #2 resulted in no plaques formed. The theory of researchers concluded that Sample #2 simply had no phages.
The next steps include collecting new soil samples and attempting Direct Isolation once more.
Title: Direct Isolation
Date: 09/02/2021 Redo: No Sample: #3
Purpose: This procedure is to find bacteriophages within our collected soil sample through Direct Isolation.
Notes:
- The following materials were collected: environmental sample, liquid PYCa media, host bacteria (250μl), sterile 3ml or 5ml syringe, 0.22 μm syringe filter, 5ml serological pipette, microcentrifuge tubes, 15ml conical tube, and a bunsen burner.
- The student’s hands were washed and gloved prior to disinfecting the workstation.
- CiDecon was spread with Kim-Wipes to disinfect the workstation.
- 70% Ethanol alcohol was sprayed on the workstation and wiped after with Kim-Wipes to speed drying.
- Gloves were removed after disinfecting to prevent burns on the next step.
- A bunsen burner station was set up to prevent contamination.
- The original 15ml soil sample #3 was halved into another 15ml tube.
- The original soil sample #3 (now halved) was stored in the fridge.
- The microcentrifuge tube to be used for isolation was labeled “Direct Isolation” with the initials of the group members and the date of 9/02/2021.
- PYCa media was added to the 7.5ml (half of the original 15ml) soil sample via serological pipette until submerged and with about 2ml of media above the sample.
- The working soil sample was inverted a few times to get saturated with the media.
- The soil sample was added to a shaking incubator for 1-2 hours at 250rpm.
- The soil sample was moved to the fridge for a few hours.
- The workbench was cleaned and disinfected as described in Steps #2-4.
- The sample was placed in the centrifuge for 10 minutes at 4℃ to further separate the soil sample and liquid media containing bacteriophages before filtration.
- A 5ml syringe was attached to a 0.22μm filter.
- Approximately 3ml of the top of the flooded soil sample was removed from the tube via a serological pipette.
- Approximately 0.75ml of the flooded sample was filtered into a microcentrifuge tube with a 0.22μm filter.
- The microcentrifuge tube was immediately capped.
- Sample #3, inside of the microcentrifuge tubes were then immediately placed into the fridge until the rest of Direct Isolation is able to be safely completed and surveyed on September 08, 2021.
- The workbench was cleaned and disinfected as described in Steps #2-4.
- September 08, 2021 the other half of the Direct Isolation process began again.
- The workbench was cleaned and disinfected as described in Steps #2-4.
- Gloves were removed after disinfecting to prevent burns on the next step.
- A bunsen burner station was set up to prevent contamination.
- 500μl of the filtrate was pipetted via micropipette into a tube containing 250μl of our bacterial host microbacterium foliorum.
- The tube of m. foliorum and filtrate was gently flicked with a finger and left to sit undisturbed for 10 minutes.
- At 10 minutes, 3ml of molten top agar was pipetted via a serological pipette into the tube of m. foliorum and filtrate.
- Immediately after releasing the top agar into the tube, the top agar and bacterial host/filtrate were aspirated and placed in a petri dish.
- The petri dish was slightly swirled to ensure the mixture covered the entire plate and was left to sit undisturbed for 20 minutes.
- Once the mixture solidified, the petri dish was flipped over and placed in the incubator to be taken out and observed on September 10, 2021.
- The workbench was cleaned and disinfected as described in Steps #2-4.
Results:
Direct Isolation completed on Sample #3 wielded unsatisfactory results with no plaques formed.
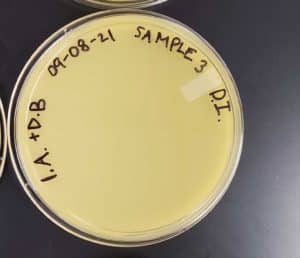
Conclusions and Next Steps:
Group members will collect a new sample and start the Direct Isolation phase.
Title: Direct Isolation
Date: September 8, 2021 Redo: No Sample: #4
Purpose: This procedure is to find bacteriophages within our collected soil sample through Direct Isolation.
Notes:
- The following materials were collected: environmental sample, liquid PYCa media, host bacteria (250μl), sterile 3ml or 5ml syringe, 0.22 μm syringe filter, 5ml serological pipette, microcentrifuge tubes, 15ml conical tube, and a bunsen burner.
- The student’s hands were washed and gloved prior to disinfecting the workstation.
- CiDecon was spread with Kim-Wipes to disinfect the workstation.
- 70% Ethanol alcohol was sprayed on the workstation and wiped after with Kim-Wipes to speed drying.
- Gloves were removed after disinfecting to prevent burns on the next step.
- A bunsen burner station was set up to prevent contamination.
- The original 15ml soil sample #4 was halved into another 15ml tube.
- The original soil sample #4 (now halved) was stored in the fridge.
- The microcentrifuge tube to be used for isolation was labeled “Direct Isolation” with the initials of the group members and the date of 9/08/2021.
- PYCa media was added to the 7.5ml (half of the original 15ml) soil sample via serological pipette until submerged and with about 2ml of media above the sample.
- The working soil sample was inverted a few times to get saturated with the media.
- The soil sample was added to a shaking incubator for 1-2 hours at 250rpm.
- The soil sample was moved to the fridge for a few hours.
- The workbench was cleaned and disinfected as described in Steps #2-4.
- The sample was placed in the centrifuge for 10 minutes at 4℃ to further separate the soil sample and liquid media containing bacteriophages before filtration.
- A 5ml syringe was attached to a 0.22μm filter.
- Approximately 3ml of the top of the flooded soil sample was removed from the tube via a serological pipette.
- Approximately 0.75ml of the flooded sample was filtered into a microcentrifuge tube with a 0.22μm filter.
- The microcentrifuge tube was immediately capped.
- 500μl of the filtrate was pipetted via micropipette into a tube containing 250μl of our bacterial host microbacterium foliorum.
- The tube of m. foliorum and filtrate was gently flicked with a finger and left to sit undisturbed for 10 minutes.
- At 10 minutes, 3ml of molten top agar was pipetted via a serological pipette into the tube of m. foliorum and filtrate.
- Immediately after releasing the top agar into the tube, the top agar and bacterial host/filtrate were aspirated and placed in a petri dish.
- The petri dish was slightly swirled to ensure the mixture covered the entire plate and was left to sit undisturbed for 20 minutes.
- Once the mixture solidified, the petri dish was flipped over and placed in the incubator for approximately 2 days.
- The workbench was cleaned and disinfected as described in Steps #2-4.
Results:
Multiple plaques formed.
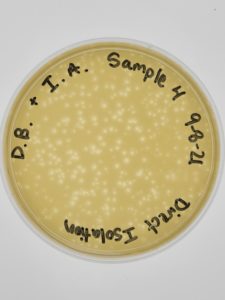
Conclusions and Next Steps:
Direct Isolation completed on Sample #4 wielded satisfactory results with multiple plaques formed. Group members will move on to phage purification.
Title: Picking a plaque, round 1
Date: September 13, 2021 Redo: No Sample: #4
Purpose: This procedure is to retrieve a phage particle from a plaque and create a liquid sample.
Notes:
- The following materials were collected: agar plates with plaques, microcentrifuge tubes, phage buffer, pipette, and a bunsen burner.
- The student’s hands were washed and gloved prior to disinfecting the workstation.
- CiDecon was spread with Kim-Wipes to disinfect the workstation.
- 70% Ethanol alcohol was sprayed on the workstation and wiped after with Kim-Wipes to speed drying.
- Gloves were removed after disinfecting to prevent burns on the next step.
- A bunsen burner station was set up to prevent contamination.
- A small circle by a permanent marker was drawn around the selected plaque and labeled ‘A’.
- The morphology of the plaque was recorded as the largest, clear plaque.
- A microcentrifuge tube was labeled ‘Sample 4:A’ and 100μl of phage buffer was added via micropipette.
- A yellow pipette tip was placed on the pipettor.
- The pipettor was lowered perpendicular to the agar plate of plaques and gently stabbed into the middle of the plaque labeled ‘A’.
- The end of the pipettor tip was placed in the microcentrifuge tube of phage buffer and tapped against the walls of the tube.
- The phage buffer was immediately aspirated and released back into the tube several times to dislodge the phage.
- The phage buffer and phage particle were mixed by vortex.
Results:
No photos of the microcentrifuge tube were taken.
Conclusions and Next Steps:
Group members will move on to the next step of the phage purification process, round one serial dilution.
Title: Serial Dilutions, round 1
Date: September 13, 2021 Redo: Yes Sample: #4
Purpose: This procedure is to prepare five liquid phage samples of decreasing concentrations.
Notes:
- The following materials were collected: microcentrifuge tube with liquid phage sample, microcentrifuge tubes, phage buffer, pipette, and a bunsen burner.
- The student’s hands were washed and gloved prior to disinfecting the workstation.
- CiDecon was spread with Kim-Wipes to disinfect the workstation.
- 70% Ethanol alcohol was sprayed on the workstation and wiped after with Kim-Wipes to speed drying.
- Gloves were removed after disinfecting to prevent burns on the next step.
- A bunsen burner station was set up to prevent contamination.
- Five microcentrifuge tubes were labeled 10⁻¹, 10⁻², 10⁻³, 10⁻⁴, and 10⁻⁵ respectively.
- 90μl of phage buffer was added to each tube via micropipette.
- 10μl of the undiluted liquid phage sample was pipetted via micropipette into the 10⁻¹ labeled microcentrifuge and then flicked with a finger and inverted.
- 10μl of diluted liquid phage sample was pipetted via micropipette from the 10⁻¹ labeled microcentrifuge and placed in the 10⁻² labeled microcentrifuge and then flicked with a finger and inverted. (a new pipette tip was used for this step)
- 10μl of diluted liquid phage sample was pipetted via micropipette from the 10⁻² labeled microcentrifuge and placed in the 10⁻³ labeled microcentrifuge and then flicked with a finger and inverted. (a new pipette tip was used for this step)
- 10μl of diluted liquid phage sample was pipetted via micropipette from the 10⁻³ labeled microcentrifuge and placed in the 10⁻⁴ labeled microcentrifuge and then flicked with a finger and inverted. (a new pipette tip was used for this step)
- 10μl of diluted liquid phage sample was pipetted via micropipette from the 10⁻⁴ labeled microcentrifuge and placed in the 10⁻⁵ labeled microcentrifuge and then flicked with a finger and inverted. (a new pipette tip was used for this step)
Results:
No photos of the microcentrifuge tubes were taken.
Conclusions and Next Steps:
Group members will move on to the next step of the phage purification process, plaque assay round 1.
Title: Plaque Assay, round 1
Date: September 13, 2021 Redo: No Sample: #4
Purpose: This procedure is to confirm the presence of phage particles on bacterial lawns from the diluted liquid phage samples.
Notes:
- The following materials were collected: microcentrifuge tubes with liquid phage samples, host bacteria (250μl), 5ml serological pipette, molten top agar, agar plates, and a bunsen burner.
- The student’s hands were washed and gloved prior to disinfecting the workstation.
- CiDecon was spread with Kim-Wipes to disinfect the workstation.
- 70% Ethanol alcohol was sprayed on the workstation and wiped after with Kim-Wipes to speed drying.
- Gloves were removed after disinfecting to prevent burns on the next step.
- A bunsen burner station was set up to prevent contamination.
- 10μl of liquid phage sample 10⁻¹ was pipetted via micropipette into a tube containing 250μl of our bacterial host microbacterium foliorum.
- The tube of m. foliorum and liquid phage sample 10⁻¹ was gently flicked with a finger and left to sit undisturbed for 10 minutes.
- 10μl of liquid phage sample 10⁻² was pipetted via micropipette into a tube containing 250μl of our bacterial host microbacterium foliorum.
- The tube of m. foliorum and liquid phage sample 10⁻² was gently flicked with a finger and left to sit undisturbed for 10 minutes.
- 10μl of liquid phage sample 10⁻³ was pipetted via micropipette into a tube containing 250μl of our bacterial host microbacterium foliorum.
- The tube of m. foliorum and liquid phage sample 10⁻³ was gently flicked with a finger and left to sit undisturbed for 10 minutes.
- 10μl of liquid phage sample 10⁻⁴ was pipetted via micropipette into a tube containing 250μl of our bacterial host microbacterium foliorum.
- The tube of m. foliorum and liquid phage sample 10⁻⁴ was gently flicked with a finger and left to sit undisturbed for 10 minutes.
- 10μl of liquid phage sample 10⁻⁵ was pipetted via micropipette into a tube containing 250μl of our bacterial host microbacterium foliorum.
- The tube of m. foliorum and liquid phage sample 10⁻⁵ was gently flicked with a finger and left to sit undisturbed for 10 minutes.
- At 10 minutes, 3ml of molten top agar was pipetted via a serological pipette into each tube of m. foliorum/diluted liquid phage sample 10⁻¹, m. foliorum/diluted liquid phage sample 10⁻², m. foliorum/diluted liquid phage sample 10⁻³, m. foliorum/diluted liquid phage sample 10⁻⁴, m. foliorum/diluted liquid phage sample 10⁻⁵ respectively.
- Immediately after releasing the top agar into each tube, the top agar and bacterial host/diluted liquid phage sample were aspirated and placed in a petri dish for each m. foliorum/diluted liquid phage sample.
- Each petri dish was slightly swirled to ensure the mixture covered the entire plate and was left to sit undisturbed for 20 minutes.
- Once each plate had the mixture solidify, each petri dish was flipped over and placed in the incubator for approximately 1 day.
- The workbench was cleaned and disinfected as described in Steps #2-4.
- After a photo and observations of each plate, the diluted liquid phage samples of Sample #4:A was moved to the refrigerator.
Results:
Conclusions and Next Steps:
Group members will move on to the next step of the phage purification process, round two picking a plaque.
Title: Picking a plaque, round 2
Date: September 15, 2021 Redo: No Sample: #4
Purpose: This procedure is to retrieve a phage particle from a plaque and create a liquid sample.
Notes:
- The following materials were collected: agar plates with plaques, microcentrifuge tubes, phage buffer, pipette, and a bunsen burner.
- The student’s hands were washed and gloved prior to disinfecting the workstation.
- CiDecon was spread with Kim-Wipes to disinfect the workstation.
- 70% Ethanol alcohol was sprayed on the workstation and wiped after with Kim-Wipes to speed drying.
- Gloves were removed after disinfecting to prevent burns on the next step.
- A bunsen burner station was set up to prevent contamination.
- A small circle by a permanent marker was drawn around the selected plaque and labeled ‘B’.
- The morphology of the plaque was recorded as the largest, clear plaque.
- A microcentrifuge tube was labeled ‘Sample 4:B’ and 100μl of phage buffer was added via micropipette.
- A yellow pipette tip was placed on the pipettor.
- The pipettor was lowered perpendicular to the agar plate of plaques and gently stabbed into the middle of the plaque labeled ‘B’.
- The end of the pipettor tip was placed in the microcentrifuge tube of phage buffer and tapped against the walls of the tube.
- The phage buffer was immediately aspirated and released back into the tube several times to dislodge the phage.
- The phage buffer and phage particle were mixed by vortex.
Results:
No photos of the microcentrifuge tube were taken.
Conclusions and Next Steps:
Group members will move on to the next step of the phage purification process, round two serial dilutions.
Title: Serial Dilutions, round 2
Date: September 15, 2021 Redo: Yes Sample: #4
Purpose: This procedure is to prepare five liquid phage samples of decreasing concentrations.
Notes:
- The following materials were collected: microcentrifuge tube with liquid phage sample, microcentrifuge tubes, phage buffer, pipette, and a bunsen burner.
- The student’s hands were washed and gloved prior to disinfecting the workstation.
- CiDecon was spread with Kim-Wipes to disinfect the workstation.
- 70% Ethanol alcohol was sprayed on the workstation and wiped after with Kim-Wipes to speed drying.
- Gloves were removed after disinfecting to prevent burns on the next step.
- A bunsen burner station was set up to prevent contamination.
- Five microcentrifuge tubes were labeled 10⁻¹, 10⁻², 10⁻³, 10⁻⁴, and 10⁻⁵ respectively.
- 90μl of phage buffer was added to each tube via micropipette.
- 10μl of the undiluted liquid phage sample was pipetted via micropipette into the 10⁻¹ labeled microcentrifuge and then flicked with a finger and inverted.
- 10μl of diluted liquid phage sample was pipetted via micropipette from the 10⁻¹ labeled microcentrifuge and placed in the 10⁻² labeled microcentrifuge and then flicked with a finger and inverted. (a new pipette tip was used for this step)
- 10μl of diluted liquid phage sample was pipetted via micropipette from the 10⁻² labeled microcentrifuge and placed in the 10⁻³ labeled microcentrifuge and then flicked with a finger and inverted. (a new pipette tip was used for this step)
- 10μl of diluted liquid phage sample was pipetted via micropipette from the 10⁻³ labeled microcentrifuge and placed in the 10⁻⁴ labeled microcentrifuge and then flicked with a finger and inverted. (a new pipette tip was used for this step)
- 10μl of diluted liquid phage sample was pipetted via micropipette from the 10⁻⁴ labeled microcentrifuge and placed in the 10⁻⁵ labeled microcentrifuge and then flicked with a finger and inverted. (a new pipette tip was used for this step)
Results:
No photos of the microcentrifuge tubes were taken.
Conclusions and Next Steps:
Group members will move on to the next step of the phage purification process, round 2 plaque assay.
Title: Plaque Assay, round 2
Date: September 15, 2021 Redo: No Sample: #4
Purpose: This procedure is to confirm the presence of phage particles on bacterial lawns from the diluted liquid phage samples.
Notes:
- The following materials were collected: microcentrifuge tubes with liquid phage samples, host bacteria (250μl), 5ml serological pipette, molten top agar, agar plates, and a bunsen burner.
- The student’s hands were washed and gloved prior to disinfecting the workstation.
- CiDecon was spread with Kim-Wipes to disinfect the workstation.
- 70% Ethanol alcohol was sprayed on the workstation and wiped after with Kim-Wipes to speed drying.
- Gloves were removed after disinfecting to prevent burns on the next step.
- A bunsen burner station was set up to prevent contamination.
- 10μl of liquid phage sample 10⁻¹ was pipetted via micropipette into a tube containing 250μl of our bacterial host microbacterium foliorum.
- The tube of m. foliorum and liquid phage sample 10⁻¹ was gently flicked with a finger and left to sit undisturbed for 10 minutes.
- 10μl of liquid phage sample 10⁻² was pipetted via micropipette into a tube containing 250μl of our bacterial host microbacterium foliorum.
- The tube of m. foliorum and liquid phage sample 10⁻² was gently flicked with a finger and left to sit undisturbed for 10 minutes.
- 10μl of liquid phage sample 10⁻³ was pipetted via micropipette into a tube containing 250μl of our bacterial host microbacterium foliorum.
- The tube of m. foliorum and liquid phage sample 10⁻³ was gently flicked with a finger and left to sit undisturbed for 10 minutes.
- 10μl of liquid phage sample 10⁻⁴ was pipetted via micropipette into a tube containing 250μl of our bacterial host microbacterium foliorum.
- The tube of m. foliorum and liquid phage sample 10⁻⁴ was gently flicked with a finger and left to sit undisturbed for 10 minutes.
- 10μl of liquid phage sample 10⁻⁵ was pipetted via micropipette into a tube containing 250μl of our bacterial host microbacterium foliorum.
- The tube of m. foliorum and liquid phage sample 10⁻⁵ was gently flicked with a finger and left to sit undisturbed for 10 minutes.
- At 10 minutes, 3ml of molten top agar was pipetted via a serological pipette into each tube of m. foliorum/diluted liquid phage sample 10⁻¹, m. foliorum/diluted liquid phage sample 10⁻², m. foliorum/diluted liquid phage sample 10⁻³, m. foliorum/diluted liquid phage sample 10⁻⁴, m. foliorum/diluted liquid phage sample 10⁻⁵ respectively.
- Immediately after releasing the top agar into each tube, the top agar and bacterial host/diluted liquid phage sample were aspirated and placed in a petri dish for each m. foliorum/diluted liquid phage sample.
- Each petri dish was slightly swirled to ensure the mixture covered the entire plate and was left to sit undisturbed for 20 minutes.
- Once each plate had the mixture solidify, each petri dish was flipped over and placed in the incubator for approximately 1 day.
- The workbench was cleaned and disinfected as described in Steps #2-4.
- After a photo and observations of each plate, the diluted liquid phage samples of Sample #4:B was moved to the refrigerator.
Results:

Conclusions and Next Steps:
Group members will move on to the next step of the phage purification process, collecting plate lysates.
Title: Purification- Collecting Plate Lysate
Date: September 20, 2021 Redo: No Sample: #4
Purpose: This procedure is to generate a highly concentrated liquid phage sample.
Notes:
- The following materials were collected: a webbed plate, 5ml serological pipette, phage buffer, sterile 5ml syringe, 0.22 μm syringe filter, 15ml conical tube, and a bunsen burner.
- The student’s hands were washed and gloved prior to disinfecting the workstation.
- CiDecon was spread with Kim-Wipes to disinfect the workstation.
- 70% Ethanol alcohol was sprayed on the workstation and wiped after with Kim-Wipes to speed drying.
- Gloves were removed after disinfecting to prevent burns on the next step.
- A bunsen burner station was set up to prevent contamination.
- 4ml of phage buffer was added to the webbed plate via serological pipette.
- 4ml of phage buffer was added to the webbed plate via serological pipette a second time.
- The webbed plate was lightly swirled and left undisturbed on the workbench for approximately 8 hours.
- After the incubation time was completed the student’s hands were washed and gloved prior to disinfecting the workstation.
- CiDecon was spread with Kim-Wipes to disinfect the workstation.
- 70% Ethanol alcohol was sprayed on the workstation and wiped after with Kim-Wipes to speed drying.
- Gloves were removed after disinfecting to prevent burns on the next step.
- A bunsen burner station was set up to prevent contamination.
- The lid of the flooded plate was removed.
- The plate was tilted by being placed on the edge of the lid to pool the liquids to one side of the plate.
- A 5ml syringe was used to aspirate the lysate.
- A 0.22 μm filter was attached to the 5ml syringe.
- The lysate was filtered into the 15ml conical tube and stored in the fridge at 4 °C.
Results:
No photos of the 15ml conical tube were taken.
Conclusions and Next Steps:
Group members will move on to the next step of the phage purification process, full plate titer.
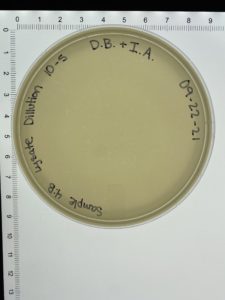
Title: Purification- Full Plate Titer
Date: September 22, 2021 Redo: No Sample: #4
Purpose: This procedure is to determine the concentration of phage particles in a lysate by using a plaque assay.
Notes:
- The following materials were collected: lysate, 5ml serological pipette, phage buffer, agar plates, molten top agar, microcentrifuge tubes, host bacteria (250μl), and a bunsen burner.
- The student’s hands were washed and gloved prior to disinfecting the workstation.
- CiDecon was spread with Kim-Wipes to disinfect the workstation.
- 70% Ethanol alcohol was sprayed on the workstation and wiped after with Kim-Wipes to speed drying.
- Gloves were removed after disinfecting to prevent burns on the next step.
- A bunsen burner station was set up to prevent contamination.
- The student’s prepared a series of serial dilutions.
- Six microcentrifuge tubes were labeled 10⁻¹, 10⁻², 10⁻³, 10⁻⁴, 10⁻⁵, and 10⁻⁶ respectively.
- 90μl of phage buffer was added to each tube via micropipette.
- 10μl of the filtered lysate was pipetted via micropipette into the 10⁻¹ labeled microcentrifuge and then flicked with a finger and inverted.
- 10μl of diluted filtered lysate sample was pipetted via micropipette from the 10⁻¹ labeled microcentrifuge and placed in the 10⁻² labeled microcentrifuge and then flicked with a finger and inverted. (a new pipette tip was used for this step)
- 10μl of diluted filtered lysate sample was pipetted via micropipette from the 10⁻² labeled microcentrifuge and placed in the 10⁻³ labeled microcentrifuge and then flicked with a finger and inverted. (a new pipette tip was used for this step)
- 10μl of diluted filtered lysate sample was pipetted via micropipette from the 10⁻³ labeled microcentrifuge and placed in the 10⁻⁴ labeled microcentrifuge and then flicked with a finger and inverted. (a new pipette tip was used for this step)
- 10μl of diluted filtered lysate sample was pipetted via micropipette from the 10⁻⁴ labeled microcentrifuge and placed in the 10⁻⁵ labeled microcentrifuge and then flicked with a finger and inverted. (a new pipette tip was used for this step)
- 10μl of diluted filtered lysate sample was pipetted via micropipette from the 10⁻⁵ labeled microcentrifuge and placed in the 10⁻⁶ labeled microcentrifuge and then flicked with a finger and inverted. (a new pipette tip was used for this step)
- 10μl of the diluted filtered lysate sample 10⁻¹ was pipetted via micropipette into a tube containing 250μl of our bacterial host microbacterium foliorum.
- The tube of m. foliorum and the diluted filtered lysate sample 10⁻¹ was gently flicked with a finger and left to sit undisturbed for 10 minutes.
- 10μl of the diluted filtered lysate sample 10⁻² was pipetted via micropipette into a tube containing 250μl of our bacterial host microbacterium foliorum.
- The tube of m. foliorum and the diluted filtered lysate sample 10⁻² was gently flicked with a finger and left to sit undisturbed for 10 minutes.
- 10μl of the diluted filtered lysate sample 10⁻³ was pipetted via micropipette into a tube containing 250μl of our bacterial host microbacterium foliorum.
- The tube of m. foliorum and the diluted filtered lysate sample 10⁻³ was gently flicked with a finger and left to sit undisturbed for 10 minutes.
- 10μl of the diluted filtered lysate sample 10⁻⁴ was pipetted via micropipette into a tube containing 250μl of our bacterial host microbacterium foliorum.
- The tube of m. foliorum and the diluted filtered lysate sample 10⁻⁴ was gently flicked with a finger and left to sit undisturbed for 10 minutes.
- 10μl of the diluted filtered lysate sample 10⁻⁵ was pipetted via micropipette into a tube containing 250μl of our bacterial host microbacterium foliorum.
- The tube of m. foliorum and the diluted filtered lysate sample 10⁻⁵ was gently flicked with a finger and left to sit undisturbed for 10 minutes.
- 10μl of the diluted filtered lysate sample 10⁻⁶ was pipetted via micropipette into a tube containing 250μl of our bacterial host microbacterium foliorum.
- The tube of m. foliorum and the diluted filtered lysate sample 10⁻⁶ was gently flicked with a finger and left to sit undisturbed for 10 minutes.
- At 10 minutes, 3ml of molten top agar was pipetted via a serological pipette into each tube of m. foliorum/diluted filtered lysate sample 10⁻¹, m. foliorum/diluted filtered lysate sample 10⁻², m. foliorum/diluted filtered lysate sample 10⁻³, m. foliorum/diluted filtered lysate sample 10⁻⁴, m. foliorum/diluted filtered lysate sample 10⁻⁵, and m. foliorum/diluted filtered lysate sample 10⁻⁶ respectively.
- Immediately after releasing the top agar into each tube, the top agar and bacterial host/diluted liquid phage sample were aspirated and placed in a petri dish for each m. foliorum/diluted filtered lysate sample.
- Each petri dish was slightly swirled to ensure the mixture covered the entire plate and was left to sit undisturbed for 20 minutes.
- Once each plate had the mixture solidify, each petri dish was flipped over and placed in the incubator for approximately 1 day.
- The workbench was cleaned and disinfected as described in Steps #2-4.
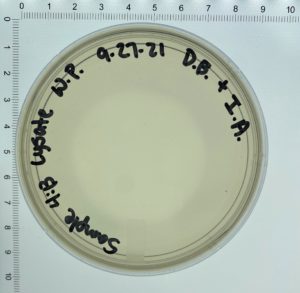
- After a photo and observations of each plate, the diluted filtered lysate sample of Sample #4:B: Lysate was wrapped and placed in the fridge.
- On September 27, 2021, the students recorded the number of plaques on the 10⁻⁶ plate as 126 plaques.
- The titer was then calculated: Titer (pfu/ml) = (126 pfu/10 μl) x (10₃ μl/ ml) x (10₆) = (12.6 x 10₃ x 10₆) pfu/ml = 12.6 x 10₉ pfu/ml
Results:


Conclusions and Next Steps:
Group members will move on to the next step, phage amplification.
Amplification
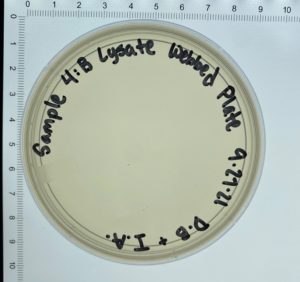
Title: Making Webbed Plates From a Lysate of Known Titer
Date: September 27, 2021 Redo: No Sample: #4B
Purpose: This procedure is to create a plate with a very high density of plaques from a lysate of a known titer.
Notes:
- The following materials were collected: lysate, 5ml serological pipette, phage buffer, agar plates, molten top agar, microcentrifuge tube, host bacteria (250μl), and a bunsen burner.
- The student’s hands were washed and gloved prior to disinfecting the workstation.
- CiDecon was spread with Kim-Wipes to disinfect the workstation.
- 70% Ethanol alcohol was sprayed on the workstation and wiped after with Kim-Wipes to speed drying.
- Gloves were removed after disinfecting to prevent burns on the next step.
- A bunsen burner station was set up to prevent contamination.
- The volume of lysate needed for the webbed plates was calculated as follows: Volume needed (ml)lysate = (1.26×10⁵ pfu) / (1.26×10¹⁰ pfu/ml) = 1×10⁻⁵ ml lysate = (1×10⁻⁵ ml) x (1000 μl/ml) = 1×10⁻² μl
- One microcentrifuge tube was labeled “Webbed Lysate”.
- 99μl of phage buffer was added to the tube via micropipette.
- 1μl of the lysate was pipetted via micropipette into the “Webbed Lysate” labeled microcentrifuge and then flicked with a finger and inverted.
- 10μl of the diluted lysate sample was pipetted via micropipette into a tube containing 250μl of our bacterial host microbacterium foliorum.
- The tube of m. foliorum and the diluted lysate sample were gently flicked with a finger and left to sit undisturbed for 10 minutes.
- Steps 11 and 12 were done six times in total.
- At 10 minutes, 3ml of molten top agar was pipetted via a serological pipette into each of the six tubes of m. foliorum/diluted lysate sample.
- Immediately after releasing the top agar into each tube, the top agar and bacterial host/diluted lysate were aspirated and placed in a petri dish for each m. foliorum/diluted lysate sample.
- Each petri dish was slightly swirled to ensure the mixture covered the entire plate and was left to sit undisturbed for 20 minutes.
- Once each plate had the mixture solidify, each petri dish was flipped over and placed in the incubator for approximately one day.
- The workbench was cleaned and disinfected as described in Steps #2-4.
- After a photo and observations of each plate, the plates of the diluted lysate sample of Sample #4:B: Lysate was wrapped and placed in the fridge.
Results:


Conclusions and Next Steps:
Group members are unclear if the webbed plate protocol was performed correctly due to no plaques being formed. Members are confirming with the professor. Confirmation with the professor determined that a second webbed plate dilution was to be performed.
Title: Making Webbed Plates From a Lysate of Known Titer
Date: September 29, 2021 Redo: Yes Sample: #4B
Purpose: This procedure is to create a plate with a very high density of plaques from a lysate of known titer.
Notes:
- The following materials were collected: lysate, 5ml serological pipette, phage buffer, agar plates, molten top agar, microcentrifuge tube, host bacteria (250μl), and a bunsen burner.
- The student’s hands were washed and gloved prior to disinfecting the workstation.
- CiDecon was spread with Kim-Wipes to disinfect the workstation.
- 70% Ethanol alcohol was sprayed on the workstation and wiped after with Kim-Wipes to speed drying.
- Gloves were removed after disinfecting to prevent burns on the next step.
- A bunsen burner station was set up to prevent contamination.
- The volume of lysate needed for the webbed plates was calculated as follows: Volume needed (ml)lysate = (1.26×10⁵ pfu) / (1.26×10¹⁰ pfu/ml) = 1×10⁻⁵ ml lysate = (1×10⁻⁵ ml) x (1000 μl/ml) = 1×10⁻² μl
- One microcentrifuge tube was labeled “2:18”.
- 18μl of phage buffer was added to the tube via micropipette.
- 2μl of the lysate was pipetted via micropipette into the “2:18” labeled microcentrifuge and then flicked with a finger and inverted.
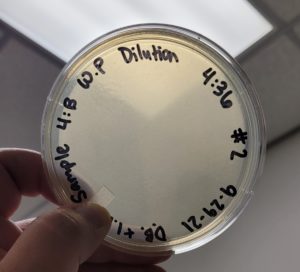
- One microcentrifuge tube was labeled “4:36”.
- 36μl of phage buffer was added to the tube via micropipette.
- 4μl of the diluted lysate was pipetted via micropipette from the tube labeled “2:18” into the “4:36” labeled microcentrifuge and then flicked with a finger and inverted.
- 10μl of the diluted lysate sample was pipetted via micropipette into a tube containing 250μl of our bacterial host microbacterium foliorum.
- The tube of m. foliorum and the diluted lysate sample were gently flicked with a finger and left to sit undisturbed for 10 minutes.
- Steps 14 and 15 were done four times in total.
- At 10 minutes, 3ml of molten top agar was pipetted via a serological pipette into each of the four tubes of m. foliorum/diluted lysate sample.
- Immediately after releasing the top agar into each tube, the top agar and bacterial host/diluted lysate were aspirated and placed in a petri dish for each m. foliorum/diluted lysate sample.
- Each petri dish was slightly swirled to ensure the mixture covered the entire plate and was left to sit undisturbed for 20 minutes.
- Once each plate had the mixture solidify, each petri dish was flipped over and placed in the incubator for approximately one day.
- The workbench was cleaned and disinfected as described in Steps #2-4.
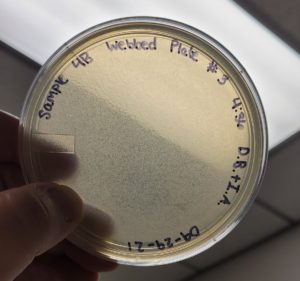
- After a photo and observations of each plate, we began our next step, flooding the plates of the diluted lysate sample of Sample #4:B.
Results:
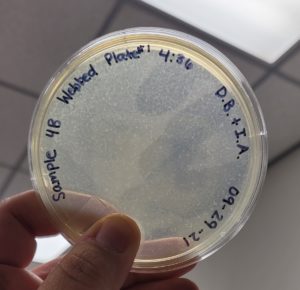

Conclusions and Next Steps:
The second round of making webbed plates with Sample #4:B produced a high titer webbed plate required to proceed to our next step of flooding the plates and retrieve a high titer lysate.
Title: Collecting a Plate Lysate
Date: September 30, 2021 Redo: No Sample: #4:B
Purpose: This procedure is to generate a highly concentrated liquid phage sample.
Notes:
- The following materials were collected: webbed plates, 5ml serological pipette, phage buffer, sterile 5ml syringe, 0.22 μm syringe filter, 50ml conical tube, and a bunsen burner.
- The student’s hands were washed and gloved prior to disinfecting the workstation.
- CiDecon was spread with Kim-Wipes to disinfect the workstation.
- 70% Ethanol alcohol was sprayed on the workstation and wiped after with Kim-Wipes to speed drying.
- Gloves were removed after disinfecting to prevent burns on the next step.
- A bunsen burner station was set up to prevent contamination.
- 8ml of phage buffer was added to each of the 4 webbed plates via a serological pipette.
- The webbed plates were lightly swirled and left undisturbed on the workbench for approximately 5 hours.
- After the incubation time was completed the student’s hands were washed and gloved prior to disinfecting the workstation.
- CiDecon was spread with Kim-Wipes to disinfect the workstation.
- 70% Ethanol alcohol was sprayed on the workstation and wiped after with Kim-Wipes to speed drying.
- Gloves were removed after disinfecting to prevent burns on the next step.
- A bunsen burner station was set up to prevent contamination.
- The lid of the flooded plates was removed.
- The plates were tilted by being placed on the edge of the lid to pool the liquids to one side of the plate.
- A 5ml syringe was used to aspirate the lysate from each plate.
- A 0.22 μm filter was attached to the 5ml syringe.
- Approximately 27ml of lysate was filtered into the 50ml conical tube and stored in the fridge at 4 °C.
- The workbench was cleaned and disinfected as described in Steps #2-4.
Results:
No photos of the 50ml conical tube were taken.
Conclusions and Next Steps:
Collecting plate lysate was successful and welded approximately 27 mL of the high titer lysate. Group members will move on to the next step of amplification, a second full plate titer.
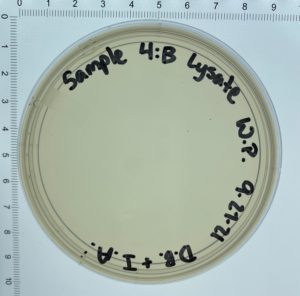
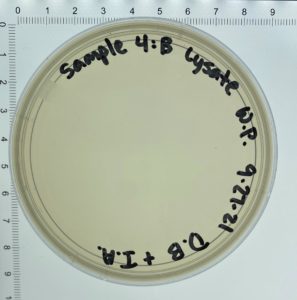
Title: Full Plate Titer
Date: October 4, 2021 Redo: No Sample: #4
Purpose: This procedure is to determine the concentration of phage particles in a lysate by using a plaque assay.
Notes:
- The following materials were collected: lysate, 5ml serological pipette, phage buffer, agar plates, molten top agar, microcentrifuge tubes, host bacteria (250μl), and a bunsen burner.
- The student’s hands were washed and gloved prior to disinfecting the workstation.
- CiDecon was spread with Kim-Wipes to disinfect the workstation.
- 70% Ethanol alcohol was sprayed on the workstation and wiped after with Kim-Wipes to speed drying.
- Gloves were removed after disinfecting to prevent burns on the next step.
- A bunsen burner station was set up to prevent contamination.
- The student’s prepared a series of serial dilutions.
- Six microcentrifuge tubes were labeled 10⁻¹, 10⁻², 10⁻³, 10⁻⁴, 10⁻⁵, and 10⁻⁶ respectively.
- 90μl of phage buffer was added to each tube via micropipette.
- 10μl of the high volume lysate was pipetted via micropipette into the 10⁻¹ labeled microcentrifuge and then flicked with a finger and inverted.
- 10μl of the diluted high volume lysate sample was pipetted via micropipette from the 10⁻¹ labeled microcentrifuge and placed in the 10⁻² labeled microcentrifuge and then flicked with a finger and inverted. (a new pipette tip was used for this step)
- 10μl of the diluted high volume lysate sample was pipetted via micropipette from the 10⁻² labeled microcentrifuge and placed in the 10⁻³ labeled microcentrifuge and then flicked with a finger and inverted. (a new pipette tip was used for this step)
- 10μl of the diluted high volume lysate sample was pipetted via micropipette from the 10⁻³ labeled microcentrifuge and placed in the 10⁻⁴ labeled microcentrifuge and then flicked with a finger and inverted. (a new pipette tip was used for this step)
- 10μl of the diluted high volume lysate sample was pipetted via micropipette from the 10⁻⁴ labeled microcentrifuge and placed in the 10⁻⁵ labeled microcentrifuge and then flicked with a finger and inverted. (a new pipette tip was used for this step)
- 10μl of the diluted high volume lysate sample was pipetted via micropipette from the 10⁻⁵ labeled microcentrifuge and placed in the 10⁻⁶ labeled microcentrifuge and then flicked with a finger and inverted. (a new pipette tip was used for this step)
- 10μl of the the diluted high volume lysate sample 10⁻¹ was pipetted via micropipette into a tube containing 250μl of our bacterial host microbacterium foliorum.
- The tube of m. foliorum and the the diluted high volume lysate sample 10⁻¹ was gently flicked with a finger and left to sit undisturbed for 10 minutes.
- 10μl of the diluted high volume lysate sample 10⁻² was pipetted via micropipette into a tube containing 250μl of our bacterial host microbacterium foliorum.
- The tube of m. foliorum and the diluted high volume lysate sample 10⁻² was gently flicked with a finger and left to sit undisturbed for 10 minutes.
- 10μl of the diluted high volume lysate sample 10⁻³ was pipetted via micropipette into a tube containing 250μl of our bacterial host microbacterium foliorum.
- The tube of m. foliorum and the diluted high volume lysate sample 10⁻³ was gently flicked with a finger and left to sit undisturbed for 10 minutes.
- 10μl of the diluted high volume lysate sample 10⁻⁴ was pipetted via micropipette into a tube containing 250μl of our bacterial host microbacterium foliorum.
- The tube of m. foliorum and the diluted high volume lysate sample 10⁻⁴ was gently flicked with a finger and left to sit undisturbed for 10 minutes.
- 10μl of the diluted high volume lysate sample 10⁻⁵ was pipetted via micropipette into a tube containing 250μl of our bacterial host microbacterium foliorum.
- The tube of m. foliorum and the diluted high volume lysate sample 10⁻⁵ was gently flicked with a finger and left to sit undisturbed for 10 minutes.
- 10μl of the diluted high volume lysate sample 10⁻⁶ was pipetted via micropipette into a tube containing 250μl of our bacterial host microbacterium foliorum.
- The tube of m. foliorum and the diluted high volume lysate sample 10⁻⁶ was gently flicked with a finger and left to sit undisturbed for 10 minutes.
- At 10 minutes, 3ml of molten top agar was pipetted via a serological pipette into each tube of m. foliorum/diluted high volume lysate sample 10⁻¹, m. foliorum/diluted high volume lysate sample 10⁻², m. foliorum/diluted high volume lysate sample 10⁻³, m. foliorum/diluted high volume lysate sample 10⁻⁴, m. foliorum/diluted high volume lysate sample 10⁻⁵, and m. foliorum/diluted high volume lysate sample 10⁻⁶ respectively.
- Immediately after releasing the top agar into each tube, the top agar and bacterial host/diluted high volume lysate sample were aspirated and placed in a petri dish for each m. foliorum/diluted high volume lysate sample.
- Each petri dish was slightly swirled to ensure the mixture covered the entire plate and was left to sit undisturbed for 20 minutes.
- Once each plate had the mixture solidify, each petri dish was flipped over and placed in the incubator for approximately 1 day.
- The workbench was cleaned and disinfected as described in Steps #2-4.
- After a photo and observations of each plate, diluted high volume lysate sample of Sample #4:B: Lysate was wrapped and placed in the fridge.
- On October 6, 2021, the students recorded the number of plaques on the 10⁻⁶ plate as 204 plaques.
- The titer was then calculated: Titer (pfu/ml) = (204 pfu/10 μl) x (10³ μl/ ml) x (10⁶) = (20.4 x 10³ x 10⁶) pfu/ml = 20.4 x 10⁹ pfu/ml
Results:


Conclusions and Next Steps:
Group members will move on to the next step, archiving your phage sample.
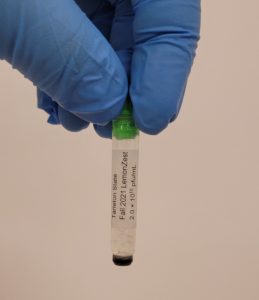
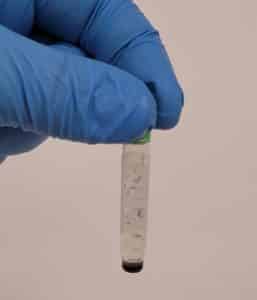
Title: Archiving Your Phage Sample
Date: October 7, 2021 Redo: No Sample: #4
Purpose: This procedure is to prepare a high-titer lysate for long-term storage.
Notes:
- The following materials were collected: high volume lysate, DMSO mixture, 5ml serological pipette, micropipette, sterile beads, and barcoded tubes.
- The student’s hands were washed and gloved.
- All materials used were placed in the biosafety hood for use.
- The phage sample was entered into the Actinobacteriophage database.
- Three barcoded tubes were each filled with sterile beads approximately 1.5cm from the top of the tube.
- 200μl of DMSO was pipetted into the 15ml conical tube via micropipette.
- The original bottle of DMSO was immediately stored away.
- 2.8ml of the high volume lysate was added to the 15ml conical tube containing DMSO via a serological pipette.
- The mixture in the 15ml conical tube was lightly vortexed.
- Approximately 3ml of the lysate/DMSO mixture was aspirated in a serological pipette.
- Each of the barcoded tubes containing sterile beads were filled with the lysate/DMSO mixture from the serological pipette (add enough mixture to just cover the beads).
- One tube was photographed for record and all the tubes were placed in the freezer.
Results:
Conclusions and Next Steps:
It was discovered that DMF was used instead of DMSO. The students will redo the archiving protocol.
Title: Archiving Your Phage Sample
Date: October 11, 2021 Redo: Yes Sample: #4
Purpose: This procedure is to prepare a high-titer lysate for long-term storage.
Notes:
- The following materials were collected: high volume lysate, DMSO mixture, 5ml serological pipette, micropipette, sterile beads, and barcoded tubes.
- The student’s hands were washed and gloved.
- All materials used were placed in the biosafety hood for use.
- Three barcoded tubes were each filled with sterile beads approximately 1.5cm from the top of the tube.
- 200μl of DMSO was pipetted into the 15ml conical tube via micropipette.
- 2.8ml of the high volume lysate was added to the 15ml conical tube containing DMSO via a serological pipette.
- The mixture in the 15ml conical tube was lightly vortexed.
- Approximately 3ml of the lysate/DMSO mixture was aspirated in a serological pipette.
- Each of the barcoded tubes containing sterile beads were filled with the lysate/DMSO mixture from the serological pipette (add enough mixture to just cover the beads).
- One tube was photographed for record and all the tubes were placed in the freezer.
Results:

Conclusions and Next Steps:
Group members will now move on to the next step, DNA extraction.
DNA Extraction
Title: Phage DNA Extraction #1
Date: 10/11/2021 Redo: No Sample: #4
Purpose: This procedure is to isolate genomic DNA from phage.
Notes:
- The following materials were collected: high volume lysate, nuclease mix 0.5M EDTA, 2M ZnCl₂, TES buffer, 10mg/mL Proteinase K, 3M potassium acetate, pH 5.2, Isopropanol, 70% ethanol, Nuclease-free water, heat block, ice, 5ml serological pipettes, and micropipettes.
- The student’s hands were washed and gloved.
- The high volume lysate was gently mixed.
- 5mL of the lysate was pipette into a 15 mL conical tube via serological pipette.
- The tube was then given to the TA, Marlee Goppert, who added 20μl of nuclease to the tube.
- The tube was gently inverted and incubated at 37°C for 10 minutes.
- 1ml of the lysate/nuclease mixture was pipetted into 5 microcentrifuge tubes each.
- 20μl of ZnCl₂ was added to each tube via micropipette after incubation was complete.
- The tube was gently inverted and incubated at 37°C for 5 minutes.
- The tube was then placed in the centrifuge at 4°C at 10,000rpm for 1 minute.
- Supernatants (liquid) was then removed via serological pipette.
- The liquid supernatants were stored in a 15ml conical tube in the refrigerator.
- 500μl of TES buffer was added to each tube of pellets and incubated at 60°C for 15 minutes.
- 1μl of Proteinase K was added to each tube via micropipette and mixed gently.
- Each tube incubated at 37°C for 10 minutes.
- 60μl of potassium acetate was added to each tube via micropipette.
- Each tube was mixed well and left on ice for 15 minutes.
- Each tube was placed in the centrifuge at 4°C at 12,000rpm for 1 minute.
- The supernatants were pipetted via serological pipette into 5 new microcentrifuge tubes.
- The old microcentrifuge tubes containing the pellets were autoclaved.
- 500μl of isopropanol was added to each of the tubes with the supernatant via micropipette.
- The tubes were gently mixed, left on ice, and placed in the refrigerator for overnight storage.
- The next afternoon, the tubes were centrifuged at 12,000rpm for 10 minutes.
- After the centrifuge was complete, the supernatant was collected by slightly tilting each tube in the direction of the pellet and pipetting the supernatant out.
- The supernatant from each tube was released into a 15ml conical tube.
- The 15ml conical tube was dumped down the sink drain and autoclaved.
- 250μl of 70% ethanol was added to each tube via micropipette.
- Each tube was centrifuged for 1 minute at 12,000rpm.
- Each tube was gently dumped out onto a folded kim-wipe and placed under the biosafety hood to dry.
- 50μl of nuclease-free water was added via micropipette to tube 1.
- The same 50μl of nuclease-free water was added via micropipette to tube 2 leaving tube 1 empty.
- Then the same 50μl of nuclease-free water was added via micropipette to tube 3 leaving tube 2 empty.
- Then the same 50μl of nuclease-free water was added via micropipette to tube 4 leaving tube 3 empty.
- Then the same 50μl of nuclease-free water was added via micropipette to tube 5 leaving tube 4 empty.
- Tube 5 was the final tube containing the phage DNA sample.
- 1μl of nuclease-free water was released on the Nanodrop pedestal to calibrate the Nanodrop.
- The pedestal was then wiped with a kim-wipe.
- 1μl of the DNA sample was released on the Nanodrop pedestal.
- The DNA concentration was recorded as 116.6ng/μl, A260/280 = 2.01, and A260/230 = 1.06.
Results:

Conclusions and Next Steps:
Group members will now complete the DNA extraction protocol to retrieve a higher volume of DNA.
Title: Phage DNA Extraction #2
Date: 10/13/2021 Redo: Yes Sample: #4B 1.2 Group Members: Dasire Brawley, Ivy Adame
Purpose: This procedure is to isolate genomic DNA from phage.
Notes:
- The following materials were collected: high volume lysate, nuclease mix 0.5M EDTA, 2M ZnCl₂, TES buffer, 10mg/mL Proteinase K, 3M potassium acetate, pH 5.2, Isopropanol, 70% ethanol, Nuclease-free water, heat block, ice, 5ml serological pipettes, and micropipettes.
- The student’s hands were washed and gloved.
- The high volume lysate was gently mixed.
- 5mL of the lysate was pipette into a 15 mL conical tube via serological pipette.
- The tube was then given to the TA, Marlee Goppert, who added 20μl of nuclease to the tube.
- The tube was gently inverted and incubated at 37°C for 10 minutes.
- 1ml of the lysate/nuclease mixture was pipetted into 5 microcentrifuge tubes each.
- 20μl of ZnCl₂ was added to each tube via micropipette after incubation was complete.
- The tube was gently inverted and incubated at 37°C for 5 minutes.
- The tube was then placed in the centrifuge at 4°C at 14,000rpm for 1 minute.
- Supernatants (liquid) was then removed via serological pipette.
- The liquid supernatants were stored in a 15ml conical tube in the refrigerator.
- 500μl of TES buffer was added to each tube of pellets and incubated at 60°C for 15 minutes.
- 1μl of Proteinase K was added to each tube via micropipette and mixed gently.
- Each tube incubated at 37°C for 10 minutes.
- 60μl of potassium acetate was added to each tube via micropipette.
- Each tube was mixed well and left on ice for 15 minutes.
- Each tube was placed in the centrifuge at 4°C at 14,000rpm for 1 minute.
- The supernatants were pipetted via serological pipette into 5 new microcentrifuge tubes.
- The old microcentrifuge tubes containing the pellets were autoclaved.
- 500μl of isopropanol was added to each of the tubes with the supernatant via micropipette.
- The tubes were gently mixed, left on ice, and placed in the refrigerator for overnight storage.
- The next morning, the tubes were centrifuged at 14,000rpm for 10 minutes.
- After the centrifuge was complete, the supernatant was collected by slightly tilting each tube in the direction of the pellet and pipetting the supernatant out.
- The supernatant from each tube was released into a 15ml conical tube.
- The 15ml conical tube was dumped down the sink drain and autoclaved.
- 250μl of 70% ethanol was added to each tube via micropipette.
- Each tube was centrifuged for 1 minute at 14,000rpm.
- Each tube was gently turned upside down onto a folded kim-wipe and placed under the biosafety hood to dry.
- 50μl of nuclease-free water was added via micropipette to tube 1.
- Then from tube 1, 50μl of nuclease-free water was aspirated and added via micropipette to tube 2 leaving tube 1 empty.
- Then the same 50μl of nuclease-free water was added via micropipette to tube 3 leaving tube 2 empty.
- Then the same 50μl of nuclease-free water was added via micropipette to tube 4 leaving tube 3 empty.
- Then the same 50μl of nuclease-free water was added via micropipette to tube 5 leaving tube 4 empty.
- Tube 5 was the final tube containing the phage DNA sample.
- 1μl of nuclease-free water was released on the Nanodrop pedestal to calibrate the Nanodrop.
- The pedestal was then wiped with a kim-wipe.
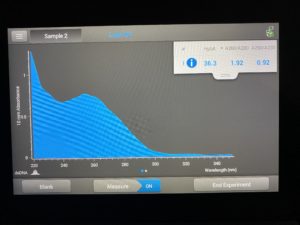
- 1μl of the DNA sample was released on the Nanodrop pedestal.
- The DNA concentration was recorded as 36.3ng/μl, A260/280 = 1.92, and A260/230 = 0.92.
Results:
Conclusions and Next Steps:
Group members will now complete the DNA extraction protocol to retrieve a higher volume of DNA and DNA purity.
Title: Phage DNA Extraction #3
Date: 10/18/2021 Redo: Yes Sample: #4B
Purpose: This procedure is to isolate genomic DNA from phage.
Notes:
- The following materials were collected: high volume lysate, nuclease mix 0.5M EDTA, 2M ZnCl₂, TES buffer, 10mg/mL Proteinase K, 3M potassium acetate, pH 5.2, Isopropanol, 70% ethanol, Nuclease-free water, heat block, ice, 5ml serological pipettes, and micropipettes.
- The student’s hands were washed and gloved.
- The high volume lysate was gently mixed.
- 5mL of the lysate was pipette into a 15 mL conical tube via serological pipette.
- The tube was then given to the TA, Marlee Goppert, who added 20μl of nuclease to the tube.
- The tube was gently inverted and incubated at 37°C for 10 minutes.
- 1ml of the lysate/nuclease mixture was pipetted into 5 microcentrifuge tubes each.
- 20μl of ZnCl₂ was added to each tube via micropipette after incubation was complete.
- The tube was gently inverted and incubated at 37°C for 5 minutes.
- The tube was then placed in the centrifuge at 4°C at 14,000rpm for 1 minute.
- Supernatants (liquid) was then removed via serological pipette.
- The liquid supernatants were stored in a 15ml conical tube in the refrigerator.
- 500μl of TES buffer was added to each tube of pellets and incubated at 60°C for 15 minutes.
- 1μl of Proteinase K was added to each tube via micropipette and mixed gently.
- Each tube incubated at 37°C for 10 minutes.
- 60μl of potassium acetate was added to each tube via micropipette.
- Each tube was mixed well and left on ice for 15 minutes.
- Each tube was placed in the centrifuge at 4°C at 14,000rpm for 1 minute.
- The supernatants were pipetted via serological pipette into 5 new microcentrifuge tubes.
- The old microcentrifuge tubes containing the pellets were autoclaved.
- 500μl of isopropanol was added to each of the tubes with the supernatant via micropipette.
- The tubes were gently mixed, left on ice, and placed in the refrigerator for overnight storage.
- Two mornings later (during the next class day), the tubes were centrifuged at 14,000rpm for 10 minutes.
- After the centrifuge was complete, the supernatant was collected by slightly tilting each tube in the direction of the pellet and pipetting the supernatant out.
- The supernatant from each tube was saved in the serological pipette and discarded in the autoclave.
- 250μl of 70% ethanol was added to each tube via micropipette.
- Each tube was centrifuged for 1 minute at 14,000rpm.
- Each tube had the supernatant pipetted out via micropipette and then discarded in the red bucket on the lab bench.
- All 5 microcentrifuge tubes were placed in a heat block at 60°C with their lids open and the heat block lid closed for 10 minutes to dry the tubes.
- 50μl of nuclease-free water was added via micropipette to tube 1.
- Then from tube 1, 50μl of nuclease-free water was aspirated and added via micropipette to tube 2 leaving tube 1 empty.
- Then the same 50μl of nuclease-free water was added via micropipette to tube 3 leaving tube 2 empty.
- Then the same 50μl of nuclease-free water was added via micropipette to tube 4 leaving tube 3 empty.
- Then the same 50μl of nuclease-free water was added via micropipette to tube 5 leaving tube 4 empty.
- Tube 5 was the final tube containing the phage DNA sample.
- 1μl of nuclease-free water was released on the Nanodrop pedestal to calibrate the Nanodrop.
- The pedestal was then wiped with a kim-wipe.
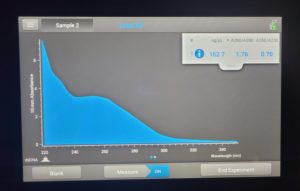
- 1μl of the DNA sample was released on the Nanodrop pedestal.
- The DNA concentration was recorded as 162.7ng/μl, A260/280 = 1.76, and A260/230 = 0.70.
Results:
Conclusions and Next Steps:
Group members will now purify the three samples of DNA to yield a higher concentration and lower pollutants.
Title: DNA Precipitation #1
Date: 10/27/2021 Redo: No Sample: #4B
Purpose: This procedure is to purify the extracted DNA from a phage.
Notes:
- The following materials were collected: 3M Sodium Acetate, ice-cold 100% Ethanol, extracted DNA from phage samples, micropipettes, microcentrifuge tube.
- The student’s hands were washed and gloved.
- The three microcentrifuge tubes containing the extracted DNA were collected.
- All three tubes had the DNA samples extracted via micropipette, the volume recorded and aspirated into one final microcentrifuge tube.
- The final volume of the extracted DNA was 116μl.
- 11.6μl of Sodium acetate was added to the tube of DNA and was calculated by dividing the final DNA volume by 10.
- 348μl of 100% Ethanol was added to the tube of DNA/Sodium acetate and was calculated by multiplying the final DNA volume by 3.
- The tube was vortexed lightly (on 5) and given to the TA, Marlee, to be stored in Dr. Edwards’ -80°C freezer overnight for 5 days.
- After 5 days, the tube was placed in the centrifuge at 14,000rpm at 4°C for 30 minutes.
- After 30 minutes, the supernatant was removed via pipette and the pellet was left in the tube.
- 0.5ml of ice-cold 75% Ethanol was added to the tube with the pellet and placed in the centrifuge at 14,000rpm at 4°C for 10 minutes.
- After 10 minutes, the supernatant was removed via pipette and the pellet was left in the tube.
- 0.5ml of ice-cold 75% Ethanol was added to the tube for a second time with the pellet and placed in the centrifuge at 14,000rpm at 4°C for 10 minutes.
- After 10 minutes, the supernatant was removed via pipette and the pellet was left in the tube.
- The tube was placed in the centrifuge on the lab bench for 1 minute at top speed.
- The tube was placed in a heat block at 37°C for 10 minutes to dry.
- After the pellet was dried, 50μl of nuclease-free water was added to the tube via pipette.
- The tube was gently flicked with a finger 4 times.
- 1μl of nuclease-free water was released on the Nanodrop pedestal to calibrate the Nanodrop.
- The pedestal was then wiped with a kim-wipe.
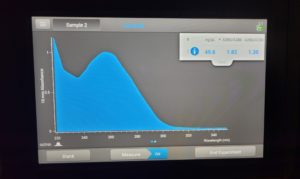
- 1μl of the precipitated DNA sample was released on the Nanodrop pedestal.
- The DNA concentration was recorded as 49.6ng/μl, A260/280 = 1.82, and A260/230 = 1.35.
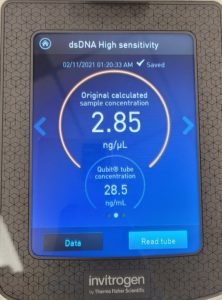
- The DNA was tested in the Qubit 3:
- Three microcentrifuge tubes were retrieved from the bag next to the Qubit.
- One 1.5 microcentrifuge tube was collected.
- 796μl of broad range Qubit buffer was added to the 1.5 microcentrifuge tube via micropipette.
- 4μl of broad range reagent dye was added to the tube of buffer via micropipette.
- The tube was lightly vortexed.
- The three small tubes were labeled “1, 2, and D” respectively.
- 190μl of the buffer/dye solution was added to each tube labeled “1” and “2” via micropipette.
- 198μl of the buffer/dye solution was added to the tube labeled “D” via micropipette.
- 10μl of standard 1 was added to the tube labeled “1” via micropipette.
- 10μl of standard 2 was added to the tube labeled “2” via micropipette.
- 2μl of the DNA to be tested was added to the tube labeled “D” via micropipette.
- All three tubes were vortexed lightly and left to sit undisturbed for 2 minutes.
- The Qubit was plugged in.
- Double stranded DNA was selected.
- Broad range was selected.
- The button “read standards” was selected.
- Tube 1 was placed into the slot and the “read standard” button was selected.
- Tube 1 was removed.
- Tube 2 was placed into the slot and the “read standard” button was selected.
- Tube 2 was removed.
- Tube D was placed into the slot and the “read sample” button was selected.
- A photo of the results was taken and tube D was removed.
- All four tubes were then autoclaved.
Results:
Conclusions and Next Steps:
Group members will make more high titer lysate and perform the DNA extraction protocol again.
Title: Making Webbed Plates From a Lysate of Known Titer
Date: 11/1/2021 Redo: Yes Sample: #4B
Purpose: This procedure is to create a plate with a very high density of plaques from a lysate of a known titer.
Notes:
- The following materials were collected: lysate, 10ml serological pipette, phage buffer, agar plates, molten top agar, microcentrifuge tube, host bacteria (250μl), and a bunsen burner.
- The student’s hands were washed and gloved prior to disinfecting the workstation.
- CiDecon was spread with Kim-Wipes to disinfect the workstation.
- 70% Ethanol alcohol was sprayed on the workstation and wiped after with Kim-Wipes to speed drying.
- Gloves were removed after disinfecting to prevent burns on the next step.
- A bunsen burner station was set up to prevent contamination.
- The volume of lysate needed for the webbed plates was calculated as follows: Volume needed (ml)lysate = (1.26×10⁵ pfu) / (1.26×10¹⁰ pfu/ml) = 1×10⁻⁵ ml lysate = (1×10⁻⁵ ml) x (1000 μl/ml) = 1×10⁻² μl
- One microcentrifuge tube was labeled “2:18”
- 18μl of phage buffer was added to the tube via micropipette
- 2μl of the lysate was pipetted via micropipette into the “2:18” labeled microcentrifuge and then flicked with a finger and inverted
- One microcentrifuge tube was labeled “4:36”.
- 36μl of phage buffer was added to the tube via micropipette.
- 4μl of the diluted lysate was pipetted via micropipette from the tube labeled “2:18” into the “4:36” labeled microcentrifuge and then flicked with a finger and inverted.
- 10μl of the diluted lysate sample was pipetted via micropipette into a tube containing 250μl of our bacterial host microbacterium foliorum.
- The tube of m. foliorum and the diluted lysate sample were gently flicked with a finger and left to sit undisturbed for 10 minutes.
- Steps 14 and 15 were done four times in total.
- At 10 minutes, 3ml of molten top agar was pipetted via a serological pipette into each of the four tubes of m. foliorum/diluted lysate sample.
- Immediately after releasing the top agar into each tube, the top agar and bacterial host/diluted lysate were aspirated and placed in a petri dish for each m. foliorum/diluted lysate sample.
- Each petri dish was slightly swirled to ensure the mixture covered the entire plate and was left to sit undisturbed for approximately 20 minutes.
- Once each plate had the mixture solidify, each petri dish was flipped over and placed in the incubator for approximately 30 hours.
- The workbench was cleaned and disinfected as described in Steps #2-4.
- After a photo and observations of each plate, the plates were autoclaved.
Results:
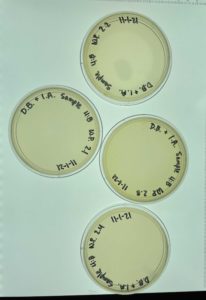
Conclusions and Next Steps:
The first round of making webbed plates to proceed with DNA extraction failed. All of the bacteria were destroyed by the phage. The students will perform this protocol again and check the plates sooner.
Title: Making Webbed Plates From a Lysate of Known Titer
Date: 11/2/2021 Redo: Yes Sample: #4B
Purpose: This procedure is to create a plate with a very high density of plaques from a lysate of a known titer.
Notes:
- The following materials were collected: lysate, 10ml serological pipette, phage buffer, agar plates, molten top agar, microcentrifuge tube, host bacteria (250μl), and a bunsen burner.
- The student’s hands were washed and gloved prior to disinfecting the workstation.
- CiDecon was spread with Kim-Wipes to disinfect the workstation.
- 70% Ethanol alcohol was sprayed on the workstation and wiped after with Kim-Wipes to speed drying.
- Gloves were removed after disinfecting to prevent burns on the next step.
- A bunsen burner station was set up to prevent contamination.
- The volume of lysate needed for the webbed plates was calculated as follows: Volume needed (ml)lysate = (1.26×10⁵ pfu) / (1.26×10¹⁰ pfu/ml) = 1×10⁻⁵ ml lysate = (1×10⁻⁵ ml) x (1000 μl/ml) = 1×10⁻² μl
- One microcentrifuge tube was labeled “2:18”.
- 18μl of phage buffer was added to the tube via micropipette.
- 2μl of the lysate was pipetted via micropipette into the “2:18” labeled microcentrifuge and then flicked with a finger and inverted.
- One microcentrifuge tube was labeled “4:36”.
- 36μl of phage buffer was added to the tube via micropipette.
- 4μl of the diluted lysate was pipetted via micropipette from the tube labeled “2:18” into the “4:36” labeled microcentrifuge and then flicked with a finger and inverted.
- 10μl of the diluted lysate sample was pipetted via micropipette into a tube containing 250μl of our bacterial host microbacterium foliorum.
- The tube of m. foliorum and the diluted lysate sample were gently flicked with a finger and left to sit undisturbed for 10 minutes.
- Steps 14 and 15 were done four times in total.
- At 10 minutes, 3ml of molten top agar was pipetted via a serological pipette into each of the four tubes of m. foliorum/diluted lysate sample.
- Immediately after releasing the top agar into each tube, the top agar and bacterial host/diluted lysate were aspirated and placed in a petri dish for each m. foliorum/diluted lysate sample.
- Each petri dish was slightly swirled to ensure the mixture covered the entire plate and was left to sit undisturbed for approximately 20 minutes.
- Once each plate had the mixture solidify, each petri dish was flipped over and placed in the incubator for approximately 22 hours.
- The workbench was cleaned and disinfected as described in Steps #2-4.
- After a photo and observations of each plate, we began the next step, flooding the plates of the diluted lysate sample of Sample #4:B.
Results:
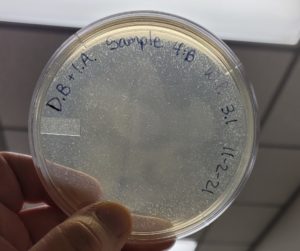
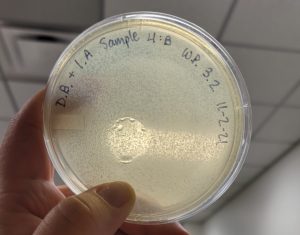
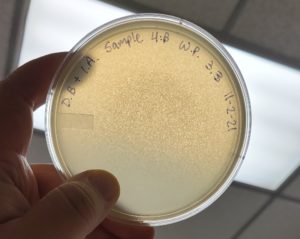
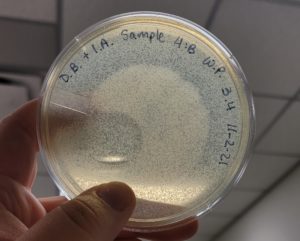
Conclusions and Next Steps:
The second round of making webbed plates with Sample #4:B produced a high titer webbed plate required to proceed to our next step of flooding the plates and retrieve a high titer lysate.
Title: Collecting a Plate Lysate
Date: 11/3/2021 Redo: Yes Sample: #4B
Purpose: This procedure is to generate a highly concentrated liquid phage sample.
Notes:
- The following materials were collected: webbed plates, 5ml serological pipette, phage buffer, sterile 5ml syringe, 0.22 μm syringe filter, 50ml conical tube, and a bunsen burner.
- The student’s hands were washed and gloved prior to disinfecting the workstation.
- CiDecon was spread with Kim-Wipes to disinfect the workstation.
- 70% Ethanol alcohol was sprayed on the workstation and wiped after with Kim-Wipes to speed drying.
- Gloves were removed after disinfecting to prevent burns on the next step.
- A bunsen burner station was set up to prevent contamination.
- 8ml of phage buffer was added to each of the 4 webbed plates via a serological pipette.
- The webbed plates were lightly swirled and left undisturbed in the fridge at 4°C for approximately 19 hours.
- After 19 hours the student’s hands were washed and gloved prior to disinfecting the workstation.
- CiDecon was spread with Kim-Wipes to disinfect the workstation.
- 70% Ethanol alcohol was sprayed on the workstation and wiped after with Kim-Wipes to speed drying.
- Gloves were removed after disinfecting to prevent burns on the next step.
- A bunsen burner station was set up to prevent contamination.
- The lid of each flooded plate was removed.
- The plates were tilted by being placed on the edge of the lid to pool the liquids to one side of the plate.
- A 5ml syringe was used to aspirate the lysate from each plate.
- A 0.22 μm filter was attached to the 5ml syringe.
- Approximately 30ml of lysate was filtered into the 50ml conical tube and stored in the fridge at 4 °C.
- The workbench was cleaned and disinfected as described in Steps #2-4.
Results:
No photos of the 50ml conical tube were taken.
Conclusions and Next Steps:
Collecting plate lysate was successful and welded approximately 30mL of the high titer lysate. Group members will move on to DNA extraction.
Title: Phage DNA Extraction #4
Date: 11/8/2021 Redo: Yes Sample: #4B
Purpose: This procedure is to isolate genomic DNA from phage.
Notes:
- The following materials were collected: high volume lysate, nuclease mix 0.5M EDTA, 2M ZnCl₂, TES buffer, 10mg/mL Proteinase K, 3M potassium acetate, pH 5.2, Isopropanol, 70% ethanol, Nuclease-free water, heat block, ice, 5ml serological pipettes, and micropipettes.
- The student’s hands were washed and gloved.
- The high-volume lysate was gently mixed.
- 5mL of the lysate was pipette into a 15 mL conical tube via serological pipette.
- The tube was then given to the TA, Marlee Goppert, who added 20μl of nuclease to the tube.
- The tube was gently inverted and set for approximately 10 minutes while the incubators warmed up.
- The tube was then incubated at 37°C for 10 minutes.
- 1ml of the lysate/nuclease mixture was pipetted into 5 microcentrifuge tubes each.
- 20μl of ZnCl₂ was added to each tube via micropipette after incubation was complete.
- The tube was gently inverted and incubated at 37°C for 5 minutes.
- The tube was then placed in the centrifuge at 4°C at 14,000rpm for 1 minute.
- Supernatants (liquid) were then removed via micropipette and discarded.
- 500μl of TES buffer was added to each tube of pellets and gently inverted.
- All 5 tubes were incubated at 60°C for 15 minutes.
- 1μl of Proteinase K was added to each tube via micropipette and mixed gently.
- Each tube incubated at 37°C for 10 minutes.
- 60μl of potassium acetate was added to each tube via micropipette.
- Each tube was mixed well and left on ice for 15 minutes.
- Each tube was placed in the centrifuge at 4°C at 14,000rpm for 1 minute.
- The supernatants were pipetted via micropipette into 5 new microcentrifuge tubes.
- The old microcentrifuge tubes containing the pellets were autoclaved.
- 500μl of isopropanol was added to each of the tubes with the supernatant via micropipette.
- The tubes were gently mixed, left on ice, and placed in the refrigerator for overnight storage.
- The next morning (during the next class day), the tubes were centrifuged at 14,000rpm for 10 minutes.
- After the centrifuge was complete, the supernatant was collected by slightly tilting each tube in the direction away from the pellet and pipetting the supernatant out.
- The supernatant from each tube was saved in the serological pipette and discarded in the autoclave.
- 250μl of 70% ethanol was added to each tube via micropipette.
- Each tube was centrifuged for 1 minute at 14,000rpm.
- Each tube had the supernatant pipetted out via micropipette and then discarded in the red bucket on the lab bench.
- All 5 microcentrifuge tubes were placed in a heat block at 30°C with their lids open and the heat block lid closed for 30 minutes to dry the tubes.
- 50μl of nuclease-free water was added via micropipette to tube 1.
- Then from tube 1, 50μl of nuclease-free water was aspirated and added via micropipette to tube 2 leaving tube 1 empty.
- Then the same 50μl of nuclease-free water was added via micropipette to tube 3 leaving tube 2 empty.
- Then the same 50μl of nuclease-free water was added via micropipette to tube 4 leaving tube 3 empty.
- Then the same 50μl of nuclease-free water was added via micropipette to tube 5 leaving tube 4 empty.
- Tube 5 was the final tube containing the phage DNA sample.
- 1μl of nuclease-free water was released on the Nanodrop pedestal to calibrate the Nanodrop.
- The pedestal was then wiped with a kim-wipe.
- 1μl of the DNA sample was released on the Nanodrop pedestal.
- The DNA concentration was recorded as 466.4ng/μl, A260/280 = 1.91, and A260/230 = 1.18.
- The DNA was tested in the Qubit 3:
- Three microcentrifuge tubes were retrieved from the bag next to the Qubit.
- One 1.5 microcentrifuge tube was collected.
- 796μl of broad range Qubit buffer was added to the 1.5 microcentrifuge tube via micropipette.
- 4μl of broad range reagent dye was added to the tube of buffer via micropipette.
- The tube was lightly vortexed.
- The three small tubes were labeled “1, 2, and D” respectively.
- 190μl of the buffer/dye solution was added to each tube labeled “1” and “2” via micropipette.
- 198μl of the buffer/dye solution was added to the tube labeled “D” via micropipette.
- 10μl of standard 1 was added to the tube labeled “1” via micropipette.
- 10μl of standard 2 was added to the tube labeled “2” via micropipette.
- 2μl of the DNA to be tested was added to the tube labeled “D” via micropipette.
- All three tubes were vortexed lightly and left to sit undisturbed for 2 minutes.
- The Qubit was plugged in.
- Double-stranded DNA was selected.
- Broad range was selected.
- The button “read standards” was selected.
- Tube 1 was placed into the slot and the “read standard” button was selected.
- Tube 1 was removed.
- Tube 2 was placed into the slot and the “read standard” button was selected.
- Tube 2 was removed.
- Tube D was placed into the slot and the “read sample” button was selected.
- A photo of the results was taken and tube D was removed.
- All four tubes were then autoclaved.
Results:
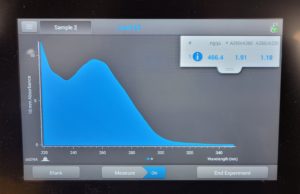
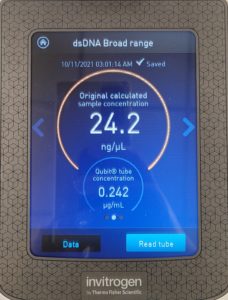
Conclusions and Next Steps:
Group members will now proceed to the characterization protocol.
Title: Phage DNA Extraction #5 (Edwards)
Date: 11/8/2021 Redo: Yes Sample: #4B
Purpose: This procedure is to isolate genomic DNA from phage.
Notes:
- The following materials were collected: high volume lysate, nuclease mix 0.5M EDTA, 2M ZnCl₂, TES buffer, 10mg/mL Proteinase K, 3M potassium acetate, pH 5.2, Isopropanol, 70% ethanol, Nuclease-free water, heat block, ice, 5ml serological pipettes, and micropipettes.
- The student’s hands were washed and gloved.
- The high volume lysate was gently mixed.
- 5mL of the lysate was pipette into a 15 mL conical tube via serological pipette.
- The tube was then given to the TA, Marlee Goppert, who added 20μl of nuclease to the tube.
- The tube was gently inverted and set for approximately 10 minutes while the incubators warmed up.
- The tube was then incubated at 37°C for 10 minutes.
- 1ml of the lysate/nuclease mixture was pipetted into 5 microcentrifuge tubes each.
- 20μl of ZnCl₂ was added to each tube via micropipette after incubation was complete.
- The tube was gently inverted and incubated at 37°C for 5 minutes.
- The tube was then placed in the centrifuge at 4°C at 14,000rpm for 1 minute.
- Supernatants (liquid) were then removed via micropipette and discarded.
- 500μl of TES buffer was added to each tube of pellets and gently inverted.
- All 5 tubes were incubated at 60°C for 15 minutes.
- 1μl of Proteinase K was added to each tube via micropipette and mixed gently.
- Each tube was incubated at 37°C for 10 minutes.
- 60μl of potassium acetate was added to each tube via micropipette.
- Each tube was mixed well and left on ice for 15 minutes.
- Each tube was placed in the centrifuge at 4°C at 14,000rpm for 1 minute.
- The supernatants were pipetted via micropipette into 5 new microcentrifuge tubes.
- The old microcentrifuge tubes containing the pellets were autoclaved.
- 500μl of isopropanol was added to each of the tubes with the supernatant via micropipette.
- The tubes were gently mixed, left on ice, and placed in the refrigerator for overnight storage.
- The next morning (during the next class day), the tubes were centrifuged at 14,000rpm for 10 minutes.
- After the centrifuge was complete, the supernatant was collected by slightly tilting each tube in the direction away from the pellet and pipetting the supernatant out.
- The supernatant from each tube was saved in the serological pipette and discarded in the autoclave.
- 250μl of 70% ethanol was added to each tube via micropipette.
- Each tube was centrifuged for 1 minute at 14,000rpm.
- Each tube had the supernatant pipetted out via micropipette and then discarded in the red bucket on the lab bench.
- All 5 microcentrifuge tubes were placed in a heat block at 30°C with their lids open and the heat block lid closed for 30 minutes to dry the tubes.
- 50μl of nuclease-free water was added via micropipette to tube 1.
- Then from tube 1, 50μl of nuclease-free water was aspirated and added via micropipette to tube 2 leaving tube 1 empty.
- Then the same 50μl of nuclease-free water was added via micropipette to tube 3 leaving tube 2 empty.
- Then the same 50μl of nuclease-free water was added via micropipette to tube 4 leaving tube 3 empty.
- Then the same 50μl of nuclease-free water was added via micropipette to tube 5 leaving tube 4 empty.
- Tube 5 was the final tube containing the phage DNA sample.
- 1μl of nuclease-free water was released on the Nanodrop pedestal to calibrate the Nanodrop.
- The pedestal was then wiped with a kim-wipe.
- 1μl of the DNA sample was released on the Nanodrop pedestal.
- The DNA concentration was recorded as 5347.2ng/μl, A260/280 = 2.07, and A260/230 = 2.01.
- The DNA was tested in the Qubit 3:
- 1. Three microcentrifuge tubes were retrieved from the bag next to the Qubit.
- One 1.5 microcentrifuge tube was collected.
- 796μl of broad range Qubit buffer was added to the 1.5 microcentrifuge tube via micropipette.
- 4μl of broad range reagent dye was added to the tube of buffer via micropipette.
- The tube was lightly vortexed.
- The three small tubes were labeled “1, 2, and D” respectively.
- 190μl of the buffer/dye solution was added to each tube labeled “1” and “2” via micropipette.
- 198μl of the buffer/dye solution was added to the tube labeled “D” via micropipette.
- 10μl of standard 1 was added to the tube labeled “1” via micropipette.
- 10μl of standard 2 was added to the tube labeled “2” via micropipette.
- 2μl of the DNA to be tested was added to the tube labeled “D” via micropipette.
- All three tubes were vortexed lightly and left to sit undisturbed for 2 minutes.
- The Qubit was plugged in.
- Double-stranded DNA was selected.
- Broad range was selected.
- The button “read standards” was selected.
- Tube 1 was placed into the slot and the “read standard” button was selected.
- Tube 1 was removed.
- Tube 2 was placed into the slot and the “read standard” button was selected.
- Tube 2 was removed.
- Tube D was placed into the slot and the “read sample” button was selected.
- A photo of the results was taken and tube D was removed.
- All four tubes were then autoclaved.
Results:
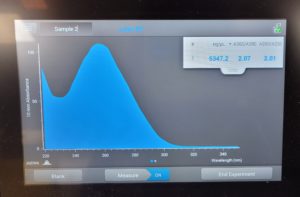

Conclusions and Next Steps:
Group members will save this DNA.
Characterization
Title: Mounting Phage Samples for TEM
Date: 11/27/2021 Redo: No Sample: #4:B
Purpose: This procedure is to prepare your phage sample for viewing with a transmission electron microscope.
Notes:
- The following materials were collected: high titer lysate, EM forceps, pelco tabs, 200–400 mesh carbon–formvar-coated copper grids, wedges of filter paper, sterile filtered water, phage buffer, micropipette, and 1% uranyl acetate.
- The student’s hands were washed and gloved.
- 1ml of HVL was transferred to a sterile microcentrifuge tube.
- The 1ml of HVL was centrifuged at top speed at 4°C for one hour.
- After one hour, the supernatants were removed via micropipette by Ashley Fannin.
- 100μl of phage buffer was added to the tube via micropipette.
- The tube was left to resuspend in a 4°C fridge overnight.
- The next day the student’s hands were gloved and the tube was placed under the biosafety hood in the biochemistry lab.
- An approximately 5 x 5 cm piece of parafilm was placed onto the lid of a Petri dish.
- A small piece of double-sided tape was stuck onto the parafilm in the lid of the Petri dish.
- EM forceps were used to remove a fresh grid from a box of unused grids, touching only the very edge of the grid.
- The dark side of the grid was placed up and only the very edge of the grid touched the adhesive.
- 10μl of lysate was pipetted onto the grid without touching the tip to the grid itself.
- The lysate was left on the grid for 2 minutes to settle.
- After 2 minutes, the excess lysate was wicked off with a wedge of filter paper.
- The grid was washed by having 10μl of sterile water pipetted onto the grid and left to sit for two minutes.
- After 2 minutes, the excess water was wicked off with a wedge of filter paper.
- The grid was washed a second time by having 10μl of sterile water pipetted onto the grid and left to sit for two minutes.
- After 2 minutes, the excess water was wicked off with a wedge of filter paper.
- 10μl of 1% uranyl acetate was pipetted onto the grid and left to sit for 2 minutes.
- After 2 minutes, the excess uranyl acetate was wicked off with a wedge of filter paper.
- The grid was left to dry undisturbed for approximately 5 minutes.
- EM forceps were used to place the dried grid into the grid box of stained grids.
- The grid box was placed in a vacuum-sealed container for storage until shipping.
Results:
No photo of the grid was taken.
Conclusions and Next Steps:
Since the phage was in the fridge too long (overnight) the TEM protocol will be performed again.
Title: Mounting Phage Samples for TEM
Date: 11/1/2021 Redo: Yes Sample: #4:B
Purpose: This procedure is to prepare your phage sample for viewing with a transmission electron microscope.
Notes:
- The following materials were collected: high titer lysate, EM forceps, pelco tabs, 200–400 mesh carbon–formvar-coated copper grids, wedges of filter paper, sterile filtered water, phage buffer, micropipette, and 1% uranyl acetate.
- The student’s hands were washed and gloved.
- 1ml of HVL was transferred to a sterile microcentrifuge tube.
- The 1ml of HVL was centrifuged at top speed at 4°C for one hour.
- After one hour, the supernatants were removed via micropipette and discarded.
- 100μl of phage buffer was added to the tube via micropipette.
- The tube was left to resuspend in a 4°C fridge for 30 minutes.
- After 30 minutes, the tube was placed under the biosafety hood in the biochemistry lab.
- An approximately 5 x 5 cm piece of parafilm was placed onto the lid of a Petri dish.
- A small piece of double-sided tape was stuck onto the parafilm in the lid of the Petri dish.
- EM forceps were used to remove a fresh grid from a box of unused grids, touching only the very edge of the grid.
- The dark side of the grid was placed up and only the very edge of the grid touched the adhesive.
- 10μl of lysate was pipetted onto the grid without touching the tip to the grid itself.
- The lysate was left on the grid for 2 minutes to settle.
- After 2 minutes, the excess lysate was wicked off with a wedge of filter paper.
- The grid was washed by having 10μl of sterile water pipetted onto the grid and left to sit for two minutes.
- After 2 minutes, the excess water was wicked off with a wedge of filter paper.
- The grid was washed a second time by having 10μl of sterile water pipetted onto the grid and left to sit for two minutes.
- After 2 minutes, the excess water was wicked off with a wedge of filter paper.
- 10μl of 1% uranyl acetate was pipetted onto the grid and left to sit for 2 minutes.
- After 2 minutes, the excess uranyl acetate was wicked off with a wedge of filter paper.
- The grid was left to dry undisturbed for approximately 5 minutes.
- EM forceps were used to place the dried grid into the C2 slot of the grid box of stained grids.
- The grid box was placed in a vacuum-sealed container for storage until shipping.
Results:
No photo of the grid was taken.
Conclusions and Next Steps:
The TEM protocol was successful.
Title: Setting Up Restriction Enzyme Digests
Date: 11/10/2021 Redo: No Sample: #4B
Purpose: To cut your phage genome into multiple fragments based on its DNA sequence.
Notes:
- The following materials were collected: phage DNA, heat block, microcentrifuge tubes, restriction enzymes with buffers, and micropipettes.
- The student’s hands were washed and gloved.
- The DNA sample was removed from the freezer, thawed in the hands of the student, and mixed by a gentle flick of the finger.
- 8μl of the DNA was calculated to be added to each of the 5 tubes of enzymes and uncut DNA tube.
- The uncut DNA tube had the following added to it: 14.5μl of nuclease free water, 8μl of DNA, and 2.5μl of 10x reaction buffer (red tube).
- The HaeIII tube had the following added to it: 14μl of nuclease free water, 8μl of DNA, 2.5μl of 10x reaction buffer, and 0.5μl of HaeIII enzyme.
- The NspI tube had the following added to it: 14μl of nuclease free water, 8μl of DNA, 2.5μl of 10x reaction buffer, and 0.5μl of NspI enzyme.
- The SacII tube had the following added to it: 14μl of nuclease free water, 8μl of DNA, 2.5μl of 10x reaction buffer, and 0.5μl of SacII enzyme.
- The SalI tube had the following added to it: 14μl of nuclease free water, 8μl of DNA, 2.5μl of 10x reaction buffer, and 0.5μl of SalI enzyme.
- All five tubes were incubated for 1.5 hours at 37°C.
- After 1.5 hours the enzyme activity was deactivated to be stored overnight: HaeIII was incubated at 80°C for 20 minutes and NspI, SacII, and SalI were incubated at 65°C for 20 minutes.
- The DNA was immediately placed in the -20°C freezer for overnight storage.
- After high heat inactivation, all four tubes were placed in the -20°C freezer for overnight storage.
Results:
No photos were taken.
Conclusions and Next Steps:
Group members will proceed to casting agarose gels.
Title: Casting Agarose Gels
Date: 11/11/2021Redo: No Sample: #4B
Purpose: To prepare an agarose gel for electrophoresis.
Notes:
- The following materials were collected: agarose powder, 1x TBE running buffer, ethidium bromide (DNA dye), erlenmeyer flask, electrophoresis apparatus and power supply, and micropipettes.
- The student’s hands were washed and gloved.
- 30ml of 1x TBE running buffer was poured into an Erlenmeyer flask.
- 0.24g of agarose powder was weighed and added to the flask of the buffer.
- The flask was capped with paper towels and placed in the microwave for 1 minute.
- The flask was taken out of the microwave after 1 minute, swirled, and checked for chunks and particles.
- No particles or chunks were detected.
- The flask was uncapped and 1.5μl of ethidium bromide (DNA dye) was added to the flask via micropipette.
- The flask was gently swirled and left to cool to a warm touch.
- The electrophoresis apparatus was constructed and the comb was added.
- Once cooled enough, the contents of the flask were poured into the electrophoresis apparatus.
- The apparatus was left undisturbed for 20 minutes for the gel to solidify.
- After the gel was completely solid, the comb was gently removed.
- 1x TBE running buffer was poured over the gel to cover it about ¼ an inch.
Results:
No photos were taken.
Conclusions and Next Steps:
Group members will proceed to gel electrophoresis.
Title: Gel Electrophoresis of Restriction Enzymes
Date: 11/11/2021Redo: No Sample: #4B
Purpose: To separate DNA fragments via agarose gel electrophoresis.
Notes:
- The following materials were collected: electrophoresis apparatus and power supply with agarose gel, 6x DNA loading dye, DNA cut with restriction enzymes, DNA ladder, and micropipettes.
- The student’s hands were washed and gloved.
- The gel was oriented as follows: wells on the negative side (since DNA is negatively charged).
- The ladder was made as follows: 1μl of HindIII digest, 24μl of nuclease-free water, and 5μl of 6x loading dye were added to a new microcentrifuge tube.
- 5μl of 6x loading dye was added to the four tubes of DNA cut with restriction enzymes and the one tube of uncut DNA.
- All six tubes were incubated at 65°C for 5 minutes.
- After incubation, the tubes were immediately placed in ice to cool for 5 minutes.
- After cooling, the tubes were centrifuged for 30 seconds at 4°C at 10,000rpm.
- The gel was loaded in the following order: 20μl of the ladder → 20μl of uncut DNA → 20μl of HaeIII cut DNA → 20μl of NspI cut DNA → 20μl of SacII cut DNA → 20μl of SalI cut DNA.
- The electrophoresis apparatus was plugged in and started.
- After approximately 1 hour and 15 minutes, the purple dye line made it between #5 and #6.
- The apparatus was turned off, the gel was examined, and the gel was photographed.
- The excess 1x TBE running buffer from the electrophoresis chamber was emptied back into the buffer’s original container.
Results:
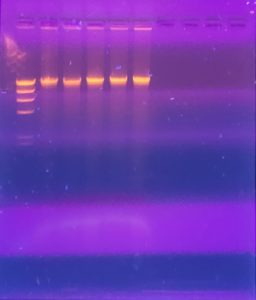
Conclusions and Next Steps:
The gel electrophoresis was successful.