Discovery of Rathburn
Sample Collection
| Collector Name | Austin | David | David | Lee |
| Sample No. | 1 | 2 | 4 | 3 |
| Date of Collection | 9/3/19 | 9/1/19 | 9/1/19 | 9/2/19 |
| Sample Type | Soil (Wet, dark brown, little organic matter) | Soil (dense clay, moist, decomposing hay and grasses) | Soil (loose, black moist and soft) | Soil (Dry, light brown, and organic matter) |
| General Location | Edge of a pond | Cow Field | Woods | Front yard |
| Location Description | Soil underneath surface of water | Under Hay ring | Under oak leaves in a wash | Under a tree, within an ant pile |
| GPS Coordinates |
Lat: 32.42’26” Long: -97.39’45” |
Lat: 32.312752 Long: -98.201393
|
Lat: 32.310349 Long: -98.199671 |
32.476880, -979640 |
| Sample Depth | 4 cm | 10 cm | 6 cm | 5-8 cm deep |
| Ambient Temperature | 31.7 C | 32.8 C (58% hum) | 32.8 C (58% hum) | 32.2 C |
Isolation/Purification
tPlaq
Direct Isolation
Date Started: Sep. 04, 2019 Redo? No
Purpose: To isolate phages in the soil sample we collected without first enriching the sample.
Notes:
We started with sample 1 and decided that it would be best for direct isolation because of the likelihood for more interesting bacteriophages. We followed the SEA Phages Protocol 5.2.
- Filled our sample with liquid media until it was completely submerged with 3ml of excess.
- Inverted our sample repeatedly to fully incorporate the media into the soil.
- Incubated the sample at 27 Degrees C for 2 hours in a shaking incubator
- Next we used a 0.22 μm filter to filter aprox. 2ml of liquid from the sample.
The next step is a Plaque Assay.
Plaque Assay (Sep 4, 2019)– SEA Phages protocol 5.3-
Purpose: To allow bacteria to grow on an agar plate along with any potential phages from the soil sample. If there are phages present they will kill bacteria around them creating small circles of cleared bacteria called plaques which allows us to visualize if there are phages present.
- Added 500 μl of the filtered phage sample to a bacterial host culture tube.
- Was mixed and allowed to sit for approx. 10 min.
- Plated the samples using 3ml of top agar mixed into the phage/bacterial culture and then transferred onto an agar plate. Plate was tilted around until the added agar mixture coated the entire surface.
- Plate sat for approx. 15-20 mins to allow the agar to solidify.
- The agar plate was inverted and incubated for 48 hours at (27 C).
Results:
The direct isolation failed. A main problem was the top agar not solidifying before the plate was inverted. In addition, there was bacterial contamination on the plate.
Conclusions and Next Steps:
Because of the top agar not solidifying before it was turned over, plaques (if there are any present) cannot be identified. We started an enriched isolation protocol at the same time with a different soil sample so we will proceed with it first before redoing a direct isolation.
Enriched Isolation
Date Started:Sep. 04, 2019 Redo? No
Purpose: To isolate a page sample from a soil sample using an enrichment step.
Notes:
With sample 4 we did an enriched isolation following SEA Phages Protocol 5.5.
- Transferred the sample to a 50ml tube to the 15ml mark.
- Filled the tube with media until it reached 35ml.
- Incubated the sample at 27 Degrees C for 2 hours in a shaking incubator
Next we transferred aprox. 1.5 ml of supernatant to a microcentrifuge tube
The tube was spun down to form a bacterial pellet in the bottom. We made sure not to spin it too much.
A 22 µm filter was used to filter the phage sample from the microcentrifuge tube into another microcentrifuge tube. We stored the culture tube that had the original enriched isolation in it in the fridge.
Spot Test
We did a spot test using protocol 5.6 from the SEA Phages guide.
An agar plate was plated with a bacterial lawn using top agar and the 250 μl culture of host bacteria.
Phage buffer was used to put spots for a negative control and the phage sample was used to put the spots for testing to see if plaques would form there.
Results:
The plate (nor a second one that was done in the same manner) worked. The bacterial lawn would not grow properly nor did we see any plaques.
Conclusions and Next Steps:
We are starting with some more direct isolation to attempt to get some of the plates to grow properly as we won’t be able to see any results if they don’t.
Redo Spot test using Enriched Isolation from 9/4
Date Started:Sep. 09, 2019 Redo? yes
Purpose: Redoing our spot test
Notes:
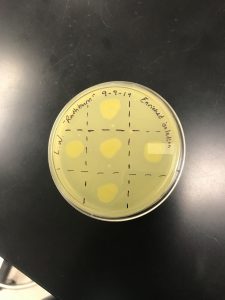
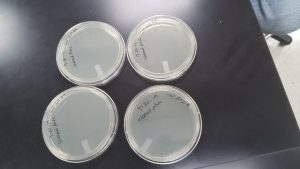
Completed spot test, Procedure 5.6
The corner triangles are negative control and squares denote where the phage was administered.
Results:
Results came back on 9/11/19. Contamination is evident, with no plaques present.
Conclusions and Next Steps:
Another isolation (direct) is recommended.
Direct Isolation
Date Started: Sep. 11, 2019 Redo? Yes
Purpose: To isolate phages in the soil sample we collected without first enriching the sample.
Notes:
We used sample 4. We followed the SEA Phages Protocol 5.2.
- Filled our sample with liquid media until it was completely submerged with 3ml of excess.
- Inverted our sample repeatedly to fully incorporate the media into the soil.
- Incubated the sample at 27 Degrees C for 2 hours in a shaking incubator
- Next we used a 0.22 μm filter to filter aprox. 2ml of liquid from the sample.
The next step is a Plaque Assay.
Plaque Assay
Date Started: Sep. 11, 2019 Redo? Yes
Purpose: To allow bacteria to grow on an agar plate along with any potential phages from the soil sample. If there are phages present they will kill bacteria around them creating small circles of cleared bacteria called plaques which allows us to visualize if there are phages present.
- Added 500 μl of the filtered phage sample to a bacterial host culture tube.
- Was mixed and allowed to sit for approx. 10 min.
- Plated the samples using 3ml of top agar mixed into the phage/bacterial culture and then transferred onto an agar plate. Plate was tilted around until the added agar mixture coated the entire surface.
- Plate sat for approx. 20 mins to allow the agar to solidify.
- The agar plate was inverted and incubated for 48 hours at (27 C).
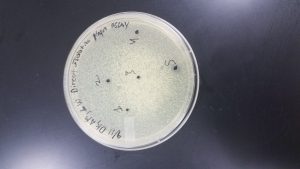
Results:
Results came back on 9/13/19. Plaques did appear on this plate.
Conclusions and Next Steps:
A virus is present on this plate. Our next step is to pick plaques to use and stick them with a micro pipette tip and combine them with more bacterial hosts and plate.
Plaque Picking
Date Started: Sep. 13, 2019 Redo? No
Purpose: To gather samples from our successful plaque assay
Notes:
- Plaques were selected based on size and numbered 1-5 (numbering not based on size)
Serial Dilutions
Date Started:Sep. 13, 2019 Redo? No
Purpose: To determine the concentration of phage particles in a lysate by using a plaque assay
Notes:
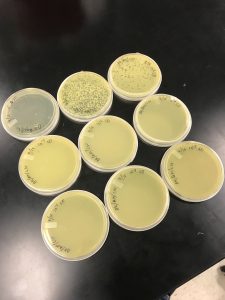
Plates were prepared for 10-1, 10-2, 10-3, 10-4, 10-5, 10-6, 10-7, and 10-8 dilutions
- Notes
Results:
Plaques were found up to the 10-3 plate.
Conclusions and Next Steps:
We need to make a lysate.
Amplification
Lysate Plate Collection
Date Started: Sep. 18, 2019 Redo? No
Purpose: To obtain a concentrated phage sample
Notes:
Followed protocol 6.3 in collecting lysates. Used the plates that plaques formed on from 9/13/19.
- Flood webbed plate. After 4 hours collect lysate by putting through 22 microliter filter and putting into a conical tube.
Results:
Lysate was collected successfully.
Conclusions and Next Steps:
To create dilutions of the lysate and plate using the full plate titer assay and then count the number of plaques to determine lysate titer.
Full Plate Titer
Date Started: Sep. 23, 2019 Redo? No
Purpose: Determine the concentration of the phage sample
Notes: followed protocols 6.5
Results: obtained on 9/25/19
Undiluted: 120,000 Pfu/mL
1/10: 12,000 Pfu/mL
1/100: 1,200 Pfu/mL
1/1,000: 10 Pfu/mL
1/10,000: 0.05 Pfu/mL
1/100,000: 0.003 Pfu/mL
Conclusions and Next Steps:
Lysate contains a phage, and the titer was calculated to be 1.2*10^5 Pfu. Next we need to make a more concentrated lysate so we will make webbed plates and extract lysate from them.
Making webbed plates
Date Started: Sep. 25, 2019 Redo? No
Purpose: To make webbed plates and extract a more concentrated (high titer) lysate from them. According to SEA Phages manual, we need a concentration of 5*10^9 Pfu (plaque forming units). Our previously extracted lysate has a concentration of 1.2*10^5 Pfu.
Notes: followed protocol 7.1
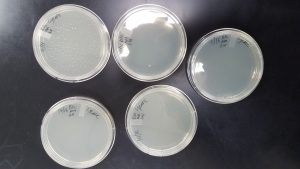
Results:
One was usable, the others were contaminated.
Conclusions and Next Steps:
Next we need to flood and collect the plate lysate from the one plate that we usable.
Collecting Plate Lysate
Date Started: Sep. 30, 2019 Redo? No
Purpose: Obtain a concentrated lysate sample
Notes: followed protocol 6.3
Only one plate was eligible for lysate extraction (the others were contaminated)
8 mL of phage buffer was added to the plate, which was then incubated for 4 hours.
Results

Conclusions and Next Steps:
We were able to get 5.5 ml of high titer lysate from the one uncontaminated plate so we need to make more webbed plates and extract more lysate from them to have enough for further protocols. Also, once we get enough we will need to do serial dilutions and plate them to calculate the titer.
Making webbed plates
Date Started: Sep. 30, 2019 Redo? Yes
Purpose: To create more webbed plates following the multiple contaminations experienced with the previous batch so we can extract more lysate.
Notes: followed protocol 7.1
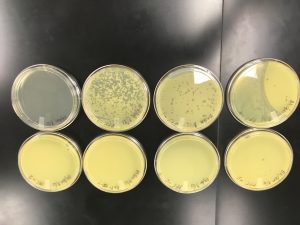
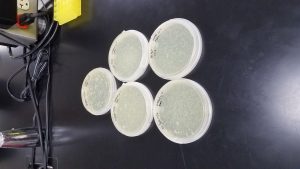
Results:
All 4 plates were uncontaminated and grew well.
Conclusions and Next Steps:
Since all 4 plates were uncontaminated, we will be able to extract lysate from all 4 plates.
Collecting Plate Lysate
Date Started: Oct 2, 2019 Redo? No
Purpose: To extract lysate from the 4 webbed plates from Sep 30.
Notes: followed protocol 6.3
Results:
We were able to extract about 19 ml of lysate from these plates.
Conclusions and Next Steps:
We combined the high titer lysate from Sep 30 with the lysate collected this day and it made almost 25 ml of lysate. Now we need to do a full plate titer to determine the concentration of this new lysate. If it is concentrated enough we can move on to DNA extraction, if not we will continue to amplify the phage in the lysate to attempt to get it to the desired titer (5*10^9 Pfu/ml).
Full Plate Titer
Date Started: Oct 11, 2019 Redo? Yes
Purpose: We are performing another full plate titer to determine the concentration of our high titer lysate.
Notes: followed protocol 6.3
Results:
Bacteria did not grow due to the batch of host bacteria being contaminated (or some other error), resulting in a failed procedure.
Conclusions and Next Steps:
We need to redo the full plate titer protocol to determine the titer of our high titer lysate.
Full Plate Titer
Date Started: Oct 14, 2019 Redo? Yes
Purpose: Redoing the full plate titer protocol to determine the titer of our high titer lysate using the new batch of host bacteria.
Notes: followed protocol 6.3
Results:
220 plaques were found on the 10^-4 plate.
Conclusions and Next Steps:
Titer was calculated at 2.4 x 10^9, which while being enough for microscopy, is not concentrated enough for DNA extraction.
Next step is creating more plates from the 10^-4 plate.
Webbed Plates
Date Started: Oct 16, 2019 Redo? Yes
Purpose: To make a more concentrated lysate to use for DNA extraction.
Notes:
Followed Protocol 7.1
Results:
The phage killed everything on the plate
Conclusions and Next Steps:
Our phages were too concentrated and the lysate should be diluted some and then more webbed plates will be made.
Webbed Plate Production
Date Started: Oct 18, 2019 Redo? Yes
Purpose: Making more webbed plates with a diluted phage lysate.
Notes: Put phage and bacteria in plates with top agar.
Results:
Five plates were good to use.
Flooding Webbed Plates
Date Started: Oct 21, 2019 Redo? Yes
Purpose: To extract a high titer lysate from the webbed plates.
Notes:
Used protocol 6.3.
Results:
The plates lost some lysate due to an accident in the lab. Then, when lysate was being collected, a plate from a different research group was mistakenly included. This rendered the resultant lysate useless. More webbed plates must be made using the same dilution so a high titer lysate can be collected to be used in DNA extraction protocol.
Webbed Plate Production
Date Started: Oct 23, 2019 Redo? Yes
Purpose: Making more webbed plates with a diluted phage lysate.
Notes: Put phage and bacteria in plates with top agar.
Webbed Plate Flooding
Date Started: Oct 25, 2019 Redo? Yes
Purpose: To extract more lysate
Notes:
Redo necesary due to unknown parties causing a spill.
Microscopy Prep
Date Started: Oct. 28 2019 Redo? Yes
Purpose: To prepare our lysate sample for Microscopy
Notes:
Sample was centrifuged for an hour, then the supernatent was removed. Time constraints forced the refrigeration of the sample until more work could be done.
Sample was resuspended for an hour two days later.
Full Plate Titer
Date Started: Oct 30, 2019 Redo? yes
Purpose: To determine the concentration of the high titer lysate collected on 10/25/19
Notes:
Created a serial dilution and plated full plates of different concentrations (10^1 – 10^8).
Results
96 plaques @ 10^4 = 1.8*10^8 Pfu/ml
9 plaques @ 10^5 = 1.6*10^8 Pfu/ml
10^3 = 1.8*10^8 Pfu/ml
Conclusions and Next Steps:
The high volume lysate we collected on 10/25/19 was less concentrated than the lysate we collected on 10/2/19 which was 2.4*10^9 Pfu/ml.
Therefore, we will use the lysate from 10/2/19 to proceed with DNA extraction and enzyme digestion. We will then have the DNA sequenced.
DNA Extraction
Alternative DNA Isolation Protocol using ZnCl2
Date Started:November 4, 2019 Redo? No
Purpose: Obtain phage DNA from our sample for genome sequencing.
Notes:
1. The lysate from 10/2/19 was mixed, then 5mL of the lysate was put into 15 mL conical tubes. We then added 20uL of nuclease mix to the conical tube with the lysate.
2. The tube was inverted and incubated for 10 mins at 37 degrees C.
3. We used 5 microfuge tubes and added 1 ml of the lysate mixture to each.
4. A volume of 20uL of ZnCl2 was added to each tube, then the tubes were inverted and incubated for 10 mins at 37 degrees C.
5. The tubes were centrifuged at 10,000 rpm for about 1 min, forming pellets in the tubes.
6. The supernatants were removed.
7. Pellets were resuspended in 500 uL of TES buffer (per tube) and incubated for 15 mins at 60 degrees C.
8. 1 uL of Proteinase K was added, they were mixed and then incubated for 10 mins at 37 degrees C.
9. 60 uL of potassium acetate was added to each tube which were then left on ice for about 15 mins.
10. The tubes were then centrifuged at 4 degrees C and 12,000 rpm for 1 min and the supernatant was collected into new tubes while the pellets were discarded.
11. 500 uL of isopropanol was added to the tubes with the supernatant in them and left on ice in the fridge.
12. The tubes were centrifuged for 10 min to form a DNA pellet and the supernatant was discarded.
13. Pellets were then washed using 250 uL of 70% ethanol and centrifuged again for 1 min; the supernatant was discarded.
14. The tubes containing the washed DNA pellets were allowed to dry for about 45 mins.
15. 50 uL of nuclease free water was used to suspend the first pellets, that solution was then used to resuspend the next and so on until all 5 washed DNA pellets were resuspended in 50 uL of water.
Results:
The resulting solution was tested for DNA concentration. Initial reading using Nanodrop showed a DNA concentration of 1082.7 ng/uL. An A260/A280 of 2.05 & a A260/A230 of 1.22. The solution was then tested using the Qbit machine and showed a DNA concentration of 59.8 ng/uL which we believe to be the more accurate reading of the two.
Conclusions and Next Steps:
The DNA extraction was successful and our DNA concentration is approx. 60 ng/uL.
Characterization
Title: Procedure
Date Started:Sep. 04, 2019 Redo? yes/no
Purpose: State in a couple of sentences what you are trying to do and why you are doing it.
Notes:
What did you do? Type out the protocols that you are doing, how you did them, and when you did them. Make notes to remind you of what you did, or what you need to do. If you did something different than normal, it is important to write that down.
Results:
Add the date(s) that the results were obtained. Describe the results and make a table, create a figure, or add an image. This is important because this is your data.
Conclusions and Next Steps:
What can be determined from your data? What should you do next?