Discovery of Damoria
Damoria Information
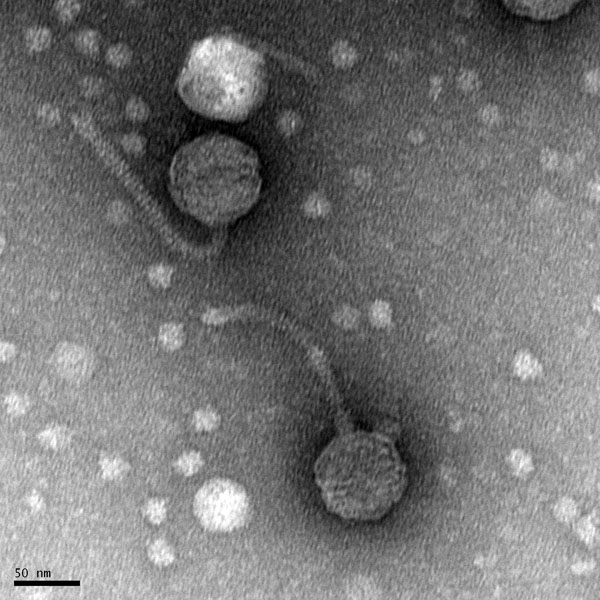
Morphology: Siphoviridae
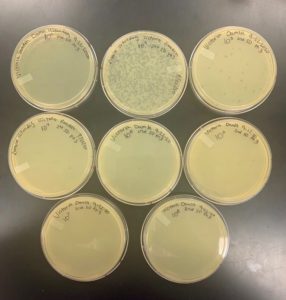
Sample Collection
| Collector Name |
Damla Ustundag | Victoria Saadeh | Damla Ustundag | Victoria Saadeh | Adopted by Selina Alvarado |
| Sample No. | 1 | 2 | 3 | 4 | 5 |
| Date of Collection | 08/25/20 | 08/25/20 | 08/31/20 | 08/31/20 | 08/28/2020 |
| Sample Type | water | water | water | water | Moist Soil |
| General Location | Stephenville, TX | Stephenville, TX | Stephenville, TX | Stephenville, TX | Garden |
| Location Description | Bosque River | Bosque River | Bosque River | Bosque River | Garden |
| GPS Coordinates |
32°12’52.1 “N98°12’11.0″W
|
32°12’52.1 “N98°12’11.0″W |
32° 12′ 49.241″ N 98° 12′ 5.929″ W |
32° 12′ 49.241″ N 98° 12′ 5.929″ W | 32.2342890, -98.3174011 |
| Sample Depth | 2-3 cm | 2-3 cm | Surface Level | Surface Level | Surface Level |
| Ambient Temperature | 37 °C | 37 °C | 33°C | 33°C | 33°C |
Isolation/Purification
Title: Direct Isolation
Date: 08/26/20 Redo: No Sample: Sample 1
Purpose: This procedure is to extract phages from the environmental Sample and infect the host bacteria using a plaque assay.
Notes:
- The work station was cleaned with CiDecon, Ethyl Alcohol, and prepared for aseptic work.
- Collect a sample and get ready for the next steps
- Removed 2 ml of liquid from the top of the water sample and filtered using a 0.22 ul syringe filter into a microcentrifuge tube.
- Using a 0.22 μm syringe filter, use syringe to extract 2ml of liquid of Sample.
- Dispense 0.5 ml of the filtered Sample, each into two microcentrifuge samples.
- Label samples
- Discharge used filters and syringes
- Add Sample into 250 μm of host bacteria
- Gently mix the Sample by using figure 8 motion
- Let sit undisturbed for 10 minutes.
- After the 10 minutes, using a sterile 5 ml pipette, dispense 3ml of molten top agar per Sample. Suck solution back into pipette to mix, and then dispense on room temperature agar plate. Make sure no bubbles form and remove them immediately.
- Make sure that the molten top agar does not start solidifying. If so, put it back in the 55 °C bath or into the microwave.
- Let agar plates sit until top agar is solid and not runny. This takes about 15-20 minutes.
- Label each agar plate and put it in an incubator.
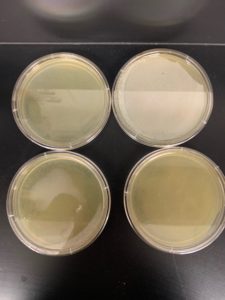
Results:
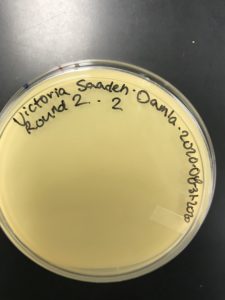
The results for sample 1 were negative.

Conclusions and Next Steps:
There was no bacterial growth on this plate and the results were negative. There were no plaques formed to use for the next step. Sample 1 was parafilm and stored in an isolation box. This step needs to be repeated.
Title: Direct Isolation
Date: 08/26/20 Redo: No Sample: sample 2
Purpose: This procedure is to extract phages from the environmental Sample and infect the host bacteria using a plaque assay.
Notes:
- The work station was cleaned with CiDecon, Ethyl Alcohol, and prepared for aseptic work.
- Collect a sample and get ready for the next steps
- Removed 2 ml of liquid from the top of the water sample and filtered using a 0.22 ul syringe filter into a microcentrifuge tube.
- Using a 0.22 μm syringe filter, use syringe to extract 2ml of liquid of Sample.
- Dispense 0.5 ml of the filtered Sample each into two microcentrifuge samples.
- Label samples
- Discharge used filters and syringes
- Add Sample into 250 μm of host bacteria
- Gently mix the Sample by using figure 8 motion
- Let sit undisturbed for 10 minutes.
- After the 10 minutes, using a sterile 5 ml pipette, dispense 3ml of molten top agar per Sample. Suck solution back into pipette to mix, and then dispense on room temperature agar plate. Make sure no bubbles form and remove them immediately.
- Make sure that the molten top agar does not start solidifying. If so, put it back in the 55 °C bath or into the microwave.
- Let agar plates sit until top agar is solid and not runny. This takes about 15-20 minutes.
- Label each agar plate and put it in an incubator.
Results: The results for sample 2 were negative.

Conclusions and Next Steps:
There was no bacterial growth on this plate and the results were negative. There were no plaques formed to use for the next step. Sample 2 was parafilm and stored in an isolation box. This step needs to be repeated.
Title: Direct Isolation
Date: 08/31/20 Redo: Yes Sample: Sample 3
Purpose: This procedure is to extract phages from the environmental Sample and infect the host bacteria using a plaque assay.
Notes:
- The work station was cleaned with CiDecon, Ethyl Alcohol, and prepared for aseptic work.
- Collect a sample and get ready for the next steps
- Removed 2 ml of liquid from the top of the water sample and filtered using a 0.22 ul syringe filter into a microcentrifuge tube.
- Using a 0.22 μm syringe filter, use syringe to extract 2ml of liquid of Sample.
- Dispense 0.5 ml of the filtered Sample each into two microcentrifuge samples.
- Label samples
- Discharge used filters and syringes
- Add Sample into 250 μm of host bacteria
- Gently mix the Sample by using figure 8 motion
- Let sit undisturbed for 10 minutes.
- After the 10 minutes, using a sterile 5 ml pipette, dispense 3ml of molten top agar per Sample. Suck solution back into pipette to mix, and then dispense on room temperature agar plate. Make sure no bubbles form and remove them immediately.
- Make sure that the molten top agar does not start solidifying. If so, put it back in the 55 °C bath or into the microwave.
- Let agar plates sit until top agar is solid and not runny. This takes about 15-20 minutes.
- Label each agar plate and put it in an incubator.
Results:
The results for sample 3 were negative.

Conclusions and Next Steps:
There was no bacterial growth on this plate and the results were negative. There were no plaques formed to use for the next step. Sample 3 was parafilm and stored in an isolation box. This step needs to be repeated.
Title: Direct Isolation
Date: 08/31/20 Redo: Yes Sample: Sample 4
Purpose: This procedure is to extract phages from the environmental Sample and infect the host bacteria using a plaque assay.
Notes:
- The work station was cleaned with CiDecon, Ethyl Alcohol, and prepared for aseptic work.
- Collect a sample and get ready for the next steps
- Removed 2 ml of liquid from the top of the water sample and filtered using a 0.22 ul syringe filter into a microcentrifuge tube.
- Using a 0.22 μm syringe filter, use syringe to extract 2ml of liquid of Sample.
- Dispense 0.5 ml of the filtered Sample each into two microcentrifuge samples.
- Label samples
- Discharge used filters and syringes
- Add Sample into 250 μm of host bacteria
- Gently mix the Sample by using figure 8 motion
- Let sit undisturbed for 10 minutes.
- After the 10 minutes, using a sterile 5 ml pipette, dispense 3ml of molten top agar per Sample. Suck solution back into pipette to mix, and then dispense on room temperature agar plate. Make sure no bubbles form and remove them immediately.
- Make sure that the molten top agar does not start solidifying. If so, put it back in the 55 °C bath or into the microwave.
- Let agar plates sit until top agar is solid and not runny. This takes about 15-20 minutes.
- Label each agar plate and put it in an incubator.
Results:
The results for sample 4 were negative.
Conclusions and Next Steps:
There was no bacterial growth on this plate and the results were negative. There were no plaques formed to use for the next step. Sample 4 was parafilm and stored in an isolation box. This step needs to be repeated.
__________________________________________________________________________
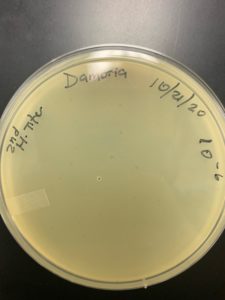
Title: Direct Isolation
Date: 08/26/20 Redo: No Sample: Sample 5
Purpose: This procedure is to extract phages from the environmental Sample and infect the host bacteria using a plaque assay.
Notes:
- The following information is by Selina Alvardo and Cheyenne Rodriguez. This procedure was completed with a plaque from Selina Alvardo and Cheyenne Rodriguez.
This was also a soil sample, and it was done along with sample 4. There were no complications with the filtration process.
- The work area was prepared for aseptic work using CiDecon and Ethyl Alcohol.
- 5ml of liquid media was pipetted into the tube with the Sample and mixed thoroughly.
- The Sample was placed in a shaking incubator and was left there for an hour and 15 minutes.
- 2ml of the Sample was removed with a syringe and the filter was attached.
- The Sample was filtered carefully into a labeled microcentrifuge tube.
- 500ul of the filtered sample was pipetted into the tube with the host bacteria.
- The inoculated bacteria were left to sit for 10 minutes to allow for attachment.
- 3ml of top agar were pipetted into the inoculated bacteria tube and quicky pipetted back up.
- Top agar and inoculated bacteria were pipetted onto an agar plate, bubbles (if any) were quickly removed.
- The Agar plate was left undisturbed for 20 minutes.
- The sample 5 plate was inverted and incubated at 4:50 pm at 23-30 degrees celsius.
- The plate was left in the incubator for 48 hours before removal.
Results:
Positive results: 08/31/2020

This was the best plate out of the five. Multiple plaques were visible.
__________________________________________________________________________
Title: Purification (Serial Dilutions)
Date: 09/02/2020 Redo: No Sample: number 5.
Purpose: To prepare samples of decreasing concentrations with sample number five using serial dilutions and plaque assay.
Notes:
- The work station was cleaned with CiDecon, Ethyl Alcohol, and prepared for aseptic work.
- Eight Microcentrifuge tubes labeled as 10^1, 10^2, 10^3,….10^8.
- 100ul of phage buffer was pipetted into a sample 5 microcentrifuge tube.
- An adopted plaque was carefully picked with a sterile 100ul micropipette tip.
- 90 ul of phage buffer transferred to each of the microcentrifuge tubes.
- 10 ul of undiluted Sample added to the 10-1 microcentrifuge tube and was vortexed.
- 10ul of tube 10^1 were transferred into microcentrifuge tube 10^2 and vortexed.
- 10ul of tube 10^2 were transferred into microcentrifuge tube 10^3 and vortexed.
- 10ul of tube 10^3 were transferred into microcentrifuge tube 10^4 and vortexed.
- 10ul of tube 10^4 were transferred into microcentrifuge tube 10^5 and vortexed.
- 10ul of tube 10^5 were transferred into microcentrifuge tube 10^6 and vortexed.
- 10ul of tube 10^6 were transferred into microcentrifuge tube 10^7 and vortexed.
- 10ul of tube 10^7 were transferred into microcentrifuge tube 10^8 and vortexed.
- 10ul of each dilution were pipetted into labeled tubes with host bacteria.
- 3ml of top agar were pipetted into each of the inoculated bacteria tubes and pipetted backup immediately.
- Top agar and inoculated bacteria were pipetted onto an agar plate.
- When the bubbles formed, they were quickly removed.
- Agar plates were left undisturbed for 30 minutes.
- The plates were inverted and placed in the incubator at 10:32 am at 23-30 °C for over 48 hours.
Results:
Negative Results: 09/02/2020

Conclusion and Next Steps:
The same amount of phage was introduced to each microcentrifuge tube instead of decrease magnification. It resulted in an excess amount of plaque due to these complications. According to this, the procedure had to be redone.
___________________________________________________________________________
Title: Purification (Serial Dilutions)
Date: 09/10/2020 Redo: yes Sample: number 5.
Purpose: To prepare samples of decreasing concentrations with sample number five using serial dilutions and plaque assay.
Notes:
- The work station was cleaned with CiDecon, Ethyl Alcohol, and prepared for aseptic work.
- Eight Microcentrifuge tubes labeled as 10^1, 10^2, 10^3,….10^8.
- 100ul of phage buffer was pipetted into a sample 5 microcentrifuge tube.
- An adopted plaque was carefully picked with a sterile 100ul micropipette tip.
- 90 ul of phage buffer transferred to each of the microcentrifuge tubes.
- 10 ul of undiluted Sample added to the 10-1 microcentrifuge tube and was vortexed.
- 10ul of tube 10^1 were transferred into microcentrifuge tube 10^2 and vortexed.
- 10ul of tube 10^2 were transferred into microcentrifuge tube 10^3 and vortexed.
- 10ul of tube 10^3 were transferred into microcentrifuge tube 10^4 and vortexed.
- 10ul of tube 10^4 were transferred into microcentrifuge tube 10^5 and vortexed.
- 10ul of tube 10^5 were transferred into microcentrifuge tube 10^6 and vortexed.
- 10ul of tube 10^6 were transferred into microcentrifuge tube 10^7 and vortexed.
- 10ul of tube 10^7 were transferred into microcentrifuge tube 10^8 and vortexed.
- 10ul of each dilution were pipetted into labeled tubes with host bacteria.
- 3ml of top agar were pipetted into each of the inoculated bacteria tubes and pipetted backup immediately.
- Top agar and inoculated bacteria were pipetted onto an agar plate.
- When the bubbles formed, they were quickly removed.
- Agar plates were left undisturbed for 30 minutes.
- The plates were inverted and placed in the incubator at 10:32 am at 23-30 °C for over 48 hours.
Results:
Positive Results: 09/10/2020

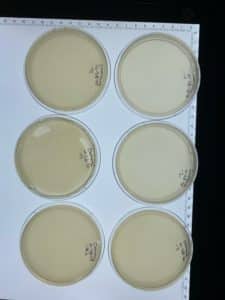
Conclusion and Next Steps:
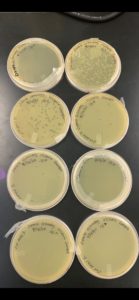
The main plates that had a plaque were plate numbers 1, 2, 3, and 6. The plaque has not been observed for the rest of the plates. Plate number 3 was selected to produce the second set of serial dilutions.
__________________________________________________________________________
Title: Purification (Serial Dilutions)
Date: 09/14/2020 Redo: no Sample: number 5B
Purpose: To prepare samples of decreasing concentrations with sample number five using serial dilutions and plaque assay.
Notes:
This is the second set of serial dilutions. The plaque was selected from plate 3 to proceed for this procedure.
- The work station was cleaned with CiDecon, Ethyl Alcohol, and prepared for aseptic work.
- Eight Microcentrifuge tubes labeled as 10^1, 10^2, 10^3,….10^8.
- 100ul of phage buffer was pipetted into a sample 5 microcentrifuge tube.
- An adopted plaque was carefully picked with a sterile 100ul micropipette tip.
- 90 ul of phage buffer transferred to each of the microcentrifuge tubes.
- 10 ul of undiluted Sample added to the 10-1 microcentrifuge tube and was vortexed.
- 10ul of tube 10^1 were transferred into microcentrifuge tube 10^2 and vortexed.
- 10ul of tube 10^2 were transferred into microcentrifuge tube 10^3 and vortexed.
- 10ul of tube 10^3 were transferred into microcentrifuge tube 10^4 and vortexed.
- 10ul of tube 10^4 were transferred into microcentrifuge tube 10^5 and vortexed.
- 10ul of tube 10^5 were transferred into microcentrifuge tube 10^6 and vortexed.
- 10ul of tube 10^6 were transferred into microcentrifuge tube 10^7 and vortexed.
- 10ul of tube 10^7 were transferred into microcentrifuge tube 10^8 and vortexed.
- 10ul of each dilution were pipetted into labeled tubes with host bacteria.
- 3ml of top agar were pipetted into each of the inoculated bacteria tubes and pipetted backup immediately.
- Top agar and inoculated bacteria were pipetted onto an agar plate.
- When the bubbles formed, they were quickly removed.
- Agar plates were left undisturbed for 30 minutes.
- The plates were inverted and placed in the incubator at 10:05 am at 23-30 °C for over 48 hours.
Results:
Positive Results: 09/14/2020
Conclusion and Next Steps: The second set of serial dilutions was completed and had positive results, but the procedure needed to be repeated. The plates were in the incubator for more than 48 hours, which resulted in getting not good webbed plates. The procedure had to be redone to get better-webbed plates.
________________________________________________________________________
Title: Purification (Serial Dilutions)
Date: 09/18/2020 Redo: yes Sample: number 5B
Purpose: To prepare samples of decreasing concentrations with sample number five using serial dilutions and plaque assay.
Notes:
- The work station was cleaned with CiDecon, Ethyl Alcohol, and prepared for aseptic work.
- Eight Microcentrifuge tubes labeled as 10^1, 10^2, 10^3,….10^8.
- 100ul of phage buffer was pipetted into a sample 5 microcentrifuge tube.
- An adopted plaque was carefully picked with a sterile 100ul micropipette tip.
- 90 ul of phage buffer transferred to each of the microcentrifuge tubes.
- 10 ul of undiluted Sample added to the 10-1 microcentrifuge tube and was vortexed.
- 10ul of tube 10^1 were transferred into microcentrifuge tube 10^2 and vortexed.
- 10ul of tube 10^2 were transferred into microcentrifuge tube 10^3 and vortexed.
- 10ul of tube 10^3 were transferred into microcentrifuge tube 10^4 and vortexed.
- 10ul of tube 10^4 were transferred into microcentrifuge tube 10^5 and vortexed.
- 10ul of tube 10^5 were transferred into microcentrifuge tube 10^6 and vortexed.
- 10ul of tube 10^6 were transferred into microcentrifuge tube 10^7 and vortexed.
- 10ul of tube 10^7 were transferred into microcentrifuge tube 10^8 and vortexed.
- 10ul of each dilution were pipetted into labeled tubes with host bacteria.
- 3ml of top agar were pipetted into each of the inoculated bacteria tubes and pipetted backup immediately.
- Top agar and inoculated bacteria were pipetted onto an agar plate.
- When the bubbles formed, they were quickly removed.
- Agar plates were left undisturbed for 30 minutes.
- The plates were inverted and placed in the incubator at 4:15 pm at 23-30 °C for over 48 hours.
Results:
Negative Results: 09/18/2020
Conclusion and Next Steps:
Most of the plates, top agar did not solidify due to not mixing well. The top agar microwaved for 45 seconds and waited until not boiling temperature, but the agar was still not enough to use it. The procedure had to be redone.
_____________________________________________________________________
Title: Purification (Serial Dilutions)
Date: 09/22/2020 Redo: yes Sample: number 5B
Purpose: To prepare samples of decreasing concentrations with sample number five using serial dilutions and plaque assay.
Notes:
This is the second set of serial dilutions. The plaque was selected from plate 3 to proceed for this procedure.
- The work station was cleaned with CiDecon, Ethyl Alcohol, and prepared for aseptic work.
- Eight Microcentrifuge tubes labeled as 10^1, 10^2, 10^3,….10^8.
- 100ul of phage buffer was pipetted into a sample 5 microcentrifuge tube.
- An adopted plaque was carefully picked with a sterile 100ul micropipette tip.
- 90 ul of phage buffer transferred to each of the microcentrifuge tubes.
- 10 ul of undiluted Sample added to the 10-1 microcentrifuge tube and was vortexed.
- 10ul of tube 10^1 were transferred into microcentrifuge tube 10^2 and vortexed.
- 10ul of tube 10^2 were transferred into microcentrifuge tube 10^3 and vortexed.
- 10ul of tube 10^3 were transferred into microcentrifuge tube 10^4 and vortexed.
- 10ul of tube 10^4 were transferred into microcentrifuge tube 10^5 and vortexed.
- 10ul of tube 10^5 were transferred into microcentrifuge tube 10^6 and vortexed.
- 10ul of tube 10^6 were transferred into microcentrifuge tube 10^7 and vortexed.
- 10ul of tube 10^7 were transferred into microcentrifuge tube 10^8 and vortexed.
- 10ul of each dilution were pipetted into labeled tubes with host bacteria.
- 3ml of top agar were pipetted into each of the inoculated bacteria tubes and pipetted backup immediately.
- Top agar and inoculated bacteria were pipetted onto an agar plate.
- When the bubbles formed, they were quickly removed.
- Agar plates were left undisturbed for 30 minutes.
- The plates were inverted and placed in the incubator at 5:35 pm at 23-30 °C for over 48 hours.
Results:
Positive Results: 09/22/2020
Conclusion and Next Steps:
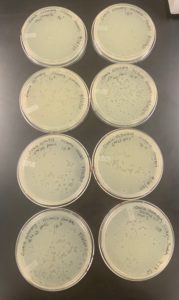
There were few plaques on most of the plates, and there was a webbed plate on plate number 2. Since the webbed plate is achieved, the next step is the obtain low volume lysate.
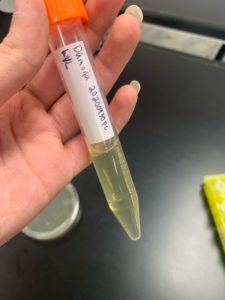
Amplification
Title: Collecting High Concentration Lysate
Date: 09/29/2020 Redo: No
Purpose: To generate a highly concentrated liquid phage sample
Notes:
- The work station was cleaned with CiDecon, Ethyl Alcohol, and prepared for aseptic work.
- Webbed plates identified for lysate collection.
- Applied 8 mL of phage buffer to the webbed plate.
- The plate sat for 2 hours at room temperature.
- Gently, swirled the phage buffer.
- After the incubation time, tilt the plate to one side, to allow the lysate to pool to one side.
- Prepare a 22um filter and a 5mL syringe for the next step.
- Using a 5 ml syringe aspirate the lysate from the plate.
- The tube was labeled and was then ready for a full plate titer.
- The tube was stored at 4°C.
Results:
The positive results: 09/30/2020
Lysate collected from 10^-2 webbed plates.
Conclusions and Next Steps:
Since we were able to obtain our low volume lysate, the next step is to plate to get more webbed plates using the high concentration lysate.
Title: Spot Titer
Date: 10/12/2020 Redo: No
Purpose: This procedure is to determine the concentration of phage particles in a lysate using a spot test.
Notes:
- The work station was cleaned with CiDecon, Ethyl Alcohol, and prepared for aseptic work.
- One agar plate was labeled for spot titer.
- Dispense the top agar-bacteria mixture onto an agar plate.
- The plate sat undisturbed for 10 minutes until it solidifies completely.
- Lysates diluted to 10-1, 10-2, 10-3, 10-4, 10-5, 10-6, 10-7, and 10-8 in phage buffer.
- 3 μl of all samples transferred to the proper location on the bacterial lawn one at a time.
- The plate incubated right-side-up for 24 hours.
Results:
The positive results: 10/13/20
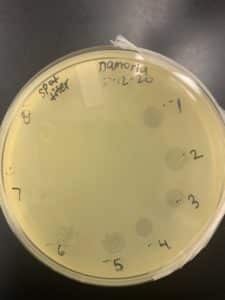
Conclusions and Next Steps:
After the calculation of the high titer lysate from spot titer, we were able to obtained 1.0×10^10 pfu/ml but we will still produce to full plate titer protocol to decide which dilutions to use to determine a more accurate titer.
___________________________________________________________________________
Title: Full Plate
Date: 10/12/2020 Redo: No Sample: 10^-2
Purpose: This procedure is to determine the concentration of phage particles in a lysate using a plaque assay.
Notes:
- The work station was cleaned with CiDecon, Ethyl Alcohol, and prepared for aseptic work.
- Eight microcentrifuges labeled accordingly.
- 90 ul of phage buffer were pipetted into each labeled tubes using a micropipette.
- 10 ul of the lysate sample were pipetted into the tube labeled 10^1 and was vortexed right after.
- 10 ul of tube 10^1 was pipetted into tube 10^2 and vortexed.
- 10 ul of tube 20^2 was pipetted into tube 10^3 and vortexed.
- 10 ul of tube 10^3 was pipetted into tube 10^4 and vortexed.
- 10 ul of tube 10^4 was pipetted into tube 10^5 and vortexed.
- 10 ul to tube 10^5 was pipetted into tube 10^6 and vortexed.
- 10ul of tube 10^6 was pipetted into tube 10^7 and vortexed.
- 10 ul of tube 10^7 was pipetted into tube 10^8 and vortexed.
- 8 host bacteria were obtained and 10 ul of each dilution were pipetted into labeled tubes.
- The tubes sat undisturbed for about 10 minutes for the next step.
- 3ml of top agar were pipetted into each of the inoculated bacteria tubes and pipetted backup immediately.
- Top agar and inoculated bacteria were pipetted onto an agar plate.
- When the bubbles formed, they were quickly removed.
- Agar plates were left undisturbed for 30 minutes.
- The plates were inverted and placed in the incubator at 11. 57 pm at 23-30 °C for over 24 hours.
Results:
Positive results: 10/13/20
Conclusions and Next Steps:
We were only able to obtain one webbed plate and it was the dilution 10^-2. The next step is the obtain our high volume lysate using and make more webbed plates using our 10^-2 dilution to obtain high concentration lysate.
_________________________________________________________________________
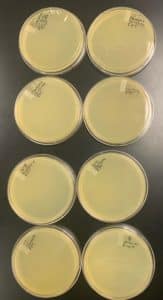
Title: Creating Webbed Plates
Date: 10/14/20 Redo: No Sample: 10^-2 HVL
Purpose: To create a high density of phages on a plate
Notes:
- Identified plate 10^-2 from our full plate titer as a webbed plate for replication.
- 90 ul of phage buffer was pipetted into each labeled tubes using a micropipette.
- 10 ul of the lysate sample was pipetted into the tube labeled 10^1 and was vortexed right after.
- 10 ul of tube 10^1 was pipetted into tube 10^2 and vortexed.
- 8 host bacteria were obtained and 10 ul of each dilution were pipetted into labeled tubes.
- The tubes sat undisturbed for about 10 minutes for the next step.
- 3ml of top agar were pipetted into each of the inoculated bacteria tubes and pipetted backup immediately.
- Top agar and inoculated bacteria were pipetted onto an agar plate.
- When the bubbles formed, they were quickly removed.
- Agar plates were left undisturbed for 30 minutes.
- The plates were inverted and placed in the incubator at 5;36 pm at 23-30 °C for over 24 hours.
- Using the 10^-2 sample, 8 more plates were created with the same phage dilution.
Results:
Negative Results: 10/15/20

Conclusions and Next Steps:
There were no webbed plates. This procedure needs to be redone.
___________________________________________________________________________
Title: Creating Webbed Plates
Date: 10/15/20 Redo: No Sample: 10^-2 HVL
Purpose: To create a high density of phages on a plate
Notes:
- Identified plate 10^-2 from our full plate titer as a webbed plate for replication.
- 90 ul of phage buffer was pipetted into each labeled tubes using a micropipette.
- 10 ul of the lysate sample was pipetted into the tube labeled 10^1 and was vortexed right after.
- 10 ul of tube 10^1 was pipetted into tube 10^2 and vortexed.
- 8 host bacteria were obtained and 10 ul of each dilution were pipetted into labeled tubes.
- The tubes sat undisturbed for about 10 minutes for the next step.
- 3ml of top agar were pipetted into each of the inoculated bacteria tubes and pipetted backup immediately.
- Top agar and inoculated bacteria were pipetted onto an agar plate.
- When the bubbles formed, they were quickly removed.
- Agar plates were left undisturbed for 30 minutes.
- The plates were inverted and placed in the incubator at 4;36 pm at 23-30 °C for over 24 hours.
- Using the 10^-2 sample, 8 more plates were created with the same phage dilution.
Results:
Positive Results: 10/16/20

Conclusions and Next Steps:
We were able to obtain 8 more webbed plates therefore we could proceed to collect more lysate to have a higher titer.
__________________________________________________________________________
Title: Collecting High Concentration Lysate
Date: 10/19/2020 Redo: No
Purpose: To generate a highly concentrated liquid phage sample
Notes:
- The work station was cleaned with CiDecon, Ethyl Alcohol, and prepared for aseptic work.
- 8 Webbed plates identified for lysate collection.
- Applied 6mL of phage buffer only to 4 of the webbed plate.
- The plate sat for 2 hours at room temperature.
- 4 of the plates moved over to the rest of the 4 plates to increase the concentration.
- The plate sat for 2 more hours at room temperature.
- Gently, swirled the phage buffer.
- the plates tilled to one side, to allow the lysate to pool to one side.
- Prepare a 22um filter and a 5mL syringe for the next step.
- Using a 5 ml syringe aspirate the lysate from the plate.
- The tube was labeled and was then ready for a full plate titer.
- The tube was stored at 4°C.
Results:
Positive: 10/19/20
Conclusions and Next Steps:
We were able to collect about 10mL lysate, the next step is to produce to full plate titer protocol to decide which dilutions to use to determine a more accurate titer.
__________________________________________________________________________
Title: Full Plate
Date: 10/21/2020 Redo: No
Purpose: This procedure is to determine the concentration of phage particles in a lysate using a plaque assay.
Notes:
- The work station was cleaned with CiDecon, Ethyl Alcohol, and prepared for aseptic work.
- Eight microcentrifuges labeled accordingly.
- 90 ul of phage buffer was pipetted into each labeled tubes using a micropipette.
- 10 ul of the lysate sample was pipetted into the tube labeled 10^1 and was vortexed right after.
- 10 ul of tube 10^1 was pipetted into tube 10^2 and vortexed.
- 10 ul of tube 20^2 was pipetted into tube 10^3 and vortexed.
- 10 ul of tube 10^3 was pipetted into tube 10^4 and vortexed.
- 10 ul of tube 10^4 was pipetted into tube 10^5 and vortexed.
- 10 ul to tube 10^5 was pipetted into tube 10^6 and vortexed.
- 10ul of tube 10^6 was pipetted into tube 10^7 and vortexed.
- 10 ul of tube 10^7 was pipetted into tube 10^8 and vortexed.
- 8 host bacteria were obtained and 10 ul of each dilution were pipetted into labeled tubes.
- The tubes sat undisturbed for about 10 minutes for the next step.
- 3ml of top agar were pipetted into each of the inoculated bacteria tubes and pipetted backup immediately.
- Top agar and inoculated bacteria were pipetted onto an agar plate.
- When the bubbles formed, they were quickly removed.
- Agar plates were left undisturbed for 30 minutes.
- The plates were inverted and placed in the incubator at 10: 15 pm at 23-30 °C for over 24 hours.
Results:
Positive results: 10/22/20
Conclusions and Next Steps:
The titer was calculated at 2.6 x 10^ 9. The next step is archiving our bacteriophage Damoria.
________________________________________________________________________________________________
Title: Full Plate
Date: 10/25/2020 Redo: yes
Purpose: To create a high density of phages on a plate
Notes:
- Identified plate 10^-3 from our full plate titer as a webbed plate for replication.
- 90 ul of phage buffer was pipetted into each labeled tubes using a micropipette.
- 10 ul of the lysate sample was pipetted into the tube labeled 10^1 and was vortexed right after.
- 10 ul of tube 10^1 was pipetted into tube 10^2 and 10^3 and vortexed.
- 6 host bacteria were obtained and 10 ul of each dilution were pipetted into labeled tubes.
- The tubes sat undisturbed for about 10 minutes for the next step.
- 3ml of top agar were pipetted into each of the inoculated bacteria tubes and pipetted backup immediately.
- Top agar and inoculated bacteria were pipetted onto an agar plate.
- When the bubbles formed, they were quickly removed.
- Agar plates were left undisturbed for 30 minutes.
- The plates were inverted and placed in the incubator at 5:20 pm at 23-30 °C for over 24 hours.
- Using the 10^-3 sample, 6 more plates were created with the same phage dilution.
Results:
Positive results: 10/22/20

Conclusions and Next Steps:
We were able to obtain 6 more webbed plates therefore we could proceed to collect more lysate to have a higher titer.
__________________________________________________________________________________________________
Title: Collecting High Concentration Lysate
Date: 10/23/2020 Redo: No
Purpose: To generate a highly concentrated liquid phage sample
Notes:
- The work station was cleaned with CiDecon, Ethyl Alcohol, and prepared for aseptic work.
- 6 Webbed plates identified for lysate collection.
- Applied 6mL of phage buffer only to 3 of the webbed plate.
- The plate sat for 2 hours at room temperature.
- 3 of the plates moved over to the rest of the 3 plates to increase the concentration.
- The plate sat for 2 more hours at room temperature.
- Gently, swirled the phage buffer.
- the plates tilled to one side, to allow the lysate to pool to one side.
- Prepare a 22um filter and a 5mL syringe for the next step.
- Using a 5 ml syringe aspirate the lysate from the plate.
- The tube was labeled and was then ready for a full plate titer.
- The tube was stored at 4°C.
Results:
Positive: 10/23/20
Conclusions and Next Steps:
We were able to collect about 9.5 mL lysate, the next step is to produce to full plate titer protocol to decide which dilutions to use to determine a more accurate titer.
________________________________________________________________________________
Title: Full Plate
Date: 10/27/2020 Redo: No
Purpose: This procedure is to determine the concentration of phage particles in a lysate using a plaque assay.
Notes:
- The work station was cleaned with CiDecon, Ethyl Alcohol, and prepared for aseptic work.
- Eight microcentrifuges labeled accordingly.
- 90 ul of phage buffer was pipetted into each labeled tubes using a micropipette.
- 10 ul of the lysate sample was pipetted into the tube labeled 10^1 and was vortexed right after.
- 10 ul of tube 10^1 was pipetted into tube 10^2 and vortexed.
- 10 ul of tube 20^2 was pipetted into tube 10^3 and vortexed.
- 10 ul of tube 10^3 was pipetted into tube 10^4 and vortexed.
- 10 ul of tube 10^4 was pipetted into tube 10^5 and vortexed.
- 10 ul to tube 10^5 was pipetted into tube 10^6 and vortexed.
- 10ul of tube 10^6 was pipetted into tube 10^7 and vortexed.
- 10 ul of tube 10^7 was pipetted into tube 10^8 and vortexed.
- 8 host bacteria were obtained and 10 ul of each dilution were pipetted into labeled tubes.
- The tubes sat undisturbed for about 10 minutes for the next step.
- 3ml of top agar were pipetted into each of the inoculated bacteria tubes and pipetted backup immediately.
- Top agar and inoculated bacteria were pipetted onto an agar plate.
- When the bubbles formed, they were quickly removed.
- Agar plates were left undisturbed for 30 minutes.
- The plates were inverted and placed in the incubator at 11: 15 pm at 23-30 °C for over 24 hours.
Results:
Positive results: 10/28/20
Conclusions and Next Steps:
The titer was calculated at 4.2 x 10^ 10. The next step is archiving our bacteriophage Damoria.
DNA Extraction
Title: DNA extraction ( Day 1)
Date: 11/9/20 Redo: No
Purpose: to extract the DNA from the phage sample.
Notes:
- 5mL of high volume Iysate was abtained and mixed with 20 uL of nuclease in 15 mL conical tube and inverted.
- The tube was placed in to incubater for 10 munites at 37C.
- Then 1mL of the solution was aliquoted into 5 microcenterfuge tubes each.
- 20 mL od Zinc Chlorine was added to each tube using 200 ul and gently inverted then incubated about 5 munites at 37C.
- The 5 microcenterfuge tubes were centerfuged for 1 minute at 10.000 rpm
- Than, the supernatans were removed by aspiration and 500 uL of TES buffre were addded to each tube and incubated for 15 munites at 60c.
- 1 uL of proteinase K was added to each tube and the tubes incubated for 10 minutes at 37C.
- 60 ul of potessium acetate was added to each tube and mixed well then placed in ice for 15 minutes. ( white precipitate formed)
- The tubes were centrifuged at 4C for 1 minute at 12.000 rpm.
- The supernatants was removed and placed into 5 new microcentrifuge tubes and the tubes with pelletes were discarded.
- 50uL of isopropenol were added to each tube and left on ice overnight.
Results:The results will be furter discussed after completing Day Two procedure and Nanodrop readings.
Conclusions and Next Steps:
The next step is to proceed to Day 2 of the DNA extraction.
Title: DNA extraction ( Day 2)
Date: 11/10/20 Redo: No
Purpose: to extract the DNA from the phage sample.
Notes:
- The tubes were centerfuted at top speed for 10 minutes and the supernant was discarded.
- 250uL of 70% ethanol were added to each microcenterfuge tubes and pinned for 1 munite at top speed then the supernatent was discarded into waste container.
- The DNA pellets were placed into heat block at 37 °C, than resuspended in 50 microliters of nuclease free water.
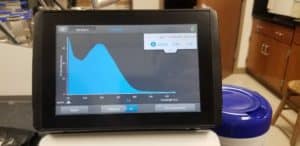
- The nanodrop reader was used to view the DNA concentration and quality.
Results:
Positive Results: 11/11/20
A260/A280 : 2:02
A260/A230 : 1.41
Concentration: 3220.5 ng/µl
Conclusions and Next Steps:
The next step is to proceed to the restriction enzyme digest procedure and the gel electrophoresis.
Characterization
Title: Restriction Enzyme Digest
Date: 11/16/20 Redo: No
Purpose: to cut the phage genome into multiple pragments based on its DNA sequence
Notes:
- DNA sample was vortexed at low speed, than placed into a heat block at 65°C for 10 minutes and quiclky placed on it on ice.
- The tube was then centrifuged for 1 minute
- The volume to obtain 0.5ug of DNA was calculated using the concentration.
- 0.5 ug( 1mL/3000ug)(1000/1mL) = 0.166 uL
- 5 new microcentrifuge tubes were labeled “Uncut, Healll, Nspl, Sacll and Sall for the restriction enymes.
- The following amaunt was added to each microcentrifuge tubes:
Uncut:
Nuclease Free Water: 20.25 uL
DNA: 2.25 uL
10X TBE Buffer: 2.5 uL
4 Tubes:
Nuclease Free Water: 21 uL
10x TBE Buffer: 2.5 uL
DNA: 1 ul
Restriction Enzyme: 0.5 uL
- The each tubes was quickly spinned for less than minute and incubated 15 minutes at 37 °C.
Results:
When the gel electrophesis completed, the results will be disscussed.
Conclusions and Next Steps:
The next steps is to cast the agarosa gel.
Title: Direct Isolation
Date: 11/16/20 Redo: No
Purpose: to cast an agarose gel for electrophoresis
Notes:
- 30 mL of 0.8% agarose powder was prepared to add into the buffer.
- 3.2 grams of agarose powder was weighed out and transfered into erlenmeyer flask.
- 30 mL of the 1x TBE Buffer was placed into the erlenemeyer falsk with the agarose power and microwawed until solution turned clear.
- Ethidium Bromide was added to the solution carafully.
- The gel was then paured into the gel apparatus when the comb was placed.
- It allowed 30 minutes for the gel to cool down.
- Once the gel solidified, the comb was removed then the gel platfrom with the solidified gel placed into the gel box. ( The wells placed at the (-) cathode end of the box)
- 1X TBE buffer was poured into the gel apparatus until the gel is submerged by 1/4 inch of the buffer.
Results:
After the gel apparatus set up, the results will be disccused in the gel electrophoresis process.
Conclusions and Next Steps:
The next steps is the perform the gel electrophoresis.