Discovery of HandsomeSquid
HandsomeSquid Information
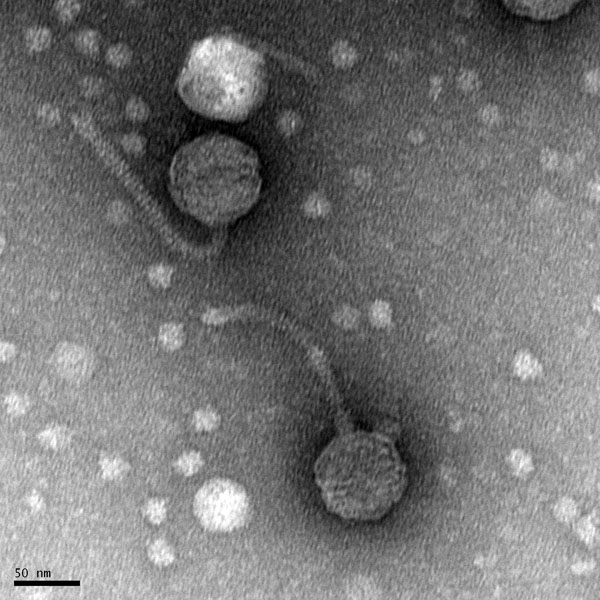
Morphology: Siphoviridae
Sample Collection
| Collector Name |
Julia Gaston | Sharon Cherian | Sharon Cherian | Julia Gaston |
| Sample No. | 1 | 2 | 3 | 4 |
| Date of Collection | 8/28/21 | 8/28/21 | 9/5/21 | 9/5/21 |
| Sample Type | Soil | Soil | Soil | Soil |
| General Location | Small body of water | Stephenville City Park | Bosque River Hiking Trail | Stephenville City Park |
| Location Description | By Stephenville Rents | River | Under a tree (shady area) | Under overpass next to Bosque River |
| GPS Coordinates | 32.210342, -98.214551 | 32.214775, -98.202579 | 32.216422, -98.198109 | 32.215930,-98.199015 |
| Sample Depth | Dug about 3 inches from the surface | Dug about 2 inches from the surface | Dug about 1 inch from the surface | Dug about 1.5 inches down |
| Ambient Temperature | 24°C | 28°C | 32°C | 32°C |
| Collector Name |
Julia Gaston | Julia Gaston | Julia Gaston | Sharon Cherian |
| Sample No. | 5 | 6 | 7 | 8 |
| Date of Collection | 9/9/2021 | 9/9/2021 | 9/14/2021 | 9/14/2021 |
| Sample Type | Soil | Soil | Soil | Soil |
| General Location | Near Gatesville to Killeen area | Near Gatesville to Killeen area | Tarleton Agriculture Center | Near TSU Math Building |
| Location Description | Pond/tank | Creek | Cow Barn | Ant Pile under a tree |
| GPS Coordinates | 31.341812, -97.870635 | 31.342561, -97.869664 | 32.242727, -98.196309 | 32.21653, -98.21592 |
| Sample Depth | Dug about 5-6 inches from the surface. | Gathered from surface | Dug 0.5 in, mostly from the surface | Dug 0.5 – 1 in, mostly from the surface |
| Ambient Temperature | 29ºC | 28ºC | 28ºC | 28ºC |
| Collector Name |
Sharon Cherian | Sharon Cherian | Sharon Cherian | Jesse Edmonson |
| Sample No. | 9 | 10 | 11 | 8 |
| Date of Collection | 9/15/21 | 9/19/21 | 9/19/21 | 9/15/2021 |
| Sample Type | Soil | Soil | Soil | Soil |
| General Location | The Edge Apartments | Tarleton Garden | TSU University Park | Anthill |
| Location Description | Ant pile by an electrical post | Shady and moist area near the edge with moss growth | Ant pile under tree | Between the road and the outer wall of the Stephenville Cemetery |
| GPS Coordinates | 32.21472, -98.21152 | 32.2158173, -98.2181610 | 32.2151090, -98.2185080 | 32.21284, -98.21638 |
| Sample Depth | Dug about 1 – 2 inches deep | Closer to the surface, dug about 0.5 inches | Closer to the surface, dug about 0.5-1 inches | Surface |
| Ambient Temperature | 30ºC | 33ºC | 33ºC | 20°C |
Isolation/Purification
Title: Direct Isolation
Date: 8/30/21 Redo: No Sample: #1
Purpose: The purpose of this procedure is to isolate bacteriophages from an environmental soil sample and to infect the host bacteria using a plaque assay.
Notes:
- Using gloves, the bench area was disinfected with CiDecon and spread with Kimwipes followed by 70% EtOH, also spread with Kimwipes. A Bunsen burner was lit to create an aseptic environment.
- A 15 ml conical tube was filled approximately ⅓ (5 mL) full with soil sample #1. The rest of original sample #1 and sample #2 were stored in the lab refrigerator.
- Using a 5 mL serological pipette, liquid media (PCYa) was added until the sample was submerged beneath 2-3 mL of liquid.
- The tube was put into a shaking incubator and shaken vigorously at 250 rpm for 1-2 hours. *Note: Put samples in the shaking incubator at 10:20 am. Samples were taken out at 12:00 pm (approx. in the incubator for 1hr 40 min).
- Sample sat for 10 minutes
- Approximately 2 mL of liquid were removed from the top of the flooded phage sample using a 0.22 μm syringe. The syringe was screwed into the sterile filter and the filtrate was dispensed into a microcentrifuge tube.
Proceeded to plaque assay protocols
- Transferred 250 microliters* of phage filtrate using a 100 microliter pipette into host bacteria M. foliorum. Gently mixed solution by flicking the tube and let it rest undisturbed for 10 minutes. *Note: We later realized that, according to the table in the protocol, 500 microliters were supposed to be transferred into the tube containing the host bacteria.
- Obtained serological pipette and pipettor and aspirated 3 mL of top agar and transferred it into the mixture containing host bacteria and phage filtrate.
- Immediately poured the entire mixture from the tube onto an agar plate. Gently but quickly swirled the mixture. Let the agar plate rest undisturbed for about 20 min.
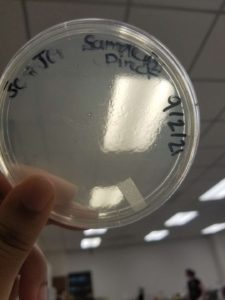
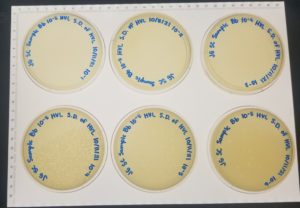
- Placed the labeled agar plate in the incubator (29ºC) at 1:30 pm to sit for 24-48 hours.
Results:
Negative results.

Conclusions and Next Steps:
Human error was a factor in our experiment. We were supposed to inoculate the host bacteria with 500 microliters of phage filtrate but used 250 microliters instead. The lid of the agar plate was set on the bench briefly, however, no contamination was observed. Our next steps are to perform a serial dilution to decrease the concentration of the phage to see if plaques will appear.
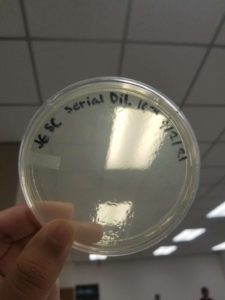
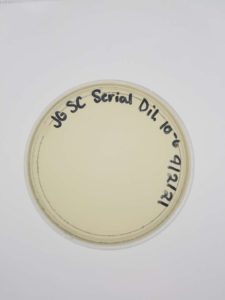
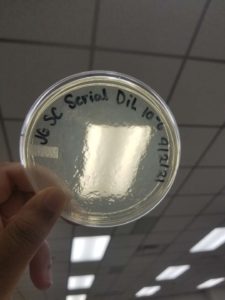
Title: Serial Dilution
Date: 9/1/21 Redo: Yes Sample: #1
Purpose: This procedure is to see if the bacteriophage was so potent that it cleared the plate or if the plate did not produce results due to human error.
Notes:
- Set up three microcentrifuge tubes and labeled each of them either 1:10, 1:100, or 1:1000
- Obtained phage buffer and transferred 90 microliters to each labeled microcentrifuge tube
- Aspirated 10 microliters of phage filtrate from the previous protocol and transferred it into the 1:10 microcentrifuge tube. Mixed it by lightly flicking the tube
- Transferred 10 microliters of phage filtrate and buffer from 1:10 into 1:100 microcentrifuge tube. Mixed it by lightly flicking the tube
- Transferred 10 microliters of phage filtrate and buffer from 1:100 into 1:1000 microcentrifuge tube. Mixed it by lightly flicking the tube
- Transferred 10 microliters of phage filtrate and buffer from 1:1000 into tube containing 250 microliters of M. foliorum. Lightly flicked the tube to mix and let it sit for approximately 10 minutes.
- Obtained top agar and pipetted 3 mL with a serological pipette and transferred it into the tube containing bacteria and phage filtrate
- Immediately aspirated the mixture back into the serological pipette and transferred it onto the agar plate.
- The mixture was quickly but gently swirled to ensure even spread
- Agar plate was put for incubation at 11:07 am
Results:
Negative/unknown results.

Conclusions and Next Steps:
Due to an unusual bumpy appearance on the agar plate, we plan to serially dilute further to isolate any phage present.
Title: Direct Isolation
Date: 9/2/21 Redo: No Sample: #2
Purpose: The purpose of this procedure is to isolate bacteriophages from an environmental soil sample and to infect the host bacteria using a plaque assay.
Notes:
- Using gloves, the bench area was disinfected with CiDecon and spread with Kimwipes followed by 70% EtOH, also spread with Kimwipes. A Bunsen burner was lit to create an aseptic environment.
- A 15 ml conical tube was filled approximately ⅓ (5 mL) full with soil sample #2. The rest of the original sample #2 was stored in the lab refrigerator.
- Using a 5 mL serological pipette, liquid media (PCYa) was added until the sample was submerged beneath 2-3 mL of liquid.
- The tube was put into a shaking incubator and shaken vigorously at 250 rpm for 1-2 hours. *Note: Put sample next to the incubator at 12:38 pm so that it could be put inside at an appropriate time. Put samples in the shaking incubator at 2:30 pm. Samples were taken out at 4:20 pm (approx. in the incubator for 1hr 50 min).
- Sample sat for 20 minutes
- Approximately 2 mL of liquid were removed from the top of the flooded phage sample using a 0.22 μm syringe. The syringe was screwed into the sterile filter and the filtrate was dispensed into a microcentrifuge tube.
Proceeded to plaque assay protocols
- Prepared agar plates were taken from the 4 degrees Celsius refrigerator and placed in the incubator for 10 minutes
- Transferred 500 microliters of phage filtrate using a 100 microliter pipette into host bacteria M. foliorum. Gently mixed solution by flicking the tube and let it rest undisturbed for 10 minutes.
- Obtained serological pipette and pipettor and aspirated 3 mL of top agar and transferred it into the mixture containing host bacteria and phage filtrate.
- Immediately aspirated the entire mixture from the tube and transferred it onto an agar plate. Gently but quickly swirled the mixture. Let the agar plate rest undisturbed for about 20 min.
- Placed the labeled agar plate in the incubator (29ºC) at 5:30 pm for 24-48 hours.
Results:
Negative results.
Conclusions and Next Steps:
It is possible that there could be an issue with our plating technique or the reagents being used. Some top agar/host bacteria phage mix was left in the bottom of the tube during aspiration, meaning some of the important phages could have been left in the bottom. We will look into this further and gather more samples in the meantime.
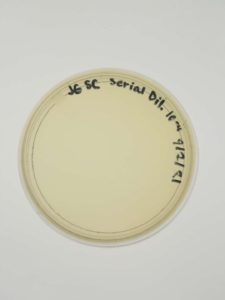
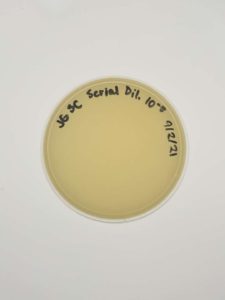
Title: Serial Dilution
Date: 9/2/21 Redo: Yes Sample: #1
Purpose: This procedure is to see if the bacteriophage was so potent that it cleared the plate or if the plate did not produce results due to human error.
Notes:
- Set up six microcentrifuge tubes and labeled each of them 10^-1, 10^-2,10^-3,10^-4,10^-5, or 10^-6
- Obtain three agar plates from 4 degrees Celsius fridge and allowed them to reach room temperature.
- Obtained phage buffer and transferred 90 microliters to each labeled microcentrifuge tube
- Aspirated 10 microliters of phage filtrate from the original phage filtrate tube and transferred it into the 10^-1 microcentrifuge tube. Mixed it by lightly flicking the tube
- Transferred 10 microliters of phage filtrate and buffer from 10^-1 into 10^-2 microcentrifuge tube. Mixed it by lightly flicking the tube
- Transferred 10 microliters of phage filtrate and buffer from 10^-2 into 10^-3 microcentrifuge tube. Mixed it by lightly flicking the tube
- Transferred 10 microliters of phage filtrate and buffer from 10^-3 into 10^-4 microcentrifuge tube. Mixed it by lightly flicking the tube
- Transferred 10 microliters of phage filtrate and buffer from 10^-4 into 10^-5 microcentrifuge tube. Mixed it by lightly flicking the tube
- Transferred 10 microliters of phage filtrate and buffer from 10^-5 into 10^-6 microcentrifuge tube. Mixed it by lightly flicking the tube
- Transferred 10 microliters of phage filtrate and buffer from 10^-4, 10^-5, and 10^-6 into the tube containing 250 microliters of M. foliorum. Lightly flicked the tube to mix and let each tube sit for approximately 10 minutes.
- Obtained top agar and pipetted 3 mL with a serological pipette and transferred it into the tube containing bacteria and phage filtrate separately for 10^-4, 10^-5, and 10^-6
- Immediately aspirated the mixture back into the serological pipette and transferred it onto the agar plate for 10^-4, 10^-5, and 10^-6 separately.
- The mixture was quickly but gently swirled for each agar plate to ensure even spread
- All three agar plates were put in for incubation at 7:10 pm for 24-48 hours.
Results:
Negative results.

Conclusions and Next Steps:
There might be a plating or reagent issue. We will look into this further but will gather and test new samples next.
Title: Direct Isolation
Date: 9/8/21 Redo: No Sample: #3
Purpose: The purpose of this procedure is to isolate bacteriophages from an environmental soil sample and to infect the host bacteria using a plaque assay.
Notes:
- Using gloves, the bench area was disinfected with CiDecon and spread with Kimwipes followed by 70% EtOH, also spread with Kimwipes. A Bunsen burner was lit to create an aseptic environment.
- A 15 ml conical tube was filled approximately ⅓ (5 mL) full with soil sample #3. The rest of the original sample #3 was stored in the lab refrigerator.
- Using a 5 mL serological pipette, liquid media (PCYa) was added until the sample was submerged beneath 2-3 mL of liquid.
- The tube was put into a shaking incubator and shaken vigorously at 250 rpm for 1-2 hours.
- Sample sat for 20 minutes
- Approximately 2 mL of liquid were removed from the top of the flooded phage sample using a 0.22 μm syringe. The syringe was screwed into the sterile filter and the filtrate was dispensed into a microcentrifuge tube.
Proceeded to plaque assay protocols
- Prepared agar plates were taken from the 4 degrees Celsius refrigerator and placed in the incubator for 10 minutes
- Transferred 500 microliters of phage filtrate using a 100 microliter pipette into host bacteria M. foliorum. Gently mixed solution by flicking the tube and let it rest undisturbed for 10 minutes.
- Obtained serological pipette and pipettor and aspirated 3 mL of top agar and transferred it into the mixture containing host bacteria and phage filtrate.
- Immediately aspirated the entire mixture from the tube and transferred it onto an agar plate. Gently but quickly swirled the mixture. Let the agar plate rest undisturbed for about 20 min.
- Placed the labeled agar plate in the incubator (29ºC) at 1:12 pm for 24-48 hours.
Results:
Negative results.

Conclusions and Next Steps:
We plan to gather and test new environmental samples next.
Title: Direct Isolation
Date: 9/9/21 Redo: No Sample: #4
Purpose: The purpose of this procedure is to isolate bacteriophages from an environmental soil sample and to infect the host bacteria using a plaque assay.
Notes:
- Using gloves, the bench area was disinfected with CiDecon and spread with Kimwipes followed by 70% EtOH, also spread with Kimwipes. A Bunsen burner was lit to create an aseptic environment.
- A 15 ml conical tube was filled approximately ⅓ (5 mL) full with soil sample #4. The rest of the original sample #4 was stored in the lab refrigerator.
- Using a 5 mL serological pipette, liquid media (PCYa) was added until the sample was submerged beneath 2-3 mL of liquid.
- The tube was put into a shaking incubator and shaken vigorously at 250 rpm for 1-2 hours.
- Sample sat for 20 minutes
- Approximately 2 mL of liquid were removed from the top of the flooded phage sample using a 0.22 μm syringe. The syringe was screwed into the sterile filter and the filtrate was dispensed into a microcentrifuge tube.
Proceeded to plaque assay protocols
- Prepared agar plates were taken from the 4 degrees Celsius refrigerator and placed in the incubator for 10 minutes
- Transferred 500 microliters of phage filtrate using a 100 microliter pipette into host bacteria M. foliorum. Gently mixed solution by flicking the tube and let it rest undisturbed for 10 minutes.
- Obtained serological pipette and pipettor and aspirated 3 mL of top agar and transferred it into the mixture containing host bacteria and phage filtrate.
- Immediately aspirated the entire mixture from the tube and transferred it onto an agar plate. Gently but quickly swirled the mixture. Let the agar plate rest undisturbed for about 20 min.
- Placed the labeled agar plate in the incubator (29ºC) at 4:36 pm for 24-48 hours.
Results:
Negative/unknown results.
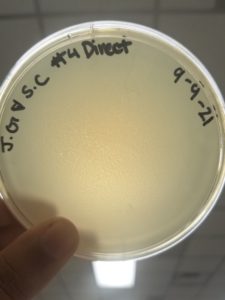
Conclusions and Next Steps:
We plan to gather and test new environmental samples next.
Title: Direct Isolation
Date: 9/13/21 Redo: No Sample: #5
Purpose: The purpose of this procedure is to isolate bacteriophages from an environmental soil sample and to infect the host bacteria using a plaque assay.
Notes:
- Using gloves, the bench area was disinfected with CiDecon and spread with Kimwipes followed by 70% EtOH, also spread with Kimwipes. A Bunsen burner was lit to create an aseptic environment.
- A 50 ml conical tube was filled approximately ⅓ (12.5 mL) full with soil sample #5. *Note: Used 50 mL conical tube instead of 15 mL for centrifuging later.
- Using a 5 mL serological pipette, liquid media (PCYa) was added until the sample was submerged beneath 2-3 mL of liquid.
- The tube was put into a shaking incubator and shaken vigorously at 250 rpm for 1-2 hours. *Note: Put in the shaking incubator at 10:03 am and took out at 12:03 pm
- Centrifuged for 10 min at 2,000 x g at 19ºC.
- Approximately 2 mL of liquid were removed from the top of the flooded phage sample using a 0.22 μm syringe. The syringe was screwed into the sterile filter and the filtrate was dispensed into a microcentrifuge tube.
Proceeded to plaque assay protocols
- Prepared agar plates were taken from the 4 degrees Celsius refrigerator and placed in the incubator for 10 minutes
- Transferred 500 microliters of phage filtrate using a 100 microliter pipette into host bacteria M. foliorum. Gently mixed solution by flicking the tube and let it rest undisturbed for 10 minutes.
- Obtained serological pipette and pipettor and aspirated 3 mL of top agar and transferred it into the mixture containing host bacteria and phage filtrate.
- Immediately aspirated the entire mixture from the tube and transferred it onto an agar plate. Gently but quickly swirled the mixture. Let the agar plate rest undisturbed for about 20 min.
- Placed the labeled agar plate in the incubator (29ºC) at 1:33 pm for 24-48 hours.
Results: Negative results
Conclusions and Next Steps:
We plan to gather and test new environmental samples using enriched isolation next.
Title: Direct Isolation
Date: 9/13/21 Redo: No Sample: #6
Purpose: The purpose of this procedure is to isolate bacteriophages from an environmental soil sample and to infect the host bacteria using a plaque assay.
Notes:
- Using gloves, the bench area was disinfected with CiDecon and spread with Kimwipes followed by 70% EtOH, also spread with Kimwipes. A Bunsen burner was lit to create an aseptic environment.
- A 50 ml conical tube was filled approximately ⅓ (12.5 mL) full with soil sample #6. *Note: Used 50 mL conical tube instead of 15 mL for centrifuging later.
- Using a 5 mL serological pipette, liquid media (PCYa) was added until the sample was submerged beneath 2-3 mL of liquid.
- The tube was put into a shaking incubator and shaken vigorously at 250 rpm for 1-2 hours. *Note: Put in the shaking incubator at 10:03 am and took out at 12:03 pm
- Centrifuged for 10 min at 2,000 x g at 19ºC.
- Approximately 2 mL of liquid were removed from the top of the flooded phage sample using a 0.22 μm syringe. The syringe was screwed into the sterile filter and the filtrate was dispensed into a microcentrifuge tube.
Proceeded to plaque assay protocols
- Prepared agar plates were taken from the 4 degrees Celsius refrigerator and placed in the incubator for 10 minutes
- Transferred 500 microliters of phage filtrate using a 100 microliter pipette into host bacteria M. foliorum. Gently mixed solution by flicking the tube and let it rest undisturbed for 10 minutes.
- Obtained serological pipette and pipettor and aspirated 3 mL of top agar and transferred it into the mixture containing host bacteria and phage filtrate.
- Immediately aspirated the entire mixture from the tube and transferred it onto an agar plate. Gently but quickly swirled the mixture. Let the agar plate rest undisturbed for about 20 min.
- Placed the labeled agar plate in the incubator (29ºC) at 1:33 pm for 24-48 hours.
Results: Negative results
Conclusions and Next Steps:
We plan to gather and test new environmental samples using enriched isolation next.
Title: Enriched Isolation
Date: 9/15/21 Redo: No Sample: #7
Purpose: The purpose of this procedure is to amplify bacteriophages in an environmental sample by allowing it to grow and replicate in bacterial growth media and to infect the host bacteria using a plaque assay.
Notes:
- Using gloves, the bench area was disinfected with CiDecon and spread with Kimwipes followed by 70% EtOH, also spread with Kimwipes. A Bunsen burner was lit to create an aseptic environment.
- A 50 ml conical tube was filled approximately 12 mL full with soil sample #7.
- Using a 5 mL serological pipette, 20 mL liquid media (PCYa) was added until the sample (until it filled up to the 32 mL mark)
- Vortexed the tube until the media and sample were well mixed
- The tube was put into a shaking incubator and shaken vigorously at 250 rpm for 1-2 hours. *Note: put in the shaking incubator at 9:44 am and took out at 12:08 pm
- Centrifuged 2,000 x g for 10 mins at 4ºC.
- Gathered 0.22 µm filter, syringe, and 50 mL conical tube to obtain the supernatant
- Using aseptic technique, obtained approximately 10 mL of filtrate. *Note: 20 mL filtrate could not be obtained due to constant consumption and clogging of 0.22 µm filter.
- 0.25 mL of M. foliorum was added to the filtrate and the tube was tilted to ensure the bacteria was mixed properly. *Note: 0.5 mL was not added because less filtrate was obtained.
- Before placing the tube into the shaking incubator, the cap was screwed one-quarter of a turn for proper aeration, and lab tape was attached to ensure the cap does not fall off. Note: Sample #8 was put into the shaking incubator at 2:47 pm
- The tube was placed in the shaking incubator at 220 rpm for 5 days
- Sample was taken out on 9/20
- Obtained serological pipette, pipettor, 0.22 µm filter and two microcentrifuge tubes. Labeled the tubes.
- Added 1.4 mL of the enriched culture to each microcentrifuge tube
- Spun the tubes at high speed in the microcentrifuge for 1 minute to pellet the bacteria
***Proceeded to filter the supernatant since it was not clear. - Removed the plunger from the syringe
- Opened a sterile filter and attached it to the barrel of the syringe.
- Pipetted 1 ml of supernatant from each microcentrifuge tube into the syringe barrel (for a total of 2 ml).
- Placed the tip of the filter/syringe over a sterile microcentrifuge tube and inserted the plunger into the syringe.
- Depressed the plunger, collected the sterile filtrate, and immediately capped the microcentrifuge tube.
Proceeded to plaque assay protocols
- Prepared agar plates were taken from the 4 degrees Celsius refrigerator and placed in the incubator for 10 minutes
- Transferred 250 microliters of phage filtrate using a 100 microliter pipette into host bacteria M. foliorum. Gently mixed solution by flicking the tube and let it rest undisturbed for 10 minutes.
- Obtained serological pipette and pipettor and aspirated 3 mL of top agar and transferred it into the mixture containing host bacteria and phage filtrate.
- Immediately aspirated the entire mixture from the tube and transferred it onto an agar plate. Gently but quickly swirled the mixture. Let the agar plate rest undisturbed for about 20 min.
- Placed the labeled agar plate in the incubator (29ºC) at 10:26 am for 24-48 hours.
Results: Negative results

Conclusions and Next Steps:
We plan to gather and test new environmental samples next.
Title: Enriched Isolation
Date: 9/15/21 Redo: No Sample: #8
Purpose: The purpose of this procedure is to amplify bacteriophages in an environmental sample by allowing it to grow and replicate in bacterial growth media and to infect the host bacteria using a plaque assay.
Notes:
- Using gloves, the bench area was disinfected with CiDecon and spread with Kimwipes followed by 70% EtOH, also spread with Kimwipes. A Bunsen burner was lit to create an aseptic environment.
- A 50 ml conical tube was filled approximately 9 mL full with soil sample #8.
- Using a 5 mL serological pipette, 20 mL liquid media (PCYa) was added until the sample (until it filled up to the 29 mL mark)
- Vortexed the tube until the media and sample were well mixed.
- The tube was put into a shaking incubator and shaken vigorously at 250 rpm for 1-2 hours. *Note: put in the shaking incubator at 9:44 am and took out at 12:08 pm
- Centrifuged 2,000 x g for 10 mins at 4ºC.
- Gathered 0.22 µm filter, syringe, and 50 mL conical tube to obtain the supernatant
- Using aseptic technique, obtained approximately 10 mL of filtrate. *Note: 20 mL filtrate could not be obtained due to constant consumption and clogging of 0.22 µm filter.
- 0.25 mL of M. foliorum was added to the filtrate and the tube was tilted to ensure the bacteria was mixed properly. *Note: 0.5 mL was not added because less filtrate was obtained.
- Before placing the tube into the shaking incubator, the cap was screwed one-quarter of a turn for proper aeration, and lab tape was attached to ensure the cap does not fall off. Note: Sample #8 was put into the shaking incubator at 1:30 pm
- The tube was placed in the shaking incubator at 220 rpm for 5 days
- Sample was taken out on 9/20
- Obtained serological pipette, pipettor, 0.22 µm filter and two microcentrifuge tubes. Labeled the tubes.
- Added 1.4 mL of the enriched culture to each microcentrifuge tube
- Spun the tubes at high speed in the microcentrifuge for 1 minute to pellet the bacteria
***Proceeded to filter the supernatant since it was not clear. - Removed the plunger from the syringe
- Opened a sterile filter and attached it to the barrel of the syringe.
- Pipetted 1 ml of supernatant from each microcentrifuge tube into the syringe barrel (for a total of 2 ml).
- Placed the tip of the filter/syringe over a sterile microcentrifuge tube and inserted the plunger into the syringe.
- Depressed the plunger, collected the sterile filtrate, and immediately capped the microcentrifuge tube.
Proceeded to plaque assay protocols
- Prepared agar plates were taken from the 4 degrees Celsius refrigerator and placed in the incubator for 10 minutes
- Transferred 250 microliters of phage filtrate using a 100 microliter pipette into host bacteria M. foliorum. Gently mixed solution by flicking the tube and let it rest undisturbed for 10 minutes.
- Obtained serological pipette and pipettor and aspirated 3 mL of top agar and transferred it into the mixture containing host bacteria and phage filtrate.
- Immediately aspirated the entire mixture from the tube and transferred it onto an agar plate. Gently but quickly swirled the mixture. Let the agar plate rest undisturbed for about 20 min.
- Placed the labeled agar plate in the incubator (29ºC) at 10:26 am for 24-48 hours.
Results: Negative Results
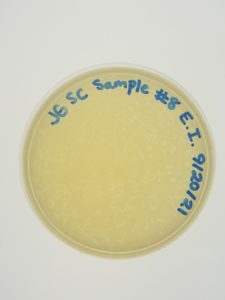
Conclusions and Next Steps:
We plan to gather and test new environmental samples next.
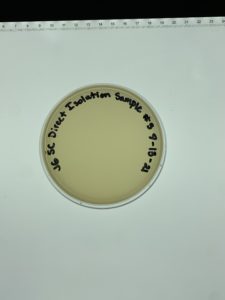
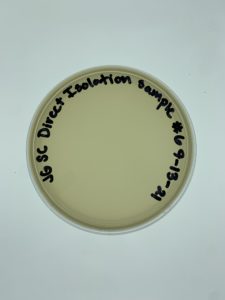
Title: Direct Isolation
Date: 9/20/21 Redo: No Sample: #9
Purpose: The purpose of this procedure is to isolate bacteriophages from an environmental soil sample and to infect the host bacteria using a plaque assay.
Notes:
- Using gloves, the bench area was disinfected with CiDecon and spread with Kimwipes followed by 70% EtOH, also spread with Kimwipes. A Bunsen burner was lit to create an aseptic environment.
- A 15 ml conical tube was filled approximately ⅓ (5-6.5 mL) full with soil sample #9. The rest of the original sample #9 was stored in the lab refrigerator at 4ºC.
- Using a 5 mL serological pipette, liquid media (PCYa) was added until the sample was submerged beneath 2-3 mL of liquid.
- The tube was put into a shaking incubator and shaken vigorously at 250 rpm for 1-2 hours.
- Centrifuged for 10 min at 2,000 x g at 19ºC.
- Approximately 2 mL of liquid were removed from the top of the flooded phage sample using a 0.22 μm syringe. The syringe was screwed into the sterile filter and the filtrate was dispensed into a microcentrifuge tube.
Proceeded to plaque assay protocols
- Prepared agar plates were taken from the 4 degrees Celsius refrigerator and placed in the incubator for 10 minutes
- Transferred 500 microliters of phage filtrate using a 100 microliter pipette into host bacteria M. foliorum. Gently mixed solution by flicking the tube and let it rest undisturbed for 10 minutes.
- Obtained serological pipette and pipettor and aspirated 3 mL of top agar and transferred it into the mixture containing host bacteria and phage filtrate.
- Immediately aspirated the entire mixture from the tube and transferred it onto an agar plate. Gently but quickly swirled the mixture. Let the agar plate rest undisturbed for about 20 min.
- Placed the labeled agar plate in the incubator (29ºC) at 10:40 am for 24-48 hours.
Results: Negative results
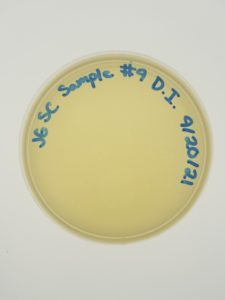
Conclusions and Next Steps:
We plan to gather and test new environmental samples next.
Title: Direct Isolation
Date: 9/21/21 Redo: No Sample: #10
Purpose: The purpose of this procedure is to isolate bacteriophages from an environmental soil sample and to infect the host bacteria using a plaque assay.
Notes:
- Using gloves, the bench area was disinfected with CiDecon and spread with Kimwipes followed by 70% EtOH, also spread with Kimwipes. A Bunsen burner was lit to create an aseptic environment.
- A 15 ml conical tube was filled approximately ⅓ (5-6.5 mL) full with soil sample #10. The rest of the original sample #10 was stored in the lab refrigerator at 4ºC.
- Using a 5 mL serological pipette, liquid media (PCYa) was added until the sample was submerged beneath 2-3 mL of liquid.
- The tube was put into a shaking incubator and shaken vigorously at 250 rpm for 1-2 hours.
- Approximately 2 mL of liquid were removed from the top of the flooded phage sample using a 0.22 μm syringe. The syringe was screwed into the sterile filter and the filtrate was dispensed into a microcentrifuge tube.
Proceeded to plaque assay protocols
- Prepared agar plates were taken from the 4 degrees Celsius refrigerator and placed in the incubator for 10 minutes
- Transferred 500 microliters of phage filtrate using a 100 microliter pipette into host bacteria M. foliorum. Gently mixed solution by flicking the tube and let it rest undisturbed for 10 minutes.
- Obtained serological pipette and pipettor and aspirated 3 mL of top agar and transferred it into the mixture containing host bacteria and phage filtrate.
- Immediately aspirated the entire mixture from the tube and transferred it onto an agar plate. Gently but quickly swirled the mixture. Let the agar plate rest undisturbed for about 20 min.
- Placed the labeled agar plate in the incubator (29ºC) at 11:04 am for 24-48 hours.
Results: Negative results
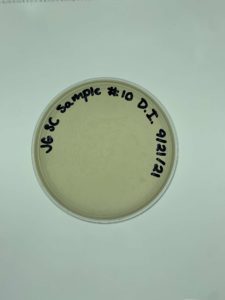
Conclusions and Next Steps:
We plan to gather and test new environmental samples next.
Title: Direct Isolation
Date: 9/21/21 Redo: No Sample: #11
Purpose: The purpose of this procedure is to isolate bacteriophages from an environmental soil sample and to infect the host bacteria using a plaque assay.
Notes:
- Using gloves, the bench area was disinfected with CiDecon and spread with Kimwipes followed by 70% EtOH, also spread with Kimwipes. A Bunsen burner was lit to create an aseptic environment.
- A 15 ml conical tube was filled approximately ⅓ (5-6.5 mL) full with soil sample #11. The rest of the original sample #11 was stored in the lab refrigerator at 4ºC.
- Using a 5 mL serological pipette, liquid media (PCYa) was added until the sample was submerged beneath 2-3 mL of liquid.
- The tube was put into a shaking incubator and shaken vigorously at 250 rpm for 1-2 hours.
- Approximately 2 mL of liquid were removed from the top of the flooded phage sample using a 0.22 μm syringe. The syringe was screwed into the sterile filter and the filtrate was dispensed into a microcentrifuge tube.
Proceeded to plaque assay protocols
- Prepared agar plates were taken from the 4 degrees Celsius refrigerator and placed in the incubator for 10 minutes
- Transferred 500 microliters of phage filtrate using a 100 microliter pipette into host bacteria M. foliorum. Gently mixed solution by flicking the tube and let it rest undisturbed for 10 minutes.
- Obtained serological pipette and pipettor and aspirated 3 mL of top agar and transferred it into the mixture containing host bacteria and phage filtrate.
- Immediately aspirated the entire mixture from the tube and transferred it onto an agar plate. Gently but quickly swirled the mixture. Let the agar plate rest undisturbed for about 20 min.
- Placed the labeled agar plate in the incubator (29ºC) at 11:04 am for 24-48 hours.
Results: Negative results

Conclusions and Next Steps:
We plan to adopt a phage from another group.
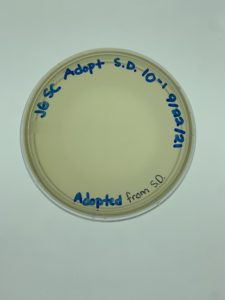
Title: Direct Isolation
Date: 9/15/2021 Redo: Yes Sample: #8
Purpose: This procedure is to extract phages from the environmental sample and infect the host bacteria using a plaque assay.
Note: This protocol was copied from Obsidian, our phage was adopted from their successful sample 8.
Notes:
Direct isolation for sample 8 and 9 were completed on the same day.
Direct Isolation
1.)We enter lab and washed our hands properly. Next, the workbench was cleaned via aseptic technique by wiping the workspace with CiDecon and then 70% ethanol and once the workbench was dry we got our supplies for direct isolation and the Bunsen burner is lit.
Extraction of Phage from Environmental Sample
2.) A 15mL conical tube was roughly around 7 ml with environmental sample 8 and liquid media was added until the soil was covered with around 3 ml.
3.) It was then inverted until the soil was thoroughly mixed with the liquid media.
4.) The tube was then put into a shaking incubator at 250rpm from 9:45am until approximately 1:15pm.
5.) The sample was then allowed to sit upright for 5 minutes to allow the particulate matter to settle.
Preparing Phage Filtrate
6.) The sample had around 3ml of liquid sitting on top of the settled particles after it was allowed to sit. A syringe was used to collect the liquid and the majority of the liquid was successfully collected.
7.) A 0.22µL filter was put onto the end of the syringe using aseptic technique, and the liquid was filtered into a 1.5mL microcentrifuge tube.
8.) Roughly .5mL of the sample was collected using this method.
Plaque Assay
9.) Only 250µL of the sample collected in the last section were then transferred to a culture tube with 250µL of host bacterial cultures and mixed gently.
10.) The sample then sat undisturbed from 10 minutes.
11.)An agar plate was collected labeled with mine and my lab partners initials along with the date as well as the sample number and the method used.
12.) 3mL of molten (55℃) top agar were aseptically mixed in the tube with the bacteria culture and phage sample, then immediately moved onto the top of the agar plate.
13.) The plate was tilted to get the molten agar to cover the entirety of the plate and left to sit on the workbench for roughly 20 minutes to allow the molten agar to cool and solidify.
14.) The plate was added to the incubator at 29℃ from 4:00 on Wednesday (9/15) until Friday(9/17).
15.) The sample was checked on at 12:00 on Thursday (9/16)
16.) This sample produced plaques.
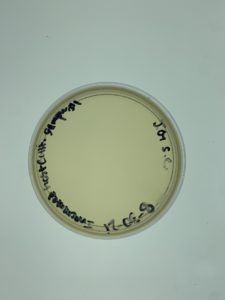
Results:
Positive. Multiple plaques were found on the plate.
(No plate picture was uploaded).
Conclusions and Next Steps:
The next step will be picking a plaque and proceeding to the serial dilutions steps.
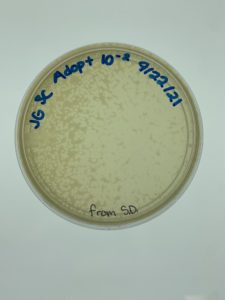
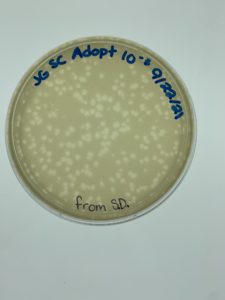
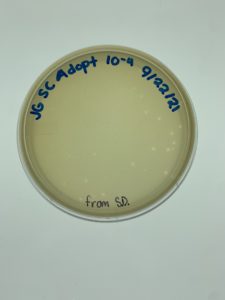
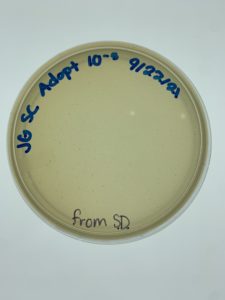
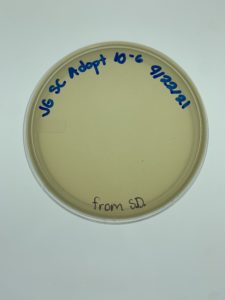
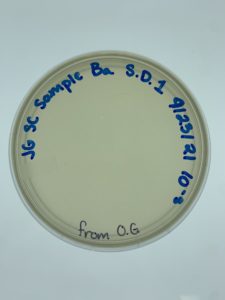
Title: Picking a Plaque and Serial Dilution 1
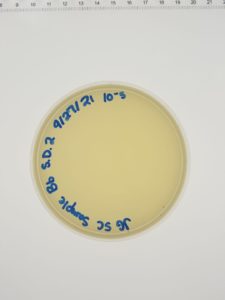
Date: 09/22/21 Redo: No Sample: JG SC (We only labeled with initials, forgot to pick a special indicator)
Purpose: The purpose of this procedure is to pick a phage from a plaque and create a liquid sample
Notes:
- Using gloves, the bench area was disinfected with CiDecon and spread with Kimwipes followed by 70% EtOH, also spread with Kimwipes. A Bunsen burner was lit to create an aseptic environment.
- Plaque JG SC was selected and labeled on the plate. Afterward, the selected plaque was “picked” by inserting a clean tip of a micropipette, held perpendicular to the plate, into the plaque–avoiding the surrounding bacteria and ensuring not to poke too deep into the bottom agar.
- 7 microcentrifuge tubes were gathered. The sample was added to a microcentrifuge tube labeled 10e0, containing 100uL of buffer solution, by dipping the tip into the buffer and tapping the tip to the side of the tube. The tube was then vortexed.
Proceeded to serial dilution (1) protocol
- The other 6 microcentrifuge tubes were labeled 10e-1 – 10e-6 and 90uL of buffer solution was added to each tube with a pipette, changing tips between each tube.
- 10uL from the original sample tube was collected with a micropipette and added to the tube labeled 10e-1. The sample tube was vortexed. The process continued with 10 uL of sample 10e-1 being added to sample 10e-2 and that tube being vortexed. This protocol was carried out to tube 10e-6.
- 6 tubes containing host bacteria were obtained and labeled 10e-1 – 10e-6. 10 uL of sample dilution from each microcentrifuge tube were added to the corresponding labeled bacteria tube using a micropipette. Obtained serological pipette and pipettor and aspirated 3 mL of top agar and transferred it into the mixture containing host bacteria and phage filtrate.
- Immediately aspirated the entire mixture from the tube and transferred it onto an agar plate. Gently but quickly swirled the mixture. Let the agar plate rest undisturbed for about 20 min. (This process was done for all 6 mixtures).
- Placed the labeled agar plate in the incubator (23-30ºC – 29) at 11:43 am for 24-48 hours.
Results:
Plaques formed.

Conclusions and Next Steps:
We realized we picked a plaque from a serial dilution rather than an original sample so we will redo this protocol correctly. We put the plates back in the incubator to see if more growth would occur (it had only been around 24 hours when we checked) and if they needed to be autoclaved and saved. More plaques had formed when checked on 9/24.
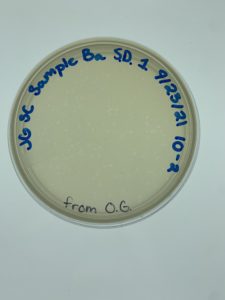
Title: Picking a Plaque and Serial Dilution 1
Date: 09/23/21 Redo: Yes Sample: Ba
Purpose: The purpose of this procedure is to pick a phage from a plaque and create a liquid sample
Notes:
- Using gloves, the bench area was disinfected with CiDecon and spread with Kimwipes followed by 70% EtOH, also spread with Kimwipes. A Bunsen burner was lit to create an aseptic environment.
- Plaque Ba was selected and labeled on the plate. Afterward, the selected plaque was “picked” by inserting a clean tip of a micropipette, held perpendicular to the plate, into the plaque–avoiding the surrounding bacteria and ensuring not to poke too deep into the bottom agar.
- 7 microcentrifuge tubes were gathered. The sample was added to a microcentrifuge tube labeled 10e0, containing 100uL of buffer solution, by dipping the tip into the buffer and tapping the tip to the side of the tube. The tube was then vortexed.
Proceeded to serial dilution (1) protocol
- The other 6 microcentrifuge tubes were labeled 10e-1 – 10e-6 and 90uL of buffer solution was added to each tube with a pipette, changing tips between each tube.
- 10uL from the original sample tube was collected with a micropipette and added to the tube labeled 10e-1. The sample tube was vortexed. The process continued with 10 uL of sample 10e-1 being added to sample 10e-2 and that tube being vortexed. This protocol was carried out to tube 10e-6.
- 6 tubes containing host bacteria were obtained and labeled 10e-1 – 10e-6. 10 uL of sample dilution from each microcentrifuge tube were added to the corresponding labeled bacteria tube using a micropipette. Obtained serological pipette and pipettor and aspirated 3 mL of top agar and transferred it into the mixture containing host bacteria and phage filtrate.
- Immediately aspirated the entire mixture from the tube and transferred it onto an agar plate. Gently but quickly swirled the mixture. Let the agar plate rest undisturbed for about 20 min. (This process was done for all 6 mixtures).
- Placed the labeled agar plate in the incubator (23-30ºC – 29) at 12:02 pm for 24-48 hours.
Results:
Plaques formed.


Conclusions and Next Steps:
The plates from the very first serial dilution and this serial dilution were placed in the fridge (4ºC) and we will continue with our second serial dilution on this sample on Monday (9/27/21). What will be done with the plates from the very first serial dilution is to be determined.
Title: Picking a Plaque and Serial Dilution 2
Date: 09/27/21 Redo: No Sample: Bb
Purpose: The purpose of this procedure is to pick a phage from a plaque and create a liquid sample
Notes:
- Using gloves, the bench area was disinfected with CiDecon and spread with Kimwipes followed by 70% EtOH, also spread with Kimwipes. A Bunsen burner was lit to create an aseptic environment.
- Plaque Bb was selected and labeled on the plate. Afterward, the selected plaque was “picked” by inserting a clean tip of a micropipette, held perpendicular to the plate, into the plaque–avoiding the surrounding bacteria and ensuring not to poke too deep into the bottom agar.
- 7 microcentrifuge tubes were gathered. The sample was added to a microcentrifuge tube labeled 10e0, containing 100uL of buffer solution, by dipping the tip into the buffer and tapping the tip to the side of the tube. The tube was then vortexed.
Proceeded to serial dilution (2) protocol
- The other 6 microcentrifuge tubes were labeled 10e-1 – 10e-6 and 90uL of buffer solution was added to each tube with a pipette, changing tips between each tube.
- 10uL from the original sample tube was collected with a micropipette and added to the tube labeled 10e-1. Sample tube was vortexed. The process continued with 10 uL of sample 10e-1 being added to sample 10e-2 and that tube being vortexed. This protocol was carried out to tube 10e-6.
- 6 tubes containing host bacteria were obtained and labeled 10e-1 – 10e-6. 10 uL of sample dilution from each microcentrifuge tube were added to the corresponding labeled bacteria tube using a micropipette. Obtained serological pipette and pipettor and aspirated 3 mL of top agar and transferred it into the mixture containing host bacteria and phage filtrate.
- Immediately aspirated the entire mixture from the tube and transferred it onto an agar plate. Gently but quickly swirled the mixture. Let the agar plate rest undisturbed for about 20 min. (This process was done for all 6 mixtures).
- Placed the labeled agar plate in the incubator (23-30ºC – 29) at 11:29 am for 24-48 hours.
Results:
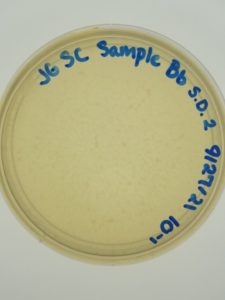
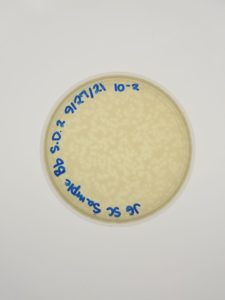

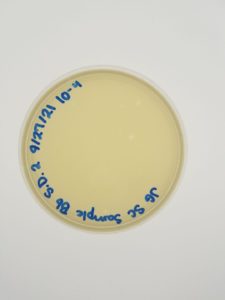

Conclusions and Next Steps:
We will move on to flooding our webbed plate (10e-1) and obtaining lysate.
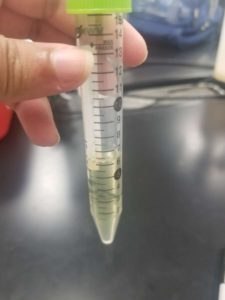
Title: Collection of Low Volume Lysate
Date: 09/29/20 Redo: No Sample: Bb
Purpose: The purpose of this procedure is to extract phages from a webbed plate in order to collect a low-volume lysate.
Notes:
- Using gloves, the bench area was disinfected with CiDecon and spread with Kimwipes followed by 70% EtOH, also spread with Kimwipes. A Bunsen burner was lit to create an aseptic environment.
- From the last protocol, the 10e-1 plate was chosen as the webbed plate because it contains the most plaques
- Obtained phage buffer and added 8mL to the 10e-1 plate using a serological pipette
- Let the plate sit for 2 hours undisturbed
- Gathered a serological pipette, pipettor, 15 mL conical tube, 0.22µm filter
- Opened the filter and removed the plunger from the syringe
- Titled the plate to one side and used the serological pipette to aspirate most of the lysate
- Added the lysate into the syringe and securely screwed it onto the filter
- Placed the filter into the 15 mL conical tube and pushed the plunger down
- Collected about 6.4 mL of lysate
- Labeled the tube and stored in the lab refrigerator at 4ºC
Results:
Conclusions and Next Steps:
We will move on to serial dilutions and plaque assay of the low volume lysate.
Title: Serial Dilutions/Full Plate Titer
Date: 10/04/21 Redo: No Sample: Bb
Purpose: The purpose of this procedure is to determine the phage particle concentration of low volume lysate.
Notes:
- Using gloves, the bench area was disinfected with CiDecon and spread with Kimwipes followed by 70% EtOH, also spread with Kimwipes. A Bunsen burner was lit to create an aseptic environment.
- Using the low concentration lysate, a 10-fold serial dilution was performed. 10 uL of the undiluted phage sample were added to a labeled 10^-1 tube and then vortexed. This process continued all the way through to a 10^-6 tube. The tubes were vortexed after each dilution and pipette tips were switched.
- 10 uL of each of the serial dilutions were dispensed into corresponding test tubes containing 250 uL of host bacteria using a micropipette. They were left to sit for 10 minutes. Obtained serological pipette and pipettor and aspirated 3 mL of top agar and transferred it into the mixture containing host bacteria and phage filtrate.
- Immediately aspirated the entire mixture from the tube and transferred it onto an agar plate. Gently but quickly swirled the mixture. Let the agar plate rest undisturbed for about 20 min. (This process was done for all 6 mixtures).
- Placed the labeled agar plate in the incubator (23-30ºC – 29) at 9:05 am for 24-48 hours.
Results:
Positive results, a webbed plate was successfully created.
10^-1 had no visible plaques.
10^-2 had no visible plaques.
10^-3 had no visible plaques.
10^-4 had an uncountable number of plaques.
10^-5 had ~2,150 plaques. (2.15 x 10^3)
10^-6 had ~215 plaques.
Calculation of titer for 10^-6:
Titer (pfu/ml) = (# pfu/ volume used in μl) x (103 μl/ml) x dilution factor
Titer (pfu/ml) = (215 pfu/10 μl) x (10^3 μl/ ml) x (10^6) = (21.5 x 10^3 x 10^6) = 2.2 x 10^10 pfu/ml

Conclusions and Next Steps:
We will create webbed plates.
Amplification
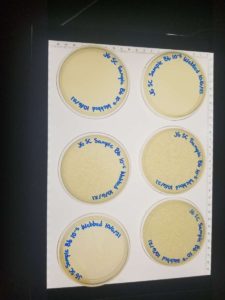
Title: Creation of Webbed Plates
Date: 10/06/2020 Redo: No Sample: Bb 10^-5
Purpose: This procedure is to create webbed plates for high-volume lysate collection.
Notes:
- Using gloves, the bench area was disinfected with CiDecon and spread with Kimwipes followed by 70% EtOH, also spread with Kimwipes. A Bunsen burner was lit to create an aseptic environment.
- Calculated to find the volume of lysate needed to create a webbed plate: (2.15 x 10^3)/(2.2 x 10^10) = 9.8 x 10^-8 mL x 1000 uL = 9.8 x 10^-5 uL (or 0.00098 uL)
- 6 plates and 6 250uL bacterial tubes were gathered and labeled for the creation of webbed plates.
- The low-volume lysate of Bb 10^-5 was removed from the fridge.
- Two microcentrifuge tubes were obtained. Phage buffer was added to both tubes, 999 uL in the first and 63 uL in the second. 1 uL of low volume lysate was added to the first tube with a micropipette. 7 uL of the lysate and phage buffer mixture from the first tube were transferred into the second tube using a new micropipette tip. The tubes were vortexed between transfers. These volumes were decided using the calculation listed above.
- 10 uL from the second tube mixture was added to each of the 6 250 host bacteria tubes. The tubes were allowed to sit for 10 minutes to allow phage attachment. Obtained serological pipette and pipettor and aspirated 3 mL of top agar and transferred it into the mixture containing host bacteria and phage filtrate.
- Immediately aspirated the entire mixture from the tube and transferred it onto an agar plate. Gently but quickly swirled the mixture. Let the agar plate rest undisturbed for about 20 min. (This process was done for all 6 mixtures).
- Placed the labeled agar plate in the incubator (23-30ºC – 29) at 12:24 pm for 24-48 hours.
Results:
Unfortunately, some of the plates were not fully solidified before flipping and resulted in 3 inconclusive plates. We were left with 3 webbed plates, leaving just enough to create a high volume lysate.
Conclusions and Next Steps:
We will flood the webbed plates to create a high-volume lysate.
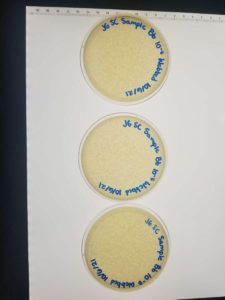
Title: Collection of “High” Volume Lysate
Date: 10/07/2021 Redo: No Sample: Bb 10^-5
Purpose: This procedure is to extract phages from a webbed plate in order to collect a high volume lysate.
Notes:
- Using gloves, the bench area was disinfected with CiDecon and spread with Kimwipes followed by 70% EtOH, also spread with Kimwipes. A Bunsen burner was lit to create an aseptic environment.
- Obtained phage buffer and added 8mL to all 3 webbed plates using a serological pipette.
- Let the plate sit for 2 hours undisturbed.
- Gathered a serological pipette, pipettor, 15 mL conical tube, 0.22µm filter.
- Opened the filter and removed the plunger from the syringe.
- Titled the plate to one side and used the serological pipette to aspirate most of the lysate.
- Added the lysate into the syringe and securely screwed it onto the filter.
- Placed the filter into the 15 mL conical tube and pushed the plunger down. This was done for each plate.
- Collected about 21 mL of lysate
- Labeled the tube and stored in the lab refrigerator at 4ºC.
Results:

Conclusions and Next Steps:
We will do another serial dilution and full plate titer with the high-volume lysate.
Title: Serial Dilutions/Full Plate Titer of High Volume Lysate
Date: 10/11/2021 Redo: No Sample: Bb 10^-5 HVL
Purpose: This procedure is to determine the phage particle concentration of the high volume lysate which will help determine the concentration needed to create webbed plates.
Notes:
- Using gloves, the bench area was disinfected with CiDecon and spread with Kimwipes followed by 70% EtOH, also spread with Kimwipes. A Bunsen burner was lit to create an aseptic environment.
- Using the high volume lysate, a 10-fold serial dilution was performed.10 uL of the undiluted phage sample were added to a labeled 10^-1 tube and then vortexed. This process continued all the way through to a 10^-6 tube. The tubes were vortexed after each dilution and pipette tips were switched.
- 10 uL of each of the serial dilutions were dispensed into corresponding test tubes containing 250 uL of host bacteria using a micropipette. They were left to sit for 10 minutes. Obtained serological pipette and pipettor and aspirated 3 mL of top agar and transferred it into the mixture containing host bacteria and high volume lysate
- Immediately aspirated the entire mixture from the tube and transferred it onto an agar plate. Gently but quickly swirled the mixture. Let the agar plate rest undisturbed for about 20 min. (This process was done for all 6 mixtures).
- Placed the labeled agar plate in the incubator (23-30ºC – 29) at 9:22 am for 24-48 hours.
Results:
Positive results, a webbed plate was successfully created.
The morphology of the plaques were small and clear with a relatively similar size and shape.
10^-1 had no visible plaques.
10^-2 had no visible plaques.
10^-3 did not solidify before flipping but it looks like it would’ve had plaques.
10^-4 had ~3,200 plaques (3.2 x 10^3).
10^-5 had ~320 plaques (3.2 x 10^2).
10^-6 had ~32 plaques.
Calculation of titer for 10^-6:
Titer (pfu/ml) = (# pfu/ volume used in μl) x (103 μl/ml) x dilution factor
Titer (pfu/ml) = (32 pfu/10 μl) x (10^3 μl/ ml) x (10^6) = (3.2 x 10^3 x 10^6) = 3.2 x 10^9 pfu/ml
The titer is close enough to 5 x 10^9 pfu/ml that it was suggested to try to continue to the next step.
Conclusions and Next Steps:
We will continue to the next step of entering our phage into the actinobacteriophage database.
Title: Entering the Phage into Actinobacteriophage Database
Date: 10/13/2021 Redo: No Sample: HandsomeSquid
Purpose: This procedure is to include our phage in the Actinobacteriophage Database to make it available for other scientists.
Notes:
- The phage was named “HandsomeSquid” according to the rules found in the “Phages” dropdown menu and “Naming Rules” on phagesdb.org.
- Registered for a PhagesDB account by clicking on the “Sign in or Register” button at the bottom left column on the page.
- Entered phage on PhagesDB.
- After logging into the site, selected “Data” dropdown menu and clicked “Add a Phage.”
- Fields shown on the page were filled if an answer was available at the time.
- Clicked “Submit” to send the request to PhagesDB. The submission would be reviewed and approved by a scientist at the University of Pittsburgh.
Results:
The submission was approved.
Conclusions and Next Steps:
We will move on to archive the phage sample.
Title: Archiving the Phage Sample
Date: 10/14/21 Redo: No Sample: HandsomeSquid
Purpose: This procedure is to prepare a high-titer lysate for long-term storage.
Notes:
- Using gloves, the bench area was disinfected with CiDecon and spread with Kimwipes followed by 70% EtOH, also spread with Kimwipes. A Bunsen burner was not lit this time as all work was done under a fume hood since DMSO is a flammable reagent.
- Certified phage samples on PhagesDB.org and made sure the correct details of our phage were shown.
- Three tubes were acquired and barcoded, two for the University of Pittsburgh and one for storage at the institution (Tarleton). It was not necessary to barcode the third tube but it was done anyway.
- Using aseptic technique, the tubes were filled with sterile beads approximately 1.5 cm from the top of the tube.
- A DMSO/lysate mixture was obtained by first using a serological pipette and pipettor to dispense 2.8 ml of high-titer lysate into a sterile 15 ml conical tube. Then, a micropipette with a clean tip was used to dispense 200 ul of DMSO into the same 15 ml conical tube. The mixture was then gently vortexed.
- Using clean pipette tips between each labeled tube, the DMSO/lysate mixture was dispensed into each tube until the beads were just coved. The tubes were closed properly.
- Two of the tubes were stored in a box at 4ºC for shipment to the University of Pittsburgh. The third tube was frozen immediately at the institution (Tarleton).
Results:
Conclusions and Next Steps:
The next step is to begin DNA extraction.
Title: Creation of Webbed Plates
Date: 11/01/2021 Redo: No Sample: Bb 10^-5
Purpose: This procedure is to create webbed plates for high-volume lysate collection.
Notes:
- Using gloves, the bench area was disinfected with CiDecon and spread with Kimwipes followed by 70% EtOH, also spread with Kimwipes. A Bunsen burner was lit to create an aseptic environment.
- Calculated to find the volume of lysate needed to create a webbed plate: (2.15 x 10^3)/(2.2 x 10^10) = 9.8 x 10^-8 mL x 1000 uL = 9.8 x 10^-5 uL (or 0.00098 uL)
- 6 plates and 6 250uL bacterial tubes were gathered and labeled for the creation of webbed plates.
- The low-volume lysate of Bb 10^-5 was removed from the fridge.
- Two microcentrifuge tubes were obtained. Phage buffer was added to both tubes, 999 uL in the first and 63 uL in the second. 1 uL of low volume lysate was added to the first tube with a micropipette. 7 uL of the lysate and phage buffer mixture from the first tube were transferred into the second tube using a new micropipette tip. The tubes were vortexed between transfers. These volumes were decided using the calculation listed above.
- 10 uL from the second tube mixture was added to each of the 6 250 host bacteria tubes. The tubes were allowed to sit for 10 minutes to allow phage attachment. Obtained serological pipette and pipettor and aspirated 3 mL of top agar and transferred it into the mixture containing host bacteria and phage filtrate.
- Immediately aspirated the entire mixture from the tube and transferred it onto an agar plate. Gently but quickly swirled the mixture. Let the agar plate rest undisturbed for about 20 min. (This process was done for all 6 mixtures).
- Placed the labeled agar plate in the incubator (23-30ºC – 29) at 12:23 pm for 24-48 hours.
Results:
The webbed plates did not come out correctly and plates were thrown away.

Conclusions and Next Steps:
We were going to make new webbed plates to create more high-volume lysate, but it was suggested that we just go ahead and focus on restriction enzyme digests and gel electrophoresis.
DNA Extraction
Title: DNA Extraction (Alternate 3.5 Protocol) Day 1
Date: 10/18/2021 Redo: No Sample: –
Purpose: This procedure is to extract DNA from the phage.
Notes:
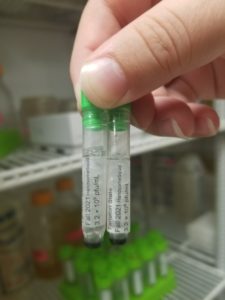
- Gently mixed HVL, then aliquoted 5mL of lysate into a 15 mL conical tube. Gave the tube to TA (Marlee G) who added 20uL of nuclease mix.
- Gently inverted the tube and incubated at 37°C for 10min.
- Aliquoted lysate into 5 microfuge tubes, 1mL each.
- Added 20uL of ZnCl2 to each tube, mixed gently by inversion, and incubated at 37°C for 5min.
- Centrifuged the tubes at 10,000rpm for 1 minute to pellet the phage.
STEPS 6 and 7 WERE DONE QUICKLY AND EFFICIENTLY
- Removed supernatants by aspiration and put into a separate 15 mL conical tube
- Resuspended pellets in 500uL TES buffer per tube, and incubated at 60°C for 15min in the heat block
- Added 1uL of Proteinase K and mixed gently. Incubated at 37°C for 10min to completely eliminate any residual nuclease activity.
- Added 60uL of potassium acetate to each tube. Mixed well and left on ice for 15 minutes.
- Centrifuged at 4°C for 1 min at 12,000rpm to pellet the capsids. Supernatants were aspirated using a micropipette and placed into new microfuge tubes. Tubes with the pellets were thrown away.
- 500uL of isopropanol were added to each of the tubes with the supernatant, mixed, and left on ice in a 4°C fridge at 1:16 pm (will resume day two DNA extractions on 10/20)
Results:
Did not take pictures of our 5 microcentrifuge tubes.
Conclusions and Next Steps:
*Note: Put in agar plate incubator for 5 min instead of heat block at 37 C
Accidentally started to aspirate supernatant before centrifuging for 1 min
We will continue on to the next steps of DNA extractions.
Title: DNA Extraction (Alternate 3.5 Protocol) Day 2
Date: 10/20/2021 Redo: No Sample: –
Purpose: This procedure is to extract DNA from the phage.
Notes:
- Obtained tubes from fridge and centrifuged at top speed for 10min to pellet DNA. Discard supernatant into a new 15 mL conical tube.
- Added 250uL of 70% ethanol in each tube, and centrifuged again for 1 minute, at top speed. Discarded supernatants into the 15 mL conical tube.
- Dried the DNA pellets at room temperature by turning upside-down onto paper towels, tapping out excess liquid, and leaving upside-down until pellets begin to turn clear. The tubes were placed in a fume hood for approximately an hour.
- Resuspended the first pellet in 50uL nuclease-free water. Then used that solution to resuspend the next pellet. Continued until all 5 pellets have been resuspended in the same 50uL of water.
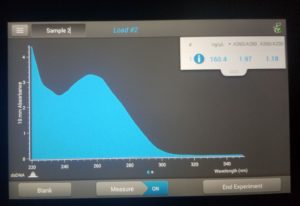
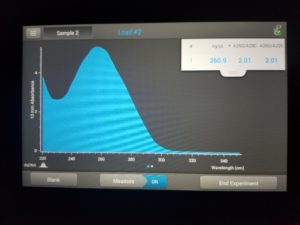
- Checked DNA concentration and quality using the Nanodrop.
Results:
ng/uL: 160.4
A260/A280: 1.97
A260/A230: 1.18
Conclusions and Next Steps:
We will do DNA Extractions again to get a higher concentration of DNA.
Title: DNA Extraction (Alternate 3.5 Protocol) Day 1
Date: 10/25/2021 Redo: Yes Sample: –
Purpose: This procedure is to extract DNA from the phage.
Notes:
- Gently mixed HVL, then aliquoted 5mL of lysate into a 15 mL conical tube. Gave the tube to TA (Marlee G) who added 20uL of nuclease mix.
- Gently inverted the tube and incubated at 37°C for 10min.
- Aliquoted lysate into 5 microfuge tubes, 1mL each.
- Added 20uL of ZnCl2 to each tube, mixed gently by inversion, and incubated at 37°C for 5min.
- Centrifuged the tubes at 10,000rpm for 1 minute to pellet the phage.
STEPS 6 and 7 WERE DONE QUICKLY AND EFFICIENTLY
- Removed supernatants by aspiration and put into a separate 15 mL conical tube
- Resuspended pellets in 500uL TES buffer per tube, and incubated at 60°C for 15min in the heat block
- Added 1uL of Proteinase K and mixed gently. Incubated at 37°C for 10min to completely eliminate any residual nuclease activity.
- Added 60uL of potassium acetate to each tube. Mixed well and left on ice for 15 minutes.
- Centrifuged at 4°C for 1 min at 12,000rpm to pellet the capsids. Supernatants were aspirated using a micropipette and placed into new microfuge tubes. Tubes with the pellets were thrown away.
- 500uL of isopropanol were added to each of the tubes with the supernatant, mixed, and left on ice in a 4°C fridge at 1:16 pm (will resume day two DNA extractions on 10/20)
Results:
Did not take pictures of our 5 microcentrifuge tubes.
Conclusions and Next Steps:
We will continue on to the next steps of DNA extraction.
Title: DNA Extraction (Alternate 3.5 Protocol) Day 2
Date: 10/26/2021 Redo: Yes Sample: –
Purpose: This procedure is to extract DNA from the phage.
Notes:
- Obtained tubes from fridge and centrifuged at top speed for 10min to pellet DNA. Discard supernatant into a new 15 mL conical tube.
- Added 250uL of 70% ethanol in each tube, and centrifuged again for 1 minute, at top speed. Discarded supernatants into the 15 mL conical tube.
- Dried the DNA pellets at room temperature by turning upside-down onto paper towels, tapping out excess liquid, and leaving upside-down until pellets begin to turn clear. The tubes were placed in a fume hood for approximately an hour.
- Resuspended the first pellet in 50uL nuclease-free water. Then used that solution to resuspend the next pellet. Continued until all 5 pellets have been resuspended in the same 50uL of water.
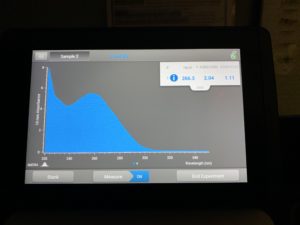
- Checked DNA concentration and quality using the Nanodrop.
Results:
ng/uL: 266.3
A260/A280: 2.04
A260/A230: 1.11
Conclusions and Next Steps:
We will do DNA Extractions again to get a higher concentration of DNA and possibly combine the final supernatants to get a good concentration of DNA. We also plan to do the TEM protocol on 10/27.
Title: DNA Extraction (Alternate 3.5 Protocol) Day 1
Date: 10/28/2021 Redo: Yes Sample: –
Purpose: This procedure is to extract DNA from the phage.
Notes:
- Gently mixed HVL, then aliquoted 5mL of lysate into a 15 mL conical tube. Gave the tube to TA (Marlee G) who added 20uL of nuclease mix.
- Gently inverted the tube and incubated at 37°C for 10min.
- Aliquoted lysate into 5 microfuge tubes, 1mL each.
- Added 20uL of ZnCl2 to each tube, mixed gently by inversion, and incubated at 37°C for 5min.
- Centrifuged the tubes at 10,000rpm for 1 minute to pellet the phage.
STEPS 6 and 7 WERE DONE QUICKLY AND EFFICIENTLY
- Removed supernatants by aspiration and put into a separate 15 mL conical tube
- Resuspended pellets in 500uL TES buffer per tube, and incubated at 60°C for 15min in the heat block
- Added 1uL of Proteinase K and mixed gently. Incubated at 37°C for 10min to completely eliminate any residual nuclease activity.
- Added 60uL of potassium acetate to each tube. Mixed well and left on ice for 15 minutes.
- Centrifuged at 4°C for 1 min at 12,000rpm to pellet the capsids. Supernatants were aspirated using a micropipette and placed into new microfuge tubes. Tubes with the pellets were thrown away.
- 500uL of isopropanol were added to each of the tubes with the supernatant, mixed, and left on ice in a 4°C fridge at 1:16 pm (will resume day two DNA extractions on 10/20)
Results:
Did not take pictures of our 5 microcentrifuge tubes.
Conclusions and Next Steps:
Continue with day 2 of DNA extraction.
Title: DNA Extraction (Alternate 3.5 Protocol) Day 2
Date: 10/29/2021 Redo: Yes Sample: –
Purpose: This procedure is to extract DNA from the phage.
Notes:
- Obtained tubes from fridge and centrifuged at top speed for 10min to pellet DNA. Discard supernatant into a new 15 mL conical tube.
- Added 250uL of 70% ethanol in each tube, and centrifuged again for 1 minute, at top speed. Discarded supernatants into the 15 mL conical tube.
- Dried the DNA pellets at room temperature by turning upside-down onto paper towels, tapping out excess liquid, and leaving upside-down until pellets begin to turn clear. The tubes were placed in a fume hood for approximately an hour.
- Resuspended the first pellet in 50uL nuclease-free water. Then used that solution to resuspend the next pellet. Continued until all 5 pellets have been resuspended in the same 50uL of water.
- Checked DNA concentration and quality using the Nanodrop.
Results:
ng/uL: 86.4
A260/A280: 1.95
A260/A230: 0.95

Conclusions and Next Steps:
We will combine and possibly try to purify our DNA further.
Title: DNA Extraction- Reprecipitation
Date: 11/01/2021 Redo: Yes
Purpose: The purpose of this procedure is to combine DNA from two previous extractions and reprecipitate DNA to obtain a purified version.
Notes:
- We calculated that we needed about 740.4 uL of 100% ethanol and 24.68 uL of Sodium Acetate to resuspend our DNA sample in, and then we left it on a bed of ice until the next lab period.
Calculations: 160.4 ng/uL + 86.4 ng/uL = 246.8 ng/uL/10 = 24.68 uL (amount of sodium acetate needed)
246.8 ng/uL x 3 = 740.4 uL (amount of ethanol needed)
- The tube was then left overnight for two days in the freezer
- On 11/3 the tube was centrifuged at full speed (14,000 rpm), 4
C for 30 mins. 75% ethanol tube was placed in ice during this time
- The supernatant was discarded into a WASTE tube.
- Next 500uL of 75% ethanol was added to the tube, and spun again for 10 min, at top speed. This washed the DNA pellet. Repeated the step twice.
- Ethanol was removed from the tube and it was spin quickly (10s top speed) to remove the trace amount of ethanol
- The DNA was then dried under the hood with the tube lid open, and it stayed there for about 55 minutes.
- Once completely dry the tube was resuspended in 50uL nuclease-free water. Then the solution was aspirated in and out of the pipette tip a few times to make sure that it was completely mixed together, doing this gently to make sure that the DNA was not harmed.
- Then the DNA concentration and quality was checked with Nanodrop.
Results:
ng/uL: 260.9
A260/A280: 2.01
A260/A230: 2.01
Conclusions and Next Steps:
We will move on to doing restriction enzymes and gel electrophoresis with our DNA.
Characterization
Title: Mounting Phage Samples for TEM and Staining with Uranyl Acetate
Date: 10/28/2021 Redo: No Sample: –
Purpose: This procedure is to prepare the phage sample for viewing using a transmission electron microscope.
Notes:
- Using gloves, the bench area was disinfected with CiDecon and spread with Kimwipes followed by 70% EtOH, also spread with Kimwipes.
- 1 mL of high-titer lysate was transferred to a sterile microcentrifuge tube aseptically.
- The lysate tube was balanced with a water tube and centrifuged for 1 hour at 4ºC and top speed to concentrate the phage particles to the bottom of the tube.
- The supernatant was removed using a micropipettor and without disturbing the pellet.
- 100 uL of phage buffer was added to the tube. The pellet was resuspended for 30 minutes to an hour in a 4ºC fridge.
The rest of the protocol was done immediately to avoid damaging the phage heads
- The work area was already prepared by the instructor.
- The cover of a 5 x 5 cm piece of parafilm was removed and the parafilm was placed in the center of a Petri dish lid.
- A PELCO Tab was placed in the center of the parafilm and the adhesive was exposed.
- Using EM forceps, a fresh grid was removed by its edge.
- The grid was placed right against the side of the tab with the dark and shiny side facing UP.
Mount and stain phage
- Using a micropipettor, 10 uL of lysate were placed on the grid without touching the tip to the grid.
- According to Table 8.1b-1, the phage would settle and attach to the grid for 2 minutes since the calculated titer was 10^9.
- Excess fluid was wicked off with a small wedge of filter paper.
- The grid was rinsed two more times by carefully pipetting 10 uL of water onto the grid and allowing it to sit for 2 minutes each time. Water was wicked off both times with a fresh wedge of filter paper.
- 10 uL of uranyl acetate was added to the grid and allowed to sit for 2 minutes.
- The excess stain was wicked off using a fresh wedge of filter paper until the surface looked like an oil slick.
- The grid was allowed to air dry and placed safely into a grid box.
Results:
N/A.
Conclusions and Next Steps:
We started our 3rd DNA extraction on the same day so we will finish that.
Title: Restriction Enzyme Digest
Date: 11/04/2021 Redo: No Samples: DNA sample 1 and 3
Purpose: This procedure is to add restriction enzymes to cut our DNA to which will help visualize how virus’s genes are coded.
Notes:
For our host bacteria the following restrictive enzymes were used: Haelll, Nspl, Sacll, and SalI.
Calculation: µl DNA = 0.5 µg (1 ml/260.9 µg)(1000 µl/1 ml) = 1.92 µl approx. 2 uL
Preparing genomic DNA
- After we gently mixed our DNA sample by lightly vortexing the tube, we incubated our sample at 65C for 10 minutes.
- After incubating we quickly placed it on ice and the microcentrifuge for less than a minute.
- Using our phage concentration of our DNA samples we determined the volume of each of our DNA needed to obtain 0.5ug. We used the formula:
Calculation: µl DNA = 0.5 µg (1 ml/260.9 µg)(1000 µl/1 ml) = 1.92 µl approx. 2 uL
- Using our calculations and dilutions, we calculated that we needed 2 uL of each DNA sample.
Setting up restriction enzyme digest reactions
- We set out 5 tubes for each DNA sample, one tube for each restrictive enzyme, and used the table and our previous calculations to determine the volume needed to be added to each tube:
Both samples of DNA had the same volume of each solution.
2 uL of DNA
2.5 uL of 10X Reaction Buffer
Hae lll, Nsp l, and Sac ll required CutSmart Buffer. Sal I required 3.1 Buffer
0.5 uL Restrictive Enzyme
20 uL Sterile ddH2O
Everything was calculated to make sure that each tube had a final volume of 25 uL
- The contents of each tube were gently mixed and quickly spun in the microcentrifuge for less than a minute.
- The tubes were then incubated at 37C for an hour.
- The tubes were then incubated at the times listed in neb.vom website for heat inactivation (Hae III :80°C for 20 min, Nsp I: 65°C for 20 min, Sac II: 65°C for 20 min, Sal I:65°C for 20 min)
- After the incubation, the tubes were then quickly spun again for less than a minute and stored in the freezer at – 20C.
Conclusions and Next Steps:
We will continue to the next step of casting agarose gel and doing gel electrophoresis.
Title: Casting Agarose Gel and Gel Electrophoresis
Date: 11/04/2021 Redo: No
Purpose: This procedure is to prepare a gel for electrophoresis in order to view our restriction enzyme digest DNA.
Notes:
PART 1- Making and Casting Agarose Gel
- Set up the apparatus and then prepared enough 0.8% agarose gel to cover the tips of the gel combs by approximately 2-3 mm.
a.) Calculated and found that we needed 0.24 g of agarose powder, so we weighed that out and then transferred the power into an Erlenmeyer flask.
Gel calculation: concentration of solute (w/v, %) = [ (mass agarose, g) / (volume agarose, ml) ] x 100
0.8 % = [ (X, g) / (30 ml) ] x 100
[(0.8 %) (30 ml)] / 100 = (X, g)
X = 0.24 g
b.) Added 30 mL of 1X TBE Buffer into the flask and mixed in 0.24 g of the agarose powder. The flask was gently swirled.
c.) Then heated the mixture in the microwave for about 1 minutes stopping every 30 seconds to gently swirl.
d.) Allowed the flask to cool for about 15 minutes.
- Once it was sufficiently cooled down, the intern put on gloves and added 5 uL of ethidium bromide (EtBr) as our gel dye. The mixture was gently swirled to make sure it was properly mixed together.
- Then poured the agarose/EtBr mixture into the prepared gel apparatus, being careful not to create any bubbles.
- Let the gel sit for about 20 minutes to cool and solidify.
- Once the gel had solidified, the comb was carefully removed and once removed the gell platform was gently out of the casting tray.
- Then placed the platform with the solidified gel into the gel box. The wells were at the (-) cathode end of the box.
- Poured 1X TBE Buffer into the gel apparatus until our gel was submerged in about 1/4 inch of buffer.
Part 2 – Gel Electrophoresis
- With the gel already oriented where the wells are closest to the cathode, we prepared our restriction enzyme digest samples for electrophoresis.
a.) Added 5 uL of concentrated 6x loading dye to each 25 uL restriction enzyme sample.
b.) Made ladder by taking 1 uL ladder and then added 5 uL of loading dye and 24 uL of nuclease free water.
Marlee gave us HindIII for our ladder
c.) After samples were made, it was placed in a 65 C incubator for 5 minutes. After the 5 minutes, immediately placed the samples on ice and then spun them in a microcentrifuge tube for about 15 seconds at 10,000 rpm.
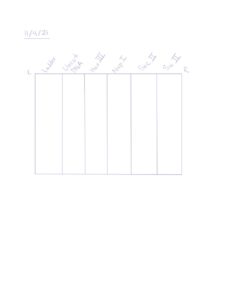
- We loaded our gel in the following order:
Ladder – Uncut DNA – HaelII – NspI – SacII – SalI
- Using a fresh tip, micropipetted each sample into the wells. We loaded 20 uL of each sample.
- Below is the picture we drew of our wells so we knew what sample was in each well
- Once the gel was all set up, plugged in the electrodes into the proper locations in the power supply. Then turned on the power and set the voltage to 100 V.
- Ran the gel until the dye had migrated to the 5-6 marker on the gel box.
- After 1 hour and 13 min, we turned off the power and took the gel box out of the container. Then moved the gel to the storage room where it was viewed under the UV light.
Results:
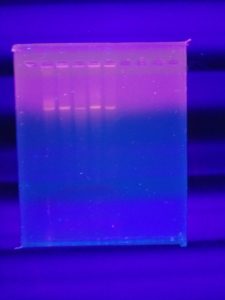
The ladder did not show up but bands are present in all other samples. However, there are no visible cuts on the DNA.
Conclusions and Next Steps:
Marlee gave us Hindiii instead of Hindiii digest so the ladder didn’t appear. We will redo the gel with some changes: Going to redo the ladder correctly, and add only 5 uL of each sample to the wells instead of 20 uL.
Part 2 – Gel Electrophoresis
- With the gel already oriented where the wells are closest to the cathode, we prepared our restriction enzyme digest samples for electrophoresis.
a.) Made ladder by taking 1 uL ladder and then added 5 uL of loading dye and 24 uL of nuclease free water.
Obtained HindIII Digest for our ladder
c.) After the ladder was made, it was placed in a 65 C incubator for 5 minutes. After the 5 minutes, immediately placed the samples on ice and then spun them in a microcentrifuge tube for about 15 seconds at 10,000 rpm.
- We loaded our gel in the following order:
Ladder – Uncut DNA – HaelII – NspI – SacII – SalI
- Using a fresh tip, micropipetted each sample into the wells. We loaded 5 uL of each sample.
- Below is the picture we drew of our wells so we knew what sample was in each well.
- Once the gel was all set up, plugged in the electrodes into the proper locations in the power supply. Then turned on the power and set the voltage to 100 V.
- Ran the gel until the dye had migrated to the 5-6 marker on the gel box.
- After 1 hour and 13 min, we turned off the power and took the gel box out of the container. Then moved the gel to the storage room where it was viewed under the UV light.
Results:
Since our bands showed up very faintly we decided to destain our gel. We did this by destaining for 15 minutes changing the 1X TBE buffer every 5 minutes.

Conclusions and Next Steps:
We will possibly run another gel with our DNA but we will talk to Dr. Edwards to discuss our next steps
Title: Restriction Enzyme Digest
Date: 11/08/2021 Redo: Yes Samples: DNA sample 1 and 3
Purpose: This procedure is to add restriction enzymes to cut our DNA to which will help visualize how virus’s genes are coded.
Notes:
For our host bacteria the following restrictive enzymes were used: Haelll, Nspl, Sacll, and SalI.
Calculation: µl DNA = 0.5 µg (1 ml/260.9 µg)(1000 µl/1 ml) = 1.92 µl approx. 2 uL
Preparing genomic DNA
- After we gently mixed our DNA sample by lightly vortexing the tube, we incubated our sample at 65C for 10 minutes.
- After incubating we quickly placed it on ice and the microcentrifuge for less than a minute.
- Using our phage concentration of our DNA samples we determined the volume of each of our DNA needed to obtain 0.5ug. We used the formula:
Calculation: µl DNA = 0.5 µg (1 ml/260.9 µg)(1000 µl/1 ml) = 1.92 µl approx. 2 uL
- Using our calculations and dilutions, we calculated that we needed 2 uL of each DNA sample.
Setting up restriction enzyme digest reactions
- We set out 5 tubes for each DNA sample, one tube for each restrictive enzyme, and used the table and our previous calculations to determine the volume needed to be added to each tube:
Both samples of DNA had the same volume of each solution.
2 uL of DNA
2.5 uL of 10X Reaction Buffer
Hae lll, Nsp l, and Sac ll required CutSmart Buffer. Sal I required 3.1 Buffer
0.5 uL Restrictive Enzyme
20 uL Sterile ddH2O
Everything was calculated to make sure that each tube had a final volume of 25 uL
- The contents of each tube were gently mixed and quickly spun in the microcentrifuge for less than a minute.
- The tubes were then incubated at 37C for an hour.
- The tubes were then incubated at the times listed in neb.vom website for heat inactivation (Hae III :80°C for 20 min, Nsp I: 65°C for 20 min, Sac II: 65°C for 20 min, Sal I:65°C for 20 min)
- After the incubation, the tubes were then quickly spun again for less than a minute and stored in the freezer at – 20C.
Conclusions and Next Steps:
We will continue to the next step of casting agarose gel and doing gel electrophoresis.
Title: Casting Agarose Gel and Gel Electrophoresis
Date: 11/08/2021 Redo: Yes
Purpose: This procedure is to prepare a gel for electrophoresis in order to view our restrictive enzyme digest DNA.
Notes:
PART 1- Making and Casting Agarose Gel
- Set up the apparatus and then prepared enough 0.8% agarose gel to cover the tips of the gel combs by approximately 2-3 mm.
a.) Calculated and found that we needed 0.24 g of agarose powder, so we weighed that out and then transferred the power into an Erlenmeyer flask.
Gel calculation: concentration of solute (w/v, %) = [ (mass agarose, g) / (volume agarose, ml) ] x 100
0.8 % = [ (X, g) / (30 ml) ] x 100
[(0.8 %) (30 ml)] / 100 = (X, g)
X = 0.24 g
b.) Added 30 mL of 1X TBE Buffer into the flask and mixed in 0.24 g of the agarose powder. The flask was gently swirled.
c.) Then heated the mixture in the microwave for about 1 minute stopping every 30 seconds to gently swirl.
d.) Allowed the flask to cool for about 15 minutes.
- Once it was sufficiently cooled down, the intern put on gloves and added 5 uL of ethidium bromide (EtBr) as our gel dye. The mixture was gently swirled to make sure it was properly mixed together.
- Then poured the agarose/EtBr mixture into the prepared gel apparatus, being careful not to create any bubbles.
- Let the gel sit for about 20 minutes to cool and solidify.
- Once the gel had solidified,the comb was carefully removed and once removed the gel platform was gently out of the casting tray.
- Then placed the platform with the solidified gel into the gel box. The wells were at the (-) cathode end of the box.
- Poured 1X TBE Buffer into the gel apparatus until our gel was submerged in about 1/4 inch of buffer.
Part 2 – Gel Electrophoresis
- With the gel already oriented where the wells are closest to the cathode, we prepared our restriction enzyme digest samples for electrophoresis.
a.) Added 5 uL of concentrated 6x loading dye to each 25 uL restriction enzyme sample.
b.) Made ladder by taking 1 uL ladder and then added 5 uL of loading dye and 24 uL of nuclease free water.
c.) After samples were made, it was placed in a 65 C incubator for 5 minutes. After the 5 minutes, immediately placed the samples on ice and then spun them in a microcentrifuge tube for about 15 seconds at 10,000 rpm.
- We loaded our gel in the following order:
Ladder – Uncut DNA – HaelII – NspI – SacII – SalI
- Using a fresh tip, micropipetted each sample into the wells. We loaded 20 uL of each sample.
- Below is the picture we drew of our wells so we knew what sample was in each well.

- Once the gel was all set up, plugged in the electrodes into the proper locations in the power supply. Then turned on the power and set the voltage to 100 V.
- Ran the gel until the dye had migrated to the 5-6 marker on the gel box.
- After 1 hour and 13 min, we turned off the power and took the gel box out of the container. Then moved the gel to the storage room where it was viewed under the UV light.
Results:
Ladders and bands are visible. However, since the bands appeared lightly we decided to destain. We did this by doing 2 rounds of destaining for 25 minutes changing every 5 minutes.
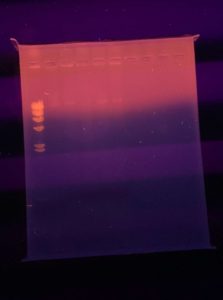
Bands are more visible after destaining

Conclusions and Next Steps:
Dr. Edwards let us know that we could go ahead and label it
