Discovery of Padme
Padme Information
Morphology: Siphoviridae

Sample Collection
| Collector Name |
Aeron Pennington | Aeron Pennington | Aeron Pennington | Aeron Pennington |
| Sample No. | 1 | 2 | 3 | 4 |
| Date of Collection | 08/28/2022 | 08/28/2022 | 09/05/2022 | 09/05/2022 |
| Sample Type | Water | Soil | Water | Soil |
| General Location | Action Middle School Pond | Shore of Lake Granbury | Acton, TX | Acton, TX |
| Location Description | Standing water pond on the far side of the athletics area of the middle school | Lake granbury has low water levels, exposing some of the shore line | Stinky Water collected in the bottom of a hay trough | Ant hill on the far side of the pasture |
| GPS Coordinates |
32.45059 N 97.71489 W |
32.42842 N 97.69598 W |
32.34877 N 97.73822 W |
|
| Sample Depth | N/A | Surface | N/A | Surface |
| Ambient Temperature | 30°C | 30°C | 31°C | 31°C |
Isolation/Purification

Title: Isolation/Purification of Environmental Sample
Date: 08/31/22
Redo: No
Sample: 1
Purpose: This method extracts phages from microbes and particulate matter in a solid or liquid environmental sample. The extracted sample is then used to infect host bacteria Mycbacterium fortuitum by using the plaque assay. The plaque assay allows you to visually confirm the presence of phage particles in a sample. It is a versatile assay that can be used for phage isolation, purification, and titering. In a plaque assay, host bacteria are mixed with a phage sample and grown as a lawn on agar. If phages are present, they will infect and replicate within the bacterial host, killing the host in the process. Newly replicated phages diffuse within the agar and repeat the process of infection, replication, and lysis of nearby host bacteria. As a result, a visible circular zone of clearing/killing called a plaque will become apparent on the bacterial lawn. Note that each plaque arises from a single phage particle in the original phage sample.
Notes:
A. Extract phage from solid environmental samples, such as soil or compost. If you collected a liquid sample, proceed directly to Step B.
-
- Using a 15 ml conical tube, fill it approximately one-third to one-half full with soil.
- Add liquid media until the sample is submerged beneath 2–3 ml of liquid.
- Cap the tube and invert several times to mix thoroughly.
- Incubate the tube while shaking vigorously in a shaking incubator at 250 rpm for 1–2 hours.
- Allow the sample to sit until particulate matter has mostly settled. This may take as few as 2 minutes or as many as 20 minutes. Alternatively, you can centrifuge these samples to hasten this process. To do this, balance the tubes and centrifuge at 2,000 x g for 10 minutes to pellet (i.e., force to the bottom of the tube) most of the soil.
B. Prepare a phage filtrate using aseptic technique.
- Open the package of a syringe filter (0.22 μm), leaving the filter in the packaging.
- Using a syringe, remove approximately 2 ml of liquid from the top of the flooded sample.
- Avoid withdrawing any solid material from the bottom of the tube to prevent clogging the filter during filtration.
- Attach the syringe to the top of the filter, and then remove the filter from the package. Be careful not to contaminate the filter in the process.
- Make sure the filter is screwed firmly into place.
- Depressing the syringe plunger, dispense a minimum of 0.5 ml of filtrate into a labeled microcentrifuge tube.
- Because debris can clog the filter, you may encounter resistance. Do not continue to force liquid through the filter or it will break. If your filter clogs, remove the clogged filter, replace it with a new one, and continue filtering.
- Cap the tube immediately.
- Discard the syringe and filter
C. Inoculate the host bacteria with your phage sample.
- Obtain the same number of aliquots of 250 μl host bacterial cultures as you have phage samples. Label the culture tubes accordingly.
- Use a micropipettor and aseptic technique to add 500 μL of direct isolation phage sample to the bacterial culture.
- Mix each inoculated host culture by gently tapping the tube.
Important: Make sure your sample makes contact with the bacteria. When you pipette a volume as small as 10 μl sometimes your sample may stick to the side of the tube. - Let the sample sit undisturbed for 5–10 minutes to allow for attachment.
D. Plate the samples with top agar. For this part of the experiment you will need 3 ml of molten top agar per sample.
-
- Obtain the same number of agar plates as you have samples. (Label these plates accordingly.
- Remove a bottle of top agar from the 55 °C bath.
Important: You want to keep the top agar in the 55 °C bath for as long as possible to prevent it from prematurely solidifying on your bench. - For each sample:
- Using a sterile 5 ml pipette, aseptically transfer 3 ml of top agar to an inoculated host tube (i.e., the tube containing bacterial host and phage sample).
Important: Try to avoid making or withdrawing bubbles, as they can look like plaques on plates. - Immediately aspirate (suck-up) the mixture back into the pipette and transfer it to the appropriate plate and discard the pipette.
Important: The top agar should not sit in the pipette for more than a few seconds because the agar will begin to solidify. - Gently, but quickly, tilt the plate in multiple directions until the top agar mixture evenly coats the agar plate.
- Using a sterile 5 ml pipette, aseptically transfer 3 ml of top agar to an inoculated host tube (i.e., the tube containing bacterial host and phage sample).
- Repeat this process for each of your samples.
E. Incubate plates to allow bacterial growth and phage infection.
-
- Let the plates sit undisturbed for ~20 minutes until the top agar solidifies.
- After the top agar has solidified, gently invert the plates and place in the proper incubator.
- Incubate the plates at the specified temperature for 24–48 hours.
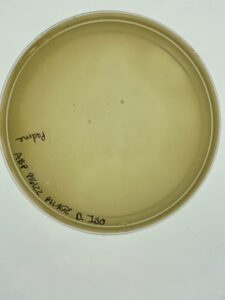
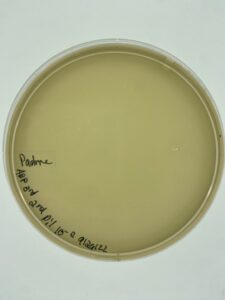
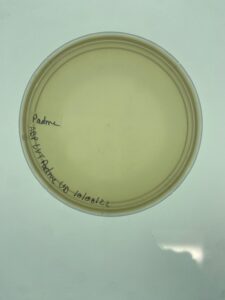
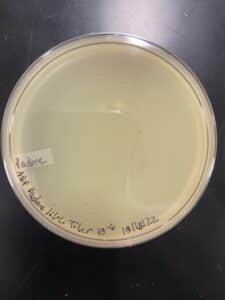
Results:
There was no growth on the plate, so a new sample is to be collected.
Conclusions and Next Steps:
No phage grew, so a new environmental sample is necessary to get a phage.
Title: Isolation/Purification of Environmental Sample by Plaque Assay
Date: 09/06/2022
Redo: Yes
Sample: 3
Purpose: This method extracts phages from microbes and particulate matter in a solid or liquid environmental sample. The extracted sample is then used to infect host bacteria Mycbacterium fortuitum by using the plaque assay. The plaque assay allows you to visually confirm the presence of phage particles in a sample. It is a versatile assay that can be used for phage isolation, purification, and titering. In a plaque assay, host bacteria are mixed with a phage sample and grown as a lawn on agar. If phages are present, they will infect and replicate within the bacterial host, killing the host in the process. Newly replicated phages diffuse within the agar and repeat the process of infection, replication, and lysis of nearby host bacteria. As a result, a visible circular zone of clearing/killing called a plaque will become apparent on the bacterial lawn. Note that each plaque arises from a single phage particle in the original phage sample.
Notes:
A. Extract phage from solid environmental samples, such as soil or compost. If you collected a liquid sample, proceed directly to Step B.
-
- Using a 15 ml conical tube, fill it approximately one-third to one-half full with soil.
- Add liquid media until the sample is submerged beneath 2–3 ml of liquid.
- Cap the tube and invert several times to mix thoroughly.
- Incubate the tube while shaking vigorously in a shaking incubator at 250 rpm for 1–2 hours.
- Allow the sample to sit until particulate matter has mostly settled. This may take as few as 2 minutes or as many as 20 minutes. Alternatively, you can centrifuge these samples to hasten this process. To do this, balance the tubes and centrifuge at 2,000 x g for 10 minutes to pellet (i.e., force to the bottom of the tube) most of the soil.
B. Prepare a phage filtrate using aseptic technique.
- Open the package of a syringe filter (0.22 μm), leaving the filter in the packaging.
- Using a syringe, remove approximately 2 ml of liquid from the top of the flooded sample.
- Avoid withdrawing any solid material from the bottom of the tube to prevent clogging the filter during filtration.
- Attach the syringe to the top of the filter, and then remove the filter from the package. Be careful not to contaminate the filter in the process.
- Make sure the filter is screwed firmly into place.
- Depressing the syringe plunger, dispense a minimum of 0.5 ml of filtrate into a labeled microcentrifuge tube.
- Because debris can clog the filter, you may encounter resistance. Do not continue to force liquid through the filter or it will break. If your filter clogs, remove the clogged filter, replace it with a new one, and continue filtering.
- Cap the tube immediately.
- Discard the syringe and filter
C. Inoculate the host bacteria with your phage sample.
- Obtain the same number of aliquots of 250 μl host bacterial cultures as you have phage samples. Label the culture tubes accordingly.
- Use a micropipettor and aseptic technique to add 500 μL of direct isolation phage sample to the bacterial culture.
- Mix each inoculated host culture by gently tapping the tube.
Important: Make sure your sample makes contact with the bacteria. When you pipette a volume as small as 10 μl sometimes your sample may stick to the side of the tube. - Let the sample sit undisturbed for 5–10 minutes to allow for attachment.
D. Plate the samples with top agar. For this part of the experiment you will need 3 ml of molten top agar per sample.
-
- Obtain the same number of agar plates as you have samples.
- Remove a bottle of top agar from the 55 °C bath.
Important: You want to keep the top agar in the 55 °C bath for as long as possible to prevent it from prematurely solidifying on your bench. - For each sample:
- Using a sterile 5 ml pipette, aseptically transfer 3 ml of top agar to an inoculated host tube (i.e., the tube containing bacterial host and phage sample).
Important: Try to avoid making or withdrawing bubbles, as they can look like plaques on plates. - Immediately aspirate (suck-up) the mixture back into the pipette and transfer it to the appropriate plate and discard the pipette.
Important: The top agar should not sit in the pipette for more than a few seconds because the agar will begin to solidify. - Gently, but quickly, tilt the plate in multiple directions until the top agar mixture evenly coats the agar plate.
- Using a sterile 5 ml pipette, aseptically transfer 3 ml of top agar to an inoculated host tube (i.e., the tube containing bacterial host and phage sample).
- Repeat this process for each of your samples.
E. Incubate plates to allow bacterial growth and phage infection.
-
- Let the plates sit undisturbed for ~20 minutes until the top agar solidifies.
- After the top agar has solidified, gently invert the plates and place in the proper incubator.
- Incubate the plates at the specified temperature for 24–48 hours.
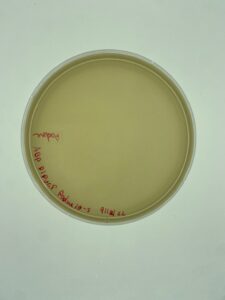
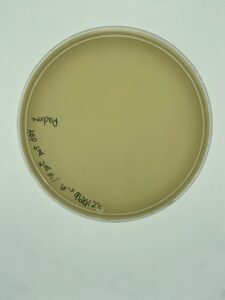
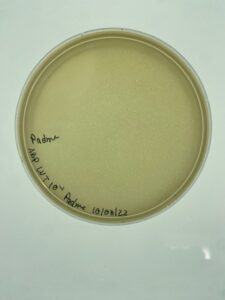
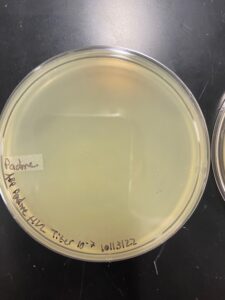
Results:
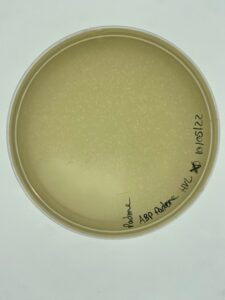
Sample 3 did grow plaques in 24 hours, but there was contamination on the plate, so the isolation and assay should be redone in order to get a non-contaminated plate. There are visible plaques
Conclusions and Next Steps:
Repeat plaque assay with the direct isolation in order to get a contamination free plate.
Title: Isolation/Purification of Environmental Sample with Plaque Assay
Date: 09/08/2022
Redo: Yes
Sample: 3
Purpose: This method extracts phages from microbes and particulate matter in a solid or liquid environmental sample. The extracted sample is then used to infect host bacteria Mycbacterium fortuitum by using the plaque assay. The plaque assay allows you to visually confirm the presence of phage particles in a sample. It is a versatile assay that can be used for phage isolation, purification, and titering. In a plaque assay, host bacteria are mixed with a phage sample and grown as a lawn on agar. If phages are present, they will infect and replicate within the bacterial host, killing the host in the process. Newly replicated phages diffuse within the agar and repeat the process of infection, replication, and lysis of nearby host bacteria. As a result, a visible circular zone of clearing/killing called a plaque will become apparent on the bacterial lawn. Note that each plaque arises from a single phage particle in the original phage sample.
Notes:
A. Extract phage from solid environmental samples, such as soil or compost. If you collected a liquid sample, proceed directly to Step B.
-
- Using a 15 ml conical tube, fill it approximately one-third to one-half full with soil.
- Add liquid media until the sample is submerged beneath 2–3 ml of liquid.
- Cap the tube and invert several times to mix thoroughly.
- Incubate the tube while shaking vigorously in a shaking incubator at 250 rpm for 1–2 hours.
- Allow the sample to sit until particulate matter has mostly settled. This may take as few as 2 minutes or as many as 20 minutes. Alternatively, you can centrifuge these samples to hasten this process. To do this, balance the tubes and centrifuge at 2,000 x g for 10 minutes to pellet (i.e., force to the bottom of the tube) most of the soil.
B. Prepare a phage filtrate using aseptic technique.
- Open the package of a syringe filter (0.22 μm), leaving the filter in the packaging.
- Using a syringe, remove approximately 2 ml of liquid from the top of the flooded sample.
- Avoid withdrawing any solid material from the bottom of the tube to prevent clogging the filter during filtration.
- Attach the syringe to the top of the filter, and then remove the filter from the package. Be careful not to contaminate the filter in the process.
- Make sure the filter is screwed firmly into place.
- Depressing the syringe plunger, dispense a minimum of 0.5 ml of filtrate into a labeled microcentrifuge tube.
- Because debris can clog the filter, you may encounter resistance. Do not continue to force liquid through the filter or it will break. If your filter clogs, remove the clogged filter, replace it with a new one, and continue filtering.
- Cap the tube immediately.
- Discard the syringe and filter
C. Inoculate the host bacteria with your phage sample.
- Obtain the same number of aliquots of 250 μl host bacterial cultures as you have phage samples. Label the culture tubes accordingly.
- Use a micropipettor and aseptic technique to add 500 μL of direct isolation phage sample to the bacterial culture.
- Mix each inoculated host culture by gently tapping the tube.
Important: Make sure your sample makes contact with the bacteria. When you pipette a volume as small as 10 μl sometimes your sample may stick to the side of the tube. - Let the sample sit undisturbed for 5–10 minutes to allow for attachment.
D. Plate the samples with top agar. For this part of the experiment you will need 3 ml of molten top agar per sample.
-
- Obtain the same number of agar plates as you have samples. (Label these plates accordingly.
- Remove a bottle of top agar from the 55 °C bath.
Important: You want to keep the top agar in the 55 °C bath for as long as possible to prevent it from prematurely solidifying on your bench. - For each sample:
- Using a sterile 5 ml pipette, aseptically transfer 3 ml of top agar to an inoculated host tube (i.e., the tube containing bacterial host and phage sample).
Important: Try to avoid making or withdrawing bubbles, as they can look like plaques on plates. - Immediately aspirate (suck-up) the mixture back into the pipette and transfer it to the appropriate plate and discard the pipette.
Important: The top agar should not sit in the pipette for more than a few seconds because the agar will begin to solidify. - Gently, but quickly, tilt the plate in multiple directions until the top agar mixture evenly coats the agar plate.
- Using a sterile 5 ml pipette, aseptically transfer 3 ml of top agar to an inoculated host tube (i.e., the tube containing bacterial host and phage sample).
- Repeat this process for each of your samples.
E. Incubate plates to allow bacterial growth and phage infection.
-
- Let the plates sit undisturbed for ~20 minutes until the top agar solidifies.
- After the top agar has solidified, gently invert the plates and place in the proper incubator.
- Incubate the plates at the specified temperature for 24–48 hours.
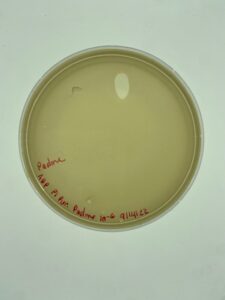
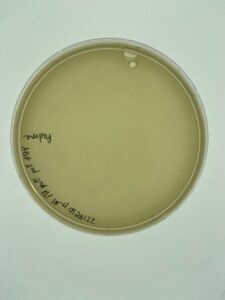
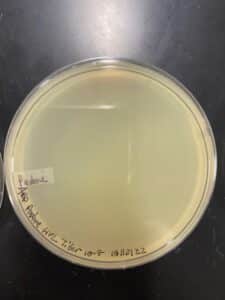
Results:
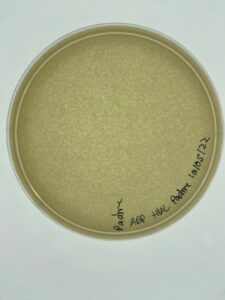
The plate was removed from the incubator after 24 hours and there was contamination on the plate. However, there was plenty of plaque formation away from the site of contamination. An isolated plaque was selected.

Conclusions and Next Steps:
There was once again contamination on the plaque assay plate, however, there was less. A plaque was selected from an isolated area on the plate and that sample was used for the first round of serial dilution.
Title: Serial Dilution of Selected Plaque Assay
Date: 09/14/2022
Redo: No
Sample: 3
Purpose: To generate well-isolated plaques
Rationale: Before you begin characterizing a phage, you need to ensure that you have a clonal phage population. The process involves serially diluting either a positive enriched culture or after rounds of purification, a picked plaque, and then performing a plaque assay with the diluted samples. By repeating this process one or two times, and always picking a plaque that is well isolated from adjacent plaques, you will obtain a clonal phage population.
Notes:
A. Pick an Isolated Plaque:
- Draw a cicle around the plaque of interest on the bottom of the plate and label it.
- Using aseptic technique, aliquot 100 μl of phage buffer into each microcentrifuge tube.
- Place a sterile tip onto a p200 micropipettor.
- Holding the pipettor perpendicular to the agar surface, gently stab the top agar in the center of the plaque (Figure 5.4-1). Avoid touching the bacteria surrounding the plaque.
- Place the end of the tip into the phage buffer in the corresponding microcentrifuge tube. Then tap the tip on the wall of the tube and pipette up and down to dislodge phage particles. Discard the tip.
- Mix well by vortexing.
B. 10-fold Serial Dilution of Selected Plaque
-
- Arrange the proper number of microcentrifuge tubes in a rack and label them 10-1, 10-2, 10-3,….10-6
- Add 90 μl of phage buffer to each of the tubes.
- Add 10 μl of your undiluted phage sample to the “10-1” tube and vortex well.
- Make sure to use a clean pipette tip for each transfer and pipette carefully, vortexing your sample well before making each dilution. Otherwise, you will not make accurate 10-fold dilutions.
- Transfer 10 μl of the “10 -1” sample to the “10-2” tube and vortex well. This solution contains 1/100th as many phage particles as your undiluted sample. It can also be referred to as your 1:100 dilution.
- Continue each successive dilution until you get to your last tube.
C. Inoculate the host bacteria with your phage sample.
- Obtain the same number of aliquots of 250 μl host bacterial cultures as you have phage samples. Label the culture tubes accordingly.
- Use a micropipettor and aseptic technique to add 10 μL of direct isolation phage sample to the bacterial culture.
- Mix each inoculated host culture by gently tapping the tube.
Important: Make sure your sample makes contact with the bacteria. When you pipette a volume as small as 10 μl sometimes your sample may stick to the side of the tube. - Let the sample sit undisturbed for 5–10 minutes to allow for attachment.
D. Plate the samples with top agar. You will need 3 ml of molten top agar per sample.
-
- Obtain the same number of agar plates as you have samples.
- Remove a bottle of top agar from the 55 °C bath.
Important: You want to keep the top agar in the 55 °C bath for as long as possible to prevent it from prematurely solidifying on your bench. - For each sample:
- Using a sterile 5 ml pipette, aseptically transfer 3 ml of top agar to an inoculated host tube (i.e., the tube containing bacterial host and phage sample).
Important: Try to avoid making or withdrawing bubbles, as they can look like plaques on plates. - Immediately aspirate (suck-up) the mixture back into the pipette and transfer it to the appropriate plate and discard the pipette.
Important: The top agar should not sit in the pipette for more than a few seconds because the agar will begin to solidify. - Gently, but quickly, tilt the plate in multiple directions until the top agar mixture evenly coats the agar plate.
- Using a sterile 5 ml pipette, aseptically transfer 3 ml of top agar to an inoculated host tube (i.e., the tube containing bacterial host and phage sample).
- Repeat this process for each of your samples.
E. Incubate plates to allow bacterial growth and phage infection.
-
- Let the plates sit undisturbed for ~20 minutes until the top agar solidifies.
- After the top agar has solidified, gently invert the plates and place in the proper incubator.
- Incubate the plates at the specified temperature for 24–48 hours.
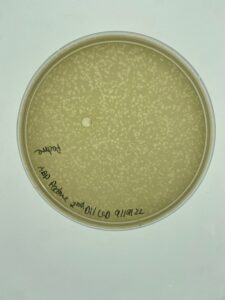
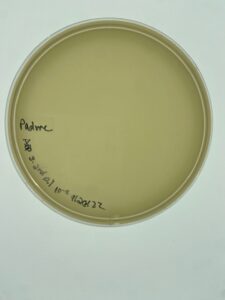
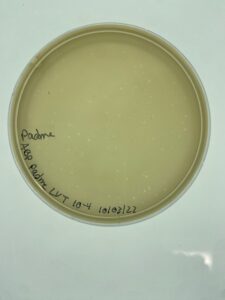
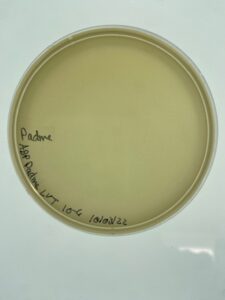
Results:
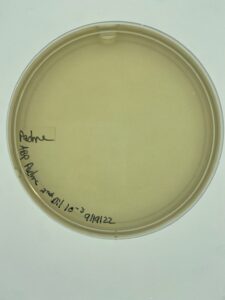
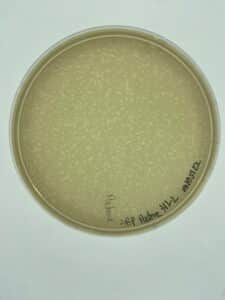
Plates were allowed to incubate for 24 hours before evaluation. Padme had plaque growth out to the 10-4 and a plaque from the third dilution was selected for a second round of serial dilution.


Conclusions and Next Steps:
Padme made plaques throughout the first 3 plates of dilutions, and one from the third plate was selected for the second round of serial dilution in order to purify the plaque.
Title:
Date: Redo: Sample:
Purpose:
Notes:
Results:
Conclusions and Next Steps:
Amplification
Title: Second Round of Serial Dilution to Purify Phage
Date: 09/19/2022
Redo: No
Sample: 3
Purpose: To generate well-isolated plaques
Rationale: Before you begin characterizing a phage, you need to ensure that you have a clonal phage population. The process involves serially diluting either a positive enriched culture or after rounds of purification, a picked plaque, and then performing a plaque assay with the diluted samples. By repeating this process one or two times, and always picking a plaque that is well isolated from adjacent plaques, you will obtain a clonal phage population.
Notes:
A. Pick an Isolated Plaque:
- Draw a cicle around the plaque of interest on the bottom of the plate and label it.
- Using aseptic technique, aliquot 100 μl of phage buffer into each microcentrifuge tube.
- Place a sterile tip onto a p200 micropipettor.
- Holding the pipettor perpendicular to the agar surface, gently stab the top agar in the center of the plaque (Figure 5.4-1). Avoid touching the bacteria surrounding the plaque.
- Place the end of the tip into the phage buffer in the corresponding microcentrifuge tube. Then tap the tip on the wall of the tube and pipette up and down to dislodge phage particles. Discard the tip.
- Mix well by vortexing.
B. 10-fold Serial Dilution of Selected Plaque
-
- Arrange the proper number of microcentrifuge tubes in a rack and label them 10-1, 10-2, 10-3,….10-6
- Add 90 μl of phage buffer to each of the tubes.
- Add 10 μl of your undiluted phage sample to the “10-1” tube and vortex well.
- Make sure to use a clean pipette tip for each transfer and pipette carefully, vortexing your sample well before making each dilution. Otherwise, you will not make accurate 10-fold dilutions.
- Transfer 10 μl of the “10 -1” sample to the “10-2” tube and vortex well. This solution contains 1/100th as many phage particles as your undiluted sample. It can also be referred to as your 1:100 dilution.
- Continue each successive dilution until you get to your last tube.
C. Inoculate the host bacteria with your phage sample.
- Obtain the same number of aliquots of 250 μl host bacterial cultures as you have phage samples. Label the culture tubes accordingly.
- Use a micropipettor and aseptic technique to add 10 μL of direct isolation phage sample to the bacterial culture.
- Mix each inoculated host culture by gently tapping the tube.
Important: Make sure your sample makes contact with the bacteria. When you pipette a volume as small as 10 μl sometimes your sample may stick to the side of the tube. - Let the sample sit undisturbed for 5–10 minutes to allow for attachment.
D. Plate the samples with top agar. You will need 3 ml of molten top agar per sample.
-
- Obtain the same number of agar plates as you have samples.
- Remove a bottle of top agar from the 55 °C bath.
Important: You want to keep the top agar in the 55 °C bath for as long as possible to prevent it from prematurely solidifying on your bench. - For each sample:
- Using a sterile 5 ml pipette, aseptically transfer 3 ml of top agar to an inoculated host tube (i.e., the tube containing bacterial host and phage sample).
Important: Try to avoid making or withdrawing bubbles, as they can look like plaques on plates. - Immediately aspirate (suck-up) the mixture back into the pipette and transfer it to the appropriate plate and discard the pipette.
Important: The top agar should not sit in the pipette for more than a few seconds because the agar will begin to solidify. - Gently, but quickly, tilt the plate in multiple directions until the top agar mixture evenly coats the agar plate.
- Using a sterile 5 ml pipette, aseptically transfer 3 ml of top agar to an inoculated host tube (i.e., the tube containing bacterial host and phage sample).
- Repeat this process for each of your samples.
E. Incubate plates to allow bacterial growth and phage infection.
-
- Let the plates sit undisturbed for ~20 minutes until the top agar solidifies.
- After the top agar has solidified, gently invert the plates and place in the proper incubator.
- Incubate the plates at the specified temperature for 24–48 hours.
Results:
Plates were lefet in the incubator for 24 hours before examination. Once again, Padme grew plaques out the third dilution.


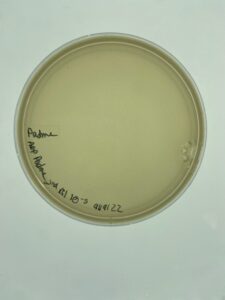
Conclusions and Next Steps:
There were no webbed plates, so another plaque from the first serial dilution will be used to do another round of second serial dilutions.
Title: Second Round of Serial Dilution to Purify Phage
Date: 09/21/22
Redo: Yes
Sample: 3
Purpose: To generate well-isolated plaques. The process involves serially diluting either a positive enriched culture or after rounds of purification, a picked plaque, and then performing a plaque assay with the diluted samples. By repeating this process one or two times, and always picking a plaque that is well isolated from adjacent plaques, you will obtain a clonal phage population.
Notes:
A. Pick an Isolated Plaque:
- Draw a cicle around the plaque of interest on the bottom of the plate and label it.
- Using aseptic technique, aliquot 100 μl of phage buffer into each microcentrifuge tube.
- Place a sterile tip onto a p200 micropipettor.
- Holding the pipettor perpendicular to the agar surface, gently stab the top agar in the center of the plaque (Figure 5.4-1). Avoid touching the bacteria surrounding the plaque.
- Place the end of the tip into the phage buffer in the corresponding microcentrifuge tube. Then tap the tip on the wall of the tube and pipette up and down to dislodge phage particles. Discard the tip.
- Mix well by vortexing.
B. 10-fold Serial Dilution of Selected Plaque
-
- Arrange the proper number of microcentrifuge tubes in a rack and label them 10-1, 10-2, 10-3,….10-6
- Add 90 μl of phage buffer to each of the tubes.
- Add 10 μl of your undiluted phage sample to the “10-1” tube and vortex well.
- Make sure to use a clean pipette tip for each transfer and pipette carefully, vortexing your sample well before making each dilution. Otherwise, you will not make accurate 10-fold dilutions.
- Transfer 10 μl of the “10 -1” sample to the “10-2” tube and vortex well. This solution contains 1/100th as many phage particles as your undiluted sample. It can also be referred to as your 1:100 dilution.
- Continue each successive dilution until you get to your last tube.
C. Inoculate the host bacteria with your phage sample.
- Obtain the same number of aliquots of 250 μl host bacterial cultures as you have phage samples. Label the culture tubes accordingly.
- Use a micropipettor and aseptic technique to add 10 μL of direct isolation phage sample to the bacterial culture.
- Mix each inoculated host culture by gently tapping the tube.
Important: Make sure your sample makes contact with the bacteria. When you pipette a volume as small as 10 μl sometimes your sample may stick to the side of the tube. - Let the sample sit undisturbed for 5–10 minutes to allow for attachment.
D. Plate the samples with top agar. You will need 3 ml of molten top agar per sample.
-
- Obtain the same number of agar plates as you have samples.
- Remove a bottle of top agar from the 55 °C bath.
Important: You want to keep the top agar in the 55 °C bath for as long as possible to prevent it from prematurely solidifying on your bench. - For each sample:
- Using a sterile 5 ml pipette, aseptically transfer 3 ml of top agar to an inoculated host tube (i.e., the tube containing bacterial host and phage sample).
Important: Try to avoid making or withdrawing bubbles, as they can look like plaques on plates. - Immediately aspirate (suck-up) the mixture back into the pipette and transfer it to the appropriate plate and discard the pipette.
Important: The top agar should not sit in the pipette for more than a few seconds because the agar will begin to solidify. - Gently, but quickly, tilt the plate in multiple directions until the top agar mixture evenly coats the agar plate.
- Using a sterile 5 ml pipette, aseptically transfer 3 ml of top agar to an inoculated host tube (i.e., the tube containing bacterial host and phage sample).
- Repeat this process for each of your samples.
E. Incubate plates to allow bacterial growth and phage infection.
-
- Let the plates sit undisturbed for ~20 minutes until the top agar solidifies.
- After the top agar has solidified, gently invert the plates and place in the proper incubator.
- Incubate the plates at the specified temperature for 24–48 hours.
Results:
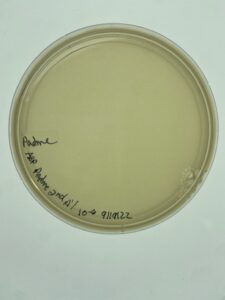
There was poor growth and plaque formation on all the plates. Only the UD and first dilution had any plaque growth at all over 24 hours.

Conclusions and Next Steps:
Another repeat of the second serial dilution is required. Perhaps a plaque from the first will need to be selected again. Perhaps the actual kept dilution from the first round would be good enough to use as a start of the second round of serial dilutions.
Title: Third Round of Second Serial Dilutions for Purification of Padme
Date: 09/26/2022
Redo: Yes
Sample: 3
Purpose: To generate well-isolated plaques. The process involves serially diluting either a positive enriched culture or after rounds of purification, a picked plaque, and then performing a plaque assay with the diluted samples. By repeating this process one or two times, and always picking a plaque that is well isolated from adjacent plaques, you will obtain a clonal phage population.
Notes:
A. Pick an Isolated Plaque:
- Draw a cicle around the plaque of interest on the bottom of the plate and label it.
- Using aseptic technique, aliquot 100 μl of phage buffer into each microcentrifuge tube.
- Place a sterile tip onto a p200 micropipettor.
- Holding the pipettor perpendicular to the agar surface, gently stab the top agar in the center of the plaque (Figure 5.4-1). Avoid touching the bacteria surrounding the plaque.
- Place the end of the tip into the phage buffer in the corresponding microcentrifuge tube. Then tap the tip on the wall of the tube and pipette up and down to dislodge phage particles. Discard the tip.
- Mix well by vortexing.
B. 10-fold Serial Dilution of Selected Plaque
-
- Arrange the proper number of microcentrifuge tubes in a rack and label them 10-1, 10-2, 10-3,….10-6
- Add 90 μl of phage buffer to each of the tubes.
- Add 10 μl of your undiluted phage sample to the “10-1” tube and vortex well.
- Make sure to use a clean pipette tip for each transfer and pipette carefully, vortexing your sample well before making each dilution. Otherwise, you will not make accurate 10-fold dilutions.
- Transfer 10 μl of the “10 -1” sample to the “10-2” tube and vortex well. This solution contains 1/100th as many phage particles as your undiluted sample. It can also be referred to as your 1:100 dilution.
- Continue each successive dilution until you get to your last tube.
C. Inoculate the host bacteria with your phage sample.
- Obtain the same number of aliquots of 250 μl host bacterial cultures as you have phage samples. Label the culture tubes accordingly.
- Use a micropipettor and aseptic technique to add 10 μL of direct isolation phage sample to the bacterial culture.
- Mix each inoculated host culture by gently tapping the tube.
Important: Make sure your sample makes contact with the bacteria. When you pipette a volume as small as 10 μl sometimes your sample may stick to the side of the tube. - Let the sample sit undisturbed for 5–10 minutes to allow for attachment.
D. Plate the samples with top agar. You will need 3 ml of molten top agar per sample.
-
- Obtain the same number of agar plates as you have samples.
- Remove a bottle of top agar from the 55 °C bath.
Important: You want to keep the top agar in the 55 °C bath for as long as possible to prevent it from prematurely solidifying on your bench. - For each sample:
- Using a sterile 5 ml pipette, aseptically transfer 3 ml of top agar to an inoculated host tube (i.e., the tube containing bacterial host and phage sample).
Important: Try to avoid making or withdrawing bubbles, as they can look like plaques on plates. - Immediately aspirate (suck-up) the mixture back into the pipette and transfer it to the appropriate plate and discard the pipette.
Important: The top agar should not sit in the pipette for more than a few seconds because the agar will begin to solidify. - Gently, but quickly, tilt the plate in multiple directions until the top agar mixture evenly coats the agar plate.
- Using a sterile 5 ml pipette, aseptically transfer 3 ml of top agar to an inoculated host tube (i.e., the tube containing bacterial host and phage sample).
- Repeat this process for each of your samples.
E. Incubate plates to allow bacterial growth and phage infection.
-
- Let the plates sit undisturbed for ~20 minutes until the top agar solidifies.
- After the top agar has solidified, gently invert the plates and place in the proper incubator.
- Incubate the plates at the specified temperature for 24–48 hours.
Results:

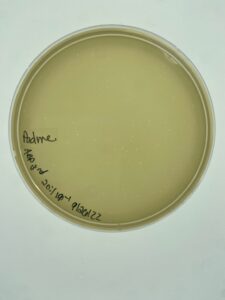
Padme grew small plaques on the UD plate, 10-1, 10-2, 10-3 and 10-4. There only a few isolated plaques on 10-3 and 10-4 fourth plates, but there was growth.
Conclusions and Next Steps:
Review plates to see if perhaps a previous plate or this first UD plate is a good candidate for a webbed plate. The plaques padme makes are generally quite small.
Title: Collecting Plate Lysates
Date: 09/29/2022 Redo: no Sample: 3
Purpose: To generate a highly concentrated liquid phage sample
Notes:
A. Identify one or more plates for lysate collection. Photograph and label the plate in notebook.
B. Flood the webbed plate(s).
-
- Apply 8 ml of sterile phage buffer to the webbed plate.
- Let the plate(s) sit at room temperature for 2–4 hours.
- Swirl the phage buffer gently, taking care not to splash.
C. Harvest a plate lysate.
-
- When the incubation time is complete, remove the lid from the plate and place it on the bench. Tilt the plate slightly by placing one edge of the plate on the lid, allowing the lysate to pool to one side.
- Prepare a 0.22 μm filter by opening the packaging but not removing the filter. Set aside.
- Using a 5 ml syringe aspirate (suck up) the lysate from the plate.
- Carefully attach the syringe to the filter. Depress the syringe plunger and collect the filtrate in a 15 ml sterile conical tube.
- If you still have unfiltered lysate remaining on your plate, remove the filter and store it in its plastic packaging to maintain sterility. Aspirate the remaining lysate, reattach the used filter, and filter the remaining lysate, collecting the filtrate in the same sterile conical tube.
- Label the tube appropriately.
D. Pool the lysates.
-
- If you have multiple webbed plates for a single phage sample, the same filter can be used for all plates if it remains sterile and unclogged. However, if it has been contaminated or becomes clogged, use a new filter.
- Combine all of the filtered lysates into the same sterile conical tube.
- Record the final volume of lysate collected.
Results:
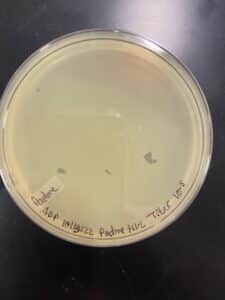
The webbed plate is from a serial dilution performed 09/19/2022. The plate was pulled from the fridge and flooded on 09/29/2022. Roughly 5 mililiters were collected.
Conclusions and Next Steps:
This low volume lysate will be used next for a full plate titer.
Title: Full Plate Titer
Date: 10/03/2022 Redo: No Sample: Padme/3
Purpose: To determine the concentration of phage particles in a lysate by using a plaque assay
Notes:
A. Perform Serial Dilution of Low lysate phage sample.
- Arrange the proper number of microcentrifuge tubes in a rack and label them 10-1, 10-2, 10-3,….10-6
- Add 90 μl of phage buffer to each of the tubes.
- Add 10 μl of low volumte lysate to the “10-1” tube and vortex well.
- Make sure to use a clean pipette tip for each transfer and pipette carefully, vortexing your sample well before making each dilution. Otherwise, you will not make accurate 10-fold dilutions.
- Transfer 10 μl of the “10 -1” sample to the “10-2” tube and vortex well. This solution contains 1/100th as many phage particles as your undiluted sample. It can also be referred to as your 1:100 dilution.
- Continue each successive dilution until you get to your last tube.
C. Inoculate the host bacteria with your phage sample.
- Obtain the same number of aliquots of 250 μl host bacterial cultures as you have phage samples. Label the culture tubes accordingly.
- Use a micropipettor and aseptic technique to add 10 μL of direct isolation phage sample to the bacterial culture.
- Mix each inoculated host culture by gently tapping the tube.
Important: Make sure your sample makes contact with the bacteria. When you pipette a volume as small as 10 μl sometimes your sample may stick to the side of the tube. - Let the sample sit undisturbed for 5–10 minutes to allow for attachment.
D. Plate the samples with top agar. You will need 3 ml of molten top agar per sample.
-
- Obtain the same number of agar plates as you have samples.
- Remove a bottle of top agar from the 55 °C bath.
Important: You want to keep the top agar in the 55 °C bath for as long as possible to prevent it from prematurely solidifying on your bench. - For each sample:
- Using a sterile 5 ml pipette, aseptically transfer 3 ml of top agar to an inoculated host tube (i.e., the tube containing bacterial host and phage sample).
Important: Try to avoid making or withdrawing bubbles, as they can look like plaques on plates. - Immediately aspirate (suck-up) the mixture back into the pipette and transfer it to the appropriate plate and discard the pipette.
Important: The top agar should not sit in the pipette for more than a few seconds because the agar will begin to solidify. - Gently, but quickly, tilt the plate in multiple directions until the top agar mixture evenly coats the agar plate.
- Using a sterile 5 ml pipette, aseptically transfer 3 ml of top agar to an inoculated host tube (i.e., the tube containing bacterial host and phage sample).
- Repeat this process for each of your samples.
E. The next day check the plates and confirm that your dilutions are valid (i.e., a 10-fold decrease in plaques).
-
-
- Use a plate with 20–200 isolated plaques and count the number of plaques.
-
F/ Calculate the titer in pfu/ml using the formula:
Titer (pfu/ml) = (# pfu/ volume used in μl) x (103 μl/ml) x dilution factor*
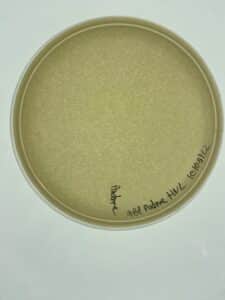
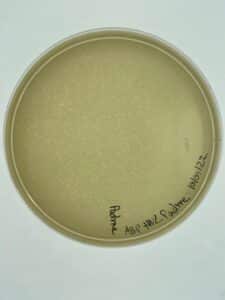
Results:
Padme’s first undiluted plate was completely blank but lysate from 10-2 was used to created more webbed plates for high volume lysate collection.
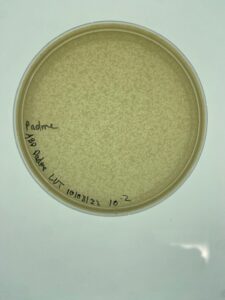
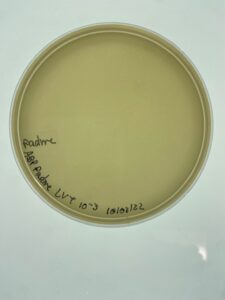

Conclusions and Next Steps:
Padme’s 10-2 dilution of low volume lysate will be used going forward to created webbed plates for high volume lysate collection.
Title: Full Plate Titer of High Volume Lysate
Date: 10/05/2022 Redo: No Sample: Padme/3
Purpose: To determine the concentration of phage particles in a lysate by using a plaque assay
Notes:
A. Flood the webbed plate(s).
-
- Apply 8 ml of sterile phage buffer to the webbed plate.
- Let the plate(s) sit at room temperature for 2–4 hours.
- Swirl the phage buffer gently, taking care not to splash.
B. Harvest a plate lysate.
-
- When the incubation time is complete, remove the lid from the plate and place it on the bench. Tilt the plate slightly by placing one edge of the plate on the lid, allowing the lysate to pool to one side.
- Prepare a 0.22 μm filter by opening the packaging but not removing the filter. Set aside.
- Using a 5 ml syringe aspirate (suck up) the lysate from the plate.
- Carefully attach the syringe to the filter. Depress the syringe plunger and collect the filtrate in a 15 ml sterile conical tube.
- If you still have unfiltered lysate remaining on your plate, remove the filter and store it in its plastic packaging to maintain sterility. Aspirate the remaining lysate, reattach the used filter, and filter the remaining lysate, collecting the filtrate in the same sterile conical tube.
- Label the tube appropriately.
C. Pool the lysates.
-
- If you have multiple webbed plates for a single phage sample, the same filter can be used for all plates if it remains sterile and unclogged. However, if it has been contaminated or becomes clogged, use a new filter.
- Combine all of the filtered lysates into the same sterile conical tube.
- Record the final volume of lysate collected.
Results:


Conclusions and Next Steps:
These plates will be flooded in order to collect high volume lysate.
Title: Collection of High Volume Phage Lysate
Date: 10/07/2022
Redo: No
Sample: Padme/3
Purpose: To generate a highly concentrated liquid phage sample
Notes:
A. Identify one or more plates for lysate collection.
B. Flood the webbed plate(s).
-
- Apply 8 ml of sterile phage buffer to the webbed plate.
- Let the plate(s) sit at room temperature for 2–4 hours.
- Swirl the phage buffer gently, taking care not to splash.
C. Harvest a plate lysate.
-
- When the incubation time is complete, remove the lid from the plate and place it on the bench. Tilt the plate slightly by placing one edge of the plate on the lid, allowing the lysate to pool to one side.
- Prepare a 0.22 μm filter by opening the packaging but not removing the filter. Set aside.
- Using a 5 ml syringe aspirate (suck up) the lysate from the plate.
- Carefully attach the syringe to the filter. Depress the syringe plunger and collect the filtrate in a 15 ml sterile conical tube.
- If you still have unfiltered lysate remaining on your plate, remove the filter and store it in its plastic packaging to maintain sterility. Aspirate the remaining lysate, reattach the used filter, and filter the remaining lysate, collecting the filtrate in the same sterile conical tube.
- Label the tube appropriately.
D. Pool the lysates.
-
- If you have multiple webbed plates for a single phage sample, the same filter can be used for all plates if it remains sterile and unclogged. However, if it has been contaminated or becomes clogged, use a new filter.
- Combine all of the filtered lysates into the same sterile conical tube.
- Record the final volume of lysate collected.
Results:
8 webbed plates were flooded and used to collect HVL.
Conclusions and Next Steps:
Roughly 45 mililiters of sample were collected and stored in the fridge. The lysate will be used next for DNA Extraction.
Title: Full Plate Titer for High Volume Lysate
Date: 10/13/2022
Redo: No Sample: 3 Padme
Purpose: To determine the concentration of phage particles in a lysate by using a plaque assay.
Notes:
A. Perform Serial Dilution of High Volume lysate phage sample.
- Arrange the proper number of microcentrifuge tubes in a rack and label them 10-1, 10-2, 10-3,….10-6
- Add 90 μl of phage buffer to each of the tubes.
- Add 10 μl of low volumte lysate to the “10-1” tube and vortex well.
- Make sure to use a clean pipette tip for each transfer and pipette carefully, vortexing your sample well before making each dilution. Otherwise, you will not make accurate 10-fold dilutions.
- Transfer 10 μl of the “10 -1” sample to the “10-2” tube and vortex well. This solution contains 1/100th as many phage particles as your undiluted sample. It can also be referred to as your 1:100 dilution.
- Continue each successive dilution until you get to your last tube.
C. Inoculate the host bacteria with your phage sample.
- Obtain the same number of aliquots of 250 μl host bacterial cultures as you have phage samples. Label the culture tubes accordingly.
- Use a micropipettor and aseptic technique to add 10 μL of direct isolation phage sample to the bacterial culture.
- Mix each inoculated host culture by gently tapping the tube.
Important: Make sure your sample makes contact with the bacteria. When you pipette a volume as small as 10 μl sometimes your sample may stick to the side of the tube. - Let the sample sit undisturbed for 5–10 minutes to allow for attachment.
D. Plate the samples with top agar. You will need 3 ml of molten top agar per sample.
-
- Obtain the same number of agar plates as you have samples.
- Remove a bottle of top agar from the 55 °C bath.
Important: You want to keep the top agar in the 55 °C bath for as long as possible to prevent it from prematurely solidifying on your bench. - For each sample:
- Using a sterile 5 ml pipette, aseptically transfer 3 ml of top agar to an inoculated host tube (i.e., the tube containing bacterial host and phage sample).
Important: Try to avoid making or withdrawing bubbles, as they can look like plaques on plates. - Immediately aspirate (suck-up) the mixture back into the pipette and transfer it to the appropriate plate and discard the pipette.
Important: The top agar should not sit in the pipette for more than a few seconds because the agar will begin to solidify. - Gently, but quickly, tilt the plate in multiple directions until the top agar mixture evenly coats the agar plate.
- Using a sterile 5 ml pipette, aseptically transfer 3 ml of top agar to an inoculated host tube (i.e., the tube containing bacterial host and phage sample).
- Repeat this process for each of your samples.
E. The next day check the plates and confirm that your dilutions are valid (i.e., a 10-fold decrease in plaques).
-
-
- Use a plate with 20–200 isolated plaques and count the number of plaques.
-
Results:
There was contamination on the plate on the 10-6 plate was thrown out.

Conclusions and Next Steps:
Padme cleared most of the plates and didn’t have any dilutions with countable plaque numbers. Another HVL dilution will be done to get countable plaques.
Title: Full Plate Titer for High Volume Lysate
Date: 10/13/2022 Redo: Yes Sample: 3/Padme
Purpose: To determine the concentration of phage particles in a lysate by using a plaque assay.
Notes:
A. Perform Serial Dilution of High Volume lysate phage sample.
- Arrange the proper number of microcentrifuge tubes in a rack and label them 10-5, 10-6, 10-7,….10-9
- Add 90 μl of phage buffer to each of the tubes.
- Add 10 μl of high volumte lysate to the “10-1” tube and vortex well.
- Make sure to use a clean pipette tip for each transfer and pipette carefully, vortexing your sample well before making each dilution. Otherwise, you will not make accurate 10-fold dilutions.
- Transfer 10 μl of the “10 -4” sample to the “10-5” tube and vortex well. This solution contains 1/100th as many phage particles as your undiluted sample. It can also be referred to as your 1:100 dilution.
- Continue each successive dilution until you get to your last tube.
C. Inoculate the host bacteria with your phage sample.
- Obtain the same number of aliquots of 250 μl host bacterial cultures as you have phage samples. Label the culture tubes accordingly.
- Use a micropipettor and aseptic technique to add 10 μL of direct isolation phage sample to the bacterial culture.
- Mix each inoculated host culture by gently tapping the tube.
Important: Make sure your sample makes contact with the bacteria. When you pipette a volume as small as 10 μl sometimes your sample may stick to the side of the tube. - Let the sample sit undisturbed for 5–10 minutes to allow for attachment.
D. Plate the samples with top agar. You will need 3 ml of molten top agar per sample.
-
- Obtain the same number of agar plates as you have samples.
- Remove a bottle of top agar from the 55 °C bath.
Important: You want to keep the top agar in the 55 °C bath for as long as possible to prevent it from prematurely solidifying on your bench. - For each sample:
- Using a sterile 5 ml pipette, aseptically transfer 3 ml of top agar to an inoculated host tube (i.e., the tube containing bacterial host and phage sample).
Important: Try to avoid making or withdrawing bubbles, as they can look like plaques on plates. - Immediately aspirate (suck-up) the mixture back into the pipette and transfer it to the appropriate plate and discard the pipette.
Important: The top agar should not sit in the pipette for more than a few seconds because the agar will begin to solidify. - Gently, but quickly, tilt the plate in multiple directions until the top agar mixture evenly coats the agar plate.
- Using a sterile 5 ml pipette, aseptically transfer 3 ml of top agar to an inoculated host tube (i.e., the tube containing bacterial host and phage sample).
- Repeat this process for each of your samples.
E. The next day check the plates and confirm that your dilutions are valid (i.e., a 10-fold decrease in plaques).
-
-
- Use a plate with 20–200 isolated plaques and count the number of plaques.
-
Results:


Conclusions and Next Steps:
High-titer lysate concentration was determined to be 7.1 x 10⁸. Next will be DNA extraction.
Title:
Date: Redo: Sample:
Purpose:
Notes:
Results:
Conclusions and Next Steps:
DNA Extraction
Title: DNA Extraction of Padme
Date: 10/25/2022
Redo: No
Sample: Padme
Purpose: Extraction of bacteriophage DNA is necessary to amplify and further characterize Padme.
Notes:
This is a two-day process.
Day One:
1. Gently mix your HVL, then aliquot 5mL of your lysate into a 15 mL conical tube. Add 20 uL of nuclease.
2. Once nuclease has been added, gently invert the tube and incubate at 37°C for 10 min.
3. Aliquot lysate into 5 microfuge tubes, 1mL each.
4. To each tube, add 20 uL of ZnCl2, mix gently by inversion, and incubate at 37°C for 5 min.
5. Centrifuge at 10,000rpm for 1min to pellet the phage.
6. Remove supernatants by aspiration, but try not to disturb the pellet. Discard the liquid-filled pipette tip.
7. Resuspend pellets in 500 uL TES buffer per tube, and incubate at 60°C for 15 min. This will denature the capsids, exposing the DNA, while protecting it from the nuclease activity.
8. Add 1 uL of Proteinase K and mix gently. Incubate at 37°C for 10 min to completely eliminate any residual nuclease activity.
9. Add 60 uL of potassium acetate to each tube. Mix well and leave on ice for 15 min. A white, dense precipitate will form. This precipitate is capsids.
10. Centrifuge at 4°C for 1 min at 12,000rpm to pellet the capsids. KEEP THE SUPERNATANTS containing your DNA, and place them into new microfuge tubes. Discard the tubes with the pellets.
11. Add 500 uL of isopropanol to each of the tubes with the supernatant, mix, and leave on ice overnight (or until the next lab).
Day Two:
12. Centrifuge at top speed for 10 min to pellet DNA, and discard the supernatant into a WASTE tube. It is OK if you do not see a pellet.
13. Add 250 uL of 70% ethanol in each tube, and spin again for 1 min, at top speed. This washes the DNA pellet. Discard supernatants into a WASTE tube.
14. Dry the DNA pellets at room temperature by turning them upside-down onto paper towels, tapping out excess liquid, and leaving them upside-down until the pellets begin to turn clear. The tubes can also be placed in a fume hood or 30⁰C incubator to help with drying. DO NOT RUSH THIS STEP! If not dry enough, you will NOT recover enough DNA!
15. Resuspend the first pellet in 50 uL of nuclease-free water. Then use that solution to resuspend the next pellet.
16. Continue until all 5 pellets have been resuspended in the same 50uL of water.
17. Check DNA concentration and quality (A260:280 and A260:230) with the Nanodrop. Record the DNA concentration and A260:280 and A260:230 ratios in your notebook!!
Results:

Concentration: 1059.7 ng/uL. A260/A280: 1.88 and A260.A230: 1.70.
Conclusions and Next Steps:
The DNA collected will be used moving forward. The concentration is not ideal (2.30) but workable. Gel will be made next week.
Title: TEM Mounting with Uranyl Acetate
Date: 10/26/2022
Redo: No Sample: Padme
Purpose:
To prepare phage sample for viewing with a transmission electron microscope.
Notes:
A. Prepare phage samples.
-
- Aseptically transfer 1 ml of high-titer lysate into a sterile microcentrifuge tube.
- Balance the tube(s) and centrifuge for 1 hour at 4 °C at top speed to concentrate the phage particles at the bottom of the tube.
- Using a micropipettor, carefully remove as much supernatant as possible without disrupting the concentrated phage at the bottom of the tube.
- Add 100 μl of phage buffer and let resuspend at 4 °C for 30 minutes to one hour.
B. Prepare your work area.
-
-
- Put on a fresh pair of gloves.
- Cover the designated work area with bench paper or a Kimwipe to create a clean work surface.
- Remove the cover from a 5 x 5 cm piece of parafilm, and place the parafilm into the lid of Petri dish.
- Place a PELCO Tab or small piece of double-sided tape onto the parafilm in the lid of the Petri dish. Expose the adhesive or the tab.
- Using EM forceps, remove a fresh grid from a box of unused grids, touching only the very edge of the grid.
- Place the grid dark-and-shiny side UP, on the edge of the tab or double-sided tape so that only the very edge of the grid (no more than 0.5 mm) is touching the adhesive.
-
C. Mount and stain your phage.
-
- Using a micropipettor, place 10 μl of lysate onto the grid without touching the tip to the grid itself.
- Allow the phage settle and attach onto the grid for at least 5 minutes.
- Using a small wedge of filter paper, wick off the excess fluid.
D. Rinse the grid two times by the following method:
-
-
- Carefully pipette 10 μl of sterile water onto the grid. Allow it to sit for 2 minutes.
- Wick off the water using a fresh wedge of filter paper.
Important: Work quickly and carefully! Do NOT allow the grid to dry out! - Add 10 μl of 1 % uranyl acetate to the grid.
Important: Uranyl acetate is a very toxic compound. You should wear gloves throughout this procedure and when working in any area where this material has been used. - Let it sit for 2 minutes.
- Wick off excess stain by using a wedge of filter paper. UA staining occurs by leaving a very thin layer of stain dried across the entire grid. You should continue to wick away the stain until the surface of the grid looks like a rainbow oil slick. Then allow the grid to air dry before putting it safely back into the grid box.
-
E. Observe your phage.
- Padme was placed in A1.
- Transport your samples to your EM facility for imaging.
Results:
Padme was placed in A1 in the grid box, ready to be sent off.
Conclusions and Next Steps:
Padme will be sent off.
Title: DNA Extraction of Padme
Date: 11.07.22 Redo: Yes Sample: HVL
Purpose:
Extraction of bacteriophage DNA is necessary to amplify and further characterize Padme.
Notes:
1. Gently mix your HVL, then aliquot 5mL of your lysate into a 15 mL conical tube. Add 20 uL of nuclease.
2. Once nuclease has been added, gently invert the tube and incubate at 37°C for 10 min.
3. Aliquot lysate into 5 microfuge tubes, 1mL each.
4. To each tube, add 20 uL of ZnCl2, mix gently by inversion, and incubate at 37°C for 5 min.
5. Centrifuge at 10,000rpm for 1min to pellet the phage.
6. Remove supernatants by aspiration, but try not to disturb the pellet. Discard the liquid-filled pipette tip.
7. Resuspend pellets in 500 uL TES buffer per tube, and incubate at 60°C for 15 min. This will denature the capsids, exposing the DNA, while protecting it from the nuclease activity.
8. Add 1 uL of Proteinase K and mix gently. Incubate at 37°C for 10 min to completely eliminate any residual nuclease activity.
9. Add 60 uL of potassium acetate to each tube. Mix well and leave on ice for 15 min. A white, dense precipitate will form. This precipitate is capsids.
10. Centrifuge at 4°C for 1 min at 12,000rpm to pellet the capsids. KEEP THE SUPERNATANTS containing your DNA, and place them into new microfuge tubes. Discard the tubes with the pellets.
11. Add 500 uL of isopropanol to each of the tubes with the supernatant, mix, and store in -20 for 6 hours.
12. Centrifuge at top speed for 10 min to pellet DNA, and discard the supernatant into a WASTE tube. It is OK if you do not see a pellet.
13. Add 250 uL of 70% ethanol in each tube, and spin again for 1 min, at top speed. This washes the DNA pellet. Discard supernatants into a WASTE tube.
14. Dry the DNA pellets at room temperature by turning them upside-down onto paper towels, tapping out excess liquid, and leaving them upside-down until the pellets begin to turn clear. The tubes can also be placed in a fume hood or 30⁰C incubator to help with drying. DO NOT RUSH THIS STEP! If not dry enough, you will NOT recover enough DNA!
15. Resuspend the first pellet in 50 uL of nuclease-free water. Then use that solution to resuspend the next pellet.
16. Continue until all 5 pellets have been resuspended in the same 50uL of water.
17. Check DNA concentration and quality (A260:280 and A260:230) with the Nanodrop. Record the DNA concentration and A260:280 and A260:230 ratios in your notebook!!
Results:

Conclusions and Next Steps:
This DNA will be used for restriction enzyme digest and characterization of Padme.
Title:
Date: Redo: Sample:
Purpose:
Notes:
Results:
Conclusions and Next Steps:
Characterization
Title: Setting Up Restriction Enzyme Digests
Date: 10/31/22 Redo: No Sample: 1
Purpose: To cut the phage genome into multiple fragments based on its DNA sequence.
Notes:
A. Prepare genomic DNA.
- Gently mix your DNA sample by either flicking the closed tube with your finger.
- Incubate the tube at 65 °C for 10 minutes, and then quickly place it on ice. Quickly spin the tube in a microcentrifuge for less than 1 minute to move all of the liquid to the bottom of the tube.
- Using the concentration of your DNA sample, calculate the volume of DNA sample needed to obtain 0.5 µg of DNA.
(0.5 µg)(6 lanes) = 3 μl
Dilution was required for Padme: (4 μl Padme DNA)(4 μl of dd Water) = 4 µg/8 μl = 0.5 µg (this is the desired concentration).
B. Set up restriction enzyme digest reactions.
-
- Set up a reaction in a microcentrifuge tube for each enzyme according to the table. Include a negative control in which no restriction enzyme is added.
HaeIII MseI NspI SacII SAII Sterile Deionized Water 20.5 μl 20.5 μl 20.5 μl 20.5 μl 20.5 μl Reaction Buffer 2.5 μl 2.5 μl 2.5 μl 2.5 μl 2.5 μl Restriction Enzyme 1 μl 1 μl 1 μl 1 μl 1 μl Phage Genomic DNA 1 μl 1 μl 1 μl 1 μl 1 μl Important: Add your phage DNA last to prevent contamination of the enzyme stocks! - Mix the contents of each tube gently and quick spin the tube in a microcentrifuge for less than 1 minute to move all of the liquid to the bottom of the tube.
- Incubate at 37 °C for up to 1 hour.
- Store at -20 °C until ready to use.
- Set up a reaction in a microcentrifuge tube for each enzyme according to the table. Include a negative control in which no restriction enzyme is added.
Results:
The six samples were incubated at 37 °C for an 1 hour.
Conclusions and Next Steps:
Gels with the phage DNA will be run tomorrow.
Title: Restriction Enzyme Gel
Date: 11/01/2022 Redo: No Sample: 1st DNA Extraction
Purpose:
To separate DNA fragments via agarose gel electrophoresis
Notes:
- Set up the gel electrophoresis equipment with a gel prepared according to the Casting Agarose Gels (10.2) protocol.
- Wearing gloves, orient the gel in such a way that the wells are closest to the cathode (black electrode).
- Prepare your restriction enzyme digest samples for electrophoresis.
- Add 5 μl of concentrated 6x loading dye to each 25 µl restriction enzyme sample.
- Place samples at 65 °C, either in a heat block or a hot water bath, for 5 minutes. Immediately place the samples on ice to cool, and then spin them in a microcentrifuge for ~ 15 seconds at 10,000 rpm.
- This step prevents annealing of the cohesive ends of phage DNA.
- Load the gel in the following order:
Ladder Uncut DNA Enzyme-1 Enzyme-2 Enzyme-3 Enzyme-n- Carefully load the gel with the proper volume of DNA ladder. Each manufacturer is different, so follow the manufacturer’s instructions.
- Using a fresh tip on your micropipettor for each sample, pipette 20 μl (or as much will fit in the well) of each RE reaction into the wells in the order suggested above.
- Holding the pipette in both hands, place your elbows on either side of the gel apparatus.
- Situate your eyes directly above the wells to make the wells easier to see.
- Place the pipette tip directly above the well, just below the surface of the buffer. Do not try to get the pipette tip into the well, or you might puncture the bottom of the gel.
- Slowly depress the pipette plunger, allowing the solution to slowly sink into the well.
- Remove the pipette from the gel before releasing the plunger.
- Draw a picture of the gel in your lab notebook, making note of where your samples are relative to your classmates’ samples.
- Plug the electrodes into the appropriate locations on the power supply. Turn on the power supply and set the voltage to 70 V.
Important: Remember, DNA runs toward the RED electrode! - Run the gel until the blue dye front has migrated at least 3.5 inches from the well. This will take approximately 1 hour.
- Turn off the power supply.
- Photograph the gel.
- Using gloves, carefully remove the gel from the electrophoresis chamber.
- Photograph your gel and obtain a copy of the gel photograph, following your instructor’s directions.
- Label your copy of the gel photograph to include the names of each enzyme used above its corresponding lane. Below is an example of a properly labelled gel photograph (Figure 10.3-1).
- Include this labelled copy of the gel photograph in your laboratory notebook and upload a copy to phagesDB.
Results:

The bands of the ladder was indistinguishable and there were no digested bands of DNA in the samples.
Conclusions and Next Steps:
Re-do restriction enzyme digest and re-run the samples.
Title: Restriction Enzyme Digests
Date: 11.14/22 Redo: Yes Sample: Padme 2nd DNA Extraction
Purpose: To cut the phage genome into multiple fragments based on its DNA sequence.
Notes:
A. Prepare genomic DNA.
- Gently mix your DNA sample by either flicking the closed tube with your finger.
- Incubate the tube at 65 °C for 10 minutes, and then quickly place it on ice. Quickly spin the tube in a microcentrifuge for less than 1 minute to move all of the liquid to the bottom of the tube.
- Using the concentration of your DNA sample, calculate the volume of DNA sample needed to obtain 0.5 µg of DNA.
(0.50)(1/62.4)(1000) = 8 μl
B. Set up restriction enzyme digest reactions.
-
- Set up a reaction in a microcentrifuge tube for each enzyme according to the table. Include a negative control in which no restriction enzyme is added.
HaeIII MseI NspI SacII SAII Sterile Deionized Water 14 μl 14 μl 14 μl 14 μl 14 μl Reaction Buffer 2.5 μl 2.5 μl 2.5 μl 2.5 μl 2.5 μl Restriction Enzyme 0.5 μl 0.5 μl 0.5 μl 0.5 μl 0.5 μl Phage Genomic DNA 8 μl 8 μl 8 μl 8 μl 8 μl Important: Add your phage DNA last to prevent contamination of the enzyme stocks! - Mix the contents of each tube gently and quick spin the tube in a microcentrifuge for less than 1 minute to move all of the liquid to the bottom of the tube.
- Incubate at 37 °C for up to 1 hour.
- Store at -20 °C until ready to use.
- Set up a reaction in a microcentrifuge tube for each enzyme according to the table. Include a negative control in which no restriction enzyme is added.
Results:
The six samples were incubated at 37 °C for an 1 hour.
Conclusions and Next Steps:
Gel with the phage restriction enzymes will be run the same day.
Title: Restriction Enzyme Gel
Date: 11/14/2022 Redo: Yes Sample: 2nd DNA Extraction
Purpose:
To separate DNA fragments via agarose gel electrophoresis
Notes:
- Set up the gel electrophoresis equipment with a gel prepared according to the Casting Agarose Gels (10.2) protocol.
- Wearing gloves, orient the gel in such a way that the wells are closest to the cathode (black electrode).
- Prepare your restriction enzyme digest samples for electrophoresis.
- Add 5 μl of concentrated 6x loading dye to each 25 µl restriction enzyme sample.
- Place samples at 65 °C, either in a heat block or a hot water bath, for 5 minutes. Immediately place the samples on ice to cool, and then spin them in a microcentrifuge for ~ 15 seconds at 10,000 rpm.
- Load the gel in the following order:
Ladder Uncut DNA Enzyme-1 Enzyme-2 Enzyme-3 Enzyme-n- Carefully load the gel with the proper volume of DNA ladder. Each manufacturer is different, so follow the manufacturer’s instructions.
- Using a fresh tip on your micropipettor for each sample, pipette 20 μl (or as much will fit in the well) of each RE reaction into the wells in the order suggested above.
- Holding the pipette in both hands, place your elbows on either side of the gel apparatus.
- Situate your eyes directly above the wells to make the wells easier to see.
- Place the pipette tip directly above the well, just below the surface of the buffer. Do not try to get the pipette tip into the well, or you might puncture the bottom of the gel.
- Slowly depress the pipette plunger, allowing the solution to slowly sink into the well.
- Remove the pipette from the gel before releasing the plunger.
- Draw a picture of the gel in your lab notebook, making note of where your samples are relative to your classmates’ samples.
- Plug the electrodes into the appropriate locations on the power supply. Turn on the power supply and set the voltage to 70 V.
Important: Remember, DNA runs toward the RED electrode! - Run the gel until the blue dye front has migrated at least 3.5 inches from the well. This will take approximately 1 hour.
- Turn off the power supply.
- Photograph the gel.
- Using gloves, carefully remove the gel from the electrophoresis chamber.
- Photograph your gel and obtain a copy of the gel photograph, following your instructor’s directions.
- Label your copy of the gel photograph to include the names of each enzyme used above its corresponding lane. Below is an example of a properly labelled gel photograph (Figure 10.3-1).
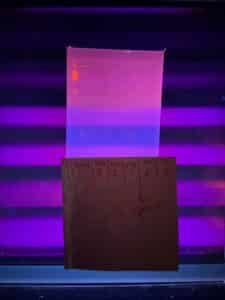
Results:
Two bands of DNA were present on the gel, potentially contamination but sequencing will answer that question. HaeIII restriction enzyme cut Padme’s DNA.
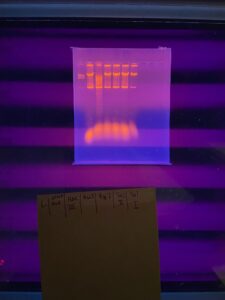
Conclusions and Next Steps:
Gel image will be uploaded onto Canvas. Work with padme is complete.
Title:
Date: Redo: Sample:
Purpose:
Notes:
Results:
Conclusions and Next Steps: