Discovery of Obsidian
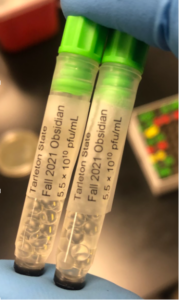
Obsidian Information
Morphology: Siphoviridae

Sample Collection
| Collector Name |
Jesse Edmonson | Carlos Canales | Carlos Canales | Carlos Canales | Carlos Canales | Jesse Edmonson | Carlos Canales | Jesse Edmonson | Jesse Edmonson |
| Sample No. | 1 | 2 | 3 | 4 | 5 | 6 | 7 | 8 | 9 |
| Date of Collection | 8/30/2021 | 9/1/2021 | 9/7/2021 | 9/12/2021 | 9/12/2021 | 9/8/2021 | 9/12/2021 | 9/15/2021 | 9/15/2021 |
| Sample Type | Soil | Soil | Soil | Soil | Soil | Soil | Soil | Soil | Soil |
| General Location | Stephenville City Park | Flowerbed | Dairy | Jaycee City Park | Apartments | Apartment Complex | Jaycee City Park | Anthill | Gutter Output |
|
Location Description
|
Soil was under a tree |
Under rock under rosebush | Side of light post on side of the road | Under Wood board next to parking lot, anthill | Under tree in hole (possibly mudgobber nest) | Next to street, grass patch | Next to grass patch, severalant hills | Between the road and the outer wall of the Stephenville cemetary | Under a gutter output on a church |
| GPS Coordinates |
Latitude:32.217313 Longitude:-98.2016525 |
Latitude:32.213795 Longitude:-98.360231 |
Latitude:32.231051 Longitude:-98.373653
|
Latitude:32.223362 Longitude:-98.230458 |
Latitude:32.224812 Longitude:-98.229177 |
Latitude:37.09024 Longitude:-95.71289 |
Latitude:32.223362 Longitude:-98.230458 |
Latitude: 32.21284 Longitude:-98.21638 |
Latitude:32.21337 Longitude:-98.21620 |
| Sample Depth | 2 inches | 5 inches | 0.5 inches | 4 inches | 0.5 inches | 3 inches | 1 inch | Surface | 1 inch |
| Ambient Temperature | 26°C | 26°C | 20°C | 18°C | 18°C | 25°C | 18°C | 20°C | 20°C |
Isolation/Purification
Title: Direct Isolation
Date: 8/30/2021 Redo: Yes Sample: #1
Purpose: This procedure is to extract phages from the environmental sample and infect the host bacteria using a plaque assay.
Notes:
Direct Isolation
1.)The workbench was cleaned via aseptic technique.
Extraction of Phage from Environmental Sample
2.) A 15mL conical tube was roughly half-full with environmental sample 1. Liquid media was added until the soil was covered with 2mL.
3.) It was then inverted until the soil was thoroughly mixed with the liquid media.
4.) The tube was then put into a shaking incubator at 250rpm from 10:47 until approximately 2:30.
5.) The sample was then allowed to sit upright for 5 minutes to allow the particulate matter to settle.
Preparing Phage Filtrate
6.) The sample had roughly 2mL of liquid sitting on top of the settled particles after it was allowed to sit. A syringe was used in an attempt to collect the liquid however, it did not work properly. Because of this, a serological pipette was used to move the liquid from the sample and to the open of the syringe instead.
7.) A 0.22µL filter was put onto the end of the syringe using aseptic technique, and the liquid was filtered into a 1.5mL microcentrifuge tube.
8.) Only ~200µL of the sample was collected using this method.
Plaque Assay
9.) All 200µL collected in the last section were then transferred to a culture tube with 250µL of host bacterial cultures and mixed gently.
10.) The sample then sat undisturbed from 2:03 until we were able to come back to the lab at 4:18.
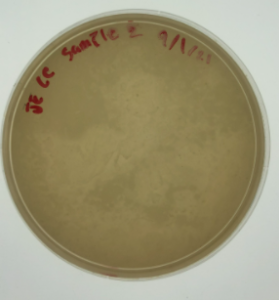
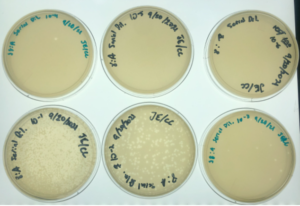
11.)An agar plate was collected labeled with mine and my lab partners initials along with the date (plate did not have “sample 1” written on it error fixed with later samples).
12.) 3mL of molten (55℃) top agar were aseptically mixed in the tube with the bacteria culture and phage sample, then immediately moved onto the top of the agar plate.
13.) The plate was tilted to get the molten agar to cover the entirety of the plate and left to sit on the workbench for roughly 20 minutes to allow the molten agar to cool and solidify. One mistake that was done was that the agar plate was not brought to room temperature, which lead to irregularity in the top agar.
14.) The plate was added to the incubator at 29℃ from 5:00 on Monday (8/30) until 9:00 Wednesday (9/1).
15.) The sample was checked on at 11:38 on Tuesday (8/31)
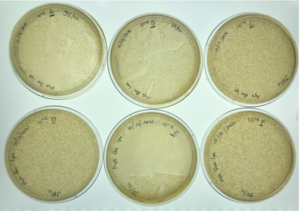
16.) Ultimately the sample failed to produce plaques.
Results:
Negative. No plaques were present on the agar plates. There was no clear growth. White film over the agar plate.

Conclusions and Next Steps:
(9/1/2021): We plan to get a 2nd environmental sample and do direct isolation again to get a bacteriophage.
Title: Direct Isolation
Date: 9/1/2021 Redo: Yes Sample: #2
Purpose: This procedure is to extract phages from the environmental sample and infect the host bacteria using a plaque assay.
Notes:
Direct Isolation
1.)The workbench was cleaned via aseptic technique by wiping the workspace with CiDecon and then 70% ethanol. Afterwards the Bunsen burner.
Extraction of Phage from Environmental Sample
2.) A 15mL conical tube was roughly half-full with environmental sample 2. Liquid media was added until the soil was covered with 3 ml.
3.) It was then inverted until the soil was thoroughly mixed with the liquid media.
4.) The tube was then put into a shaking incubator at 250rpm from 9:30 until approximately 1:05.
5.) The sample was then allowed to sit upright for 5 minutes to allow the particulate matter to settle.
Preparing Phage Filtrate
6.) The sample had around 3ml of liquid sitting on top of the settled particles after it was allowed to sit. A syringe was used to collect the liquid and the majority of the liquid was successfully collected.
7.) A 0.22µL filter was put onto the end of the syringe using aseptic technique, and the liquid was filtered into a 1.5mL microcentrifuge tube.
8.) Only ~200µL of the sample was collected using this method.
Plaque Assay
9.) All 200µL collected in the last section were then transferred to a culture tube with 250µL of host bacterial cultures and mixed gently.
10.) The sample then sat undisturbed from 10 minutes.
11.)An agar plate was collected labeled with mine and my lab partners initials along with the date as well as the sample number and the method used.
12.) 3mL of molten (55℃) top agar were aseptically mixed in the tube with the bacteria culture and phage sample, then immediately moved onto the top of the agar plate.
13.) The plate was tilted to get the molten agar to cover the entirety of the plate and left to sit on the workbench for roughly 20 minutes to allow the molten agar to cool and solidify. One mistake that was done was that the agar plate was not brought to room temperature, which lead to irregularity in the top agar.
14.) The plate was added to the incubator at 29℃ from 4:00 on Wednesday (9/1) until Friday(9/3).
15.) The sample was checked on at 12:00 on Thursday (9/2)
16.) Ultimately again, the sample failed to produce plaques.
Results:
Negative. No plaques were present on the agar plate. There was no clear growth. White film over the agar plate
Conclusions and Next Steps:
(9/8/2021): So far, there appears to be no growth and this may have been due to the sample as this was deep in the ground so it may have been at a colder sample. We will get another environmental sample and see if there is a resulting bacteriophage and do direct isolation again.
Title: Direct Isolation
Date: 9/8/2021 Redo: Yes Sample: #3
Purpose: This procedure is to extract phages from the environmental sample and infect the host bacteria using a plaque assay.
Notes:
Direct Isolation
1.)We enter lab and washed our hands properly. Next, the workbench was cleaned via aseptic technique by wiping the workspace with CiDecon and then 70% ethanol and once the workbench was dry we got our supplies for direct isolation and the Bunsen burner is lit.
Extraction of Phage from Environmental Sample
2.) A 15mL conical tube was roughly around 7 ml with environmental sample 3 and liquid media was added until the soil was covered with around 3 ml.
3.) It was then inverted until the soil was thoroughly mixed with the liquid media.
4.) The tube was then put into a shaking incubator at 250rpm from 9:45am until approximately 1:15pm.
5.) The sample was then allowed to sit upright for 5 minutes to allow the particulate matter to settle.
Preparing Phage Filtrate
6.) The sample had around 3ml of liquid sitting on top of the settled particles after it was allowed to sit. A syringe was used to collect the liquid and the majority of the liquid was successfully collected.
7.) A 0.22µL filter was put onto the end of the syringe using aseptic technique, and the liquid was filtered into a 1.5mL microcentrifuge tube.
8.) Only ~200µL of the sample was collected using this method.
Plaque Assay
9.) All 200µL collected in the last section were then transferred to a culture tube with 250µL of host bacterial cultures and mixed gently.
10.) The sample then sat undisturbed from 10 minutes.
11.)An agar plate was collected labeled with mine and my lab partners initials along with the date as well as the sample number and the method used.
12.) 3mL of molten (55℃) top agar were aseptically mixed in the tube with the bacteria culture and phage sample, then immediately moved onto the top of the agar plate.
13.) The plate was tilted to get the molten agar to cover the entirety of the plate and left to sit on the workbench for roughly 20 minutes to allow the molten agar to cool and solidify. One mistake that was done was that the agar plate was not brought to room temperature, which lead to irregularity in the top agar.
14.) The plate was added to the incubator at 29℃ from 4:00 on Wednesday (9/1) until Friday(9/3).
15.) The sample was checked on at 12:00 on Thursday (9/2)
16.) Ultimately again, the sample failed to produce plaques.
Results:
Negative. No plaques were present on the agar plate. There was no clear growth. White film over the agar plate

Conclusions and Next Steps:
(9/10/2021): We plan to do at least two samples at the same time next time to double our chances.
Title: Direct Isolation
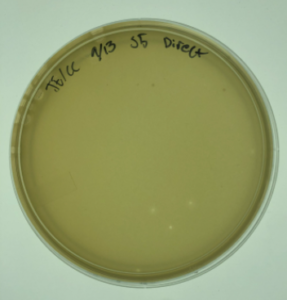
Date: 9/13/2021 Redo: Yes Sample: #4
Purpose: This procedure is to extract phages from the environmental sample and infect the host bacteria using a plaque assay.
Notes:
Direct isolation for samples 4 through sample 7 were all completed on the same day.
Direct Isolation
1.)We enter lab and washed our hands properly. Next, the workbench was cleaned via aseptic technique by wiping the workspace with CiDecon and then 70% ethanol and once the workbench was dry we got our supplies for direct isolation and the Bunsen burner is lit.
Extraction of Phage from Environmental Sample
2.) A 15mL conical tube was roughly around 7 ml with environmental sample 4 and liquid media was added until the soil was covered with around 3 ml.
3.) It was then inverted until the soil was thoroughly mixed with the liquid media.
4.) The tube was then put into a shaking incubator at 250rpm from 9:00am until approximately 1:10pm.
5.) The sample was then allowed to sit upright for 5 minutes to allow the particulate matter to settle.
Preparing Phage Filtrate
6.) The sample had around 3ml of liquid sitting on top of the settled particles after it was allowed to sit. A syringe was used to collect the liquid and the majority of the liquid was successfully collected.
7.) A 0.22µL filter was put onto the end of the syringe using aseptic technique, and the liquid was filtered into a 1.5mL microcentrifuge tube.
8.) Only ~200µL of the sample was collected using this method.
Plaque Assay
9.) All 200µL collected in the last section were then transferred to a culture tube with 250µL of host bacterial cultures and mixed gently.
10.) The sample then sat undisturbed from 10 minutes.
11.)An agar plate was collected labeled with mine and my lab partners initials along with the date as well as the sample number and the method used.
12.) 3mL of molten (55℃) top agar were aseptically mixed in the tube with the bacteria culture and phage sample, then immediately moved onto the top of the agar plate.
13.) The plate was tilted to get the molten agar to cover the entirety of the plate and left to sit on the workbench for roughly 20 minutes to allow the molten agar to cool and solidify.
14.) The plate was added to the incubator at 29℃ from 1:00 pm on Monday (9/13) until Wednesday(9/15).
15.) The sample was checked on at 12:05 pm on Tuesday (9/14)
16.) Ultimately again, the sample failed to produce plaques.
Results:
Negative. No plaques were present on the agar plate. There was no clear growth. Contamination in one spot of the dish.

Conclusions and Next Steps:
(9/15/2021): We will do 2 more dirt samples at the same time before we do the water sample that is available.
Title: Direct Isolation
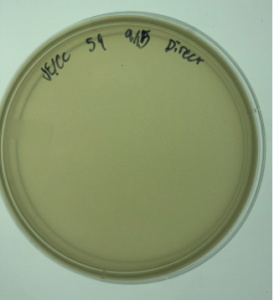
Date: 9/13/2021 Redo: Yes Sample: #5
Purpose: This procedure is to extract phages from the environmental sample and infect the host bacteria using a plaque assay.
Notes:
Direct isolation for samples 4 through sample 7 were all completed on the same day.
Direct Isolation
1.)We enter lab and washed our hands properly. Next, the workbench was cleaned via aseptic technique by wiping the workspace with CiDecon and then 70% ethanol and once the workbench was dry we got our supplies for direct isolation and the Bunsen burner is lit.
Extraction of Phage from Environmental Sample
2.) A 15mL conical tube was roughly around 7 ml with environmental sample 5 and liquid media was added until the soil was covered with around 3 ml.
3.) It was then inverted until the soil was thoroughly mixed with the liquid media.
4.) The tube was then put into a shaking incubator at 250rpm from 9:00am until approximately 1:10pm.
5.) The sample was then allowed to sit upright for 5 minutes to allow the particulate matter to settle.
Preparing Phage Filtrate
6.) The sample had around 3ml of liquid sitting on top of the settled particles after it was allowed to sit. A syringe was used to collect the liquid and the majority of the liquid was successfully collected.
7.) A 0.22µL filter was put onto the end of the syringe using aseptic technique, and the liquid was filtered into a 1.5mL microcentrifuge tube.
8.) Only ~200µL of the sample was collected using this method.
Plaque Assay
9.) All 200µL collected in the last section were then transferred to a culture tube with 250µL of host bacterial cultures and mixed gently.
10.) The sample then sat undisturbed from 10 minutes.
11.)An agar plate was collected labeled with mine and my lab partners initials along with the date as well as the sample number and the method used.
12.) 3mL of molten (55℃) top agar were aseptically mixed in the tube with the bacteria culture and phage sample, then immediately moved onto the top of the agar plate.
13.) The plate was tilted to get the molten agar to cover the entirety of the plate and left to sit on the workbench for roughly 20 minutes to allow the molten agar to cool and solidify.
14.) The plate was added to the incubator at 29℃ from 1:00 pm on Monday (9/13) until Wednesday(9/15).
15.) The sample was checked on at 12:05 pm on Tuesday (9/14)
16.) Ultimately again, the sample failed to produce plaques.
Results:
Negative. No plaques were present on the agar plate. There was no clear growth.
Conclusions and Next Steps:
(9/15/2021): We will do 2 more dirt samples at the same time before we do the water sample that is available.
Title: Direct Isolation
Date: 9/13/2021 Redo: Yes Sample: #6
Purpose: This procedure is to extract phages from the environmental sample and infect the host bacteria using a plaque assay.
Notes:
Direct isolation for samples 4 through sample 7 were all completed on the same day.
Direct Isolation
1.)We enter lab and washed our hands properly. Next, the workbench was cleaned via aseptic technique by wiping the workspace with CiDecon and then 70% ethanol and once the workbench was dry we got our supplies for direct isolation and the Bunsen burner is lit.
Extraction of Phage from Environmental Sample
2.) A 15mL conical tube was roughly around 7 ml with environmental sample 6 and liquid media was added until the soil was covered with around 3 ml.
3.) It was then inverted until the soil was thoroughly mixed with the liquid media.
4.) The tube was then put into a shaking incubator at 250rpm from 9:45am until approximately 1:10pm.
5.) The sample was then allowed to sit upright for 5 minutes to allow the particulate matter to settle.
Preparing Phage Filtrate
6.) The sample had around 3ml of liquid sitting on top of the settled particles after it was allowed to sit. A syringe was used to collect the liquid and the majority of the liquid was successfully collected.
7.) A 0.22µL filter was put onto the end of the syringe using aseptic technique, and the liquid was filtered into a 1.5mL microcentrifuge tube.
8.) Only ~200µL of the sample was collected using this method.
Plaque Assay
9.) All 200µL collected in the last section were then transferred to a culture tube with 250µL of host bacterial cultures and mixed gently.
10.) The sample then sat undisturbed from 10 minutes.
11.)An agar plate was collected labeled with mine and my lab partners initials along with the date as well as the sample number and the method used.
12.) 3mL of molten (55℃) top agar were aseptically mixed in the tube with the bacteria culture and phage sample, then immediately moved onto the top of the agar plate.
13.) The plate was tilted to get the molten agar to cover the entirety of the plate and left to sit on the workbench for roughly 20 minutes to allow the molten agar to cool and solidify.
14.) The plate was added to the incubator at 29℃ from 1:00 pm on Monday (9/13) until Wednesday(9/15).
15.) The sample was checked on at 12:05 pm on Tuesday (9/14)
16.) Ultimately again, the sample failed to produce plaques.
Results:
Negative. No plaques were present on the agar plate. There was no clear growth. White film over the agar plate

Conclusions and Next Steps:
(9/15/2021): We will do 2 more dirt samples at the same time before we do the water sample that is available.
Title: Direct Isolation
Date: 9/13/2021 Redo: Yes Sample: #7
Purpose: This procedure is to extract phages from the environmental sample and infect the host bacteria using a plaque assay.
Notes:
Direct isolation for samples 4 through sample 7 were all completed on the same day.
Direct Isolation
1.)We enter lab and washed our hands properly. Next, the workbench was cleaned via aseptic technique by wiping the workspace with CiDecon and then 70% ethanol and once the workbench was dry we got our supplies for direct isolation and the Bunsen burner is lit.
Extraction of Phage from Environmental Sample
2.) A 15mL conical tube was roughly around 7 ml with environmental sample 7 and liquid media was added until the soil was covered with around 3 ml.
3.) It was then inverted until the soil was thoroughly mixed with the liquid media.
4.) The tube was then put into a shaking incubator at 250rpm from 9:45am until approximately 1:10pm.
5.) The sample was then allowed to sit upright for 5 minutes to allow the particulate matter to settle.
Preparing Phage Filtrate
6.) The sample had around 3ml of liquid sitting on top of the settled particles after it was allowed to sit. A syringe was used to collect the liquid and the majority of the liquid was successfully collected.
7.) A 0.22µL filter was put onto the end of the syringe using aseptic technique, and the liquid was filtered into a 1.5mL microcentrifuge tube.
8.) Only ~200µL of the sample was collected using this method.
Plaque Assay
9.) All 200µL collected in the last section were then transferred to a culture tube with 250µL of host bacterial cultures and mixed gently.
10.) The sample then sat undisturbed from 10 minutes.
11.)An agar plate was collected labeled with mine and my lab partners initials along with the date as well as the sample number and the method used.
12.) 3mL of molten (55℃) top agar were aseptically mixed in the tube with the bacteria culture and phage sample, then immediately moved onto the top of the agar plate.
13.) The plate was tilted to get the molten agar to cover the entirety of the plate and left to sit on the workbench for roughly 20 minutes to allow the molten agar to cool and solidify.
14.) The plate was added to the incubator at 29℃ from 1:00 pm on Monday (9/13) until Wednesday(9/15).
15.) The sample was checked on at 12:05 pm on Tuesday (9/14)
16.) Ultimately again, the sample failed to produce plaques.
Results:
Negative. No plaques were present on the agar plate. There was no clear growth. White film over the agar plate
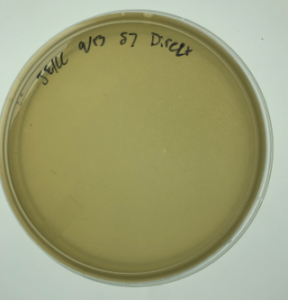
Conclusions and Next Steps:
(9/15/2021): We will do 2 more dirt samples at the same time before we do the water sample that is available.
Title: Direct Isolation
Date: 9/15/2021 Redo: Yes Sample: #8
Purpose: This procedure is to extract phages from the environmental sample and infect the host bacteria using a plaque assay.
Notes:
Direct isolation for sample 8 and 9 were completed on the same day.
Direct Isolation
1.)We enter lab and washed our hands properly. Next, the workbench was cleaned via aseptic technique by wiping the workspace with CiDecon and then 70% ethanol and once the workbench was dry we got our supplies for direct isolation and the Bunsen burner is lit.
Extraction of Phage from Environmental Sample
2.) A 15mL conical tube was roughly around 7 ml with environmental sample 8 and liquid media was added until the soil was covered with around 3 ml.
3.) It was then inverted until the soil was thoroughly mixed with the liquid media.
4.) The tube was then put into a shaking incubator at 250rpm from 9:45am until approximately 1:15pm.
5.) The sample was then allowed to sit upright for 5 minutes to allow the particulate matter to settle.
Preparing Phage Filtrate
6.) The sample had around 3ml of liquid sitting on top of the settled particles after it was allowed to sit. A syringe was used to collect the liquid and the majority of the liquid was successfully collected.
7.) A 0.22µL filter was put onto the end of the syringe using aseptic technique, and the liquid was filtered into a 1.5mL microcentrifuge tube.
8.) Roughly .5mL of the sample was collected using this method.
Plaque Assay
9.) Only 250µL of the sample collected in the last section were then transferred to a culture tube with 250µL of host bacterial cultures and mixed gently.
10.) The sample then sat undisturbed from 10 minutes.
11.)An agar plate was collected labeled with mine and my lab partners initials along with the date as well as the sample number and the method used.
12.) 3mL of molten (55℃) top agar were aseptically mixed in the tube with the bacteria culture and phage sample, then immediately moved onto the top of the agar plate.
13.) The plate was tilted to get the molten agar to cover the entirety of the plate and left to sit on the workbench for roughly 20 minutes to allow the molten agar to cool and solidify.
14.) The plate was added to the incubator at 29℃ from 4:00 on Wednesday (9/15) until Friday(9/17).
15.) The sample was checked on at 12:00 on Thursday (9/16)
16.) This sample produced plaques.
Results:
Positive. Multiple plaques were found on the plate.

Conclusions and Next Steps:
The next step will be picking a plaque and proceding to the serial dilutions steps.
Title: Direct Isolation
Date: 9/15/2021 Redo: Yes Sample: #9
Purpose: This procedure is to extract phages from the environmental sample and infect the host bacteria using a plaque assay.
Notes:
Direct isolation of sample 8 and sample 9 occurred on the same day.
Direct Isolation
1.)We enter lab and washed our hands properly. Next, the workbench was cleaned via aseptic technique by wiping the workspace with CiDecon and then 70% ethanol and once the workbench was dry we got our supplies for direct isolation and the Bunsen burner is lit.
Extraction of Phage from Environmental Sample
2.) A 15mL conical tube was roughly around 7 ml with environmental sample 9 and liquid media was added until the soil was covered with around 3 ml.
3.) It was then inverted until the soil was thoroughly mixed with the liquid media.
4.) The tube was then put into a shaking incubator at 250rpm from 9:45am until approximately 1:15pm.
5.) The sample was then allowed to sit upright for 5 minutes to allow the particulate matter to settle.
Preparing Phage Filtrate
6.) The sample had around 3ml of liquid sitting on top of the settled particles after it was allowed to sit. A syringe was used to collect the liquid and the majority of the liquid was successfully collected.
7.) A 0.22µL filter was put onto the end of the syringe using aseptic technique, and the liquid was filtered into a 1.5mL microcentrifuge tube.
8.) Roughly 1mL of the sample was collected using this method.
Plaque Assay
9.) 250µL of sample collected in the last section were then transferred to a culture tube with 250µL of host bacterial cultures and mixed gently.
10.) The sample then sat undisturbed from 10 minutes.
11.)An agar plate was collected labeled with mine and my lab partners initials along with the date as well as the sample number and the method used.
12.) 3mL of molten (55℃) top agar were aseptically mixed in the tube with the bacteria culture and phage sample, then immediately moved onto the top of the agar plate.
13.) The plate was tilted to get the molten agar to cover the entirety of the plate and left to sit on the workbench for roughly 20 minutes to allow the molten agar to cool and solidify.
14.) The plate was added to the incubator at 29℃ from 4:00 on Wednesday (9/15) until Friday (9/17).
15.) The sample was checked on at 12:00 on Thursday (9/16)
16.) Ultimately again, the sample failed to produce plaques.
Results:
Negative. No plaques were present on the agar plate. There was no clear growth. White film over the agar plate
Conclusions and Next Steps:
Sample 8 was positive. Therefore, we will proceed to serial dilutions using the plaques in sample 8.
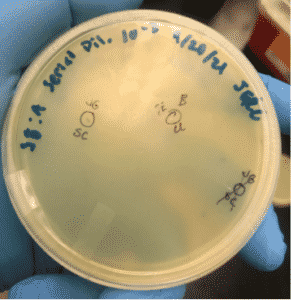
Title: First Serial Dilution of Sample A
Date: 9/20/2021 Redo: No Sample: A
Purpose: The purpose of this experiment is to serial dilute the sample A to get a countable # of plaques present on the plate.
Notes:

1. Using gloves, we disinfected the bench area with CiDecon and spread it with Kimwipes and then followed with 70% EtOH and also wiped with Kimwipes. We turned on a Bunsen burner to create an aseptic environment for the procedure.
2. Plaque A was selected and labeled on the plate as seen above. Before we began we collected 7 microcentrifuge tubes for further on in the procedure.
3. Next, we labeled the 7 microcentrifuge tubes as 10e0, 10e-1, 10e-2, 10e-3, 10e-4, 10e-5, and 10e-6 then for the tube with the label of 10e0, we dispensed 100 ul of buffer solution into the tube. For the rest of the tube we dispense 90 ul of buffer solution into each one.
4. With the selected plaque, we picked the plaque by inserting the clean tip of a micropipette, making sure it is perpendicular to avoid touching any surrounding bacteria and ensuring not to go deep into the agar.
5. The sample was then added to the 10e0 tube, “original”, by dipping the tip into the buffer and tapping the end to make sure the sample was in the buffer solution. Then the tube was vortexed to ensure that it was mixed in thoroughly.
6. Next, using a micropipette, we transferred 10 ul from the “original” and added it to the 10e-1 tube, then it was vortexed. Then 10 ul from the 10e-1 was transferred and was vortexed as well. This procedure was carried out to 10e-6 tube.
7. We collected 6 agar plates which will be used later in the procedure and bring to room temperature. Then we labeled each agar with our initials, date and the procedure and the dilution factor.
8. Then we collected 6 host bacteria tubes which will be used for the serial dilution. We labeled each tube from 10e-1 to 10e-6, not including the “original” and then 10 ul of sample dilution from each tube was added to the corresponding labeled bacteria tube using a micropipette. For ever transfer, we used a new pipette tip. We waited for 10 minutes and the we obtained 6 serological pipettes and a pipettor. With the serological pipette and pipettor, we aspirated 3 ml of top agar and transferred it into the 10e-1 tube mixture containing the host bacteria and phage dilution.
9.Immediately, we aspirated the entire mixture from the tube and transferred it the agar plate labeled as the 10e-1 plate. This was done for every tube and the procedure was placed with their corresponding dilution factor. We then spread the agar and let the agar plates rest undisturbed for around 20 min.
10. We then place the agar plates in the incubator (23-30ºC) for 24-48 hours.
Results:
Plaques formed.
Conclusions and Next Steps:
The plates were wrapped and placed in the fridge at 4ºC and for the second dilution we will used one of the plates form the 1st serial dilution and use it for the 2nd serial dilution.
Title: Picking a Plaque and Second Serial Dilution
Date: 9/22/2021 Redo: No Sample: B
Purpose: The purpose is to use serial dilution the sample B form the 1st serial dilution to get a countable # of plaques present on the plate.
Notes:
We picked a plaque on the 10e-3 plate to use for the 2nd serial dilution.
1. Using gloves, we disinfected the bench area with CiDecon and spread it with Kimwipes and then followed with 70% EtOH and also wiped with Kimwipes. We turned on a Bunsen burner to create an aseptic environment for the procedure.
2. Plaque B was selected and labeled on the plate as seen above. Before we began we collected 7 microcentrifuge tubes for further on in the procedure.
3. Next, we labeled the 7 microcentrifuge tubes as 10e0, 10e-1, 10e-2, 10e-3, 10e-4, 10e-5, and 10e-6 then for the tube with the label of 10e0, we dispensed 100 ul of buffer solution into the tube. For the rest of the tubes we dispense 90 ul of buffer solution into each one.
4. With the selected plaque, we picked the plaque by inserting the clean tip of a micropipette, making sure it is perpendicular to avoid touching any surrounding bacteria and ensuring not to go deep into the agar.
5. The sample was then added to the 10e0 tube, “original”, by dipping the tip into the buffer and tapping the end to make sure the sample was in the buffer solution. Then the tube was vortexed to ensure that it was mixed in thoroughly.
6. Next, using a micropipette, we transferred 10 ul from the “original” and added it to the 10e-1 tube, then it was vortexed. Then 10 ul from the 10e-1 was transferred and was vortexed as well. This procedure was carried out to 10e-6 tube.
7. We collected 6 agar plates which will be used later in the procedure and bring to room temperature. Then we labeled each agar with our initials, date and the procedure and the dilution factor.
8. Then we collected 6 host bacteria tubes which will be used for the serial dilution. We labeled each tube from 10e-1 to 10e-6, not including the “original” and then 1o ul of sample dilution from each tube was added to the corresponding labeled bacteria tube using a micropipette. For ever transfer, we used a new pipette tip. We waited for 10 minutes and the we obtained 6 serological pipettes and a pipettor. With the serological pipette and pipettor, we aspirated 3 ml of top agar and transferred it into the 10e-1 tube mixture containing the host bacteria and phage dilution.
9.Immediately, we aspirated the entire mixture from the tube and transferred it the agar plate labeled as the 10e-1 plate. This was done for every tube and the procedure was placed with their corresponding dilution factor. We then spread the agar and let the agar plates rest undisturbed for around 20 min.
10. We then place the agar plates in the incubator (23-30ºC) for 24-48 hours.
Results:
Plaques formed.

Conclusions and Next Steps:
We will begin to flood the plates
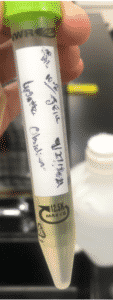
Title: Collection of Low Volume Lysate
Date: 9/23/2021 Redo: No Sample: B
Purpose: This procedure is to extract the phage form a webbed plate to collect the low-volume lysate.
Notes:
1. Using gloves, we disinfected the bench area with CiDecon and spread it with Kimwipes and then followed with 70% EtOH and also wiped with Kimwipes. We turned on a Bunsen burner to create an aseptic environment for the procedure.
2. The 10e-2 plate was chose due to the fact that it contained the most observable plaques without wiping out the plate.
3. We flooded the 10e-2 plate with 8 ml of phage buffer using a serological pipette.
4. We let the plate sit undisturbed for 2 hours.
5. Gathered a serological pipette, pipettor, 15 mL conical tube, 0.22µm filter
6.Opened the filter and removed the plunger from the syringe
7. Titled the plate to one side and used the serological pipette to aspirate most of the lysate
8.Added the lysate into the syringe and securely screwed it onto the filter
9.Placed the filter into the 15 mL conical tube and pushed the plunger down
10.Collected about 5.0 mL of lysate
11. Labeled the tube and stored in the lab refrigerator at 4ºC
Results:
LVL was successfully collected.
Conclusions and Next Steps:
We will then move on to doing the Full Plate Titer procedure using the low volume lysate.
Title: Serial Dilution/Full Plate Titer
Date: 9.28/2021 Redo: No Sample: B
Purpose: To Determine the phage particle concentration of the low volume lysate.
Notes:
1. Using gloves, we disinfected the bench area with CiDecon and spread it with Kimwipes and then followed with 70% EtOH and also wiped with Kimwipes. We turned on a Bunsen burner to create an aseptic environment for the procedure.
2. Using the LVL, we performed a 10-fold serial dilutiion. We obtained 6 microcentrifuge tubes and we labeled them from 10^-1 to 10^-6. Then with every tube we dispensed 90 ul of phage buffer. We transferred 10 ul of the LVL into the labeled 10^-1 and cortexs. This process continued through all of the other tubes.
3. Next, 10 ul form each serial dilution was dispensed ito a correspondoing host bacteria tube using a micropipettor. The host bacterai and lysate mixture is left undisturbed for 10 min. and then we obtained 6 serological pipettes and a pipettor. By using the pipettor and a new pipette we aspirated 3 ml of top agar and transferred it to the mixture of hsot bacteria and phage.
4. Right after, the tip agar was dispensed, we aspirated the entire mixture and transferred into an agar plate that had been previously labeled with the corresponding serial dilution factor and the label included the date, our initials and the procedure.Then we swirled the mixture to spread it on the agar plate and left it undisturbed for around 20 minutes. This process was repeated for the other serial dilution factors.
5. Then we placed the labeled agar plates into the incubator. (23-30ºC).
Results:
Positive results and webbed plates were done correctly.
10^-1 had no visible plaque and top agar fell apart.
10^-2had an uncountable number of plaques.
10^-3 had ~ 450 plaques
10^-4 had ~ 45 plaques
10^-5 had 2 plaques
10^-6 had no visible plaques
Calculation of Titer for 10^-4:
Titer (pfu/ml) = (#pfu/volume used in ul) x (103 ul/ml) x dilution factor
Titer (pfu/ml)= (45 Pfu/10 ul) x (10^3 ul/ml) x (10^4)=4.5 x 10^8 pfu/ml
Conclusions and Next Steps:
Creating Webbed Plates
Amplification
Title: Creating Webbed Plates
Date: 10/11/2021 Redo: Yes Sample: B 10^-3
Purpose: This procedure is to create webbed plates for a high-volume lysate.
Notes:
1. Using gloves, we disinfected the bench area with CiDecon and spread it with Kimwipes and then followed with 70% EtOH and also wiped with Kimwipes. We turned on a Bunsen burner to create an aseptic environment for the procedure.
2. We calculated to find the volume of lysate needed to create a webbed plate: (4.5 x 10^3)/(4.5 x 10^8)=1.0 x 10^-2 ul or 0.01 ul. For this, I decided that 10^-3 looked better and so we tried the 10^-3 dilution for these webbed plates.
3.We gathered 6 agar plates and 6 host bacteria tubes for the webbed plates and we labeled the plates to the dilution factor of 10^-3 and we also included on the plates the date, procedure and our initials
4.We then got 3 microcentrifuge tubes and we labeled them 10^-1, 10^-2 and 10^-3. We then added 90 ul of phage buffer to each tube. Next, with the LVL, we transferred 10 ul of the LVL to the 10^-1 and we vortexed the tube. This procedure was done again to each tube all the way to the 10^-3 tube.
5. Then 10 ul of the 10^-3 tube was added to each of the host bacteria tubes. We left the tube undisturbed for 10 minutes and then we obtained seroligcal pipettes and a pipettor and aspirated 3 ml of top agar and transferred it to the mixture of host bacteria and phage filtrate.
6. Immediately, we then aspirated the mixture from the tube and transferred it to the agar plate. Then we swirled the mixture to spread it on the agar plate and left it undisturbed for around 20 minutes. This process was repeated for the other mixtures.
8. We then placed the labeled agar plates into the incubator(23-30ºC).
Results:
The plates were not as expected and they were not as webbed completely. Plus, on two plates, the top agar did not solidify.

Conclusions and Next Steps:
Retry the webbed plates but do them for the serial dilution factor of 10^-2 to see if we better webbed plates
Title: Creating Webbed Plates
Date: 10/13/2021 Redo: No Sample: B 10^-2
Purpose: This procedure is to create webbed plates for a high-volume lysate.
Notes:
1. Using gloves, we disinfected the bench area with CiDecon and spread it with Kimwipes and then followed with 70% EtOH and also wiped with Kimwipes. We turned on a Bunsen burner to create an aseptic environment for the procedure.
2. We calculated to find the volume of lysate needed to create a webbed plate: (4.5 x 10^3)/(4.5 x 10^8)=1.0 x 10^-2 ul or 0.01 ul. We went with the 10^-2 for these webbed plates.
3.We gathered 6 agar plates and 6 host bacteria tubes for the webbed plates and we labeled the plates to the dilution factor of 10^-2 and we also included on the plates the date, procedure and our initials
4.We then got 3 microcentrifuge tubes and we labeled them 10^-1 and 10^-2. We then added 90 ul of phage buffer to each tube. Next, with the LVL, we transferred 10 ul of the LVL to the 10^-1 and we vortexed the tube. This procedure was done again to each tube all the way to the 10^-2 tube.
5. Then 10 ul of the 10^-2 tube was added to each of the host bacteria tubes. We left the tube undisturbed for 10 minutes and then we obtained seroligcal pipettes and a pipettor and aspirated 3 ml of top agar and transferred it to the mixture of host bacteria and phage filtrate.
6. Immediately, we then aspirated the mixture from the tube and transferred it to the agar plate. Then we swirled the mixture to spread it on the agar plate and left it undisturbed for around 20 minutes. This process was repeated for the other mixtures.
8. We then placed the labeled agar plates into the incubator(23-30ºC).
Results:
Positive results, we managed to get 3 webbed plates but the other 3 plate, the toop agar did not solify.
Conclusions and Next Steps:
Flood plates to collect the high volume lysate created.
Title: Collection of “High” Volume Lysate
Date: 10/14/2021 Redo: No Sample: B 10^-2
Purpose: This procedure is to extract the high volume lysate form the webbed plates.
Notes:
1. Using gloves, we disinfected the bench area with CiDecon and spread it with Kimwipes and then followed with 70% EtOH and also wiped with Kimwipes. We turned on a Bunsen burner to create an aseptic environment for the procedure.
2. We flooded the 10e-2 plate with 8 ml of phage buffer using a serological pipette.
3.. We let the plate sit undisturbed for 2 hours and we collected a serological pipette, pipettor, 15 mL conical tube, 0.22µm filter tpo filter the phage.
4. We opened the filter and removed the plunger from the syringe and we sucked up the fluid from the plate by tilting the plate to a side and uded the serolgical pipette to aspirate the lysate.
5. Added the lysate into the syringe and securely screwed it onto the filter
6. Placed the filter into the 15 mL conical tube and pushed the plunger down.
7. We collected a total of about 10 mL of lysate
8. We labeled the tube and stored in the lab refrigerator at 4ºC
Results:

Conclusions and Next Steps:
We will perform the serial dilution and full plate titer with the high volume lysate.
Title: Serial Dilutions/Full Plate Titer of High Volume Lysate
Date: 10/18/2021 Redo: Yes Sample: B 10^-2
Purpose: This procedure is to determine the concentration of the phage of the high volume lysate which will help for further experiments.
Notes:
1. Using gloves, we disinfected the bench area with CiDecon and spread it with Kimwipes and then followed with 70% EtOH and also wiped with Kimwipes. We turned on a Bunsen burner to create an aseptic environment for the procedure.
2. Using the HVL, we performed a 10-fold serial dilution. We obtained 6 microcentrifuge tubes and we labeled them from 10^-1 to 10^-6. Then with every tube we dispensed 90 ul of phage buffer. We transferred 10 ul of the HVL into the labeled 10^-1 and cortexs. This process continued through all of the other tubes.
3. Next, 10 ul from each serial dilution was dispensed ito a corresponding host bacteria tube using a micropipettor. The host bacteria and lysate mixture is left undisturbed for 10 min. and then we obtained 6 serological pipettes and a pipettor. By using the pipettor and a new pipette we aspirated 3 ml of top agar and transferred it to the mixture of hsot bacteria and phage.
4. Right after, the tip agar was dispensed, we aspirated the entire mixture and transferred into an agar plate that had been previously labeled with the corresponding serial dilution factor and the label included the date, our initials and the procedure. Then we swirled the mixture to spread it on the agar plate and left it undisturbed for around 20 minutes. This process was repeated for the other serial dilution factors.
5. Then we placed the labeled agar plates into the incubator. (23-30ºC).
Results:
Negative results. The plates were wiped out and we did not see any plaques on all of the plates.

Conclusions and Next Steps:
We will do the serial dilution and full plate titer of the HVL again and see if we get better results.
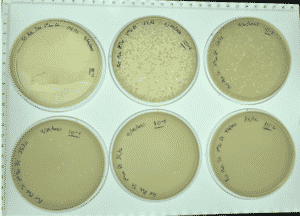
Title: Serial Dilutions/Full Plate Titer of High Volume Lysate
Date: 10/20/2021 Redo: No Sample: B 10^-2
Purpose: This procedure is to determine the concentration of the phage of the high volume lysate which will help for further experiments.
Notes:
1. Using gloves, we disinfected the bench area with CiDecon and spread it with Kimwipes and then followed with 70% EtOH and also wiped with Kimwipes. We turned on a Bunsen burner to create an aseptic environment for the procedure.
2. Using the HVL, we performed a 10-fold serial dilution. We obtained 6 microcentrifuge tubes and we labeled them from 10^-1 to 10^-6. Then with every tube we dispensed 90 ul of phage buffer. We transferred 10 ul of the HVL into the labeled 10^-1 and cortexs. This process continued through all of the other tubes.
3. Next, 10 ul from each serial dilution was dispensed ito a corresponding host bacteria tube using a micropipettor. The host bacteria and lysate mixture is left undisturbed for 10 min. and then we obtained 6 serological pipettes and a pipettor. By using the pipettor and a new pipette we aspirated 3 ml of top agar and transferred it to the mixture of hsot bacteria and phage.
4. Right after, the tip agar was dispensed, we aspirated the entire mixture and transferred into an agar plate that had been previously labeled with the corresponding serial dilution factor and the label included the date, our initials and the procedure. Then we swirled the mixture to spread it on the agar plate and left it undisturbed for around 20 minutes. This process was repeated for the other serial dilution factors.
5. Then we placed the labeled agar plates into the incubator. (23-30ºC).
Results:
Positive results, webbed plates were created successfully and with no contamination.
10^-1 had no visible plaques
10^-2 had no visible plaques
10^-3 had no visible plaques
10^-4 had an uncountable amount of plaques
10^-5 had around 5,500 plaques
10^-6 had around 550 plaques

Calculation of Titer for 10^-6:
Titer (pfu/ml) = (#pfu/volume used in ul) x (10^3 ul/ml) x dilution factor
Titer (pfu/ml)= (550 Pfu/10 ul) x (10^3 ul/ml) x (10^6)=5.5 x 10^10 pfu/ml.
With this result, we aere suggested to continue to the next step.
Conclusions and Next Steps:
We will continue to beginning to enter the pahge int the actinobacteriophage database.
Title: Entering the Phage into Actinobacteriophage Database
Date: 11/1/2021 Redo: No Sample: Obsidian
Purpose: This procedure is to include our phage in the Actinobacteriophage Database to make it available to other scientists.
Notes:
1.The phage was named “Obsidian” according to the rules found in the “Phages” dropdown menu and “Naming Rules” on phagedb.org.
2.We registered for a PhageDB account by clicking on the “Sign in or Register” button at the bottom left column on the page.
3. We entered the phage on PhageDB:
- After logging into the site, we selected “Data” dropdown menu and clicked “Add a Phage.”
- Then we answered all of the fields that we were able to fill in with the available data and time.
4.We then clicked “Submit” to send the request to PhageDB. The submission would then be reviewed and approved by a scientist at the University of Pittsburgh.
Results:
Submission approved.
Conclusions and Next Steps:
Move on the archiving the phage sample
Title: Archiving The Phage Sample
Date: 10/1/2021 Redo: No Sample: Obsidian
Purpose: This procedure is to prepare a high titer lysate for long-term storage.
Notes:
1. We began by putting on gloves and disinfected the bench area with CiDecon and spread with Kimwipes and then followed by 70% EtOH and wiped with kimwipes. Most of the procedure will be done under a fume hood since DMSO is a flammable reagent.
2. Certify the phage samples on PhageDB.org and make sure the correct details of our phage were shown.
3. Three tubes were used and barcoded, two for the University of Pittsburgh and one for storage at the institution (Tarleton).
4. Using aseptic technique, the tubes were filled with sterile bead approximately 1.5 cm form the top of the tube.
5. Next, we dispensed 2.8 ml of high-titer lysate with a serological pipette and pipettor into a sterile 15 m conical tube. Then we dispensed 200 ul of DMSO into the same 15 ml conical tube with a micropipette with a clean tip and then the conical tube was gently vortexed.
6.We dispensed the DMSO/lysate mixture into each tube until the beads were covered and we used clean pipettes tips for each labeled tube. The tubes were close properly.
7. Two of the tubes were then stored into a box at 4ºC for shipment to the University of Pittsburgh and the third tube was frozen at the institution (Tarleton).
Results:
Conclusions and Next Steps:
The next step is to start DNA extraction.
DNA Extraction
Title: DNA Extraction-Day 1
Date: 11/3/2021 Redo: No Protocol: Alternate 3.5
Purpose: The purpose of this procedure is to extract DNA from the phage
Notes:
1. After cleaning the bench and putting on gloves, we mixed the HVL gently and then we aliquot 5 ml of our lysate into a 15 ml conical tube. The tube was then given to the TA who added 20 ul of nuclease mix.
2. Once nuclease was added, we gently inverted the tube and incubated at 37°C for 10 minutes.
3. Then the lysate was aliquot into 5 microcentrifuge tubes and had 1 ml each.
4. Next in each tube, 20 ul of ZnCl2 was added and was mixed by gently inverting the tubes and incubated at 37°C for 5 minute and at this point this precipitates the phage.
5. The tubes are then centrifuged at 10,00rpm for 1 minute to pellet the phage.
THE NEXT TWO STEPS MUST BE DONE QUICKLY AND EFFECIENTLY.
6. The supernatants was removed by aspiration and discarded and the pellet was left undisturbed.
7. The pellets were resuspended in 500ul TES buffer per tube and incubated at 60°C for 15 minutes to denature the capsids which exposes the DNA, while protecting it form the nuclease activity.
8. Next, 1 ul of Proteinase K was added and mixed gently and incubated at 37°c for 10min to eliminate any residual nuclease activity.
9. Then 60 ul of potassium acetate was added to each tube and then mixed well. They were then left on ice for 15 min. A white precipitate was formed which represents the capsids.
10.The tubes are centrifuged at 4C for 1 min at 12,00rpm to pellet the capsids. The we kept the supernatants which contained the DNA and they were placed into new microfuge tubes. The tubes with the pellets were thrown away.
11. Lastly 500 ul of isopropanol was added to each of the tubes with the supernatant, mix and left on ice until the next lab.
Conclusions and Next Steps:
We will come back the next day to finish the 2nd part of the extraction protocol
Title: DNA Extraction-Day 2
Date: 11/5/2021 Redo: No Protocol: Alternate 3.5
Purpose: The purpose of this procedure is to extract DNA from the phage.
Notes:
1. We remove the tubes from the ice and we centrifuge the tubes at top speed for 10 min to pellet DNA and we discarded the supernatant into the waste tube that we got for the waste. We did see some pellet at the bottom of the tubes.
2. We added 250 ul of 70% ethanol to each tube and we spun it down again for 1 min at top speed. The ethanol washes the DNA pellet and then we discard the supernatant from those tubes into the waste tube.
3. We dry the DNA pellets at room temperature by turning the tubes upside down onto paper towels and we tapped out the excess liquid and we leave upside down until the pellets turned cleared. To make sure they were dry, we placed them into the 30°C incubator. We waited around 1 hour to dry.
4. We resuspended the first pellet with 50 ul of nuclease-free water and we used that solution to resuspend the next pellet. We continued to resuspend the rest of the pellets in the other tubes with the same 50 ul of water.
5.We check the DNA concentration and quality with the Nanodrop and record the DNA concentration.
Results:
Note: There was salt contamination in our DNA samples so the A260/A230 numbers were off
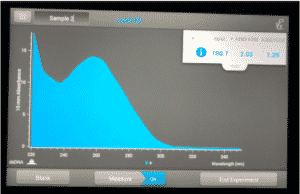
ng /ul #: 700.7
A260/A280 #: 2.03
A260/A230 #: 1.29
Conclusions and Next Steps:
The quality of A260/A280 and A260/A230 numbers were not the best and we decided to try and precipitate the DNA.
Title: Reprecipitation
Date: 11/8/2021 Redo: No Protocol: Alternate 3.5
Purpose: The purpose of this procedure is to extract DNA from the phage for future procedure.
Notes:
11/8/2021
1. We calculated that we needed Xul of 3M sodium acetate and Xul of 100% ethanol to resuspend the DNA sample and we left it on an ice bed until next lab.
2. The tube were left in the freezer for two days.
11/10/2021
3. The tube was centrifuged at full speed of 14000rpm at a temperature of 4°C for 30 minutes.
4. Then we discarded the supernatant into a waste tube.
5.Next, 500 ul of ice cold 75% ethanol was used to wash the pellets and was centrifuged for 10 min at the top speed.
6.The ethanol was removed from the tube and spun for 10 secs at top speed to remove traces of ethanol.
7. Step 5 and 6 was done again to wash the DNA pellet again.
8. Then the pellet was dried under a fume hood with the lid open to help dry the sample quicker.
9. Once it was dry, the pellet was resuspended in 50 ul of nuclease-free water and the the solution was aspirated to mix it well. It was done gently as to not harm the DNA.
10.Then the DNA concentration and quality was checked with the Nanodrop.
Qubit:
11.We did the Quibit to get a better reading of the DNA concentration of the sample.
12.First, we made a working buffer with 597 ul of dsDBA HS buffer and added 3 ul of dsDNA HS reagent (blue top) to the buffer and then we vortexed.
13. Then we ontained 3 microcentrifuge tubes, we labeled then as 1 for Standard 1, 2 for Standard 2 and DNA for the sample that we have.
14. For Standard one we dispensed 190 ul of working buffer and then added 10 ul of Standard 1 (red top)
15. For Standard 2, we added 190 ul of working buffer and then added 10 ul of Standard 2 (yellow top)
16. For the DNA sample, we added 198 ul of working buffer and then 2 ul of DNA to the tube.
17. We then vortexed all the tubes for 3 sec and incubate at room temperature for 2 minutes. Then we placed them in order into the Quibit to read the concentration.
Results:
ng /ul #: 248.4
A260/A280 #: 2.00
A260/A230 #: 1.93
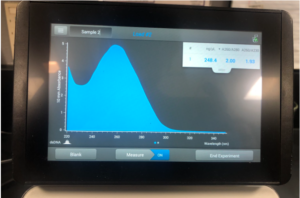
Qubit DNA Concnetation: 29.2 ng/ul

Conclusions and Next Steps:
We will move on to doing restriction enzymes and gel electrophoresis with our DNA sample.
Characterization
Title: Mounting Phage Samples for TEM and Staining with Uranyl Acetate
Date: 10/28/2021 Redo: No Sample: –
Purpose: This procedure is to prepare phage for viewing by using a transmission electron microscope.
Notes:
1. Using gloves, we disinfected the bench area with CiDecon and spread it with Kimwipes and then followed with 70% EtOH and also wiped with Kimwipes.
Preparing Phage Samples:
2. we transferred 1 ml of our HVL into a sterile microcentrifuge tube.
3. We centrifuged the tube for 1 hour at 4°C at the top speed to get the phage particles to the bottom.
4.We then used a micropipettor to carefully remove the supernatant without disturbing the phage at the bottom of the tube. We got as much out as possible.
5. We added 10 ul of phage bugger and let the phage resuspend at 4°C for 1 hour.
6. We then started to do the rest of the protocol to avoid damaging the phage heads.
Prepare Work Area (was done by instructor)
1. We put on a fresh pair of gloves and then we covered the area with bench paper to have a clean work surface.
2. The cover of a 5 x 5 cm piece of parafilm was removed and the parafilm was placed at the center of the petri dish lid and then we placed a PELCO tab at the center of the parafilm and left the adhesive exposed.
3. We used the EM forceps to grab a grid by its edge and the grisd was placed right against the side of the tab and we had the dark shiny side facing up.
Mount and Stain Phage:
1. We used a micropipettor to transferre 10 ul of the lysate onto the grid whil not touching the tip to the grid.
2. We looked at Table 8.1b-1 in the procedure and we decide that the pahge would settle and attach to the grid for 2 minutes because the caluclated titer was 10^9.
3. Then we wicked off the excess fluid with the edges of filter paper.
4. The grid was rinsed 2 times by carefully pipetting 10 ul of water onto the grid and to have it sit for 2 minutes each time. The water was wicked off in the same manner for the excess fluid.
5.Then 10 ul of uranyl acetate was added to the grid and sat for 2 minutes
6.The excess was wicked off until the surface had an oil-like look.
7.The grid was then allow to air dry and placed safely into the grid box
Results:
N/A
Conclusions and Next Steps:
We start on the first DNA Extraction.
Title: Restriction Enzyme Digest
Date: 11/10/2021 Redo: No Sample: DNA sample 1
Purpose: This procedure is to add restriction enzyme to cut the DNA of our sample and to visualize it for the next part in our procedure.
Notes:
The restriction enzymes were used in the procedure: Haelll, NspI, Sacll and Sall
Preparing genomic DNA:
1. We gently mixed our DNA sample by slightly vortexing it at a low speed. Then we incubated our sample at 65°C for 10 minutes, and then immediately placed the sample in ice and then centrifuged the tube for less than a minute.
2. By using the concentration of our DNA sample (instructor decided between Nanodrop and Qubit), we calculated the volume of DNA need to obtain 0.5 ug of DNA.
Calculation of ul DNA=0.5ug (1ml/110 ug)(100 ul/1ml)= 4.5 ul
We calculated the amount of ul need for DNA to obtain 0.5ug was 4.5 ul.
Setting Up Restriction Enzyme Reactions:
3. We set 5 tubes for each of the enzymes reactions. One for uncut DNA and the other 4 corresponding to the restriction enzymes and then we used the table to determine the volume that is needed for each tube:
- Total Volume (25 ul)
- 4.5 ul of DNA
- 0.5 ul of Restrictive Enzyme
-
- Hae lll, Nsp l, and Sac ll required CutSmart Buffer. Sal I required 3.1 Buffer
-
- 2.5ul 10X Reaction Buffer
- 17.5 sterile ddH2O
- Uncut
- 4.5 ul of DNA
- 2.5ul 10X Reaction Buffer
- 18 ul sterile ddH2O
Everything was calculated to make sure that each tube had a final volume of 25 uL
4. Then the tubes were gently mixed and spun in the centrifuge for less than a minute.
5. The the tubes were incubated at 37°C for 1 hour.
6. The tubes were then incubate at the times listed in neb.vom webside for heat inactivation (Hae III :80°C for 20 min, Nsp I: 65°C for 20 min, Sac II: 65°C for 20 min, Sal I:65°C for 20 min)
7.Once the incubation is done, we spun the tubes for less than a minute and stored them in the freezer at -20°C
Conclusions and Next Steps:
We will continue to casting the agarose gel and dong the gel electrophoresis for the DNA
Title: Casting Agarose Gel and Gel Electrophoresis
Date: 11/11/2021Redo: No Sample: DNA Sample 1
Purpose: This procedure is to prepare gel for gel electrophoresis to view the digested DNA.
Notes:
Part 1-Making and Casting Agarose Gel
1. We set up the gel electrophoresis apparatus and placed the comb to prepare for the gel.
2. We calculated that we needed 0.24 g of agarose powder and we transferred that to an Erlenmeyer flask.
3. Then we added 30 ml of 1X TBE Buffer to the Erlenmeyer flask and swirled to mix.
4. Next we heated the mixture for 1 minute, at 30 sec, we breiefly take it out and gently swirled to mix and put it back into the microwave to continue heating.
5. We took it out and allow the flask to cool for around 15 minutes.
6. Once it cooled down, we added 1.5 ul of ethidium bromide as the gel dye and then mixed the mixture by swirling it.
7. We then pored the mixture fo agarose adnd ethidium bromide into the gel cast and we used a 10 well comb to creat the well in the gel.
8. We let the gel sit for arond 20 minutes to cool and solidify
9.Onces solidified, we carefully removed the cmob and then gently remove the cast carrying the gel and then we placed the cast platform back into the apparatus but we put the wells in the direction of the (-) cathode.
10. Lastly, we poured 1X TBE Buffer into the gel apparatus until the gel was submerged in about 1/4 inch of buffer.
Part 2-Gel Electrophoresis
1.Once the gel was properly placed, we prepared the restriction enzyme digest samples for electrophoresis.
a.) % ul of concentrated 6X loading dye was added to each of the 25 ul restriction samples
b.)We then prepared our ladder for the procedure, we got another microcentrifuge tube and then we added 1 ul of ladder(HindiIII Digest-given by instructor), 5 ul o 6X loading dye and then 24 ul of ddH2O(Nuclease-Free Water).
c)Once the smaples were made, we place the samples into the 65°C incubator for 5 minutes and then immediately, we placed the samples on ice and spun them in the microcentrifuge for around 15 secs at 10,000 rpm.
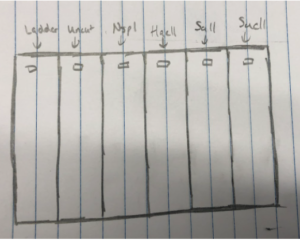
2.We loaded the gel in the following order:
Ladder – Uncut DNA – Nspl – Haell – Sall – Sacll
3. Using a fresh tip and a micropipettor, we loaded 20ul of each sample into the wells.
4. The picture below shoes how we saw the wells and how we knew which sample was in each well.
5. Once the gel was set up, we plugged in the electrodes and then we ran the gel electrophoresis apparatus at a voltage of 100 V.
6.We ran the gel until the dye migrated to around the 506 marker on the gel box.
7.After 1 hour and 30 minutes, we turned off the power and took out the gel box. We then moved the gel to the storage room to view the gel under the UV transilluminator.
Results:
The results are positive, the lines are present but they are faded. Dr. Edwards said it was a good to move forward.

Conclusions and Next Steps:
We can now begin to label the gel electrophoresis.