Discovery of Kudou
Kudou Information
Morphology: Siphoviridae

Sample Collection
| Collector Name |
Azah Williams | Li Prahl | Li Prahl | Li Prahl |
| Sample No. | 1 | 2 | 3 | 4A/4B |
| Date of Collection | 08/28/23 | 08/28/23 | 09/05/23 | 09/05/23 |
| Sample Type | Soil | Soil | Soil | Soil |
| General Location | Bosque River Riverbed | Bosque River Riverbed | Northern Bosque Riverbed | Suburban Backyard |
| Location Description | Right by the riverbed, where the water is clear. | Farther down by riverbed where the water is clear. | By the riverbed and slightly under the dock. | In a backyard, by the air conditioner where the dirt is moist. |
| GPS Coordinates |
378 W Long ST Stephenville, TX 76401
32.2134° N, 98.2018° W
|
378 W Long ST Stephenville, TX 78401 32.2134° N, 98.2018° W |
644 S Graham ST Stephenville, TX 76401 32.2149°N, 98.2027° W
|
985 N Lillian ST Stephenville, TX 76401 32.2211°N, 98.2212°W
|
| Sample Depth | Surface of Riverbed | Surface of the Riverbed | Surface by Riverbed, slightly under the dock. | A few centimeters under the surface near the air conditioner. |
| Ambient Temperature | 34°C | 34°C | 39°C | 39°C |
| Collector Name |
Azah Williams | Azah Williams | ||
| Sample No. | 5 | 6 | ||
| Date of Collection | 09/16/23 | 09/17/23 | ||
| Sample Type | Soil | Soil | ||
| General Location | 1604 four seasons LN fort worth Tx 76140 | 2732 clovermeadow dr fort worth TX 76123 | ||
| Location Description | The end of the road by an apartment building by the woods | outside the house by the sidewalk under the shade of a tree | ||
| GPS Coordinates |
|
|
||
| Sample Depth | surface | surface | ||
| Ambient Temperature | 35.7°C | 27.8°C | °C | °C |
Isolation/Purification
Title: Isolation/Purification of Environmental Sample
Date: 08/30/23
Redo: No
Sample: 1
Purpose: This procedure is used to isolate bacteriophages from soil samples and infect a host through plaque assay.
Notes:
1. Using gloves, the bench area was first sprayed with CiDecon and spread with paper towels, followed by 70% Ethanol. We then lit the bunsen burner.
2. A 15 ml conical tube was filled approximately to 9ml with dirt. With a serological pipet, 4ml of liquid media was poured into the 15 ml conical tube. The tube was lightly inverted until the mixture was properly combined.
3. Sample 1 was then placed in a shaking incubator, shaken at 250 rpm for one hour at 9:30am.
4. Sample was taken out of the shaking incubator and sat for approximately 1 minutes.
5. Using a syringe (without filter), approximately 2ml of liquid from the top of the flooded sample was collected. The filter was then attached to the top of the syringe. Approximately 1 ml of filtrate was put into a labeled microcentrifuge tube and capped immediately.
6. We opened the pippette over the open flame and attached it to the pippettor, where we obtained approximately 3ml of agar and placed it into the tube of host bacteria and samples. It was immediately sucked back up and transferred into the petri dish, and quickly tilted the dish to cover the whole surface of the petri dish. It was then left to rest for 20 minutes and then incubated at 11:19pm
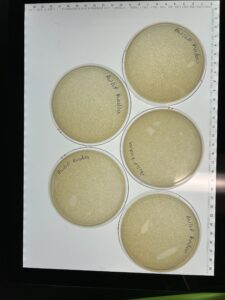
Results:
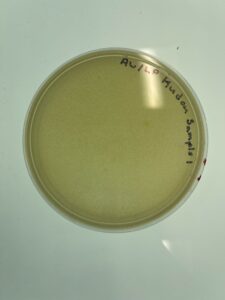
Sample 1 was checked at September 1st at 4:47pm, and we have found no plaques or lawn spots seen on the picture above.
Conclusions and Next Steps:
Because there were plaques, therefore we have to get new dirt sample and do more direct isolation testing.
Title: Isolation/Purification of Environmental Sample
Date: 08/30/23
Redo: No
Sample: 2
Purpose: This procedure is used to isolate bacteriaphage from soil samples and infect a host through plaque assay.
Notes:
1. Using gloves, the bench area was first sprayed with CiDecon and spread with paper towels, followed by 70% Ethanol. We then lit the bunsen burner.
2. A 15 ml conical tube was filled approximately to 8ml with dirt. With a serological pipet, 4ml of liquid media was poured into the 15 ml conical tube. The tube was lightly inverted until the mixture was properly combined.
3. Sample 2 was then placed in a shaking incubator, shaken at 250 rpm for one hour at 9:30am.
4. Sample 2 was taken out of the shaking incubator and sat for approximately 1 minutes.
5. Using a syringe (without filter), approximately 2ml of liquid from the top of the flooded sample was collected. The filter was then attached to the top of the syringe. Approximately 1 ml of filtrate was put into a labeled microcentrifuge tube and capped immediately.
6. We opened the pippette over the open flame and attached it to the pippettor, where we obtained approximately 3ml of agar and placed it into the tube of host bacteria and sample 2. It was immediately sucked back up and transferred into the petri dish, and quickly tilted the dish to cover the whole surface of the petri dish. It was then left to rest for 20 minutes and then incubated at 11:19pm
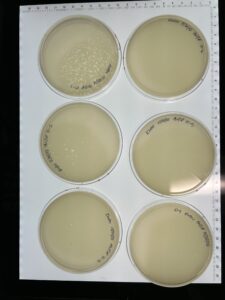
Results:
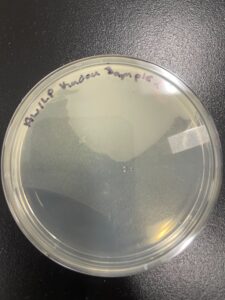
The picture above shows that on August 31st at 5:07pm, and that sample 2 had become contaminated and needed to be disposed of.
Conclusions and Next Steps:
We need to be more vigilant during the process of mixing solutions, sample, and the host bacteria in order to not contaminate the plate. We need to collect another dirt sample and do the same testing again.
Title: Direct Isolation/Purification of Environmental Sample
Date: 09/11/23
Redo: No
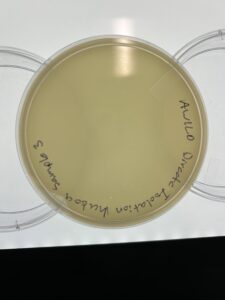
Sample: 3
Purpose: This procedure is used to isolate bacteriaphages from soil samples and infect a host through plaque assay.
Notes:
1. Using gloves, the bench area was first sprayed with CiDecon and spread with paper towels, followed by 70% Ethanol. We then lit the bunsen burner.
2. The conical tube was filled with 7ml of dirt. We then added 3ml of liquid media. It was then placed in the shaking incubator at 250 rpm for 1 hour at 10:06am.
3. We removed sample 3 from the shaking incubator and used a syringe to remove approximately 2ml of liquid media. We attached the filter and depressed the syringe plunger, dispensing .5ml into the microcentrifuge tube and immediately capped it.
4. We placed the solution in 250 μl of the host bacteria. We let it sit for 5 minutes then transferred 3ml of top agar into the host tube. It was immediately sucked back up and placed into the petri dish. We tilted the plate until it was all covered with our top agar mixture. We let it sit for 3 minutes then placed it in the incubator at 11:17am on 09/11/23.
Results: There are no signs of plaques in sample 3 as of 09/13/23
Conclusion and Next Steps
Due to the fact there are no positive plaques, we need to go back and collect more dirt samples to isolate.
Title: Enriched Isolation/Purification of Environmental Sample
Date: 09/06/23
Redo: No
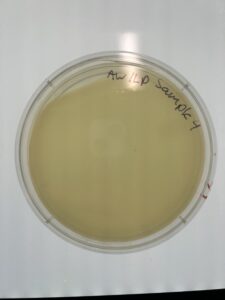
Sample: 4A
Purpose: This procedure is used to isolate bacteriaphages from soil samples and infect a host through plaque assay.
Notes:
1. Using gloves, the bench area was first sprayed with CiDecon and spread with paper towels, followed by 70% Ethanol. We then lit the bunsen burner.
2. We filled a 50ml conical tube with our dirt sample up to 10ml. We then added liquid media up to the 25 mark. We then placed it in the shaking incubator at 9:20 for 1 hour. We then balanced the tubes and centrifuge at 2,000 x g for 10 minutes to pellet.
3. We then filtered sample 4A with a .22 µm filter to remove unwanted bacteria and soil particles. We collected the flow through a sterile 50ml sterile conical tube and recovered 15 ml.
4. We then added 0.5ml of bacterial host culture to the conical tube.
5. We then incubated the conical tube at 10:59am at 09/06/23, shaking at 220 rpm for 2 days. Because we are using a 50ml conical tube, we screwed the cap on one-quarter of a turn so that the conical tube is only loosely capped. We secured the cap with a short piece of lab tap.
6. Then using gloves, the bench area was first sprayed with CiDecon and spread with paper towels, followed by 70% Ethanol.
7. We continued work on 09/11/23. The bench area was sprayed with CiDecon and spread by paper towels, followed by 70% Ethanol.
8. Using a pipette, we transfered 1.4 ml of the enriched culture from the conical tube to a microcentrifuge tube. We then spun the tubes in a microcentrifuge for 1 minute, each tube balanced on each side. Once the supernatant was seperated with the bacteria on the bottom, we transfered it to two clean microcentrifuge tubes.
9. After we collected the sample, we used a micropipette to collect 10 μl and combined it with 250 μl of the host bacteria. After that we combined 3ml of agar with the solution, and put it into a petri dish. We let it sit for 20 minutes to let the agar totally solidify. We then stuck it into the incubator at 10:03am on 09/11/23.
Results: Sample 4A has no signs of plaques as of 09/13/23.

Conclusion and Next Steps
Because there are no plaques, we need to go back to collect more samples of dirt.
Direct Isolation/Purification of Environmental Sample
Date: 09/13/23
Redo: No
Sample: 4B
Purpose: This procedure is used to isolate bacteriaphages from soil samples and infect a host through plaque assay.
Notes:
1. Using gloves, the bench area was first sprayed with CiDecon and spread with paper towels, followed by 70% Ethanol. We then lit the bunsen burner.
2. The conical tube was filled with 7ml of dirt. We then added 3ml of liquid media. It was then placed in the shaking incubator at 250 rpm for 1 hour at 9:22am.
3. We removed sample 4B from the shaking incubator and used a syringe to remove approximately 2ml of liquid media. We attached the filter and depressed the syringe plunger, dispensing .5ml into the microcentrifuge tube and immediately capped it.
4. We placed the solution in 250 μl of the host bacteria. We let it sit for 5 minutes then transferred 3ml of top agar into the host tube. It was immediately sucked back up and placed into the petri dish. We tilted the plate until it was all covered with our top agar mixture. We let it sit for 4 minutes then placed it in the incubator at 10:39am on 09/13/23.
Results: There are no plaques present in the host bacteria of sample 4B.
Conclusion and Next Steps: We need to collect more dirt and redo the process to isolate a plaque.
Title: Direct Isolation/Purification of Environmental Sample
Date: 09/20/23
Redo: No
Sample: 5
Purpose: This procedure is used to isolate bacteriaphages from soil samples and infect a host through plaque assay.
Notes:
1. Using gloves, the bench area was first sprayed with CiDecon and spread with paper towels, followed by 70% Ethanol. We then lit the bunsen burner.
2. The conical tube was filled with 8ml of dirt. We then added 5ml of liquid media. It was then placed in the shaking incubator at 250 rpm for 1 hour at 09:09am.
3. We removed sample 5 from the shaking incubator and used a syringe to remove approximately 2ml of liquid media. We attached the filter and depressed the syringe plunger, dispensing .5ml into the microcentrifuge tube and immediately capped it.
4. We placed the solution in 250 μl of the host bacteria. We let it sit for 5 minutes then transferred 3ml of top agar into the host tube. It was immediately sucked back up and placed into the petri dish. We tilted the plate until it was all covered with our top agar mixture. We let it sit for 4 minutes then placed it in the incubator at 10:23am on 09/20/23.
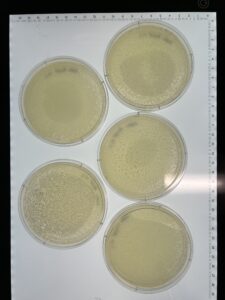
Results: We have a good amount of plaques present in this sample.
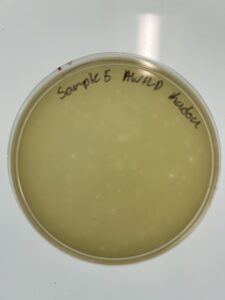
Conclusion and Next Steps:
We will choose between sample 5, and sample 6 to see which plaque we pick to use in serial dilution.
Title: Enriched Isolation/Purification of Environmental Sample
Date: 09/18/23
Redo: No
Sample: 6
Purpose: This procedure is used to isolate bacteriaphages from soil samples and infect a host through plaque assay.
Notes:
1. Using gloves, the bench area was first sprayed with CiDecon and spread with paper towels, followed by 70% Ethanol. We then lit the bunsen burner.
2. We filled a 50ml conical tube with our dirt sample up to 10ml. We then added liquid media up to the 35 mark. We then placed it in the shaking incubator at 9:12 for 1 hour. We then balanced the tubes and centrifuge at 2,000 x g for 10 minutes to pellet.
3. We then filtered sample 6 with a .22 µm filter to remove unwanted bacteria and soil particles. We collected the flow through a sterile 50ml sterile conical tube and recovered 15 ml.
4. We then added 0.5ml of bacterial host culture to the conical tube.
5. We then incubated the conical tube at 10:24am at 09/18/23, shaking at 220 rpm for 2 days. Because we are using a 50ml conical tube, we screwed the cap on one-quarter of a turn so that the conical tube is only loosely capped. We secured the cap with a short piece of lab tap.
6. Then using gloves, the bench area was first sprayed with CiDecon and spread with paper towels, followed by 70% Ethanol. We then lit the bunsen burner.
7. We continued work on 09/20/23. The bench area was sprayed with CiDecon and spread by paper towels, followed by 70% Ethanol.
8. Using a pipette, we transfered 1.4 ml of the enriched culture from the conical tube to a microcentrifuge tube. We then spun the tubes in a microcentrifuge for 1 minute, each tube balanced on each side. Once the supernatant was seperated with the bacteria on the bottom, we transfered it to two clean microcentrifuge tubes.
9. After we collected the sample, we used a micropipette to collect 10 μl and combined it with 250 μl of the host bacteria. After that we combined 3ml of agar with the solution, and put it into a petri dish. We let it sit for 7 minutes to let the agar totally solidify. We then stuck it into the incubator at 9:45am on 09/20/23.
Results: We have a huge amount of plaques present in the host bacteria.

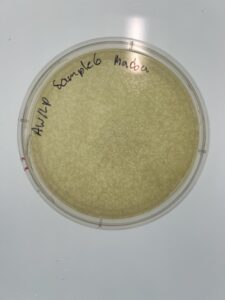
Conclusion and Next Steps:
We will have to pick between sample 5 and sample 6 (1 or 2) to pick a plaque and proceed with serial dilution.
Title: Serial Dilution
Date: 09/25/23
Redo: No
Sample: 6
Purpose: This procedure is used to prepare liquid phage samples to decrease the concentration.
Notes:
1. Using gloves, the bench area was first sprayed with CiDecon and spread with paper towels, followed by 70% Ethanol. We then lit the bunsen burner.
2. Sample 6 was inspected, where we picked out plaque H to use for our serial dilution.
3. We set up a 10-fold serial dilution all the way up to 10-8. We arranged the set of microcentrifuge tubes in a rack and labeled them accordingly such as 10-1, 10-2, 10-3, all the way to 10-6. We then added 90μl of phage buffer to each tube.
4. Then, using sample 6H, we added 10μl to 10-1. We switched out the pipette tip and vortexed the sample. We repeated this process all the way up to 10-6.
5. We then collected 10μl of each tube and combined it with 250μl of the host bacteria. Using a sterile 5ml pipette, we combined 3ml of top agar into the inoculated host tube. This was immediately collected and transfered into each plate labeled accordingly to each dilution sequence. These plates were then let to rest for 10 minutes and incubated at 10:17am on 09/25/23.
Results: We are phage positive up to 10-3.

Conclusion and Next Steps: We will pick another isolated plaque and do another serial dilution.
Amplification
Title: Second Round of Serial Dilution to Purify Phage
Date: 09/27/23
Redo: No
Sample: 6C
Purpose: This procedure is used to prepare liquid phage samples to decrease the concentration.
Notes:
- 1. Using gloves, the bench area was first sprayed with CiDecon and spread with paper towels, followed by 70% Ethanol. We then lit the bunsen burner.
- 2. 10-3 was inspected, where we picked out plaque C to use for our serial dilution.
- 3. We set up a 10-fold serial dilution all the way up to 10-6. We arranged the set of microcentrifuge tubes in a rack and labeled them accordingly such as 10-1, 10-2, 10-3, all the way to 10-6. We then added 90μl of phage buffer to each tube.4. Then, using sample 6C, we added 10μl to 10-1. We switched out the pipette tip and vortexed the sample. We repeated this process all the way up to 10-6.5. We then collected 10μl of each tube and combined it with 250μl of the host bacteria. Using a sterile 5ml pipette, we combined 3ml of top agar into the inoculated host tube. This was immediately collected and transferred into each plate labeled accordingly to each dilution sequence. These plates were then let to rest for 10 minutes and incubated at 10:01am on 09/27/23.
Results: We have a webbed plate of 10^1, and phages present all the way up to 10^5.
Conclusions and Next Steps: We will use 10^1, the webbed plate to flood with phage buffer to obtain high titer lysate.
Title: Collecting Lysate
Date: 10/02/23
Redo: No
Sample: 6C (10^1)
Purpose: To generate a highly concentrated liquid phage sample
Notes:
- 1. Using gloves, the bench area was first sprayed with CiDecon and spread with paper towels, followed by 70% Ethanol. We then lit the bunsen burner.
- 2. We picked out sample 6C 10^1, where the plate is webbed with phages. We then applied 8ml of sterile phage buffer to the webbed plate, and let it sit at room temperature for 8 hours.
3. At 4:00pm of 10/02/23, we came back. Using gloves, the bench area was first sprayed with CiDecon and spread with paper towels, followed by 70% Ethanol. We then lit the bunsen burner.
4. We removed the lid from the plate and tilted it so the lysate pooled to one side. Preparing a 0.22μm filter, we left it in the package. Using a syringe we sucked up all the remaining lysate from the plate.
5. We then attached the filter and depressed the plunger to collect the high titer lysate into a 15ml sterile conical tube. It was then labeled appropriately and stored in the isolation bin of the fridge.
-
- Results: Collected lysate.
- Conclusions and Next Steps: We will use the lysate sample to then proceed to a full plate titer.
Title: Full Plate Titer
Date: 10/04/23
Redo: No
Sample: 6C (10^1) Lysate
Purpose: To calculate titer, and to see which dilution will produce webbed plates.
Notes:
1. Using gloves, the bench area was first sprayed with CiDecon and spread with paper towels, followed by 70% Ethanol. We then lit the bunsen burner.
2. We set up a 10-fold serial dilution all the way up to 10-4. We arranged the set of microcentrifuge tubes in a rack and labeled them accordingly such as 10-1, 10-2, 10-3, all the way to 10-4. We then added 90μl of phage buffer to each tube.
3. Then, using sample 6C lysate, we added 10μl to 10-1. We switched out the pipette tip and vortexed the sample. We repeated this process all the way up to 10-4.
4. We then collected 10μl of each tube and combined it with 250μl of the host bacteria. Using a sterile 5ml pipette, we combined 3ml of top agar into the inoculated host tube. This was immediately collected and transferred into each plate labeled accordingly to each dilution sequence. These plates were then let to rest for 10 minutes and incubated at 09:21am on 10/04/23.
Results: We have successfully made a webbed plate from our lysate.
Conclusion and Next Steps:
Because we have the appropriate amount of phages, we will use the lysate to make more webbed plates.
Title: Making Webbed Plates From A Lysate of Known Titer
Date: 10/09/23
Redo: No
Sample: 6C (10^1) Lysate
Purpose: To create a plate with a very high density of plaques from a lysate of known titer
Notes:
1. Using gloves, the bench area was first sprayed with CiDecon and spread with paper towels, followed by 70% Ethanol. We then lit the bunsen burner.
2. We calculated the number of plaques needed. In our 10^2 plate, we have roughly 2 thousand plaques.
3. We set up a 10-fold serial dilution all the way up to 10-2. We arranged the set of microcentrifuge tubes in a rack and labeled them accordingly such as 10-1 and 10-2. We then added 90μl of phage buffer to each tube.
4. Then, using the lysate, we added 10μl to 10-1. We switched out the pipette tip and vortexed the sample. We repeated this process all the way up to 10-2.
5. We then collected 10μl of each tube and combined it with 250μl of the host bacteria. Using a sterile 5ml pipette, we combined 3ml of top agar into the inoculated host tube. This was immediately collected and transferred into each plate labeled accordingly to each dilution sequence. These plates were then let to rest for 10 minutes and incubated at 9:32am on 10/09/23.
Results: 3 of the 5 plates are webbed.
Conclusion and Next Steps:
We will flood the webbed plates to collect high volume lysate.
Title: Collecting High Titer Lysate
Date: 10/11/23
Redo: No
Sample: 6C Lysate Webbed Plates
Purpose: To generate a concentrated high titer liquid phage sample.
Notes:
- 1. Using gloves, the bench area was first sprayed with CiDecon and spread with paper towels, followed by 70% Ethanol. We then lit the bunsen burner.
- 2. We picked out sample 6H webbed plates, where the plate is webbed with phages. We then applied 8ml of sterile phage buffer to the 4 webbed plate, and let it sit at room temperature for 8 hours.
3. At 2:00pm of 10/11/23, we came back. Using gloves, the bench area was first sprayed with CiDecon and spread with paper towels, followed by 70% Ethanol. We then lit the bunsen burner.
4. We removed the lid from the plate and tilted it so the lysate pooled to one side. Preparing a 0.22μm filter, we left it in the package. Using a syringe we sucked up all the remaining lysate from the plate.
5. We then attached the filter and depressed the plunger to collect the high titer lysate into a 50ml sterile conical tube. It was then labeled appropriately and stored in the isolation bin of the fridge.
-
- Results: Collected high titer lysate.
- Conclusions and Next Steps: We will use the high titer lysate sample to then proceed to a full plate titer.
-
-
-
Title: Full Plate Titer
Date: 10/16/23
Redo: No
Sample: High titer lysate
Purpose: To calculate titer, and to see which dilution will produce webbed plates.
Notes:
1. Using gloves, the bench area was first sprayed with CiDecon and spread with paper towels, followed by 70% Ethanol. We then lit the bunsen burner.
2. We set up a 10-fold serial dilution all the way up to 10-8. We arranged the set of microcentrifuge tubes in a rack and labeled them accordingly such as 10-1, 10-2, 10-3, all the way to 10-8. We then added 90μl of phage buffer to each tube.
3. Then, using the high titer lysate, we added 10μl to 10-1. We switched out the pipette tip and vortexed the sample. We repeated this process all the way up to 10-8.
4. We then collected 10μl of each tube and combined it with 250μl of the host bacteria. Using a sterile 5ml pipette, we combined 3ml of top agar into the inoculated host tube. This was immediately collected and transferred into each plate labeled accordingly to each dilution sequence. We plated dilutions 10-3, 10-4, 10-5, 10-6. These plates were then let to rest for 10 minutes and incubated at 9:42am on 10/16/23.
Results:
- Plates were contaminated due to contaminated lysate.
Conclusion and Next Steps: - We will have to re-filter the high lysate and redo this process again.
-
Title: Full Plate Titer
Date: 10/17/23
Redo: Yes
Sample: High titer lysate
Purpose: To calculate titer, and to see which dilution will produce webbed plates.
Notes:
1. Using gloves, the bench area was first sprayed with CiDecon and spread with paper towels, followed by 70% Ethanol. We then lit the bunsen burner.
2. We set up a 10-fold serial dilution all the way up to 10-8. We arranged the set of microcentrifuge tubes in a rack and labeled them accordingly such as 10-1, 10-2, 10-3, all the way to 10-8. We then added 90μl of phage buffer to each tube.
3. Then, using the high titer lysate, we added 10μl to 10-1. We switched out the pipette tip and vortexed the sample. We repeated this process all the way up to 10-8.
4. We then collected 10μl of each tube and combined it with 250μl of the host bacteria. Using a sterile 5ml pipette, we combined 3ml of top agar into the inoculated host tube. This was immediately collected and transferred into each plate labeled accordingly to each dilution sequence. We plated dilutions 10-5, 10-6, 10-7, 10-8. These plates were then let to rest for 10 minutes and incubated at 12:40pm on 10/17/23.
Results: These plates were also contaminated.

- Conclusion and Next Steps: Due to the filtered lysate being contaminated, we will have to go back to low lysate and recreate our webbed plates to gather more high lysate.
-
-
-
Title: Making Webbed Plates From A Lysate of Known Titer
Date: 10/20/23
Redo: YES
Sample: 6C (10^1) Lysate
Purpose: To create a plate with a very high density of plaques from a lysate of known titer
Notes:
1. Using gloves, the bench area was first sprayed with CiDecon and spread with paper towels, followed by 70% Ethanol. We then lit the bunsen burner.
2. We calculated the number of plaques needed. In our 10^2 plate, we have roughly 2 thousand plaques.
3. We set up a 10-fold serial dilution all the way up to 10-2. We arranged the set of microcentrifuge tubes in a rack and labeled them accordingly such as 10-1 and 10-2. We then added 90μl of phage buffer to each tube.
4. Then, using the lysate, we added 10μl to 10-1. We switched out the pipette tip and vortexed the sample. We repeated this process all the way up to 10-2.
5. We then collected 10μl of each tube and combined it with 250μl of the host bacteria. Using a sterile 5ml pipette, we combined 3ml of top agar into the inoculated host tube. This was immediately collected and transferred into each plate labeled accordingly to each dilution sequence. These plates were then let to rest for 10 minutes and incubated at 9:32am on 10/20/23.
Results: The plates are unfortunately not webbed enough.
Conclusion and Next Steps: This process will be redone with dilutions 10-1, 10-2, and 10-3 to ensure webbed plate results as well as let the agar sit properly to avoid sliding when flipped to incubate.
-
Title: Making Webbed Plates From A Lysate of Known Titer
Date: 10/21/23
Redo: YES
Sample: 6C (10^1) Lysate
Purpose: To create a plate with a very high density of plaques from a lysate of known titer
Notes:
1. Using gloves, the bench area was first sprayed with CiDecon and spread with paper towels, followed by 70% Ethanol. We then lit the bunsen burner.
2. We calculated the number of plaques needed. In our 10^2 plate, we have roughly 2 thousand plaques.
3. We set up a 10-fold serial dilution all the way up to 10-3. We arranged the set of microcentrifuge tubes in a rack and labeled them accordingly such as 10-1 and 10-2 and 10-3. We then added 90μl of phage buffer to each tube.
4. Then, using the lysate, we added 10μl to 10-1. We switched out the pipette tip and vortexed the sample. We repeated this process all the way up to 10-3.
5. We then collected 10μl of each tube and combined it with 250μl of the host bacteria. Using a sterile 5ml pipette, we combined 3ml of top agar into the inoculated host tube. This was immediately collected and transferred into each plate labeled accordingly to each dilution sequence. These plates were then let to rest for 10 minutes and incubated at 12:53pm on 10/21/23.
Results: Five webbed plates have been made.
Conclusion and Next Steps: With the webbed plates, we will flood with phage buffer and collect high lysate.
-
-
Title: Collecting High Titer Lysate
Date: 10/23/23
Redo: YES
Sample: 6C Lysate Webbed Plates
Purpose: To generate a concentrated high titer liquid phage sample.
Notes:
- 1. Using gloves, the bench area was first sprayed with CiDecon and spread with paper towels, followed by 70% Ethanol. We then lit the bunsen burner.
- 2. We picked out sample 6H webbed plates, where the plate is webbed with phages. We then applied 8ml of sterile phage buffer to the 4 webbed plate, and let it sit at room temperature for 8 hours.
3. On 10/23/23, we came back. Using gloves, the bench area was first sprayed with CiDecon and spread with paper towels, followed by 70% Ethanol. We then lit the bunsen burner.
4. We removed the lid from the plate and tilted it so the lysate pooled to one side. Preparing a 0.22μm filter, we left it in the package. Using a syringe we sucked up all the remaining lysate from the plate.
5. We then attached the filter and depressed the plunger to collect the high titer lysate into a 50ml sterile conical tube. It was then labeled appropriately and stored in the isolation bin of the fridge.
-
-
Results: Collected high titer lysate.
Conclusions and Next Steps: We will use the high titer lysate sample to then proceed to a full plate titer.
-
-
-
-
Title: Full Plate Titer
Date: 10/23/23
Redo: Yes
Sample: High titer lysate
Purpose: To calculate titer, and to see which dilution will produce webbed plates.
Notes:
1. Using gloves, the bench area was first sprayed with CiDecon and spread with paper towels, followed by 70% Ethanol. We then lit the bunsen burner.
2. We set up a 10-fold serial dilution all the way up to 10-8. We arranged the set of microcentrifuge tubes in a rack and labeled them accordingly such as 10-1, 10-2, 10-3, all the way to 10-8. We then added 90μl of phage buffer to each tube.
3. Then, using the high titer lysate, we added 10μl to 10-1. We switched out the pipette tip and vortexed the sample. We repeated this process all the way up to 10-8.
4. We then collected 10μl of each tube and combined it with 250μl of the host bacteria. Using a sterile 5ml pipette, we combined 3ml of top agar into the inoculated host tube. This was immediately collected and transferred into each plate labeled accordingly to each dilution sequence. We plated dilutions 10-1, 10-2, 10-3, 10-4, 10-5, 10-6. These plates were then let to rest for 10 minutes and incubated at 3:00pm on 10/??/23.
Results: Titer is (42 pfu/10μl) x (10-2 μl/ml) x (10-6) = 4.2 x 10⁻⁸ pfu/ml
Conclusion and Next Steps: We will proceed to TEM.
-

DNA Extraction
Title: DNA Extraction
Date: 10/30/23
Redo: No
Sample: High Titer Lysate
Purpose: To concentrate liquid phage samples prior to extracting DNA
Notes:
1. We washed our hands accordingly, and put on gloves as all the procedures took place in the hood.
2. We transferred 5ml of phage lysate into a 10ml conical tube. We added 25µl of nuclease mix and mixed by repeated inversions. This was then incubated at 37 °C for 10 minutes.
3. Using a 5ml pipette, 5ml of lysate mixture was separated into 5 microcentrifuge tubes. 25µl ZnCl2 was added and gently inverted for mixture. It was then incubated at 37 °C for 10 minutes. Afterwards, the supernatant was removed leaving only the pellet.
4. 200µl of EDTA (0.1M concentration) was add to each microcentrifuge tube, where the micrpippetor helped re-suspend the pellet by piping up and down. 1.0ml of phage pellet was transferred into a clean 15ml conical tube. Where 2ml of DNA clean up resin was added. The mixture was gently inverted for 2 minutes.
5. Two columns were attached to the syringe barrels. 1.5ml of phage DNA was pressed through the barrel. The column was then removed, where we attached a new syringe barrel to wash the salts from the DNA. 2 ml of 80 % isopropanol was used for each wash, where we washed 5 times for each column.
6. The columns were placed in a fresh microcentrifuge tube, where it was spun at 10,000 x g for 5 minutes. The columns were then transferred into new microcentrifuge tubes and spun at 10,000 x g for 1 minute. The columns were removed from the microcentrifuge tubes and directly placed into the 90 °C heating block for no more than 60 seconds.
7. Each column was then placed into a clean microcentrifuge tube, where 50μl of 90 °C sterile ddH2O was dispersed directly into the column. We let the column incubate for 1 minute at room temperature, then spun at 10,000 x g for 1 minute. The DNA was then combined and placed into a new microcentrifuge tube.
Results:
 No DNA.
Conclusions and Next Steps:
This process will have to be repeated until DNA is captured.
Title: DNA Extraction
Date: 11/01/23
Redo: Yes
Sample: High Titer Lysate
Purpose: To concentrate liquid phage samples prior to extracting DNA
Notes:
1. We washed our hands accordingly, and put on gloves as all the procedures took place in the hood.
2. We transferred 5ml of phage lysate into a 10ml conical tube. We added 25µl of nuclease mix and mixed by repeated inversions. This was then incubated at 37 °C for 10 minutes.
3. Using a 5ml pipette, 5ml of lysate mixture was separated into 5 microcentrifuge tubes. 25µl ZnCl2 was added and gently inverted for mixture. It was then incubated at 37 °C for 10 minutes. Afterwards, the supernatant was removed leaving only the pellet.
4. 200µl of EDTA (0.1M concentration) was add to each microcentrifuge tube, where the micrpippetor helped re-suspend the pellet by piping up and down. 1.0ml of phage pellet was transferred into a clean 15ml conical tube. Where 2ml of DNA clean up resin was added. The mixture was gently inverted for 2 minutes.
5. Two columns were attached to the syringe barrels. 1.5ml of phage DNA was pressed through the barrel. The column was then removed, where we attached a new syringe barrel to wash the salts from the DNA. 2 ml of 80 % isopropanol was used for each wash, where we washed 5 times for each column.
6. The columns were placed in a fresh microcentrifuge tube, where it was spun at 10,000 x g for 5 minutes. The columns were then transferred into new microcentrifuge tubes and spun at 10,000 x g for 1 minute. The columns were removed from the microcentrifuge tubes and directly placed into the 90 °C heating block for no more than 60 seconds.
7. Each column was then placed into a clean microcentrifuge tube, where 50μl of 90 °C sterile ddH2O was dispersed directly into the column. We let the column incubate for 1 minute at room temperature, then spun at 10,000 x g for 1 minute. The DNA was then combined and placed into a new microcentrifuge tube.
Results:
 Very little DNA.
Conclusions and Next Steps:
This process will have to be repeated until DNA is captured.
Title: DNA Extraction
Date: 11/01/23
Redo: Yes
Sample: High Titer Lysate
Purpose: To concentrate liquid phage samples prior to extracting DNA
Notes:
1. We washed our hands accordingly, and put on gloves as all the procedures took place in the hood.
2. We transferred 5ml of phage lysate into a 10ml conical tube. We added 25µl of nuclease mix and mixed by repeated inversions. This was then incubated at 37 °C for 10 minutes.
3. Using a 5ml pipette, 5ml of lysate mixture was separated into 5 microcentrifuge tubes. 25µl ZnCl2 was added and gently inverted for mixture. It was then incubated at 37 °C for 10 minutes. Afterwards, the supernatant was removed leaving only the pellet.
4. 200µl of EDTA (0.1M concentration) was add to each microcentrifuge tube, where the micrpippetor helped re-suspend the pellet by piping up and down. 0.5µl Proteinase K and 50 µl SDS was added to the lysate mixture and gently mixed, where it was left to incubate at 37 °C for 10 minutes. 1.0ml of phage pellet was transferred into a clean 15ml conical tube. Where 2ml of DNA clean up resin was added. The mixture was gently inverted for 2 minutes.
5. Two columns were attached to the syringe barrels. 1.5ml of phage DNA was pressed through the barrel. The column was then removed, where we attached a new syringe barrel to wash the salts from the DNA. 2 ml of 80 % isopropanol was used for each wash, where we washed 5 times for each column.
6. The columns were placed in a fresh microcentrifuge tube, where it was spun at 10,000 x g for 5 minutes. The columns were then transferred into new microcentrifuge tubes and spun at 10,000 x g for 1 minute. The columns were removed from the microcentrifuge tubes and directly placed into the 90 °C heating block for no more than 60 seconds.
7. Each column was then placed into a clean microcentrifuge tube, where 50μl of 90 °C sterile ddH2O was dispersed directly into the column. We let the column incubate for 1 minute at room temperature, then spun at 10,000 x g for 1 minute. The DNA was then combined and placed into a new microcentrifuge tube.
Results:
 DNA was acquired.
Conclusions and Next Steps:
This process will have to be repeated until 1.8 DNA is captured. We will also try to reorecipitate the DNA.
Title: Reprecipitation of DNA
Date: 11/06/23
Redo: No
Sample: High Titer Lysate
Purpose: To combine two previous DNA extraction samples to gather a more accurate nanoreading.
Notes:
- 1. We washed our hands and put on sterile gloves. The station was sprayed down with CiDecon and then Ethanol. Most of this took place in the hood. Samples 1 and 2 of DNA were removed from the freezer and left to thaw.
- 2. Sample 1 had 66μl, and sample 2 had 58μl. The combined volume of the two samples is 124μl. The two DNA samples were moved into a clean microcentrifuge tube. Sodium acetate was calculated to be .10 volume of the DNA, which turns out to be 12.4μl. And 100% ethanol was 3 times the volume of the combined DNA samples, which turned out to be 372μl.
- 3. These solutions were all aspirated into the DNA sample, and was inverted to mix thoroughly. The tube was then placed in the -80°C freezer overnight.
- 4. On 11/08/23, the sample was retrieved from the freezer and centrifuge full speed at 4°C for 30 minutes. The supernatant was disposed of, and 0.5ml of 75% Ethanol was added. The tube was then placed in the centrifuge for 10 minutes. This was conducted twice.
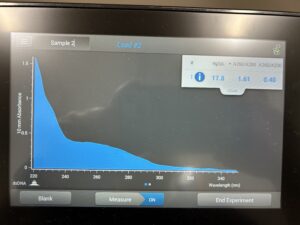
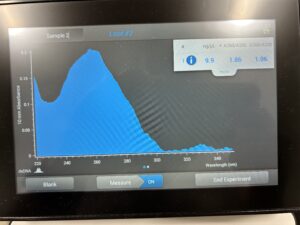
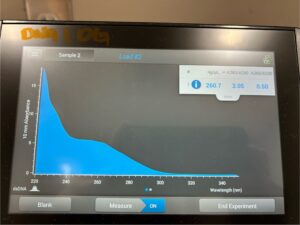
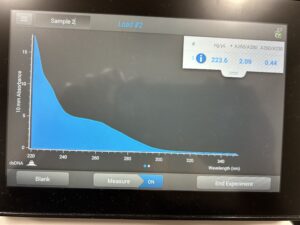
- 5. After as much liquid able to was removed, the tube was set in the 37°C incubator to air dry. 50μl of nuclease free water was added, and the product was taken to be scanned by the Nanodrop machine.Results: The DNA sample has reached a good number, but we need more quantity of quality DNA.
Conclusions and Next Steps:
We will use a new DNA protocol to extract DNA.
Title: DNA Extraction Protocol Alternative
Date: 11/09/23
Redo: No
Sample: High Lysate
Purpose: To extract high quality and quantity of DNA.
Notes:
1. 5ml of high lysate was placed within a 15ml conical tube. 20μl of nuclease mixture was added, and the tube was gently inverted and placed into a 37°C incubator for 10 minutes.
3. This mixture was placed into 5 microcentrifuge tubes with 1ml each. 20μl of ZnCl2 was added, mixed gently by inversion, and incubated for 5 minutes. This was then centrifuged at 10,000rpm for 1 minute.
4. The supernatants were removed, and the pellets were resuspended in 500μl of TES buffer per tube, and incubated at 60°C for 15 minutes. 1μl of Proteinase K was added and gently mixed, and incubated at 37°C for 10 minutes.
5. 60μl of potassium acetate was added to each tube, was inverted to mix, and left on ice for 15 minutes. This was then centrifuged at 12,000rpm for 1 minute. The supernatants were collected and placed into new microcentrifuge tubes, while the pellet was disposed of. 500μl of isopropanol was added to each tube, mixed, and left on ice.
6. On 11/10/23, I returned to the lab. The DNA mixture was centrifuged at top speed for 10 minutes, and the supernatant was disposed of. 250μl of 70% ethanol was added, and was then spun for another minute.
7. The DNA was dried at 30°C until there was no liquid left. The first pellet was resuspended in 50μl of nuclease free water. That solution was used to resuspend the next pellet, until all 5 pellets were resuspended in the same solution.
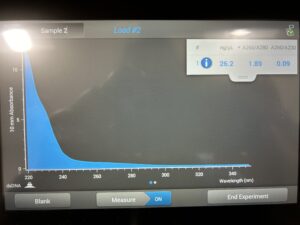
8. The DNA was then checked using the Nanodrop.
Results:

Conclusion and Next Steps: Will have to do a new ethanol precipitation protocol.
Title: Ethanol Precipitation of DNA
Date: 11/10/23
Redo: No
Sample: DNA 5
Procedure: Extract quality and quantity DNA through ethanol precipitation.
Notes:
1. Hands were washed and gloves were put on. The surface of the lab was sterilized with CiDeon and Ethanol. 22μl of DNA was measured. Than 0.1 volume of DNA was calculated to 2.2μl for the sodium acetate. 2.5 volume was calculated to be 55μl of 70% ethanol.
2. 2.2μl of sodium acetate was added to the DNA, then 55μl of ice cold 100% ethanol. This mixture was vortexed until mixed, and set for 1 hour in the -80°C fridge.
3. It was then centrifuged at full speed at 4°C for 30 minutes. The pellet was washed with 0.5ml of ice cold 75% ethanol, and spun at 4°C for 10 minutes. This process was repeated twice.
4. The ethanol was removed, and the mixture was quickly vortexed to remove the trace amounts of ethanol left over. The pellet was then air dried and resuspended in 50μl of nuclease free water.
Results: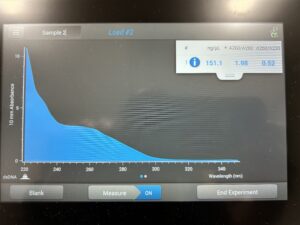
Conclusion and Next Steps: Go back to new DNA extraction protocol and repeat the process.
Title: DNA Extraction Protocol Alternative
Date: 11/13/23
Redo: Yes
Sample: High Lysate
Purpose: To extract high quality and quantity of DNA.
Notes:
1. 10ml of high lysate was placed within a 15ml conical tube. 40μl of nuclease mixture was added, and the tube was gently inverted and placed into a 37°C incubator for 10 minutes.
3. This mixture was placed into 10 microcentrifuge tubes with 1ml each. 20μl of ZnCl2 was added, mixed gently by inversion, and incubated for 5 minutes. This was then centrifuged at 10,000rpm for 1 minute.
4. The supernatants were removed, and the pellets were resuspended in 500μl of TES buffer per tube, and incubated at 60°C for 15 minutes. 1μl of Proteinase K was added and gently mixed, and incubated at 37°C for 10 minutes.
5. 60μl of potassium acetate was added to each tube, was inverted to mix, and left on ice for 15 minutes. This was then centrifuged at 12,000rpm for 1 minute. The supernatants were collected and placed into new microcentrifuge tubes, while the pellet was disposed of. 500μl of isopropanol was added to each tube, mixed, and left on ice.
6. On 11/13/23, I returned to the lab. The DNA mixture was centrifuged at top speed for 10 minutes, and the supernatant was disposed of. 250μl of 70% ethanol was added, and was then spun for another minute.
7. The DNA was dried at 30°C until there was no liquid left. The first pellet was resuspended in 50μl of nuclease free water. That solution was used to resuspend the next pellet, until all 5 pellets were resuspended in the same solution.
8. The DNA was then checked using the Nanodrop.
Results:
Conclusion and Next Steps:
Reprecipitate the DNA.

Title: Ethanol Precipitation of DNA
Date: 11/13/23
Redo: Yes
Sample: High Lysate
Notes:
1. Hands were washed and gloves were put on. The surface of the lab was sterilized with CiDeon and Ethanol. 22μl of DNA was measured. Than 0.1 volume of DNA was calculated to 2.2μl for the sodium acetate. 2.5 volume was calculated to be 55μl of 100% ethanol.
2. 2.2μl of sodium acetate was added to the DNA, then 55μl of ice cold 100% ethanol. This mixture was vortexed until mixed, and set for 1 hour in the -80°C fridge.
3. It was then centrifuged at full speed at 4°C for 30 minutes. The pellet was washed with 0.5ml of ice cold 75% ethanol, and spun at 4°C for 10 minutes. This process was repeated twice.
4. The ethanol was removed, and the mixture was quickly vortexed to remove the trace amounts of ethanol left over. The pellet was then air dried and resuspended in 50μl of nuclease free water.
Results:
Conclusion and Next Steps:
Reprecipitate the DNA again.
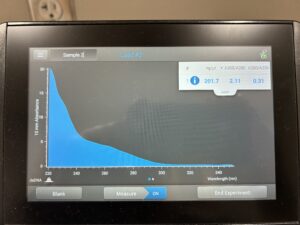
DNA 1 and 2 Nanodrop.
Title: Reprecipitation of DNA
Date: 11/13/23
Redo: Yes
Sample: High Lysate
Notes:
- 1. We washed our hands and put on sterile gloves. The station was sprayed down with CiDecon and then Ethanol. Most of this took place in the hood. Samples 1 and 2 of DNA were removed from the freezer and left to thaw.
- 2. Sample 1 had 36μl, and sample 2 had 38μl. The combined volume of the two samples is 74μl. The two DNA samples were moved into a clean microcentrifuge tube. Sodium acetate was calculated to be .10 volume of the DNA, which turns out to be 7.4μl. And 100% ethanol was 3 times the volume of the combined DNA samples, which turned out to be 222μl.
- 3. These solutions were all aspirated into the DNA sample, and was inverted to mix thoroughly. The tube was then placed in the -80°C freezer overnight.
- 4. On 11/14/23, the sample was retrieved from the freezer and centrifuge full speed at 4°C for 30 minutes. The supernatant was disposed of, and 0.5ml of 75% Ethanol was added. The tube was then placed in the centrifuge for 10 minutes. This was conducted twice.
- 5. After as much liquid able to was removed, the tube was set in the 37°C incubator to air dry. 50μl of nuclease free water was added, and the product was taken to be scanned by the Nanodrop machine.
Results:

Conclusion and Next Steps:
DNA will have to be extracted from the last of the high lysate.
Title: DNA Extraction Protocol Alternative
Date: 11/14/23
Redo: Yes
Sample: High Lysate
Purpose: To extract high quality and quantity of DNA.
Notes:
1. 5ml of high lysate was placed within a 15ml conical tube. 20μl of nuclease mixture was added, and the tube was gently inverted and placed into a 37°C incubator for 10 minutes.
3. This mixture was placed into 5 microcentrifuge tubes with 1ml each. 20μl of ZnCl2 was added, mixed gently by inversion, and incubated for 5 minutes. This was then centrifuged at 10,000rpm for 1 minute.
4. The supernatants were removed, and the pellets were resuspended in 500μl of TES buffer per tube, and incubated at 60°C for 15 minutes. 1μl of Proteinase K was added and gently mixed, and incubated at 37°C for 10 minutes.
5. 60μl of potassium acetate was added to each tube, was inverted to mix, and left on ice for 15 minutes. This was then centrifuged at 12,000rpm for 1 minute. The supernatants were collected and placed into new microcentrifuge tubes, while the pellet was disposed of. 500μl of isopropanol was added to each tube, mixed, and left on ice.
6. The DNA mixture was centrifuged at top speed for 10 minutes, and the supernatant was disposed of. 250μl of 70% ethanol was added, and was then spun for another minute.
7. The DNA was dried at 30°C until there was no liquid left. The first pellet was resuspended in 50μl of nuclease free water. That solution was used to resuspend the next pellet, until all 5 pellets were resuspended in the same solution.
8. The DNA was then checked using the Nanodrop.
Results:
Conclusion and Next Steps:
Title: Ethanol Precipitation of DNA
Date: 11/13/23
Redo: Yes
Sample: High Lysate
Notes:
1. Hands were washed and gloves were put on. The surface of the lab was sterilized with CiDeon and Ethanol. 48μl of DNA was measured. Than 0.1 volume of DNA was calculated to 4.8μl for the sodium acetate. 2.5 volume was calculated to be 120μl of 100% ethanol.
2. 4.8μl of sodium acetate was added to the DNA, then 120μl of ice cold 100% ethanol. This mixture was vortexed until mixed, and set for 1 hour in the -80°C fridge.
3. It was then centrifuged at full speed at 4°C for 30 minutes. The pellet was washed with 0.5ml of ice cold 75% ethanol, and spun at 4°C for 10 minutes. This process was repeated twice.
4. The ethanol was removed, and the mixture was quickly vortexed to remove the trace amounts of ethanol left over. The pellet was then air dried and resuspended in 50μl of nuclease free water.
Results: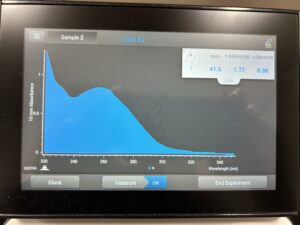
Conclusion and Next Steps:
We have run out of DNA, high lysate, and time for the semester.
Characterization
-
-
-
-
Title: TEM (Transmission Electronic Microscopy)
Date: 10/25/23
-
Redo: No
Sample: High titer lysate
Purpose: To prepare the phage sample for viewing with TEM.
Notes:-
1. Using gloves, the bench area was first sprayed with CiDecon and spread with paper towels, followed by 70% Ethanol. We then lit our bunsen burner. We transferred 1ml of high titer and water into two microcentrifuge tubes. These tubes were balanced and centrifuged at 1 hour. We removed the supernatant from the tube, and added 100μl of phage buffer and let it resuspend for 30 minutes.
-
2. Washing our hands and putting on clean gloves, the designated work area was covered with bench paper. We removed the cover from a 5×5 cm piece of parafilm and was was placed in the lid of the petri dish. A PLECO tab/small pieec of double sided tape was placed onto the parafilm in the lid of the petri dish.3. Using EM forceps, we removed a fresh grid, only touching the edges of the grid to keep sterile. The grid was placed dark/shiny side up. Using a micropipettor, 10μl of the lysate was placed onto the grid without touching the tip of the grid itself. The phage was allowed to settle and attach for at least _ minutes.
4. A small wedge of filter paper was used to wick off excess fluid. The grid was rinsed two times by pipetting 10μl of sterile water onto the grid, which was allowed to sit for 2 minutes, then wicked using a fresh wedge of filter paper.
5. We added 10μl of 1% uranyl acetate to the grid. It was then let to rest for 2 minutes. The surface was wicked off by using a wedge filter paper until the surface of the grid looks like rainbow oil slick. The grid was allowed to air dry before being placed back into the grid box.
-
-
Results:
The grid was prepared to be shipped to a facility for TEM.
Conclusion and Next Steps:
Once it is returned, we will record its morphology.
Title: Setting Up Restriction Enzyme Digests
Date: ##/###/##
Redo: Yes/No
Sample: #
Purpose: ###.
Notes:
Results:
###.
Conclusions and Next Steps:
###.