Discovery of Interrobang
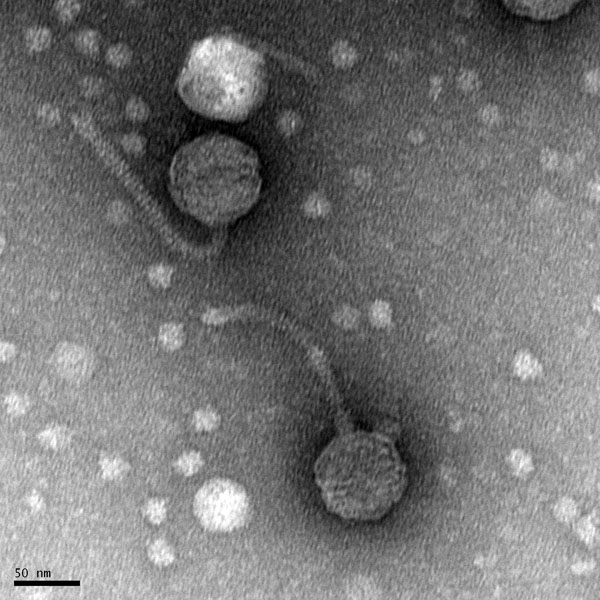
Interrobang Information
Morphology: Siphoviridae
Sample Collection
| Collector Name |
Esmae | Marisol | Esmae | Marisol | Esmae | Esmae | Marisol |
Esmae
|
Esmae | Marisol |
| Sample No. | EV1 | ML2 | EV3 | ML4 | EV5 | EV6 | ML7 | EV8 | EV9 | ML10 |
| Date of Collection | 08/29/2021 | 08/28/21 | 08/31/2021 | 09/07/2021 | 09/12/2021 | 09/13/2021 | 09/20/21 | 09/19/21 | 09/19/21 | 09/20/21 |
| Sample Type | soil | soil | soil (compost) | soil | soil | soil | soil | soil | liquid | soil |
| General Location | Hico,Tx. | Fort Worth, Tx. | Stephenville, Tx. | Fort Worth, Tx. | Hico, Tx. | Hico, Tx. | Fort Worth, Tx. | Hico,Tx | Hico,Tx | Fort Worth, Tx. |
| Location Description | Moist Soil was gathered from under a plastic tarp on a dairy | Soil was gathered from above a pond in a park | Soil was gathered from a compost yard | Soil was gathered from underneath a rose bush | Soil was gathered from underneath a peach tree | An ant pile on the edge of a driveway | Soil was gathered from underneath a rock in a garden | Soil was gathered from an ant pile |
Liquid was gathered from an lagoon at a dairy |
Soil was gathered from underneath a rock in a feild |
| GPS Coordinates |
32.110330 -98.115173 |
32.687791 -97.376675
|
32.155642 -98.082315 |
32.699522 -97.349393
|
32.115562 -98.117161 |
32.115710 -98.117535 |
32.695889 -97.349741 |
32.115640 -98.117539
|
32.108686 -98.111304 |
32.732609 -97.329372 |
| Sample Depth | superficial | 1in | about 3ft above ground | superficial | 2in | superficial | 2in | superficial | superficial | 4in |
| Ambient Temperature | 31°C | 32°C | 35°C | 22°C | 26°C | 29°C | 24°C | 32°C | 28°C | 24°C |
Isolation/Purification
Title: Direct Isolation
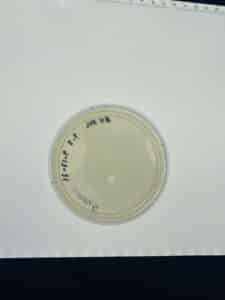
Date: 08/30/2020 Redo: No Sample: # EV 1 Purpose:
This procedure is to extract bacteriophages from the environmental sample and infect the host bacteria using a plaque assay.
Notes:
- Collect a new sample
- Clean your work station with CiDecon, Ethyl Alcohol, to prepare your bench for aseptic work.Collect all your supplies (environmental sample, Liquid media* (5 ml/sample), Sterile 3 ml or 5 ml syringe, 0.22 μm syringe filter, 5 ml serological pipettes, Microcentrifuge tubes, 15 ml conical tube, matches, fire can.)
- Used the electronic pipette to add 9 ml of liquid media into the sample and mix thoroughly.
- The sample was placed into the shaking incubator for 3 hours and 15 minutes
- A serological pipette was then used to take the liquid out from the sample and add it to a 3ml syringe.
- attach the syringe to a (0.22 um) filter and filter into a Microcentrifuge tube.
- Obtain the host bacteria cultures and use a micropipettor to dispense 250μl of phage sample into the host bacteria.
- Mix both the host and sample by gently tapping the tube.
- Let are sample sit undisturbed for 10 minutes.
- Using a serological pipette add 3ml of molten top agar to the inoculated bacteria tube.
- Immediately aspirated the mixture into the pipette and transferred onto the plate (avoiding withdraw of bubbles).
- Tilt the plate in multiple directions until the agar mixture evenly coats the agar plate
- The agar plate was left undisturbed for 10 minutes.
- Sample 1 was incubated at 4 pm on August 30th at 29 degrees celsius
- The plate was left in the incubator for 18 hours before removal on August 31.
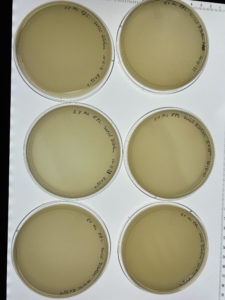
Results:
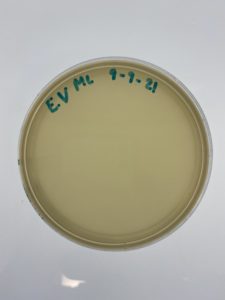
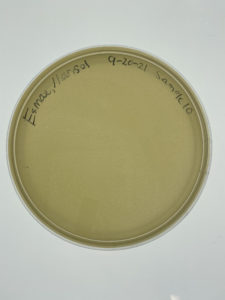
The results for sample 1 were negative showing no signs for bacteriophage
Conclusions and Next Steps:
Sample 1 showed no signs of bacteriophages. The next step that must be taken is gathering more soil sample in order to gain a contamiated sample. For future experiments the plate showed signs of air bubbles, in order to prevent this when putting the mixture into the plate the process should be done slower.
Title: Direct Isolation
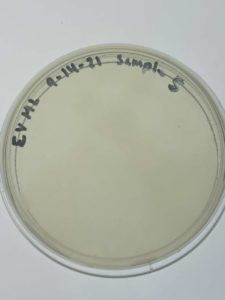
Date: 08/30/2021 Redo: no Sample: ML 2
Purpose:
The purpose is to extract bacteriophages from an environmental Sample and infect the host bacteria using a plaque assay.
Notes:
- Collect a new sample
- Clean your work station with CiDecon, Ethyl Alcohol, to prepare your bench for aseptic work.Collect all your supplies (environmental sample, Liquid media* (5 ml/sample), Sterile 3 ml or 5 ml syringe, 0.22 μm syringe filter, 5 ml serological pipettes, Microcentrifuge tubes, 15 ml conical tube, matches, fire can.)
- Used the electronic pipette to add 7 ml of liquid media into the sample and mix thoroughly.
- The sample was placed into the shaking incubator for 2 hours and 15 minutes
- After shaking the sample was allowed to sit for about 10 minutes to allow all the particulate matter to settle.
- 2.85 ml of the sample was removed and a (0.22 um) filter was attached. After filtering the sample there was 1.5 ml left.
- 1.5 ml was put into an empty conical tube of 15ml.
- Obtain the host bacteria cultures and use a micropipettor to dispense 250μl of phage sample into the host bacteria.
- Mix both the host and phage by gently tapping the tube.
- Let are sample sit undisturbed for 10 minutes.
- Using a serological pipette add 3ml of molten top agar to the inoculated bacteria tube.
- Immediately aspirated the mixture into the pipette and transferred onto the plate (avoiding withdraw of bubbles).
- Tilt the plate in multiple directions until the agar mixture evenly coats the agar plate
- The agar plate was left undisturbed for 10 minutes.
- Sample 2 was incubated at 5 pm on August 30th at 37 degrees celsius
- The plate was left in the incubator for 41 hours and removed on September 1st.
Results:
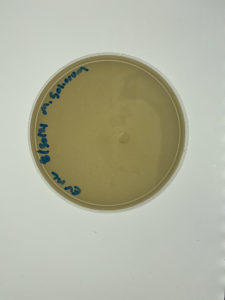
The results for sample 2 were negative showing no signs of bacteriophage.
Conclusions and Next Steps:
The plate showed no sign of bacteriophage. The next step that should be taken is gathering another sample to test. A modification needs to be made due to this being the second failed attempt, for the next experiment the type of isolation that will be perfomed is Enriched Isolation. This will be a different experiment from Direct Isolation in hopes for a different results.
Title: Enriched Isolation
Date: 09/01/21 Redo: no Sample: EV 3
Purpose:
This procedure is to extract bacteriophages from the environmental Sample and infect the host bacteria using a plaque assay by using Enriched Isolation.
Notes:
- Collected a new sample
- Clean your workstation with CiDecon, Ethyl Alcohol, to prepare your bench for aseptic work.Collect all your supplies (environmental sample, Liquid media, Sterile 5 ml syringe, 0.22 μm syringe filter, 5 ml serological pipettes, Microcentrifuge tubes, 50 ml sterile tube, matches, fire can.)
- In the 50 ml conical tube 11ml is filled with the soil sample
- Add 24ml of liquid media to the soil sample so it can hit the 35ml mark
- Invert the tube a couple of times to mix the soil and liquid media, then put the tube in the shaking incubator at ~250 rpm for 1–2 hour
- After the sample was shaking for 45 minutes I removed it and vortexes and then placed it back into incubator to be shaken
- After 2 hours in the shaking incubator the tube was taken out and put into the centrifuge for 10 minutes
- In order to be put into the centrifuge the sample needs to balanced with another 50ml sterile tube, weight of soil sample was 47.9g so the other tube was filled with water to weigh approximately the same as 47.97g
- The sample was then filtered through a 0.22µm filter collected in a 50ml conical tube, reaching approximately 22.5 ml
- Added 0.5 ml of the bacteria host into the 50ml tube with the filtered soil sample
- The 50ml tube was then placed back into the incubator to be shaken vigorously for 2-5 days, however the tube had to be slightly shut in order to ensure the sample could breath, tape was place onto the top of the tube and the tube itself to ensure the cap wont come off
- After 2 days in the shaking incubator the soil sample with the bacteria was collected to start the next process, however the top fell off, sample was fully exposed
- Using a pipette, two samples of 1.4ml of was transported into two different microcentrifuge
- Then place the two microcentrifuge across from each other in the microcentrifuge in order for the samples two spin at a high pace for a minute in order to pellet the bacteria
- Due to the sample not being clear after the spin in the microcentrifuge, the two samples had to be filtered through a 0.22µm filter
- In order to do this a syringe and .22µm filter is needed. The plunger of the syringe is removed while the syringe top connects to the filter, its prepare for the samples in the microcentrifuge
- Approximately 1ml of the sample is taken from each of the microcentrifuge tube using a pipette, while ensuring to not touch the bacterial pellet
- Then the plunger was place back on the syringe and started to depress the sample, the filtered sample was collected into a new microcentrifuge tube, until approximately 1ml was filled, the sample is clearer then before it was filtered
- The microfuge tube was quickly closed after filtered and then stored in a temperature of 4 °C on September the 3rd.
- removed a plate out of the fridge which is stored at 4 °C
- 3ml molten top agar was collected into a serological pipette and transferred into a culture tube
- the top agar and bacteria was quickly drawn up using a serological pipette and placed on a plate.
- The plate sat out on the work bench to let the agar solidify for 20 minutes
- The plate was then placed into the incubator at 6:35 pm on September 7th
Results:

The results for sample 3 were negative for showing no signs of bacteriophage.
Conclusions and Next Steps:
The plate showed no signs of bacteriophage. The next step that should be taken is gathering another sample to test. The modification that needs to be made is the soil type, a more rich soil sample is needed in order to find bacteriophages. This type of soil will be easily determined with a moist feel to the soil and the soil having a earthy smell to it. This will tell us weither their is a problem within our process, for quicker results we will be doing a direct isolation.
Title: Direct Isolation
Date: 09/08/2021 Redo: no Sample: ML4
Purpose: The purpose is to extract bacteriophages from an environmental Sample and infect the host bacteria using a plaque assay through direct isolation, using a more enriched soil sample to extract bacteriophages.
Notes:
- Clean your workstation with CiDecon, Ethyl Alcohol, to prepare your bench for aseptic work.Collect all your supplies (environmental sample, Liquid media* (5 ml/sample), Sterile 3 ml or 5 ml syringe, 0.22 μm syringe filter, 5 ml serological pipettes, Microcentrifuge tubes, 15 ml conical tube, matches, fire can.)
- Used a 5 ml electronic pipette to add 7 ml of liquid media into the sample and mix thoroughly.
- The sample was inverted until the sample is completely mixed with the liquid media
- On wednesday at 9:26 the sample was placed into the shaking incubator to continue mixing the soil and liquid media
- The sample was a removed from the shaking incubator at 10:50 am and placed into the fridge at 4 degree Celsius
- The sample was removed from the fridge, and due to there being some soil still mix with the media it was placed in the centrifuge for 10 minutes then put back into the fridge of 4 degree celsius
- The following day the sample was removed from the fridge, workplace was cleaned and materials were gathered
- After lighting the fire, a five ml pipette was used in order to extract approximately 2ml of the liquid from the soil sample.
- The 2ml was then placed into a syringe, this was possible by removing the plunger from the back part of the syringe and the 2ml liquid was place into the syringe and the plunger was pace back on top
- Before pressing down on the plunger, a 0.22 μm filter is needed, open the 0.22 μm filter and attached it all the way to the tip of the syringe where the liquid will come out from
- Before the plunger was depressed a microcentrifuge tube is needed to catch the already filtered liquid. The plunger was then pressed on slowly in order to ensure the 0.22 μm filter won’t break, no resistance was met. The microcentrifuge filled to 2ml.
- A 250 μl host bacteria culture tube, 2 other 5ml pipette, and molten top agar is needed
- Due to the 500 μl being needed a 5ml pipette is used in order to get the full 500 μl.
- The 500 μl was taken the microcentrifuge tube and added to the host bacteria culture tube
- The tube is then mixed together by tapping the bottom of the tube until the two are completely mixed
- The tube was then left undisturbed for 12 minutes
- A 5ml pipette was then used to take out 3ml of molten top algar, it was added to the culture bacteria tube and then immediately suck back into the 5ml pipette and slowly placed into a plate
- The plate was then tilted in different directions to ensure that the liquid would cover the entire plate. Left undisturbed for 20 minutes
- The plate was then inverted and placed into a temporary incubator of 29 degrees celsius at 1:30pm. Moved to the actual incubator with a 33 degree celsius at 3:00pm
Results:
Sample 4 showed no signs of bacteriophage.
Conclusions and Next Steps:
Sample 4 failed in showing signs of bacteriophage. This leds us into needing to find a new soil sample to find bacteriophages. The modification that needs to be done is the soil, no baceriophages were seen meaning that there was no phage in that location, another place is need to be looked into to find phages.
Title: Direct
Date: 9/13/21 Redo: no Sample: EV5
Purpose: The purpose is to extract bacteriophages from an environmental Sample and infect the host bacteria using a plaque assay through direct isolation, using a more enriched soil sample to extract bacteriophages.
Notes:
- Clean your workstation with CiDecon, Ethyl Alcohol, to prepare your bench for aseptic work.Collect all your supplies (environmental sample, Liquid media* (5 ml/sample), Sterile 3 ml or 5 ml syringe, 0.22 μm syringe filter, 5 ml serological pipettes, Microcentrifuge tubes, 15 ml conical tube, matches, fire can.)
- A 5 ml electronic pipette was used to add 9 ml of liquid media into the sample and mix thoroughly.
- On Wednesday (9-13-21) at 9:25am the sample was placed into the shaking incubator to continue mixing the soil and liquid media for a hour.
- The sample was removed from the shaking incubator at 10:25 and then placed into the centrifuged for 10 minutes.
- A 5ml serological pipette was then used in order to remove 2ml of sample and place it into a 3ml syringe by removing the plunger from the back of the syringe, the plunger was carefully put back in place to ensure that none of the liquid would squeezed out.
- The syringe was then attach the to a 0.22 μm filter. The plunger was carefully pressed down upon to ensure the filter wouldn’t break. The filtered liquid was placed into a Microcentrifuge tube.
- Obtain the host bacteria culture tube and use a micropipette to dispense 100μl a total of five differnt times of the phage sample tube into the host bacteria tube.
- Mix both the host and phage by gently tapping the tube.
- Let the sample sit undisturbed for 10 minutes.
- Using a 5ml pipette add 3ml of molten top agar to the inoculated bacteria tube. This is where we contaminated are sample as we used the wrong top agar.
- Immediately aspirated the mixture into the pipette and transferred onto the plate (avoiding withdrawal of bubbles).
- Tilt the plate in multiple directions until the agar mixture evenly coats the agar plate
- The agar plate was left undisturbed for 20 minutes.
- After 20 minutes of sitting, the sample was still a liquid mixture. The conclusion was that the molten top algar that was used was not good, leaving us with the liquid mixture we got.
- The sample was discarded and plating of the sample was restarted .
Results:
The plate was unusable, the molten top algar that was mixed with the bacteria and the soil sample never solidify after twenty minutes.
Conclusions and Next Steps:
Sample 5 will have to be re-done due to the molten top algar that was used being for this sample not being good, chucks were present within it. The next step that will need to be taken from here is getting a new molten top algar for the rest of the future samples in order to ensure this would not happen again.
Title: Direct
Date:9-14-21 Redo: yes Sample: EV5
Purpose:The purpose is to extract bacteriophages from an environmental sample and infect the host bacteria using a plaque assay through direct isolation, this time a pervious sample will be re-done due to human error of the last attempt.
Notes:
- Clean your workstation with CiDecon, Ethyl Alcohol, to prepare your bench for aseptic work.Collect all your supplies (already filtered sample 5, bacteria culturetube, 5 ml serological pipettes, Microcentrifuge tube, matches, fire can.)
- Due to the fact that sample five is being repeated, there was a part of sample five that was already done and stored away, we started the experiment over from this part.
- The expreiment this time began at part seven of the previous sample 5 experiment. A micropipette was used to dispense 100μl a total of five differnt times from the phage sample microcentrifuge tube into the host bacteria tube.
- The newly formed mixtured was then mixed together by tapping on the tube.
- After mixing the mixture it was left undisturbed for 10 minutes. This gives the bacteria and soil sample time to attach to one another.
- A 5ml pipette was then used to take out 3ml of molten top algar, it was added to the culture bacteria tube and then immediately suck back into the 5ml pipette and slowly placed into a plate
- The plate was then tilted in different directions to ensure that the liquid would cover the entire plate, however the plate was not tilited quick enough that the liquid ended up solidifing before fully bring tilted. Caused a uneven surface on the plate. Left undisturbed for 20 minutes
- The plate was then inverted and placed into a temporary incubator of 29 degrees celsius at 1:30pm. Moved to the actual incubator with a 33 degree celsius at 5:05pm
Results:
Sample 5 showed no signs of bacteriophages.
Conclusions and Next Steps:
The plate for sample 5 showed no signs of bacteriophage, failed the purpose. The next step that should be taken is gathering another soil sample to test. The modification that needs to be made is the handling of the molten top algar, ensuring that once the liqued that is mixed with both the bacteria and molten top algar is tilted as soon it is placed into the plate to ensure a smooth surface of the plate. A different type of soil will also be used for the next sample, in hope for bacteriophage.
Title: Direct
Date: 9-15-21 Redo: No Sample: EV6
Purpose: The purpose is to extract bacteriophages from an environmental Sample and infect the host bacteria using a plaque assay through direct isolation, using a more enriched soil sample to extract bacteriophages.
Notes:
- Clean your workstation with CiDecon, Ethyl Alcohol, to prepare your bench for aseptic work.Collect all your supplies (environmental sample, Liquid media* (5 ml/sample), Sterile 3 ml or 5 ml syringe, 0.22 μm syringe filter, 5 ml serological pipettes, Microcentrifuge tubes, 15 ml conical tube, matches, fire can.)
- An 5 ml electronic pipette was used to add 9 ml of liquid media into the soil sample, about 3ml of the liquid media was still above the soil sample.
- The sample was inverted until the sample is completely mixed with the liquid media
- On Wednesday (9-15-21) at 9:22 am the sample was placed into the shaking incubator to continue mixing the soil and liquid media for an hour.
- The sample was a removed from the shaking incubator at 10:22 am and placed into the fridge at 4 degree Celsius
- The sample was removed from the fridge, and due to there being some soil still mix with the media it was placed in the centrifuge for 10 minutes
- A five ml pipette was used in order to extract approximately 2ml of the liquid from the soil sample.
- The 2ml was then placed into a syringe, this was possible by removing the plunger from the back part of the syringe and the 2ml liquid was place into the syringe and the plunger was place back on top
- Before pressing down on the plunger, a 0.22 μm filter is needed, open the 0.22 μm filter and attached it all the way to the tip of the syringe where the liquid will come out from. A microcentrifuge tube is also needed to catch the already filtered liquid from the 0.22 μm filter
- The plunger was then pressed on slowly in order to ensure the 0.22 μm filter won’t break. The microcentrifuge tube was filled to 2ml.
- A 250 μl host bacteria culture tube, 1 other 5ml pipette, micropipette, and molten top agar is needed
- A micropipette was used to dispense 100μl a total of five differnt times from the soil sample microcentrifuge tube into the host bacteria tube
- The tube is then mixed together by tapping the bottom of the tube until the two are completely mixed
- The tube was then left undisturbed for 10 minutes
- A 5ml pipette was then used to take out 3ml of molten top algar, it was added to the culture bacteria tube and then immediately suck back into the 5ml pipette and slowly placed into a plate
- The plate was then tilted in different directions to ensure that the liquid would cover the entire plate. Left undisturbed for 20 minutes
- The plate was then inverted and placed into incubator with a 33 degree celsius at 5:00pm
Results:

Sample 6 showed no signs of bacteriophages.
Conclusions and Next Steps:
Sample 6 failed in showing signs of bacteriophage. The next step that needs to be taken is gathering more soil samples from a phage more likely places, such as underneath rocks or just moist soil, digging more into the ground then just getting superficial dirt.
Title: Direct
Date: 09/20/21 Redo: no Sample:ML7
Purpose: The purpose is to extract bacteriophages from an environmental sample and infect the host bacteria using a plaque assay through direct isolation, from soil samples that were gathered from places deeper in the earth.
Notes:
- Clean your workstation with CiDecon, Ethyl Alcohol, to prepare your bench for aseptic work.Collect all your supplies (environmental sample, Liquid media* (5 ml/sample), Sterile 3 ml or 5 ml syringe, 0.22 μm syringe filter, 5 ml serological pipettes, Microcentrifuge tubes, 15 ml conical tube, matches, fire can.)
- An 5 ml electronic pipette was used to add 5 ml of liquid media into the soil sample, there was about 2 ml of the liquid media was still above the soil sample.
- The sample was inverted several times until the sample is completely mixed with the liquid media
- On Monday (9-20-21) at 9:10 am the sample was placed into the shaking incubator to continue mixing the soil and liquid media for about an hour.
- The sample was a removed from the shaking incubator at 10:30 am
- Due to there being some soil still mix with the media it was placed in the centrifuge at 10:33 for 10 minutes
- A five ml pipette was then used in order to extract approximately 2ml of the liquid from the soil sample.
- The 2ml was then placed into a syringe, this was possible by removing the plunger from the back part of the syringe and the 2ml liquid was place into the syringe and the plunger was place back on top
- Before pressing down on the plunger, a 0.22 μm filter is needed, open the 0.22 μm filter and attached it all the way to the tip of the syringe where the liquid will come out from. A microcentrifuge tube is also needed to catch the already filtered liquid from the 0.22 μm filter
- The plunger was then pressed on slowly in order to ensure the 0.22 μm filter won’t break. The microcentrifuge tube was filled to 2ml.
- A 250 μl host bacteria culture tube, 1 other 5ml pipette, micropipette, and molten top agar is needed
- A micropipette was used to dispense 100μl a total of five differnt times from the soil sample microcentrifuge tube into the host bacteria tube
- The tube is then mixed together by tapping the bottom of the tube until the two are completely mixed
- The tube was then left undisturbed for 10 minutes
- A 5ml pipette was then used to take out 3ml of molten top algar, it was added to the culture bacteria tube and then immediately suck back into the 5ml pipette and slowly placed into a plate
- The plate was then tilted in different directions to ensure that the liquid would cover the entire plate. Left undisturbed for 20 minutes
- The plate was then inverted and placed into incubator with a 33 degree celsius at 11:10 am
Results:
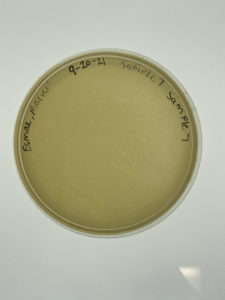
Sample 7 showed no signs of bacteriophages.
Conclusions and Next Steps:
Sample 7 failed in showing signs of bacteriophage. Due to doing four samples on the same day, the next step that needs to be taken is either find bacteriophages in the other 3 samples or adopte a sample.
Title: Direct
Date: 09/20/21 Redo: no Sample: EV8
Purpose: The purpose is to extract bacteriophages from an environmental sample and infect the host bacteria using a plaque assay through direct isolation, from soil samples that were gathered from places deeper in the earth.
Notes:
- Clean your workstation with CiDecon, Ethyl Alcohol, to prepare your bench for aseptic work.Collect all your supplies (environmental sample, Liquid media* (5 ml/sample), Sterile 3 ml or 5 ml syringe, 0.22 μm syringe filter, 5 ml serological pipettes, Microcentrifuge tubes, 15 ml conical tube, matches, fire can.)
- An 5 ml electronic pipette was used to add 11 ml of liquid media into the soil sample, about 2ml of the liquid media was still above the soil sample.
- The sample was inverted until the sample is completely mixed with the liquid media
- On Monday(9-20-21) at 10:00 am the sample was placed into the shaking incubator to continue mixing the soil and liquid media for an hour.
- The sample was a removed from the shaking incubator at 11:00 am and placed into the fridge at 4 degree Celsius
- The sample was removed from the fridge later on in the day, and due to there being too much of the soil sample in the tube, another tube was needed to transfer half of the sample in order to for it to be placed it in the centrifuge for 10 minutes at 4:35pm
- A five ml pipette was then used in order to extract approximately 2ml of the liquid from the soil sample.
- The 2ml was then placed into a syringe, this was possible by removing the plunger from the back part of the syringe and the 2ml liquid was place into the syringe and the plunger was place back on top
- Before pressing down on the plunger, a 0.22 μm filter is needed, open the 0.22 μm filter and attached it all the way to the tip of the syringe where the liquid will come out from. A microcentrifuge tube is also needed to catch the already filtered liquid from the 0.22 μm filter
- The plunger was then pressed on slowly in order to ensure the 0.22 μm filter won’t break. The microcentrifuge tube was filled to 2ml.
- A 250 μl host bacteria culture tube, 1 other 5ml pipette, micropipette, and molten top agar is needed
- A micropipette was used to dispense 100μl a total of five differnt times from the soil sample microcentrifuge tube into the host bacteria tube
- The tube is then mixed together by tapping the bottom of the tube until the two are completely mixed
- The tube was then left undisturbed for 10 minutes at 5:06pm
- A 5ml pipette was then used to take out 3ml of molten top algar, it was added to the culture bacteria tube and then immediately suck back into the 5ml pipette and slowly placed into a plate
- The plate was then tilted in different directions to ensure that the liquid would cover the entire plate. Left undisturbed for 20 minutes
- The plate was then inverted and placed into incubator with a 33 degree celsius at 5:40pm
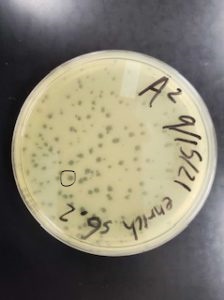
Results:
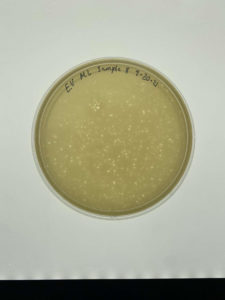
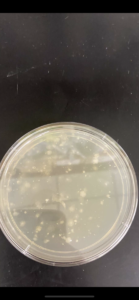
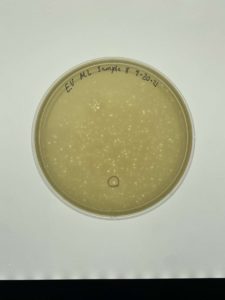
Sample 8 did show signs of bacteriophages.
Conclusions and Next Steps:
Sample 8 successfully showed signs of bacteriophage. The next step that needs to be taken is use this plate for serial dilutions due to this being the only plate with signs of bacteriophages. The next two samples were done before getting the results of sample 8.
Title: Direct
Date: 09/20/21 Redo: no Sample: EV9
Purpose: The purpose is to extract bacteriophages from an environmental sample and infect the host bacteria using a plaque assay through direct isolation, a liquid samples was then used here for better hope of bacteriophages.
Notes:
- Clean your workstation with CiDecon, Ethyl Alcohol, to prepare your bench for aseptic work.Collect all your supplies (environmental sample, Sterile 3 ml or 5 ml syringe, 0.22 μm syringe filter, 5 ml serological pipettes, Microcentrifuge tubes, 15 ml conical tube, matches, fire can.)
- Due to this being a liquid sample, the steps lessen. A tube of 15ml of liquid sample used for this experiment started Monday (09-20-21).
- A 5ml syringe is used to extract 3ml of the liquid sample
- The syringe was then attached to a 0.22 μm syringe filter, at the other end of filter a microcentrifuge tube was there to catch the liquid after compressing on the syringe
- The microcentrifuge tube was filled up to 2ml
- A micropipette was used to dispense 100μl a total of five differnt times from the liquid sample in the microcentrifuge tube into the host bacteria tube
- The tube is then mixed together by tapping the bottom of the tube until the two are completely mixed
- The tube was then left undisturbed for 10 minutes
- A 5ml pipette was then used to take out 3ml of molten top algar, it was added to the culture bacteria tube and then immediately suck back into the 5ml pipette and slowly placed into a plate
- The plate was then tilted in different directions to ensure that the liquid would cover the entire plate. Left undisturbed for 20 minutes
- The plate was then inverted and placed into incubator with a 33 degree celsius at 5:00pm
Results:

Sample 9 showed no signs of bacteriophages.
Conclusions and Next Steps:
Sample 9 failed to show signs of bacteriophage. The next step that needs to be taken is to use sample 8 for the serial dilutions in the next step. This is due to no other plate showing signs of bacteriophages.
Title: Direct
Date: 09/20/21 Redo: no Sample: ML10
Purpose: The purpose is to extract bacteriophages from an environmental sample and infect the host bacteria using a plaque assay through direct isolation, from soil samples that were gathered from places deeper in the earth.
Notes:
- Clean your workstation with CiDecon, Ethyl Alcohol, to prepare your bench for aseptic work.Collect all your supplies (environmental sample, Liquid media* (5 ml/sample), Sterile 3 ml or 5 ml syringe, 0.22 μm syringe filter, 5 ml serological pipettes, Microcentrifuge tubes, 15 ml conical tube, matches, fire can.)
- An 5 ml electronic pipette was used to add 8 ml of liquid media into the soil sample, about 3ml of the liquid media was still above the soil sample.
- The sample was inverted until the sample is completely mixed with the liquid media
- On Monday (9-20-21) at 9:12 am the sample was placed into the shaking incubator to continue mixing the soil and liquid media for an hour.
- The sample was a removed from the shaking incubator at 10:25 am
- A five ml pipette was used in order to extract approximately 2ml of the liquid from the soil sample.
- The 2ml was then placed into a syringe, this was possible by removing the plunger from the back part of the syringe and the 2ml liquid was place into the syringe and the plunger was place back on top
- Before pressing down on the plunger, a 0.22 μm filter is needed, open the 0.22 μm filter and attached it all the way to the tip of the syringe where the liquid will come out from. A microcentrifuge tube is also needed to catch the already filtered liquid from the 0.22 μm filter
- The plunger was then pressed on slowly in order to ensure the 0.22 μm filter won’t break. The microcentrifuge tube was filled to 2ml.
- A 250 μl host bacteria culture tube, 1 other 5ml pipette, micropipette, and molten top agar is needed
- A micropipette was used to dispense 100μl a total of five differnt times from the soil sample microcentrifuge tube into the host bacteria tube
- The tube is then mixed together by tapping the bottom of the tube until the two are completely mixed
- The tube was then left undisturbed for 10 minutes
- A 5ml pipette was then used to take out 3ml of molten top algar, it was added to the culture bacteria tube and then immediately suck back into the 5ml pipette and slowly placed into a plate
- The plate was then tilted in different directions to ensure that the liquid would cover the entire plate. Left undisturbed for 20 minutes
- The plate was then inverted and placed into incubator with a 33 degree celsius at 11:25 am.
Results:
Sampe 10 showed no signs of bacteriophages.
Conclusions and Next Steps:
Sample 10 failed to show signs of bacteriophage. The next step that needs to be taken is to use sample 8 for the serial dilutions in the next step. This is due to no other plate showing signs of bacteriophages.
Title: Picking a Plaque
Date: 09/22/21 Redo: no Sample: EV8
Purpose: To retrieve phage particles from a plaque that we have chosen and create a liquid sample from that plaque.
Notes:
- Clean your workstation with CiDecon, Ethyl Alcohol, to prepare your bench for aseptic work.Collect all your supplies (phage buffer, the sample that will be diluted, microcentrifuge tubes, matches, fire can, pen.)
- On Wensday (09/22/21) the phage plate that does have a bacteriophages is needed in order to pick a plaque.
- A pen is needed in order to mark which plaque will be used. A small circle is drawn on the bottom of the plate in order to show which plaque we picked.
- The plaque that was picked was small not fully rounded in a circle. Had irregular sides on the outside, on the inside it was clear.
- Label each microcentrifuge tube
- put 100μl of phage buffer into the microcentrifuge tube using a micropipette and aseptic techique
- Use a sterile tip on a p200 micropipette
- This is then used to stab the agar surface in the center of the phage at a perpendicular angle, ensure to not get the bacteria surroundings.
- Then place the tip of the micropipette that just stab the phage in the phage buffer in the microcentrifuge tube. Tap the tip against the wall and pipette up and down to ensure that the phage particles are dislodged.
- Mix the microcentrifuge tube by vortexting
Results:
The first part of Picking a Phage is finished.
Conclusions and Next Steps:
Sample 8 plate that had bacteriophages was in order to get a plaque from it for the next step. The next step is to perform serial dilutions on the plaque that was chosen from this part.
Title: Serial Dilutions
Date: 09/22/21 Redo: no Sample: EV8
Purpose: Prepare liquid phage samples of decreasing concentrations in order to purify, amplify, and titer the phage sample.
Notes:
- Clean your workstation with CiDecon, Ethyl Alcohol, to prepare your bench for aseptic work.Collect all your supplies (phage buffer, the sample that will be diluted, 6 microcentrifuge tubes, matches, fire can, pen.)
- We used 6 microcentrifuge tubes in this experiment, however one already had phage buffer inside and the plaque inside (it will be the original one), prepare the other 5 microcentrifuge tubes by labeling them as 10^-1, 10^-2, ect.
- We added 90μm of phage buffer to the other 5 microcentrifuge tube by using a micropipette and aseptic techique.
- From here 10μm was taken from the original microcentrifuge tube with the plaque with a micropipette and aseptic techique, and put into the microcentrifuge tube labled as 10^-1
- The sample was then vortexed
- These two steps were repeated 4 more times, while ensureing to change the pipette tip after each time the tip was used in another microcentrifuge tube taking 10μm of the previous microcentrifuge. It’s a transfer of 10μm of 10^-1 to 10^-2 then from 10^-2 to 10^-3 and so on while vortexing between all of them leaving tube 10^-5 with 100μl
- We then gathered 10μm from each microcentrifuge tube using a micropipette and a new tip each time, and place the 10μm into six different 250 μl host bacteria culture tube that were marked beforehand for each dilution
- Each of the tubes were then mixed through tapping and then left alone for 10 minutes
- A 5ml pipette was then used to take out 3ml of molten top algar, it was added each of the culture bacteria tube and then immediately suck back into the 5ml pipette and slowly placed into a plate, repeated for each microcentrifuge tube
- The plate was then tilted in different directions to ensure that the liquid would cover the entire plate. Left undisturbed for 20 minutes
- The plate was then inverted and placed into incubator with a 33 degree celsius at 11:55 am.
Results:
Each plates of the serial dilution had signs of bacteriophages.
Conclusions and Next Steps:
Several of the serial diluted plates showed signs of bacteriophages. The next step that will be taken is to do another serial dilution using one of the already serial diluted plates.
Title: Second Serial Dilutions
Date: 09/27/21 Redo: no Sample: EV8
Purpose: Prepare liquid phage samples of decreasing concentrations in order to purify, amplify, and titer the phage sample.
Notes:
- Clean your workstation with CiDecon, Ethyl Alcohol, to prepare your bench for aseptic work.Collect all your supplies (phage buffer, the sample that will be diluted, microcentrifuge tubes, matches, fire can, pen.)
- On Monday (09/27/21) the phage plate that does have a bacteriophages is needed in order to pick a plaque. The plate that we decided to use was plate number 5.
- A pen is needed in order to mark which plaque will be used. A small circle is drawn on the bottom of the plate in order to show which plaque we picked.
- The plaque that was picked was small not fully rounded in a circle. Had irregular sides on the outside, on the inside it was clear.
- We gather six microcentrifuges tubes and label each one as Bx10, Bx10^-1, …, Bx10^-5
- We put 100μl of phage buffer into the microcentrifuge tube using a micropipette and aseptic techique labeled Bx10
- Using a sterile tip on a p200 micropipette to stab the agar surface in the center of the phage at a perpendicular angle, ensure to not get the bacteria surroundings the phage.
- Then placed the tip of the micropipette that was just used to stab the phage, in the phage buffer of the microcentrifuge tube label Bx10. We tapped the tip against the wall and pipette up and down to ensure that the phage particles are dislodged.
- Mix the microcentrifuge tube by vortexting
- We added 90μm of phage buffer to the other 5 microcentrifuge tube by using a micropipette and aseptic techique.
- From here 10μm was taken from the original microcentrifuge tube with the plaque with a micropipette and aseptic techique, and put into the microcentrifuge tube labled as Bx10^-1
- The sample was then vortexed
- These two steps were repeated 4 more times, while ensureing to change the pipette tip after each time the tip was used in another microcentrifuge tube taking 10μm of the previous microcentrifuge tube. It’s a transfer of 10μm of 10^-1 to 10^-2 then from 10^-2 to 10^-3 and so on while vortexing between all of them leaving tube Bx10^-5 with 100μl
- We then gathered 10μm from each microcentrifuge tube using a micropipette and a new tip each time, and place the 10μm into six different 250 μl host bacteria culture tube that were marked beforehand for each dilution
- Each of the tubes were then mixed through tapping and then left alone for 10 minutes
- A 5ml pipette was then used to take out 3ml of molten top algar, it was added each of the culture bacteria tube and then immediately suck back into the 5ml pipette and slowly placed into a plate, repeated for each microcentrifuge tube
- The plate was then tilted in different directions to ensure that the liquid would cover the entire plate. Left undisturbed for 20 minutes
- The plate was then inverted and placed into incubator with a 33 degree celsius at 10:20am
Results:

Several plates are lacking bacteriophages.
Conclusions and Next Steps:
Several plates of the second serial dilution are lacking bacteriophages. The next steps that will need to be taken will be to repeat this process in order to get better results. To ensure better results in next trail we will ensure that a full10μm is gathered into the micropipette when transfering from each microcentrifuge tube.
Title: Second Serial Dilutions
Date: 09/29/21 Redo: yes Sample: EV8
Purpose: Prepare liquid phage samples of decreasing concentrations in order to purify, amplify, and titer the phage sample.
Notes:
- Clean your workstation with CiDecon, Ethyl Alcohol, to prepare your bench for aseptic work.Collect all your supplies (phage buffer, the sample that will be diluted, microcentrifuge tubes, matches, fire can, pen.)
- On Wednesday (09/29/21) the phage plate that does have a bacteriophages is needed in order to pick a plaque. The plate that we decided to use was plate number 5.
- A pen is needed in order to mark which plaque will be used. A small circle is drawn on the bottom of the plate in order to show which plaque we picked.
- The plaque that was picked was small not fully rounded in a circle. Had irregular sides on the outside, on the inside it was clear.
- We gather six microcentrifuges tubes and label each one as Cx10, Cx10^-1, …, Cx10^-5
- We put 100μl of phage buffer into the microcentrifuge tube using a micropipette and aseptic techique labeled Cx10
- Using a sterile tip on a p200 micropipette to stab the agar surface in the center of the phage at a perpendicular angle, ensure to not get the bacteria surroundings the phage.
- Then placed the tip of the micropipette that was just used to stab the phage, in the phage buffer of the microcentrifuge tube label Cx10. We tapped the tip against the wall and pipette up and down to ensure that the phage particles are dislodged.
- Mix the microcentrifuge tube by vortexting
- We added 90μm of phage buffer to the other 5 microcentrifuge tube by using a micropipette and aseptic techique.
- From here 10μm was taken from the original microcentrifuge tube with the plaque with a micropipette and aseptic techique, and put into the microcentrifuge tube labled as Cx10^-1
- The sample was then vortexed
- These two steps were repeated 4 more times, while ensureing to change the pipette tip after each time the tip was used in another microcentrifuge tube taking 10μm of the previous microcentrifuge. It’s a transfer of 10μm of 10^-1 to 10^-2 then from 10^-2 to 10^-3 and so on while vortexing between all of them leaving tube Cx10^-5 with 100μl
- We then gathered 10μm from each microcentrifuge tube using a micropipette and a new tip each time, and place the 10μm into six different 250 μl host bacteria culture tube that were marked beforehand for each dilution
- Each of the tubes were then mixed through tapping and then left alone for 10 minutes
- A 5ml pipette was then used to take out 3ml of molten top algar, it was added each of the culture bacteria tube and then immediately suck back into the 5ml pipette and slowly placed into a plate, repeated for each microcentrifuge tube
- The plate was then tilted in different directions to ensure that the liquid would cover the entire plate. Left undisturbed for 20 minutes
- The plate was then inverted and placed into incubator with a 33 degree celsius at 10:45am
Results:

The second serial dilution did have bacteriophages within each plate.
Conclusions and Next Steps:
The second serial dilution had bacteriophages within each plate. The next step will need to be taken is collecting plate lysate from a webbed plate in our serial dilution.
Title: Collecting Plate Lysates
Date: 10/04/21 Redo: no Sample: EV8
Purpose: The purpose is to generate a highly concentrated liquid phage sample.
Notes:
- Clean your workstation with CiDecon, Ethyl Alcohol, to prepare your bench for aseptic work.Collect all your supplies (phage buffer, filter, 5ml syringe, 15ml sterile conical tube, 5 ml serological pipette, matches, fire can, pen.)
- From the second serial dilution we had to pick a webbed plate from the plates. Due to our only webbed plate being Cx10 we used that for this following procedure.
- Due to there being only a small amount of phages on the plate we had to apply double the amount of phage buffer into our webbed plate. This was advised in hope for our next plates to have double the amount of phages from before.
- Using a 5ml serological pipette we put a total of 16ml of phage buffer into our webbed plate.
- After this we left the plate sit in room temperture for three hours. We then swirl the phage buffer gently.
- After the 3hours, the lid was removed from the webbed plate and then place under the plate to give the plate a tilt so the lysate in the plate to pool to one side. This made it easier to collect the lysate.
- With a 5ml syringe we collected the lysate from plate.
- After collecting all the lysate from the plate, the syringed was then attached to a 0.22 μm filter.
- The syringed was then depressed and the filtered lysate was collected into a 15ml sterile conical tube.
- The tubed was labeled “low lysate” and the initialed with our initials and placed into the refrigerated at 4 °C.
Results:
A total of 13ml of filtered lysate was collected from the plate.
Conclusions and Next Steps:
With a total of 15ml being collected of low lysate we can move on to the next step. The next step will be to start on full plate titer procedure.
Title: Full Plate Titer: Serial Dilution from Lysate
Date: 10/06/21 Redo: no Sample: EV8
Purpose: To get a high lysate from one of the serial diluted plates that used low lysate.
Notes:
- Clean your workstation with CiDecon, Ethyl Alcohol, to prepare your bench for aseptic work.Collect all your supplies (phage buffer, the sample that will be diluted, microcentrifuge tubes, matches, fire can, pen.)
- On Wednesday (10/06/21) the low lysate liquid that we gather in the step before is needed
- We gather six microcentrifuges tubes and label each one as Dx10, Dx10^-1, …, Dx10^-5
- We put 90μl of phage buffer into the microcentrifuge tube using a micropipette and aseptic techique labeled Dx10
- Using a sterile tip on a p200 micropipette we gathered 10μl from the low lysate and then placed it in the Dx10 microcentrifuges tube
- We then mixed the microcentrifuge tube by vortexting it
- We added 90μm of phage buffer to the other 5 microcentrifuge tube by using a micropipette and used aseptic techique.
- From here 10μl was taken from the original microcentrifuge tube with the low lysate in it by the use of a micropipette and aseptic techique, and put the 10μl into the microcentrifuge tube labled as Dx10^-1
- The sample was then vortexed
- These two steps were repeated 4 more times, while ensureing to change the pipette tip after each time the tip was used in another microcentrifuge tube taking 10μm of the previous microcentrifuge. It’s a transfer of 10μl of 10^-1 to 10^-2 then from 10^-2 to 10^-3 and so on while vortexing between all of them leaving tube Dx10^-5 with 100μl
- We then gathered 10μl from each microcentrifuge tube using a micropipette and a new tip each time, and place the 10μl into six different 250 μl host bacteria culture tube that were marked beforehand for each dilution
- Each of the tubes were then mixed through tapping and then left alone for 10 minutes
- A 5ml pipette was then used to take out 3ml of molten top algar, it was added each of the culture bacteria tube and then immediately suck back into the 5ml pipette and slowly placed into a plate, repeated for each bacteria culture tube
- The plate was then tilted in different directions to ensure that the liquid would cover the entire plate. Left undisturbed for 20 minutes
- The plate was then inverted and placed into incubator with a 33 degree celsius at 4:30pm
Results:
The plates did all have bacteriophages, however there phage count was too low so the procedure will need to be done again.
Conclusions and Next Steps:
Due to the bacteriophages being to low this procedure will need to be done again to get a higher count of bacteriophages. The next step will be to do the low lysate serial dilution over again. For the next procedure we should try changing the number of lysate useded in the first microcentrifuge tube.
Title: Full Plate Titer: Serial Dilution from Lysate
Date: 10/11/21 Redo: yes Sample: EV8
Purpose: To get a high lysate from one of the serial diluted plates that used low lysate.
Notes:
- Clean your workstation with CiDecon, Ethyl Alcohol, to prepare your bench for aseptic work. Collect all your supplies (phage buffer, the sample that will be diluted, microcentrifuge tubes, matches, fire can, pen.)
- On Monday (10/11/21) the low lysate liquid that we gather in the step before is needed
- We gather six microcentrifuges’ tubes and label each one as Ex10, Ex10^-1, …, Ex10^-5
- We put 90μl of phage buffer into the microcentrifuge tube using a micropipette and aseptic technique labeled Ex10
- Using a sterile tip on a p200 micropipette we gathered 10μl from the low lysate and then placed it in the Dx10 microcentrifuges tube
- We then mixed the microcentrifuge tube by vortex it
- We added 90μm of phage buffer to the other 5 microcentrifuge tube by using a micropipette and used aseptic technique.
- From here 10μl was taken from the original microcentrifuge tube with the low lysate in it by the use of a micropipette and aseptic technique, and put the 10μl into the microcentrifuge tube labeled as Ex10^-1
- The sample was then vortexed
- These two steps were repeated 4 more times, while ensuring to change the pipette tip after each time the tip was used in another microcentrifuge tube taking 10μm of the previous microcentrifuge. It’s a transfer of 10μl of 10^-1 to 10^-2 then from 10^-2 to 10^-3 and so on while vertexing between all of them leaving tube Ex10^-5 with 100μl
- We then gathered 10μl from each microcentrifuge tube using a micropipette and a new tip each time, and place the 10μl into six different 250 μl host bacteria culture tube that were marked beforehand for each dilution
- Each of the tubes were then mixed through tapping and then left alone for 10 minutes
- A 5ml pipette was then used to take out 3ml of molten top algar, it was added each of the culture bacteria tube and then immediately suck back into the 5ml pipette and slowly placed into a plate, repeated for each bacteria culture tube
- The plate was then tilted in different directions to ensure that the liquid would cover the entire plate. Left undisturbed for 20 minutes
- The plate was then inverted and placed into incubator with a 33 degree Celsius at 10:55am
Results:
There were very little to no signs of phages within the plates.
Conclusions and Next
The plates either had little to no signs of phages within the plates. Due to this we were advised to start over again from the second serial dilution. The thing that will change this time is the plate and phage we decided to use for the second serial dilution.
Title: Second Serial Dilutions
Date: 10/13/21 Redo: yes Sample: EV8
Purpose: Prepare liquid phage samples of decreasing concentrations in order to purify, amplify, and titer the phage sample.
Notes:
- Clean your workstation with CiDecon, Ethyl Alcohol, to prepare your bench for aseptic work. Collect all your supplies (phage buffer, the sample that will be diluted, microcentrifuge tubes, matches, fire can, pen.)
- On Wednesday (10/13/21) the phage plate that does have a bacteriophages is needed in order to pick a plaque. The plate that we decided to use was plate number 3.
- A pen is needed in order to mark which plaque will be used. A small circle is drawn on the bottom of the plate in order to show which plaque we picked.
- The plaque that was picked was small not fully rounded in a circle. Had irregular sides on the outside, on the inside it was clear, somewhat bigger than the rest of the phages on the plate, and a bit of a distance from the rest of the phages.
- We gather six microcentrifuges tubes and label each one as Fx10, Fx10^-1, …, Fx10^-5
- We put 100μl of phage buffer into the microcentrifuge tube using a micropipette and aseptic technique labeled Fx10
- Using a sterile tip on a p200 micropipette to stab the agar surface in the center of the phage at a perpendicular angle, ensure to not get the bacteria surroundings the phage.
- Then placed the tip of the micropipette that was just used to stab the phage, in the phage buffer of the microcentrifuge tube label Fx10. We tapped the tip against the wall and pipette up and down to ensure that the phage particles are dislodged.
- Mix the microcentrifuge tube through the technique vortex
- We added 90μm of phage buffer to the other 5 microcentrifuge tube by using a micropipette and aseptic technique.
- From here 10μm was taken from the original microcentrifuge tube with the plaque with a micropipette and aseptic technique, and put into the microcentrifuge tube labeled as Fx10^-1
- The sample was then vortexed
- These two steps were repeated 4 more times, while ensuring to change the pipette tip after each time the tip was used in another microcentrifuge tube taking 10μm of the previous microcentrifuge. It’s a transfer of 10μm of 10^-1 to 10^-2 then from 10^-2 to 10^-3 and so on while we used the technique vortex between all of them, leaving tube Fx10^-5 with 100μl
- We then gathered 10μm from each microcentrifuge tube using a micropipette and a new tip each time, and place the 10μm into six different 250 μl host bacteria culture tube that were marked beforehand for each dilution
- Each of the tubes were then mixed through tapping and then left alone for 10 minutes
- A 5ml pipette was then used to take out 3ml of molten top algar, it was added each of the culture bacteria tube and then immediately suck back into the 5ml pipette and slowly placed into a plate, repeated for each microcentrifuge tube
- The plate was then tilted in different directions to ensure that the liquid would cover the entire plate. Left undisturbed for 20 minutes
- The plate was then inverted and placed into incubator with a 33 degree Celsius at 12:13pm. However, the first two plates were placed inside at 12:40pm due to them not solidifying
Results:

As experienced within the very first time of serial solution there were only some plates with phages.
Conclusions and Next Steps:
The third attempt of doing the second serial dilution lacked bacteriophages within each of the plates. The next step that we will take is adopting a new bacteriophage. This is due to the several repeats that we have experience and still lacking of bacteriophages in plates in almost every other experiment step we take. Though in the next attempt in order to not experience the same problem of plates not solidifying after the 20 minutes we have to ensure to swirl the molten top algar container before we use it for our plates.
Title: Picking a Plaque
Date: 10/18/21 Redo: yes Sample:6B adopted from Austin Densmore and Aryana Pernarelli
Purpose: To retrieve phage particles from a plaque that we have chosen and create a liquid sample from that plaque.
Notes:
- Clean your workstation with CiDecon, Ethyl Alcohol, to prepare your bench for aseptic work.Collect all your supplies (phage buffer, the sample that will be diluted, microcentrifuge tubes, matches, fire can, pen.)
- On Monday (10/18/21) the adopted phage plate that has a bacteriophages is needed in order to pick a plaque.
- A pen is needed in order to mark which plaque will be used. A small circle is drawn on the bottom of the plate in order to show which plaque we picked.
- The plaque that was picked was a medium sized phage thats not fully rounded in a circle. Has almost a diamond shape to it.
- Label each microcentrifuge tube
- put 100μl of phage buffer into the first microcentrifuge tube that wont be serial diluted, use a micropipette and aseptic techique to put phage buffer in the tube
- Use a sterile tip on a p200 micropipette
- The tip is then used to stab the agar surface in the center of the phage at a perpendicular angle, while we ensure to not get the bacteria surroundings.
- Then place the tip of the micropipette that just stab the phage in the phage buffer in the microcentrifuge tube. Tap the tip against the wall and pipette up and down to ensure that the phage particles are dislodged.
- Mix the microcentrifuge tube by vortexting
Results:
The first part of Picking a Phage is finished.
Conclusions and Next Steps:
The adopted plate that had bacteriophages was picked in order to get a plaque from it, the next step we begin. The next step is to perform serial dilutions on the plaque that was chosen from this part.
Title: Serial Dilutions
Date: 10/18/21 Redo: yes Sample: 6B
Purpose: Prepare liquid phage samples of decreasing concentrations in order to purify, amplify, and titer the phage sample.
Notes:
- Clean your workstation with CiDecon, Ethyl Alcohol, to prepare your bench for aseptic work.Collect all your supplies (phage buffer, the sample that will be diluted, 6 microcentrifuge tubes, matches, fire can, pen.)
- On Monday (10/18/21) we used 6 microcentrifuge tubes in this experiment, however one already had phage buffer inside and the plaque inside (it will be the original one), prepare the other 5 microcentrifuge tubes by labeling them as Gx10^-1, Gx10^-2, ect.
- We added 90μm of phage buffer to the other 5 microcentrifuge tube by using a micropipette and aseptic techique.
- From here 10μm was taken from the original microcentrifuge (Gx10) tube with the plaque with a micropipette and aseptic techique, and put into the microcentrifuge tube labled as Gx10^-1
- The sample was then vortexed
- These two steps were repeated 4 more times, while ensureing to change the pipette tip after each time the tip was used in another microcentrifuge tube taking 10μm of the previous microcentrifuge. It’s a transfer of 10μm of Gx10^-1 to Gx10^-2 then from Gx10^-2 to Gx10^-3 and so on while vortexing between all of them leaving tube Gx10^-5 with 100μl
- We then gathered 10μm from each microcentrifuge tube using a micropipette and a new tip each time, and place the 10μm into six different 250 μl host bacteria culture tube that were marked beforehand for each dilution
- Each of the tubes were then mixed through tapping and then left alone for 10 minutes
- A 5ml pipette was then used to take out 3ml of molten top algar, it was added each of the culture bacteria tube and then immediately suck back into the 5ml pipette and slowly placed into a plate, repeated for each microcentrifuge tube
- The plate was then tilted in different directions to ensure that the liquid would cover the entire plate. Left undisturbed for 20 minutes
- The plate was then inverted and placed into incubator with a 33 degree celsius at 10:30 am.
Results:
Each plate showed signs of bacteriophages.
Conclusions and Next Steps:
Several of the serial diluted plates showed signs of bacteriophages. The next step that will be to perform another serial dilution using one of the phages from the already serial diluted plates.
Title: Second Serial Dilutions
Date: 10/19/21 Redo: yes Sample: 6B
Purpose: Prepare liquid phage samples of decreasing concentrations in order to purify, amplify, and titer the phage sample.
Notes:
- Clean your workstation with CiDecon, Ethyl Alcohol, to prepare your bench for aseptic work.Collect all your supplies (phage buffer, the sample that will be diluted, microcentrifuge tubes, matches, fire can, pen.)
- On Monday (10/21/21) the phage plate that does have a bacteriophages is needed in order to pick a plaque. The plate that we decided to use was plate number 5.
- A pen is needed in order to mark which plaque will be used. A small circle is drawn on the bottom of the plate in order to show which plaque we picked.
- The plaque that was picked was small not fully rounded in a circle. Had irregular sides on the outside, on the inside it was clear.
- We gather six microcentrifuges tubes and label each one as Hx10, Hx10^-1, …, H x10^-5
- We put 100μl of phage buffer into the microcentrifuge tube using a micropipette and aseptic techique labeled Hx10
- Using a sterile tip on a p200 micropipette to stab the agar surface in the center of the phage at a perpendicular angle, ensure to not get the bacteria surroundings the phage.
- Then placed the tip of the micropipette that was just used to stab the phage, in the phage buffer of the microcentrifuge tube label Hx10. We tapped the tip against the wall and pipette up and down to ensure that the phage particles are dislodged.
- Mix the microcentrifuge tube by vortexting
- We added 90μm of phage buffer to the other 5 microcentrifuge tube by using a micropipette and aseptic techique.
- From here 10μm was taken from the original microcentrifuge tube with the plaque with a micropipette and aseptic techique, and put into the microcentrifuge tube labled as Hx10^-1
- The sample was then vortexed
- These two steps were repeated 4 more times, while ensureing to change the pipette tip after each time the tip was used in another microcentrifuge tube taking 10μm of the previous microcentrifuge tube. It’s a transfer of 10μm of 10^-1 to 10^-2 then from 10^-2 to 10^-3 and so on while vortexing between all of them leaving tube Hx10^-5 with 100μl
- We then gathered 10μm from each microcentrifuge tube using a micropipette and a new tip each time, and place the 10μm into six different 250 μl host bacteria culture tube that were marked beforehand for each dilution
- Each of the tubes were then mixed through tapping and then left alone for 10 minutes
- A 5ml pipette was then used to take out 3ml of molten top algar, it was added each of the culture bacteria tube and then immediately suck back into the 5ml pipette and slowly placed into a plate, repeated for each microcentrifuge tube
- The plate was then tilted in different directions to ensure that the liquid would cover the entire plate. Left undisturbed for 20 minutes
- The plate was then inverted and placed into incubator with a 33 degree celsius at 5:28pm
Results:

Each serial diution plate showed signs of bacteriophages.
Conclusions and Next Steps:
The second serial dilution had bacteriophages within each plate. The next step that will be taken is collecting low lysate from a webbed plate in our serial dilution.
Title: Collecting Plate Lysates
Date: 10/21/21 Redo: no Sample: 6B
Purpose: The purpose is to generate a highly concentrated liquid phage sample.
Notes:
- Clean your workstation with CiDecon, Ethyl Alcohol, to prepare your bench for aseptic work.Collect all your supplies (phage buffer, filter, 5ml syringe, 15ml sterile conical tube, 5 ml serological pipette, matches, fire can, pen.)
- On Thursday (10/21/21) from the second serial dilution we had to pick a webbed plate from the plates. The webbed plate that was used was Hx10^-1 for this following procedure.
- Due to there being only a small amount of phages on the plate we had to apply double the amount of phage buffer into our webbed plate. This was advised in hope for our next plates to have double the amount of phages from before.
- Using a 5ml serological pipette we put a total of 16ml of phage buffer into our webbed plate.
- After this we left the plate sit in room temperture for three hours. We then swirl the phage buffer gently.
- After the 3hours, the lid was removed from the webbed plate and then place under the plate to give the plate a tilt so the lysate in the plate to pool to one side. This made it easier to collect the lysate.
- With a 5ml syringe we collected the lysate from plate.
- After collecting all the lysate from the plate, the syringed was then attached to a 0.22 μm filter.
- The syringed was then depressed and the filtered lysate was collected into a 15ml sterile conical tube.
- The tubed was labeled “low lysate” and the initialed with our initials and placed into the refrigerated at 4 °C.
Results:

A total of 6.5 ml of low lysate was collected from the webbed plate
Conclusions and Next Steps:
With a total of 6.5 ml of low lysate being collected and filtered, we can now perform the next step. The next step that will be taken is low lysate serial diltuion.
Title: Low Lysate Serial Dilution
Date: 10/21/21 Redo: no Sample: EV8
Purpose: To get a high lysate from one of the serial diluted plates that used low lysate.
Notes:
- Clean your workstation with CiDecon, Ethyl Alcohol, to prepare your bench for aseptic work.Collect all your supplies (phage buffer, the sample that will be diluted, microcentrifuge tubes, matches, fire can, pen.)
- On Wednesday (10/21/21) the low lysate liquid that we gather in the step before is needed
- We gather six microcentrifuges tubes and label each one as I x10, I x10^-1, …, I x10^-5
- We put 90μl of phage buffer into the microcentrifuge tube using a micropipette and aseptic techique labeled I x10
- Using a sterile tip on a p200 micropipette we gathered 10μl from the low lysate and then placed it in the I x10 microcentrifuges tube
- We then mixed the microcentrifuge tube by vortexting it
- We added 90μm of phage buffer to the other 5 microcentrifuge tube by using a micropipette and used aseptic techique.
- From here 10μl was taken from the original microcentrifuge tube with the low lysate in it by the use of a micropipette and aseptic techique, and put the 10μl into the microcentrifuge tube labled as I x10^-1
- The sample was then vortexed
- These two steps were repeated 4 more times, while ensureing to change the pipette tip after each time the tip was used in another microcentrifuge tube taking 10μm of the previous microcentrifuge. It’s a transfer of 10μl of 10^-1 to 10^-2 then from 10^-2 to 10^-3 and so on while vortexing between all of them leaving tube I x10^-5 with 100μl
- We then gathered 10μl from each microcentrifuge tube using a micropipette and a new tip each time, and place the 10μl into six different 250 μl host bacteria culture tube that were marked beforehand for each dilution
- Each of the tubes were then mixed through tapping and then left alone for 10 minutes
- A 5ml pipette was then used to take out 3ml of molten top algar, it was added each of the culture bacteria tube and then immediately suck back into the 5ml pipette and slowly placed into a plate, repeated for each bacteria culture tube
- The plate was then tilted in different directions to ensure that the liquid would cover the entire plate. Left undisturbed for 20 minutes
- The plate was then inverted and placed into incubator with a 33 degree celsius at 5:40pm
Results:
Each plate had phages on them.
Conclusions and Next Steps:
The plates we got from low lysate dilution plating all had phages. This allows us to get high volume lysate from our webbed plate. It also allows us to get the low volume lysate calculation which was 6.0 x 10^8. Our next step would be to flood for high volume lysate.
Title: Low Lysate Serial Dilution
Date: 11/01/21 Redo: yes Sample: 6B
Purpose: To get a high lysate from one of the serial diluted plates that used low lysate.
Notes:
- Clean your workstation with CiDecon, Ethyl Alcohol, to prepare your bench for aseptic work.Collect all your supplies (phage buffer, the sample that will be diluted, microcentrifuge tubes, matches, fire can, pen.)
- On Monday (11/01/21) the low lysate liquid that we gather in the step before is needed
- We gather six microcentrifuges tubes and label each one as L x10, L x10^-1, …, L x10^-5
- We put 90μl of phage buffer into the microcentrifuge tube using a micropipette and aseptic techique labeled L x10
- Using a sterile tip on a p200 micropipette we gathered 10μl from the low lysate and then placed it in the L x10 microcentrifuges tube
- We then mixed the microcentrifuge tube by vortexting it
- We added 90μm of phage buffer to the other 5 microcentrifuge tube by using a micropipette and used aseptic techique.
- From here 10μl was taken from the original microcentrifuge tube with the low lysate in it by the use of a micropipette and aseptic techique, and put the 10μl into the microcentrifuge tube labled as L x10^-1
- The sample was then vortexed
- These two steps were repeated 4 more times, while ensureing to change the pipette tip after each time the tip was used in another microcentrifuge tube taking 10μm of the previous microcentrifuge. It’s a transfer of 10μl of 10^-1 to 10^-2 then from 10^-2 to 10^-3 and so on while vortexing between all of them leaving tube L x10^-5 with 100μl
- We then gathered 10μl from each microcentrifuge tube using a micropipette and a new tip each time, and place the 10μl into six different 250 μl host bacteria culture tube that were marked beforehand for each dilution
- Each of the tubes were then mixed through tapping and then left alone for 10 minutes
- A 5ml pipette was then used to take out 3ml of molten top algar, it was added each of the culture bacteria tube and then immediately suck back into the 5ml pipette and slowly placed into a plate, repeated for each bacteria culture tube
- The plate was then tilted in different directions to ensure that the liquid would cover the entire plate. Left undisturbed for 20 minutes
- The plate was then inverted and placed into incubator with a 33 degree celsius at 10:55am
Results:

Each plate had bacteriophage on them.
Conclusions and Next Steps:
The plates we got from our second low lysate serial dilution all had bacteriophage. This allows us to get high volume lysate from our webbed plate. It also allows us to get the low volume lysate calculation which was 5.8 x 10^8. Our next step would be to flood for high volume lysate.
Amplification
Title: Collecting High Plate Lysates
Date: 10/25/21 Redo: no Sample: 6B
Purpose: The purpose is to generate a highly concentrated liquid phage sample that when phages are calculated from the plates will give a titrate over or equal to 5×10^9.
Notes:
- Clean our workstation with CiDecon, Ethyl Alcohol, to prepare your bench for aseptic work.Collect all your supplies (phage buffer, filter, 5ml syringe, 15ml sterile conical tube, 5 ml serological pipette, matches, fire can, pen.)
- On Monday (10/25/21) from the second serial dilution we had to pick a webbed plate from the plates. The webbed plate that was used was Ix10^-3 for this following procedure.
- Due to there being only a small amount of phages on the plate we had to apply double the amount of phage buffer into our webbed plate. This was advised in hope for our next plates to have double the amount of phages from before.
- Using a 5ml serological pipette we put a total of 16ml of phage buffer into our webbed plate.
- After this we left the plate sit in room temperture for three hours. We then swirl the phage buffer gently.
- After the 2 hours and 54 minutes, the lid was removed from the webbed plate and then place under the plate to give the plate a tilt so the lysate in the plate to pool to one side. This made it easier to collect the lysate.
- With a 5ml syringe we collected the lysate from plate.
- After collecting all the lysate from the plate, the syringed was then attached to a 0.22 μm filter.
- The syringed was then depressed and the filtered lysate was collected into a 15ml sterile conical tube.
- The tubed was labeled “high lysate” and the initialed with our initials and placed into the refrigerated at 4 °C.
Results:
A total of 6.5 ml of high lysate was collected from the low lysate webbed plate
Conclusions and Next Steps:
With a total of 6.5 ml of high volume lysate being collected and filtered, we can now perform the next step. The next step that will be to do a full plate titer dilution.
Title: Full Plate Titer dilution
Date: 10/26/21 Redo: no Sample: 6B
Purpose: To get a high lysate from one of the serial diluted plates that used low lysate.
Notes:
- Clean your workstation with CiDecon, Ethyl Alcohol, to prepare your bench for aseptic work.Collect all your supplies (phage buffer, the sample that will be diluted, microcentrifuge tubes, matches, fire can, pen.)
- On Tuesday (10/26/21) the low lysate liquid that we gather in the step before is needed
- We gather six microcentrifuges tubes and label each one as J x10, J x10^-1, …, J x10^-5
- We put 90μl of phage buffer into the microcentrifuge tube using a micropipette and aseptic techique labeled J x10
- Using a sterile tip on a p200 micropipette we gathered 10μl from the low lysate and then placed it in the J x10 microcentrifuges tube
- We then mixed the microcentrifuge tube by vortexting it
- We added 90μm of phage buffer to the other 5 microcentrifuge tube by using a micropipette and used aseptic techique.
- From here 10μl was taken from the original microcentrifuge tube with the high volume lysate in it by the use of a micropipette and aseptic techique, and put the 10μl into the microcentrifuge tube labled as J x10^-1
- The sample was then vortexed
- These two steps were repeated 4 more times, while ensureing to change the pipette tip after each time the tip was used in another microcentrifuge tube taking 10μm of the previous microcentrifuge. It’s a transfer of 10μl of 10^-1 to 10^-2 then from 10^-2 to 10^-3 and so on while vortexing between all of them leaving tube J x10^-5 with 100μl
- We then gathered 10μl from each microcentrifuge tube using a micropipette and a new tip each time, and place the 10μl into six different 250 μl host bacteria culture tube that were marked beforehand for each dilution
- Each of the tubes were then mixed through tapping and then left alone for 10 minutes
- A 5ml pipette was then used to take out 3ml of molten top algar, it was added each of the culture bacteria tube and then immediately suck back into the 5ml pipette and slowly placed into a plate, repeated for each bacteria culture tube
- The plate was then tilted in different directions to ensure that the liquid would cover the entire plate. Left undisturbed for 20 minutes
- The plate was then inverted and placed into incubator with a 33 degree celsius at 5:20pm
Results:

All the plates we had phages.
Conclusions and Next Steps:
All of our full plate titer dilutions had bacteriophage. Due to this we decided to do another full plate titer dilution to get a plate that we can counted bacteriophage more than 20 and less than 200. In the next full plate titer dilution sample we will dilute to 10x^-9 in order to find more countable phages.
Title: Full Plate Titer dilution
Date: 10/27/21 Redo: yes Sample: 6B
Purpose: To get a high lysate from one of the serial diluted plates that used low lysate.
Notes:
- Clean your workstation with CiDecon, Ethyl Alcohol, to prepare your bench for aseptic work.Collect all your supplies (phage buffer, the sample that will be diluted, microcentrifuge tubes, matches, fire can, pen.)
- On Wednesday (10/27/21) the low lysate liquid that we gather in the step before is needed
- We gather six microcentrifuges tubes and label each one as K x10, K x10^-1, …, K x10^-9
- We put 90μl of phage buffer into the microcentrifuge tube using a micropipette and aseptic techique labeled K x10
- Using a sterile tip on a p200 micropipette we gathered 10μl from the high volume lysate and then placed it in the K x10 microcentrifuges tube
- We then mixed the microcentrifuge tube by vortexting it
- We added 90μm of phage buffer to the other 9 microcentrifuge tube by using a micropipette and used aseptic techique.
- From here 10μl was taken from the original microcentrifuge tube with the low lysate in it by the use of a micropipette and aseptic techique, and put the 10μl into the microcentrifuge tube labled as K x10^-1
- The sample was then vortexed
- These two steps were repeated 8 more times, while ensureing to change the pipette tip after each time the tip was used in another microcentrifuge tube taking 10μm of the previous microcentrifuge. It’s a transfer of 10μl of 10^-1 to 10^-2 then from 10^-2 to 10^-3 and so on while vortexing between all of them leaving tube K x10^-9 with 100μl
- We then gathered 10μl from the last 6 microcentrifuge tube using a micropipette and a new tip each time, and place the 10μl into six different 250 μl host bacteria culture tube that were marked beforehand for each dilution
- Each of the tubes were then mixed through tapping and then left alone for 10 minutes
- A 5ml pipette was then used to take out 3ml of molten top algar, it was added each of the culture bacteria tube and then immediately suck back into the 5ml pipette and slowly placed into a plate, repeated for each bacteria culture tube
- The plate was then tilted in different directions to ensure that the liquid would cover the entire plate. Left undisturbed for 20 minutes
- The plate was then inverted and placed into incubator with a 33 degree celsius at 5:58pm
Results:
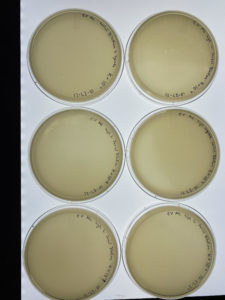
Only our plate 10x^-4 and 10x^-5 had bacteriophage.
Conclusions and Next Steps:
In our second attempt for full titer plates dilution, only plates 10x^-4 and 10x^-5 had bacteriophage. Due to our plate 4 in the first full titer dilution and our second full titer dilution looking simlar we can use them to performe the calcultation for high lysate. Which turn out to be 2.5 x 10^7 after averaging the count of the two phages. Due to us now knowing the titer calculation we can perform the TEM with it which will be our next step. However, due to the calculation being 10^7 we will either need to do another high lysate solution or (as we were advised to try) we can try to continue to DNA extraction and archiving but double the amount we have to use of the high lysate in order to get the results we should.
Title: Archiving Phage Sample
Date: 11/01/21 Redo: yes Sample: 6B
Purpose: To prepare the high lysate for a long-term storage.
Notes:
- Clean your workstation with CiDecon, Ethyl Alcohol, to prepare your bench for aseptic work.Collect all your supplies (high lysate, archiving tubes, DMSO , matches, fire can, lables)
- Gathered three archiving tubes that will be used for archiving. Each tube will need to be labled with your phage sample name and trite for your high lysate.
- Underneath the fumehood, we put on gloves in order to ensure to not contamiate the next part, with all three tubes we will filled them 3/4 of the way with beads.
- We then dispensed 4.0 ml of our high lysate into a sterile 15ml conical tube.
- After that we then added 280μl of DMSO to the 15 ml tube. We then vortexed the tube after ensuring that we cap the tube.
- We then used a serological pipette in order to fill the the 3 archiving tube with the mixture of lysate/DMSO. The amount we put in was around 1.4ml though it mostly depended on where the beads were. We focused on filling the tubes up to the top of the beads. This step was repeated for the other two tubes.
- Lastly, we ensure to cap all the tubes and place them in the storage box provided to us, it was then place in the refrigerator at 4°C.
Results:
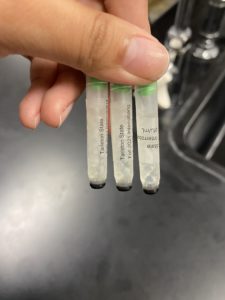
We ended up with three tubes archived tubes.
Conclusions and Next Steps:
The three tubes we have are archived and ready to be sent to a university. Our next is to make more high lysate that has a titer of 5×10^9.
Title: Collecting High Plate Lysates
Date: 11/02/21 Redo: yes Sample: 6B
Purpose: The purpose is to generate a highly concentrated liquid phage sample that when phages are calculated from the plates will give a titrate over or equal to 5×10^9.
Notes:
- Clean our workstation with CiDecon, Ethyl Alcohol, to prepare your bench for aseptic work.Collect all your supplies (phage buffer, filter, 5ml syringe, 15ml sterile conical tube, 5 ml serological pipette, matches, fire can, pen.)
- On Tuesday (10/02/21) from the second serial dilution we had to pick a webbed plate from the plates. The webbed plate that was used was Lx10^-2 for this following procedure.
- Due to there being only a small amount of phages on the plate we had to apply double the amount of phage buffer into our webbed plate. This was advised in hope for our next plates to have double the amount of phages from before.
- Using a 5ml serological pipette we put a total of 16ml of phage buffer into our webbed plate.
- After this we left the plate sit in room temperture for three hours. We then swirl the phage buffer gently.
- After the 5 hours and 04 minutes, the lid was removed from the webbed plate and then place under the plate to give the plate a tilt so the lysate in the plate to pool to one side. This made it easier to collect the lysate.
- With a 5ml syringe we collected the lysate from plate.
- After collecting all the lysate from the plate, the syringed was then attached to a 0.22 μm filter.
- The syringed was then depressed and the filtered lysate was collected into a 50ml sterile conical tube.
- The tubed was labeled “high lysate” and the initialed with our initials and placed into the refrigerated at 4 °C.
Results:
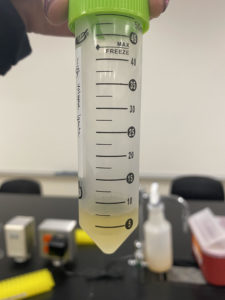
A total of 7.5 ml of high lysate was collected from the low lysate webbed plate
Conclusions and Next Steps:
With a total of 7.5 ml of high volume lysate being collected and filtered, we can now perform the next step. The next step that will be to do a full plate titer dilution.
Title: Full Plate Titer dilution
Date: 11/03/21 Redo: yes Sample: 6B
Purpose: To get a high lysate from one of the serial diluted plates that used low lysate.
Notes:
- Clean your workstation with CiDecon, Ethyl Alcohol, to prepare your bench for aseptic work.Collect all your supplies (phage buffer, the sample that will be diluted, microcentrifuge tubes, matches, fire can, pen.)
- On Wednesday (11/03/21) the low lysate liquid that we gather in the step before is needed
- We gather six microcentrifuges tubes and label each one as M x10, M x10^-1, …, M x10^-9
- We put 90μl of phage buffer into the microcentrifuge tube using a micropipette and aseptic techique labeled M x10
- Using a sterile tip on a p200 micropipette we gathered 10μl from the high volume lysate and then placed it in the M x10 microcentrifuges tube
- We then mixed the microcentrifuge tube by vortexting it
- We added 90μm of phage buffer to the other 9 microcentrifuge tube by using a micropipette and used aseptic techique.
- From here 10μl was taken from the original microcentrifuge tube with the low lysate in it by the use of a micropipette and aseptic techique, and put the 10μl into the microcentrifuge tube labled as M x10^-1
- The sample was then vortexed
- These two steps were repeated 8 more times, while ensureing to change the pipette tip after each time the tip was used in another microcentrifuge tube taking 10μm of the previous microcentrifuge. It’s a transfer of 10μl of 10^-1 to 10^-2 then from 10^-2 to 10^-3 and so on while vortexing between all of them leaving tube M x10^-9 with 100μl
- We then gathered 10μl from the last 6 microcentrifuge tube using a micropipette and a new tip each time, and place the 10μl into six different 250 μl host bacteria culture tube that were marked beforehand for each dilution
- Each of the tubes were then mixed through tapping and then left alone for 10 minutes
- A 5ml pipette was then used to take out 3ml of molten top algar, it was added each of the culture bacteria tube and then immediately suck back into the 5ml pipette and slowly placed into a plate, repeated for each bacteria culture tube
- The plate was then tilted in different directions to ensure that the liquid would cover the entire plate. Left undisturbed for 20 minutes
- The plate was then inverted and placed into incubator with a 33 degree celsius at 6:01pm
Results:
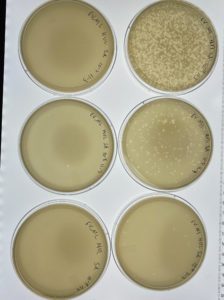
All the plates we had bacteriophage.
Conclusions and Next Steps:
All of our full plate titer dilutions had bacteriophage of varying amounts. We decided to count our M x 10^6 plate in order to find the titer for the plate. We ended up counting 20 bacteriophage which we founf that the titer ended up being 2.0 x 10^6 pfu/ml. Due to this we will try to continue on in the experiment with the DNA extraction part.
DNA Extraction
Title: TEM
Date: 10/29/2021 Redo: No Sample: 6B
Purpose: Prepares the phage sample for viewing with a transmission electron microscope.
Notes:
- On Friday (10/29/21) we transfer 1ml of our high volume lysate into a sterile microfuge tube, step was perform twice in order for the next step to be done.
- We then centrifuged the tubes using the two microfuge tubes that we created from the 1ml high volume lysate in order to balance the centrifuge machine
- It was centrifuged for an hour at 4 °C , it started at 1:39pm and was finished at 2:39pm.
- We then used a micropipettor to remove as much as we could of the supernatant without disturbing the concentrated phage at the bottom of the tube.
- With the microfuge tube that has the undisturbed concentrated phage, we then added 100 μl of phage buffer and then left to rest for 30 minutes in the refrigerator at 4 °C, was put in at 3:00pm and taken out for the next step at 3:30pm
- Some of the next steps were already prepared such as the an area being cover by bench paper, PELCO tab, EM forceps, filter paper, and the lid of a petri dish.
- We still had to gather a 5×5 cm of parafilm gloves, the microfuge tube with the concentrated phage, micropipetter and the tips for the micropipetter
- On the bench paper work area, everything was done underneith a fumehood, we begin the TEM by placing the 5x5cm parafilm on the top lid of the Petri dish and then place the PELCO tab on the parafilm with the adhesive exposed
- We then used the EM forceps to remove a fresh grid from a box of unused grids. Which we then place next to the adhesive with the dark shiny side up. While doing this make sure you pick up the grid by the very edge.
- With the micropipettor we brought, we placed 10 μl of our lysate onto the grid without touching the grid itself. The tip of the micropipetter is discarded afterwards in a 15ml trash tube that was provided.
- We let the phage settle and attach itself to the grid for 6 minutes, this was based on the high volume lysate calculation we found 2.5 x 10^7, 10^7 gives us a approximate wait time of 5-7 minutes. We decided to wait 6 minutes due to this
- using the filter paper we barley touch the side of the grids to get rid of the excess fluid.
- We then ririnse the grid twice by using the micropipette to put 10μl of water onto the grid. We left it for 2 minutes then got rid of the water by using a peice of filter paper and slightly touching the side of the grid. This process is repeated one more time. The filter paper and the tips were that were use was then put into the trash tube.
- After that we added 10μl of 1% uranyl acetate to the grid while being extremly careful due to the substance being toxic. It is left for 2 minutes before it excess UA being removed with the fiter paper and the tips were place in the trash tube.
- Lastly, the grid was left to dry for a couple of minutes before it was placed into a used grid container in part B5. This will then be sent off to a lab wgere they will show how our phages look like.
Results:
Enter results here
Conclusions and Next Steps:
Enter conclusions here
Title: DNA Extraction
Date: 11/08/2021 Redo: No Sample: 6B
Purpose: This procedure is to extract the DNA from our high lysate sample that we collected and have the titer from.
Notes:
Day one:
- On Monday (11/08/21) we mixed the HVL that we gathered, then transfered 5 mL of the HVL to a 15 mL coniccal tube.
- The tube was then given to a TA who added 20uL of nuclease mix to the 15 mL tube
- The tube was then inverted gently and incubated at 37°C for 10 minutes
- The lysate was then transfered into 5 microfuge tubes with each one containing 1 mL
- 20uL of ZnCl2 was then added to the 5 tubes, mixed through inversion, and incubated at 37°C for 5 minutes.
- Once finished the tubes were centirifuge at 10,000rpm for one minute, another tube was added filled with water in order to balance the centirifuge machine.
- A pellet formed from centrifuging, while ensuring to keep the pellet, we removed the supernatant through aspiration from each tube. The supernatant can then be discared.
- Then resuspend the pellets in 500uL TES buffer in each tube, all five were then incubated at 60°C for 15 minutes, this is done in order to expose the DNA while protecting the nuclease activity.
- The five tubes then added 1uL of Proteinase K then mixed gently. Afterwards incubate at 37°C for 10 minutes, in order to eliminate nuclease activity
- Then added 60 uL of potassium acetate to each of the 5 tubes, mix and then left on ice for 15 minutes.
- The tubes were then centifuged again but this time at 4°C for 1min at 12,000rpm. Then keep the supernatant by transfering each supernatant into a new microfuge tube. The pellets can then be thrown away
- Lastly, add 500 uL of isopropanol to each supernatant tube, mixed through inversion, and left overnight on ice
- Day Two
- We then centrifuge the tubes at top speed for 10 minutes, the supernatant was then collected and discarded without disturbing the pellet at the bottom
- Afterwards we added 250uL of 70% ethanol to each tube, spun for 1 minute at top speed, then discarded the supernatant into waste.
- The DNA pellets were then placed upside down on a napkin at room temperature underneith the fume hood in order to dry the DNA pellets
- Once the tubes were dried each tube, we added 50 uL of the same nuclease-free water and resuspended throughout the 5 microfuge tubes until the same 50uL of nuclease-free water have went through the five tubes and in one single tube.
- The DNA concentration was then checked through Nanodrop.
Results:
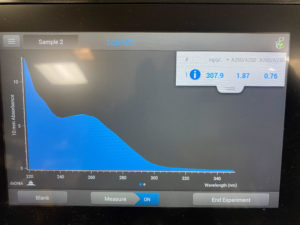
The nanodrop readings showed a good level of DNA but high level of contamination.
Conclusions and Next Steps:
The Nanodrop reading showed a good level of DNA that came from our HVL, but also showed high level of contamination. The next step would be to do the ethanol precipitation of DNA/RNA to decrease the contamination level.
Title: Ethanol precipitation of RNA/DNA
Date: 11/09/2021 Redo: No Sample: 6B
Purpose: This procedure is to decrease the amount of contamination in the our DNA mircocentrifuge tube.
Notes:
Day one:
- On Tuesday (11/09/21) we added 3.1 mL of sodium acetate to our microcentifuge tube that we used for the Nanodrop test with, we also added 93 mL of ice cold 100% Ethanol to the microcentifuge tube. These numbers were gathered from the volume in the microfuge tube that we used for testing the nanodrop, we had 31 mL from the tube we timed this by 0.1 to get the 3.1 mL for the sodium acetate needed, while we timed 31 mL by 3 to get the volume of ice cold 100% Ethanol needed.
- We then vortexed the microfuge tube on low until it was mixed thoroughly
- We then left it over night in a -80°C fridge for overnight
- The following day after taking the microfuge tube was taken out and centrifuge at full speed in a 4°C for 30 minutes
- Afterwards the pellets were washed twice with 0.5 mL ice cold 75% Ethanol and spun again in the centrifuge at full speed at 4°C for 10 minutes each time, while each time taking out the supernatant the first time and the ethanol the second time
- After the second 10 minutes take out the ethanol spun the tube quickly for 10 seconds to ensure to remove the ethanol
- Air dry the pellet using the fume hood and we added 50 uL of nuclease free water to the dry tube
- We then checked the DNA concentration by the use of Nanodrop
Results:
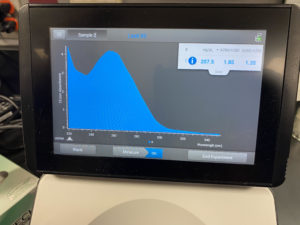
The nanodrop readings showed a good level of DNA and not as high level of contamination where we can keep going.
Conclusions and Next Steps:
The Nanodrop reading showed a good level of DNA , and also showed not as high level of contamination. The next step would be to keep going with finding the DNA concentration through Qubit.
Title: Qubit
Date: 11/10/2021 Redo: No Sample: 6B
Purpose: This procedure is to find the exact concentration of DNA in our tube.
Notes:
- On Wednesday (11/10/21) we gathered 3 0.5 microcentrifuge tube and one 1.5 microcentrifuge tube
- A total of 597 uL of dsDNA HS buffer was added to 1.5 microcentrifuge tube by using a 100uL micropipettor and using a 10uL micropipettor was used to add 3 uL of dsDNA HS reagent to the same microcentrifuge tube and then vortexed
- In one 0.5 microcentrifuge tube 190 uL working buffer we created from the last step was added with a 100 uL micropipettor, 10 uL of standard 1 was added with a 10 uL micropipettor
- In another 0.5 microcentrifuge tube we added 190 uL working buffer we created from the last step was added with a 100 uL micropipettor, 10 uL of standard 2 was added with a 10 uL micropipettor
- In the last 0.5 microcentrifuge tube we added 198 uL of working buffer was added with a 100 uL micropipettor and 2 uL of DNA was added to the tube with 10 uL micropipettor
- Afterwards the three tubes was vortex for 3 seconds and left to sit for 2 minutes
- The tubes were then read with an invitrogen machine by thermo fisher scientific
Results:
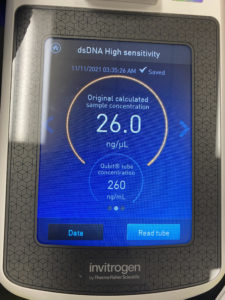
The result of the qubit reading was 26 ng/μl DNA concentration in just 2μl of our microcentifuge tube
Conclusions and Next Steps:
The qubit reading showed that 26 ng/μl concentration of DNA was in every 2μl of DNA in our microcentifuge tube
Characterization
Title: Restriction Emzyme Digest
Date: 11/10/2021 Redo: No Sample: 6B
Purpose: This procedure is to cut the phage into multiple fragments based on the DNA sequence
Notes:
- With the DNA sample we gathered, we gently mixed the tube through flickering with our fingers
- The tube was then incubated at 65 °C for 10 minutes and then placed on ice right afterwards. The tube was then place in the microcentrifuge for less than 1 minute
- With the concentration of our DNA sample gathered between the Nanodrop and the qubit test we calculated the volume of DNA sample needed to obtain 0.5 µg of DNA.
µl DNA = 0.5 µg (ml/110 µg)(1000 µl/1 ml) = 4.5 µl
STEP B
- We then gathered 5 microcentifuge tubes and put 4.5 µl of our DNA in each one, and labled them as uncut, HAE III, Nsp I, Sac II and Sal I
- Then in each tube, expect the uncut and the Sal I, we place 2.5 uL of 10x reaction buffer and 0.5 uL of the respective restrictive enzyme and 17.5 of sterile ddH2O
- In the uncut tube no enzymes were place only 20.5 of sterile ddH2O was added to the tube
- While in the Sal I added 3.1 buffer and its Sal I enzyme and ddH2O for all tubes to end up with 25 uL
- Each tube was then mixed gently and quickly spun in the microcentrifuge for less than 1 minute
- The tubes were then incubated for one hour at 37 °C
- Lastly, the tubes were spun again at top speed for less than one minutes and then stored in a -20 °C freezer.
Conclusions and Next Steps:
We ended up with 5 microcentrifuge tubes with 4 having different enzymes and one with none and only DNA. The next step is to cast agarose gel and doing gel electrophoresis.
Title: Casting Agarose Gel and Gel Electrophoresis
Date: 11/11/2021 Redo: No Sample: 6B
Purpose: This procedure is to prepare a gel for electrophoresis so we can view our DNA and our DNA with the restrictive enzyme.
Notes:
- On Thursday (11/11/21) we got a erlenmeyer flask in order to put make our gel apparatus in we need enough 0.8% of agarose gel in order to cover the tips of the 2-3 mm gel combs
- In order to make the gel we needed 0.24g of agarose powder and 30mL of x TBE Buffer into the erlenmeyer flask
- The flask was then heated for one minute, but we stopped at 30 seconds to gently swirl the flask.
- Once it was finished we allowed the tube to cool for a bit before adding 5 uL of ethidium bromide (EtBr) to the flask, we then swirled it again and poured the mixture into the gel apparatus, while ensuring not to create bubbles by pouring slowly and when there was little of the gel left in the tube we poured it to the side of the apparatus
- We then left the gel to sit for 20 minutes so it can solidify
- While the gel was solidifing we got the our uncut DNA, and the DNA with the enzyme in order to prepare them to be place in the gel
- We added 5 uL of 6x loading dye to each tube, however at this point we made the mistake of adding Hind III enzyme to each of our tubes, this ruined the items in the microcentrifuge tube. Due to us not having anymore DNA to make the 4 enzymes containers again we could only make one uncut container with the DNA we had left.
- We then made the ladder with 5 uL of loading dye, 24uL of nuclease free water, and 1 uL of Hind III emzyme
- The two samples were then place in a 65 °C heat block for 5 minutes then place on ice to cool them and lastly they were microcentrifuge for 15 seconds at 10,000rpm
The gel was loaded in the following order:
Ladder, Uncut DNA
- once the gel was fully cooled / solidified we remove the comb by pulling it stright up, we also removed the gel casting tray platform so we could place it in the correct postition
- The platform was place in the gel apparatus where wells were at the cathode end of the box (at the negative end of the gel apparatus)
- We then pour 1x TBE buffer into the gell apparatus until the gel was submerged with about 1/4 inch of the 1X TBE Buffer
- we used a micropipette with a new tip each time in order to load 20 uL of the ladder and the Uncut DNA to two of the wells
- Once the 20 uL were added we put the lid of the gel apperatus on with the postive end of the lid at the bottom of the wells
- We then pluged the electrodes into the power supply with the power set at 100 V.
- We left the gel to run until the dye got to 5-6 marker of the gel box
- After 1 hour and 20 minutes, we turned off the power box, took out the gel box container from the gel apparatus, then place the gel over the UV lights machine in the storage room of the lab
Results:
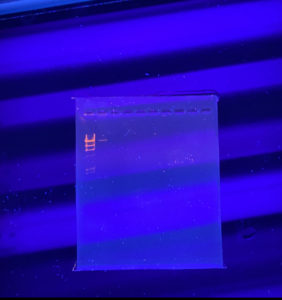
The ladder did show up in the results and so did the uncut DNA
Conclusions and Next Steps:
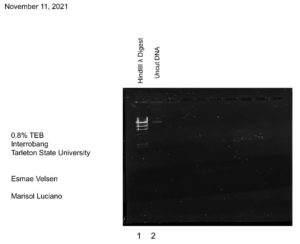
The DNA electrophoresis was successful for the most part with the uncut DNA we had.