Discovery of NeonMoon
Sample Collection
| Collector Name | Tanner | Tanner | Chloe |
| Sample No. | #1 | #2 | #3 |
| Date of Collection | 8/30/2019 | 9/1/2019 | 9/1/2019 |
| Sample Type | Liquid | Liquid | Soil |
| General Location | Lipan | Lipan | Stephenville |
| Location Description | Barn runoff, stagnant water pit | Stagnant water in the Bosque river | Damp soil in the courtyard of the Bosque Apartments |
| GPS Coordinates | 32.524253, -98.044864 | 32.214288, -98.203214 | 32.218783, -98.215924 |
| Sample Depth | Surface water | Surface water | Soil about 2cm below the surface dirt |
| Ambient Temperature | 33.3 Degrees Celsius | 31.7 Degrees Celsius | 27.78 degrees Celsius |
Isolation/Purification
Direct Isolation
Date Started:Sep. 04, 2019 Redo? No
Purpose: Our goal is to isolate a new phage from one of our environmental samples.
Notes:
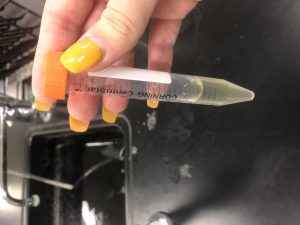
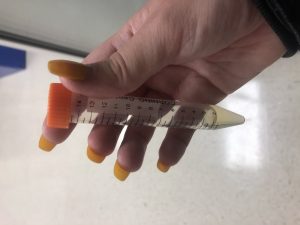
To begin, we prepared our bench for aseptic work while the other person gathered our materials. The materials we used were our liquid environmental samples, 5mL sterile syringe, 0.22 micrometer syringe filter, and several microcentrifuge tubes. We prepared to filter the top 2mL of our sample using a syringe and a sterile filter. We avoided filtering as much solid matter from the liquid sample as possible. We filtered 0.5mL of the filtrate into a microcentrifuge tube and capped it immediately.
Results:
On September 4, 2019 at 4:30 p.m, a new phage had been isolated, and we decided to carry on with the next procedure to test for new phages.

Conclusions and Next Steps:
We continued the process into plaque assay.
Plaque Assay
Date Started:Sep. 05, 2019 Redo? Yes
Purpose: Our purpose was to test for phages on a bacterial lawn we created.
Notes:
In order to proceed with our phage isolation, a plaque assay was needed. This process proved to be quite difficult the first time attempted. Due to prior arrangements, this step had to be completed with only one lab partner present, Tanner Taylor. To begin, aseptic technique was used in order to clean the work area. After washing my hands, I assembled the supplies. The supplies needed for this experiment was a vial containing 250 microliters of host bacteria, the isolated sample, a 10-100 microliter micropipettor, a bottle of top agar heated at 55 degrees Celsius until needed, and a sterile 5mL pipette with the pipette gun. To begin, I lit the open flame to provide a “balloon” of air that is safe to work in. In this “balloon” I transferred 500 microliters of the sample into the vial of host bacteria. After tapping the outside of the glass containing the mixture in order to mix it further, I set it aside and let it sit for 5-10 minutes. In order to be efficient, I used this time to retrieve my top agar, after turning off my flame. After coming back and arranging my materials, I re-lit the flame. Working closely to it in order to avoid contamination, I used the 5mL pipette to transfer 3mL of top agar to the vial containing the bacteria and isolated phage. Immediately after dispensing the top agar, I gathered it back into the pipette, and then dispensed it into an agar plate. I then tilted the plate in order to spread the top agar all over the bottom of the plate. I sat the plate down and waited 15 minutes in order for the top agar to solidify. After the wait, I flipped the plate over in order to be sure that the top agar had indeed solidified. I then placed the plate into the incubator and let it sit for 2 days for the phage to show up in the bacteria.
Mistakes: Several mistakes and breaches of aseptic technique occurred during this particular step of the lab. First among these was that when I gathered my materials for the first time, I brought out the wrong plates. After fully completing the experiment, I discovered my mistake and realized that I had to restart. On my second attempt, I did not let my top agar sit for long enough, and thus when flipped the top agar fell to the bottom of the plate, invalidating the sample. On my third and last mistake, I opened my pipette to far away from the flame, resulting in it becoming contaminated. Luckily, I realized this as soon as it was done so I did not contaminate any of my sample. After experiencing all of these mistakes I was able to successfully, and aseptically, complete the plaque assay.
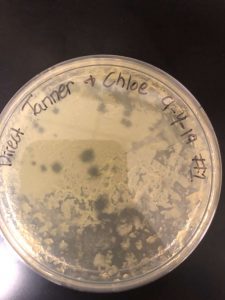
Results:
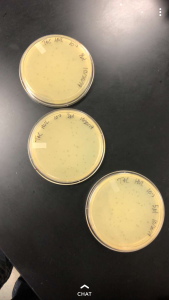
On Friday, September 6th, 2 days after placing our plate inside of the incubator, an aggressive phage was discovered on our plate. The phage was very visible, and had several plaques which could be further experimented on.

Conclusions and Next Steps:
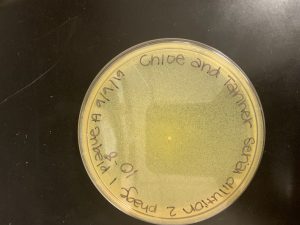
From our data we determined that we did indeed have a phage, and that there was a very high chance that this phage is one that has yet to be discovered. From this data we knew that we could experiment further, proceeding to the first serial dilution and spot test. I circled two plaques in order to use them in the next experiment.
First Serial Dilution Spot Test
Date Started:Sep. 06th, 2019 Redo? no
Purpose: The purpose of this experiment was to dilute the phage down to the lowest percentage where the phage was still noticeable, thus reducing the odds of multiple phages in each subsequent dish.
Notes:
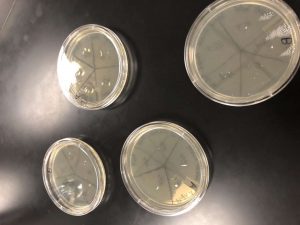
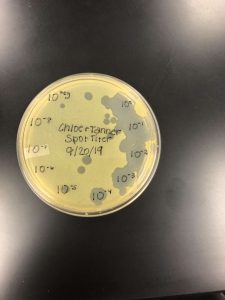
To prepare for this experiment, multiple steps were needed to be set up in order to have a smooth lab with no mistakes. Once again, prior circumstances only allowed myself, Tanner, to attend the experiment. After cleaning the table, I prepared for the lab. To setup, I needed to label 20 different microcentrifuge tubes. 18 of these were used for testing each plaque that was circled, 9 each. There were also 2 negative control microcentrifuge tubes, with one being concocted at the beginning of the experiment and one at the end. I labeled these by dilution size, initials of the group, and whether they were taken from plaque A or B. Also, I gathered the dish that had the picked plaques on it. Finally, I retrieved a 10 – 100 microliter micropipetter. With that, my materials were gathered and I was ready to start the experiment. For the experiment, I used the micropipetter to transfer 90 microliters of phage buffer to each microcentrifuge tube. I used a new tip each time, just in case I unknowingly caused contamination. After each tube had phage buffer, I used a new tip and dipped it into the marked plaque. I then dipped the infected tip into the first non-control tube. After vortexing, I used a new tip to extract 10 microliters from that tube and place it into the next tube, vortexing it as well. I continued to do this from every tube up to 10^-8 for each plaque, using a new tip each time. I did nothing to the negative control plates. After doing this, I immediately began the spot test. I used a new tip for the micropipetter each time, as I took 10 microliters from each tubed and placed it into a pre-made grid on each plate. After each diluted sample was placed on the dish, I put them into the incubator agar side down and let them sit for the weekend.
Results:
On Monday, September 9th, our group went into the lab to check the spot test and mark the results. We discovered that there no contamination and that the lab had worked perfectly, with the spot test showing exactly where the phage got so diluted that it was not able to noticeably affect the bacteria.
Conclusions and Next Steps:
Our data showed us the maximum effective dilution of our phage, which we then used as the starting point for the next round of dilutions. This, the second serial dilution, would be done as the first part of the amplification process.
Second Serial Dilution
Date Started:Sep. 09, 2019 Redo? No
Purpose: Our purpose was to begin the process of amplifying one of the phages from our first serial dilution.
Notes:
To begin, like always, we prepared our bench for aseptic technique while the other person gathered the materials. We continued our procedure by setting up ten-fold serial dilutions by arranging the microcentifuge tubes in order from 10^0 to 10^-8, including a negative control. Each tube was filled with 90 microliters of phage buffer. We added 10 microliters of the undiluted phage into the first tube and vortexed. We used a clean pipette tip and transferred 10 microliters of the first tube into the second one, and vortexed as well. We continued this process for each tube, using a clean pipette tip for each transfer. We added 10 microliters of each diluted solution to 250 microliters of host bacteria, and let it sit for ten minutes. Finally, we mixed 3mL of top agar with each new solution and transferred each one to an individual plate. To finish the procedure, we transferred the plates into the incubator after letting the top agar sit for fifteen minutes.
Results:
Our phage was amplified and we were able to continue in our process.

Conclusions and Next Steps:
We continued with a low volume lysate and a spot titer in the amplification process.
Amplification
Low Volume Lysate
Date Started:Sep. 16th, 2019 Redo? no
Purpose: In order to continue the experiment, a low volume lysate of our phage sample had to be collected.
Notes:
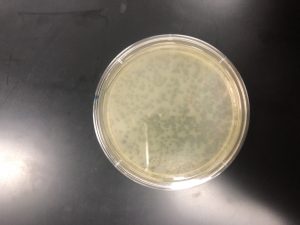
In order to prepare for the plate lysates, after using proper aseptic technique for cleaning the work space, our materials had to be gathered. We used a .22 micron filter, a 5mL sterile syringe, phage buffer, and a sterile 15mL conical tube for storage of the lysate. Along with these, we also needed to choose the proper plate for collection of a lysate. After selecting the best plate for continuation (one which had a webbed design of leftover bacteria, but was not completely clear), we were ready for the first step in the lysate collection process. This involved flooding the webbed plate by dispensing 8mL of phage buffer into the dish. After doing this, the plate had to be left in the incubator for 2-4 hours to allow the phage buffer to mix with the sample. After 2 hours in the incubator, the dish was removed for further experimentation. The second step of lysate collection involved extracting the phage buffer and placing it into the 15mL conical tube. The liquid was aspirated from the dish into the 5mL syringe, the sterile .22 micron was applied, and the liquid was pushed through the filter into the 15mL conical tube. One use of the syringe was enough to collect all of the lysate, so multiple aspirations were not needed. After collecting the lysate, the 15mL conical tube was properly labeled and placed in the 4 degree Celcius refrigerator until needed again. All materials were then disposed of properly in the correct location.
Results:
A low volume lysate was collected on Sept. 16th at 11:20 A.M. and stored in the refrigerator at the proper temperature.

Conclusions and Next Steps:
Following this, a Serial Dillution and Spot Titer is needed in order to determine the correct dillution that should be placed upon a full plate titer.
Spot Test
Date Started: 9/20/19 Redo? yes
Purpose: To determine the presence of a phage and the concentration of the dilution to continue with a spot titer.
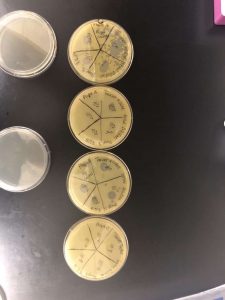
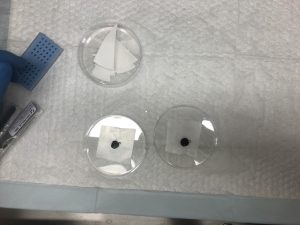
Notes: We began with cleaning our work area through aseptic technique to ensure protection. Then, we prepped our plate by putting 3mL of top agar with 250 microliters of host bacteria and immediately pipetting it into our plate. We spread the solution evenly throughout the plate and allowed it to sit for ten minutes. We then started our third serial dilution with the low volume lysate. We continued with the same process as our other dilutions, but with the low volume lysate instead. When we had finished with that we use a micropipette to transfer 3 microliters of each concentration into its designated spot on the plate. We allowed it to sit out for 30 minutes before transferring it to the incubator for 48 hours.
Mistakes:
On our first attempt, upon inspection of the plate after incubation, a plaque was discovered in the section designated for negative control. In order to ensure sterility of out test, we ran the experiment again, ensuring that proper aseptic technique was used throughout.
Results:
After the second test was incubated, we discovered our spot titer was successful and that no plaque was seen in the negative control section. From this, we are able to calculate the proper dillution amount to use for the next experiment.
Full Plate Titer
Date Started: 9/30/2019 Redo? Yes
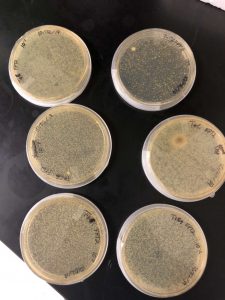
Between 9/30/19 and 10/9/19, our lab experienced an unknown problem which was eventually discovered to be that our bacteria was dying off, resulting in any experiments being flawed. The first of our flawed experiments was attempted with the 10^-4, 10^-5, and 10^-6 concentrations from our dilutions. After preparing our work area, cleaning, we gathered the materials. We needed 4 plates, one for each dilution along with our negative control. We also would need 4 bacterial culture tubes, the micropipettor, the large pipette gun, and four 5mL pipettes. Very similar to the plaque assay protocol, we inoculated the bacteria with 10 microliters of sample, making sure to label each with the proper concentration. after letting the bacteria sit for 10 minutes, 3 mL of top agar was added to the solution, which was then transferred to the plate. After ten more minutes, the plates were flipped, labeled, and placed into the incubator. Upon inspecting the plates, however, issues were found that were initially expected to be contamination. Due to this, the plates were wrapped and placed in the refrigerator. The experiment was then retried, using the exact same protocol. However, the exact same results became of the experiment. We agreed to try the experiment one more time on 9/6/19. Instead of using the same samples, we used the 10^-1, 10^-2, and 10^-3 samples. This was so that if our calculated samples were contaminated, we might be able to see a result on different samples. However, this experiment also ended in the same unexpected result. In order to figure out what the problem was, we had a class discussion, as everybody was experiencing similar results.
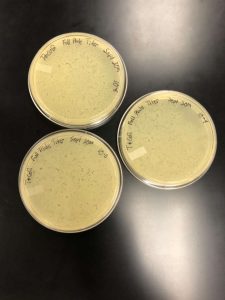
After this discussion, our lab team decided to run a spot test in which we tested our negative samples, as well as the 10^-1 concentration sample. We did this with the new samples of bacteria. The protocol was similar to that done in the spot test experiment. We cleaned our work area and gathered the negative control micro-centrifuge tube, the 50 mL conical tube of phage buffer, and the 10^-1 sample, along with one plate, top agar, and the micropipettor. Following this, we simply labeled the plate, spread 3mL of top agar onto it, and then used the micropipettor to transfer 3 microliters of each sample to the plate, each in their own divided section. The plate was then left alone for 5 minutes and then placed in the incubator.
It was then determined that the problem lied in the bacteria, as it was beginning to die and therefore the plates were not valid. However, we were also able to determine that there was significant contamination in the diluted samples.
In order to fix this, an entire new serial dilution was done from the low volume lysate, with a new conical tube of phage buffer. After the serial dilutions were new and non-contaminated, as well as the bacteria having been re-made, the original experiment could continue. Using the calculated value of 10^-5 as what seemed to e the proper dilution, three plaque assays were done with the 10^-4, -5, and -6 dilutions so as to “trap” the proper dilute. After incubation, it was discovered that the 10^-4 was the optimal webbed plate.

High Volume Lysate
After the creation of the webbed plate, a high volume lysate needed to be done. In order to do this, I first cleaned the work area, washed my hands, and prepared my materials. I needed a 15 mL pipette, the pipette gun, the 10^-4 webbed plate, and 8mL of sterile phage buffer.
To collect the high volume lysate, the 8 mL of phage buffer was dispensed upon the webbed plate under the protection of the flame. After dispensing the buffer, the plate was capped, then wrapped and placed in room temperature for an hour, followed by in the refrigerator for 7 hours. This gave the phage buffer long enough to collect phage particulate for extraction.


Collection of High Volume Lysate
After the hour at room temperature and 7 hours of sitting in the refrigerator, the lysate was ready to be collected.
Determining the Concentration of our High Volume Lysate
In order to determine how long our lysate needed to rest on the grid in the next step, we had to determine the concentration of our lysate and plug it into the provided formula, which would tell us the length of time needed. To determine the concentration, a spot test was preformed using the dilutions of the lysate. Using three plates ranging from the negative and a 10^0 up to a 10^-10 concentration, we isolated each dilution to determine the amount of plaques that would form. Upon doing this and allowing it to sit in an incubator overnight, 23 plaques were located on the 10^-6 sector. By plugging this into the provided formula, the titer was determined to be 2.3 x 10^9. This would mean that in the next step, the sample would need to sit on the plate for a total of 2 mins before being cleaned off.
Mounting Phage Samples for TEM and Staining with Uracil Acetate (Using Pelco Tabs). 10/25/19
Date Started: 10/20/2019 Redo? No
Purpose:
This procedure is used to make it possible to see our phage with a transmission electron microscope.
Notes:
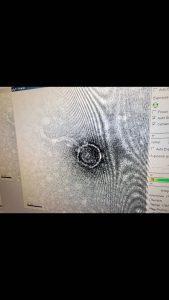
We started by preparing our phage samples by centrifuging 1 mL of our high volume lysate for an hour at 4 degrees Celsius to separate phage particles on the bottom of the tube. We used a micropipettor to remove most of the supernatant. Then we centrifuged the phage particles with the phage buffer for 45 minutes. We then prepared our workspace under the fume hood to mount and stain our phage. We began by placing ten microliters of our lysate on the grid using a micropipettor, and being sure to not let the tip touch the grid. We then allowed time for the phage to settle and attach onto the grid. Then, we used filter paper to dab away any excess. We then started to rinse the grid, but worked quickly. We placed 10 microliters of sterile water on the grid and wicked it off with the filter paper. We did this twice. Then, to stain, we added ten microliters of 1% uranyl acetate to our grid, let it sit for two minutes, and then quickly picked up the excess fluid with our filter paper. We continued to dry up the excess fluid until our grid had an oily complex. Finally, after letting the grid air dry, we placed our grid in the 5A spot of our designated grid box to be transported for imaging.
Results:
Conclusion and Next Steps:
Serial Dilution
Date Started: October 30, 2019 Redo? no
Purpose: The purpose of completing another serial dilution is to guarantee we have enough lysate to continue with our DNA extraction.
Notes: We set up our station as an aseptic procedure. To create the new set of webbed plates, we plated our 10^-4, 10^-5, and 10^-6 dilutions. We used a micropipetor to add ten microliters of each dilution to the aliquoted host bacteria. Then, we used a micropipettor to transfer 3 mL of top agar into the bacteria and dilution mixture. After doing so, we used the micropipettor to immediately move the mixture to a thawed plate. This procedure was repeated for each of the three serial dilutions.
Results: After waiting the allotted time, our plates may not be webbed enough and we may have too little lysate.
Conclusion: We will either continue the process into DNA extraction or decide if we want to focus on creating more lysate.
DNA Extraction
3.5 M. foliorum DNA extraction
Date Started: Nov. 8th Redo? no
Purpose: To extract the DNA from our ample to determine if the small amount of DNA that we had would be enough to continue with the protocol.
Notes:
For the DNA extraction, as nothing is growing, the torch is not needed. However, it is always worth cleaning the table with the CiDecon and the ethanol. The high volume lysate was gently mixed, then aliquoted from the original tube into a separate 15 mL conical tube. The tube was given to our lab instructor so that she could add 20 microliters of nuclease mix. After this was added, the solution was inverted and left in the 37 degree Celsius incubator for 10 minutes. 1 mL of the incubated solution was added to each of 5 microcentrifuge tubes. 20 microliters of Zinc Chloride was added and mixed to every tube, and was then placed again in the 37 degree Celsius incubator for 5 minutes. This precipitated out the phage. This was then put in the incubator, at 10,000 rpm for 1 minute. This pelleted the phage, making it more solid. Immediately after getting the tubes out of the centrifuge, the next steps had to be done as quick as possible. The supernatant was drained out from all of the samples with the micropipettor. Then, 500 microliters of TES Buffer was added to each tube and it was placed in the 60 degree Celsius incubator for 15 minutes. One microliter of Proteinase K, which needs to stay cold, was added to the solution. This mixture was placed in the 37 degree incubator for 10 minutes. 60 microliters of potassium acetate was added to the tubes, and the gel like precipitate that appeared was placed on ice for 15 minutes. After retrieving the tubes from the ice, they were placed in the centrifuge at 4 degrees Celsius at 12,000 rpm for 1 minute. The supernatants were moved to separate tubes, and the original tubes were thrown away. 500 microliters of isopropanol was added to each tube, and the solution was left to sit for just over 2 hours in ice. The tubes were then put into the incubator at top speed for 10 minutes. All of the supernatant was added to a waste tube. 250 microliters of 70% ethanol was added to each tube and centrifuged for one minute at top speed. The supernatant, again, was discarded into the waste tube. 250 more microliters of ethanol were added, and the step was repeated. Then, the tubes were placed in a 60 degree Celsius incubator and left until fully dried. After fully dry, one of the pellets was suspended in 50 mictoliters of nuclease free water, which was then moved to each tube in order to collect all the sample. Then, the concentration and quality of the DNA was checked in the Nano-drop by first wiping, then testing a blank of 1 microliter of nuclease free water, then wiping, then testing the DNA.
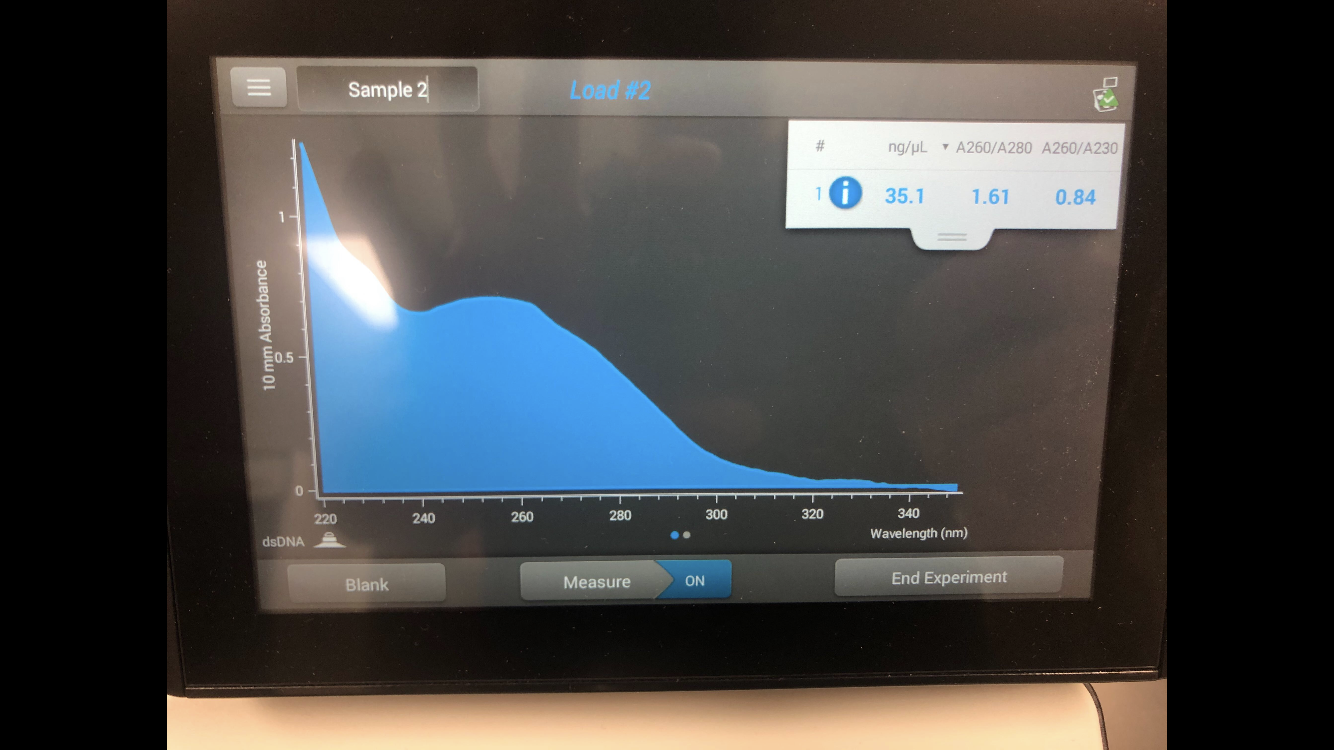
Results:
Unfortunately, after extracting our DNA from the HVL, it was determined that the DNA still had too much salt. The concentration of the DNA was 12.8 ng/microliter, while the A260/A280 was 1.64 and the A260/A230 was 0.57.
Conclusions and Next Steps:
A new protocol was given to use in which we were able to clean the DNA, removing some of the excess salt.
Faith’s Modified Crush Gel Procedure
Date Started: Nov. 9th, 2019 Redo? no
Purpose: The goal of this procedure is to clean the DNA to a manageable amount of salt and a strong DNA concentration.
Notes:
In order to clean the DNA, ridding some of the salt, we began with the 50 microliters of sample in the microliter tube. To this we added 5 microliters of 3M Sodium Acetate and 150 microliters of 100% ethanol. After letting the mixture sit for 5 minutes, it was centrifuged at top speed for 10 minutes. The supernatant was aspirated out and stored in case of disturbing the pellet. 1mL of iced 70% ethanol was then added, and the mixture was centrifuged for 2 minutes. The supernatant of ethanol was then aspirated from the mixture. The pellet was then left to dry for 2 hours. Afterwards, when the pellet was completely dry, the pellet was re-suspended in 25 microliters of nuclease-free water.
Results:
After cleaning the DNA and running it through the incubator, it was found that the concentration of the DNA was to low, and the salt concentration was to high to continue working with the sample. As we did not have another lysate ready, and the due date was Nov. 11th, this would be the end of our experiment for this semester.
Conclusions and Next Steps:
However, Dr. Edwards allowed the lab group to continue working and make the agarose gel and see if we would be able to notice our DNA in said gel.

Enzyme Digest and Agarose Gel
Date Started: Nov. 9th, 2019 Redo? no
Purpose: Even though we did not have enough DNA to send in to determine the genome, we ran the enzyme digest and created an agarose gel in order to try to visibly see evidence of the DNA.
Notes: The sample of DNA was incubated at 65 degrees Celsius for 10 minutes, then quickly spun in an incubator to collect the liquid at the bottom of the microcentrifuge tube. The calculations showed that due to the low percent of our DNA, we would need 40 microliters of the sample in order to have .5 micrograms of the DNA. As we only had 25 microliters, this was obviously not possible. Thus, we simply divided the sample evenly among 4 microcentrifuge tubes, with 8.25 microliters in each tube. 2.5 microliters of reaction buffer were added to each tube, along with 13.75 microliters of ddH20. The ladder was added to one of the tubes, .5 microliters more of ddH20 was added to the second, .5 microliters of Sac2 was added to the third, and .5 microliters of Hind3 was added to the fourth. All for were then quickly spun in a centrifuge to pool the liquid, and then incubated at 37 degrees Celsius for one hour. The gel apparatus was set up with help with the help of Dr. Edwards. .5 microliters of the dye was added to each tube, and the samples were placed in a 65 degree incubator for 5 minutes, then immediately moved to ice. After cooling, the samples were spun in a centrifuge at 10,000 rpm for 15 seconds. The samples were then loaded into the wells in the gel in the order of ladder, uncut, Sac2, Hind3. The device was plugged in and set to 100 volts, ran for one hour, and then photographed.
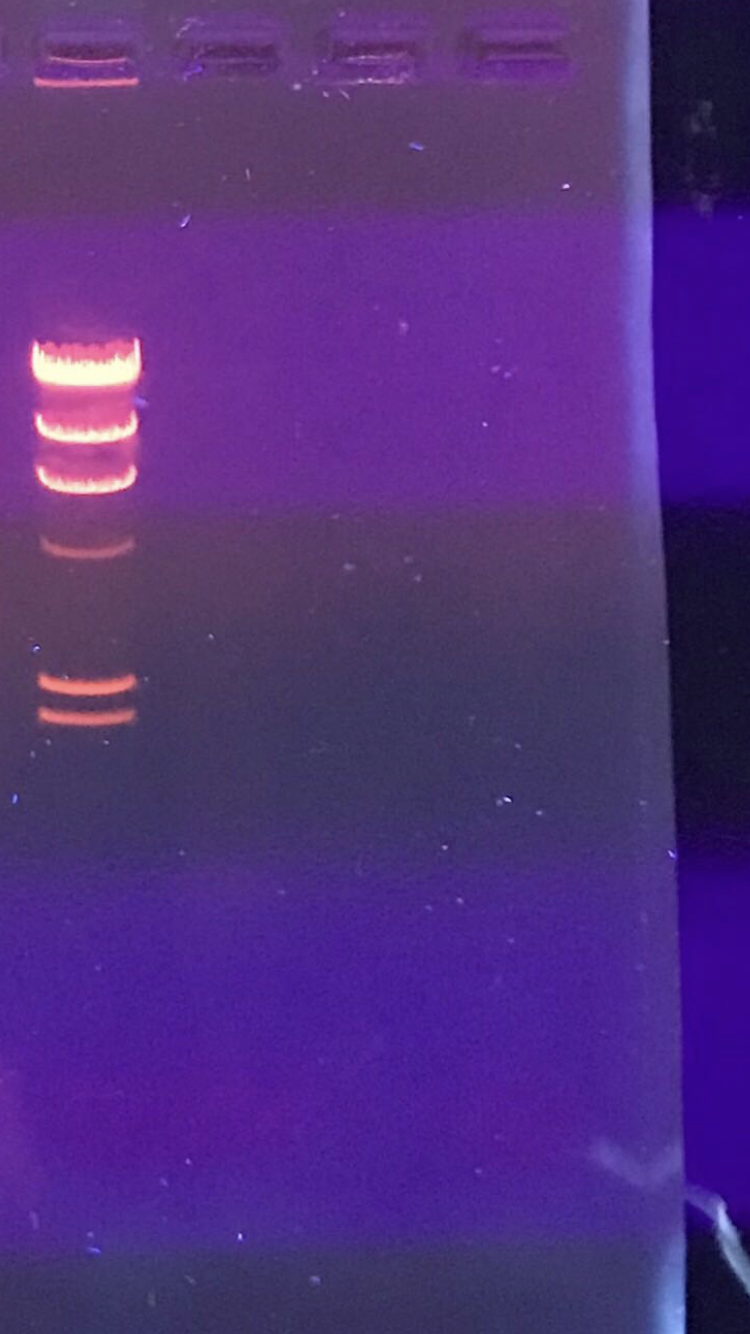
Results:
Due to the extremely low concentration of the DNA, none was visible and thus no cuts could be seen.
Next Steps:
The phage lysate needed to be archived in order to be tested the following semester.

Archiving the Phage Sample
Date Started: Nov. 9th, 2019 redo? no
Purpose: The lysate was archived so work could be continued the following semester
Notes: Two barcoded storage tubes were acquired for storage at the University of Pittsburgh, and an additional non-barcoded tube for storage at Tarleton. Each tube was labeled with the titer and the name of the phage, then filled to 1.5 centimeters from the top with sterile beads using aseptic technique. 2.8 mL was placed into a sterile 15mL conical tube. 200 microliters was added to the tube, and the solution was vortexed. The solution was then transferred to the three tubes so that the beads were just barely covered, capped, and ready for storage.
Results: The high volume lysate was successfully stored for later use.
Characterization
Title: Procedure
Date Started:Sep. 04, 2019 Redo? yes/no
Purpose: State in a couple of sentences what you are trying to do and why you are doing it.
Notes:
What did you do? Type out the protocols that you are doing, how you did them, and when you did them. Make notes to remind you of what you did, or what you need to do. If you did something different than normal, it is important to write that down.
Results:
Add the date(s) that the results were obtained. Describe the results and make a table, create a figure, or add an image. This is important because this is your data.
Conclusions and Next Steps:
What can be determined from your data? What should you do next?