Discovery of BlueMoth
BlueMoth Information
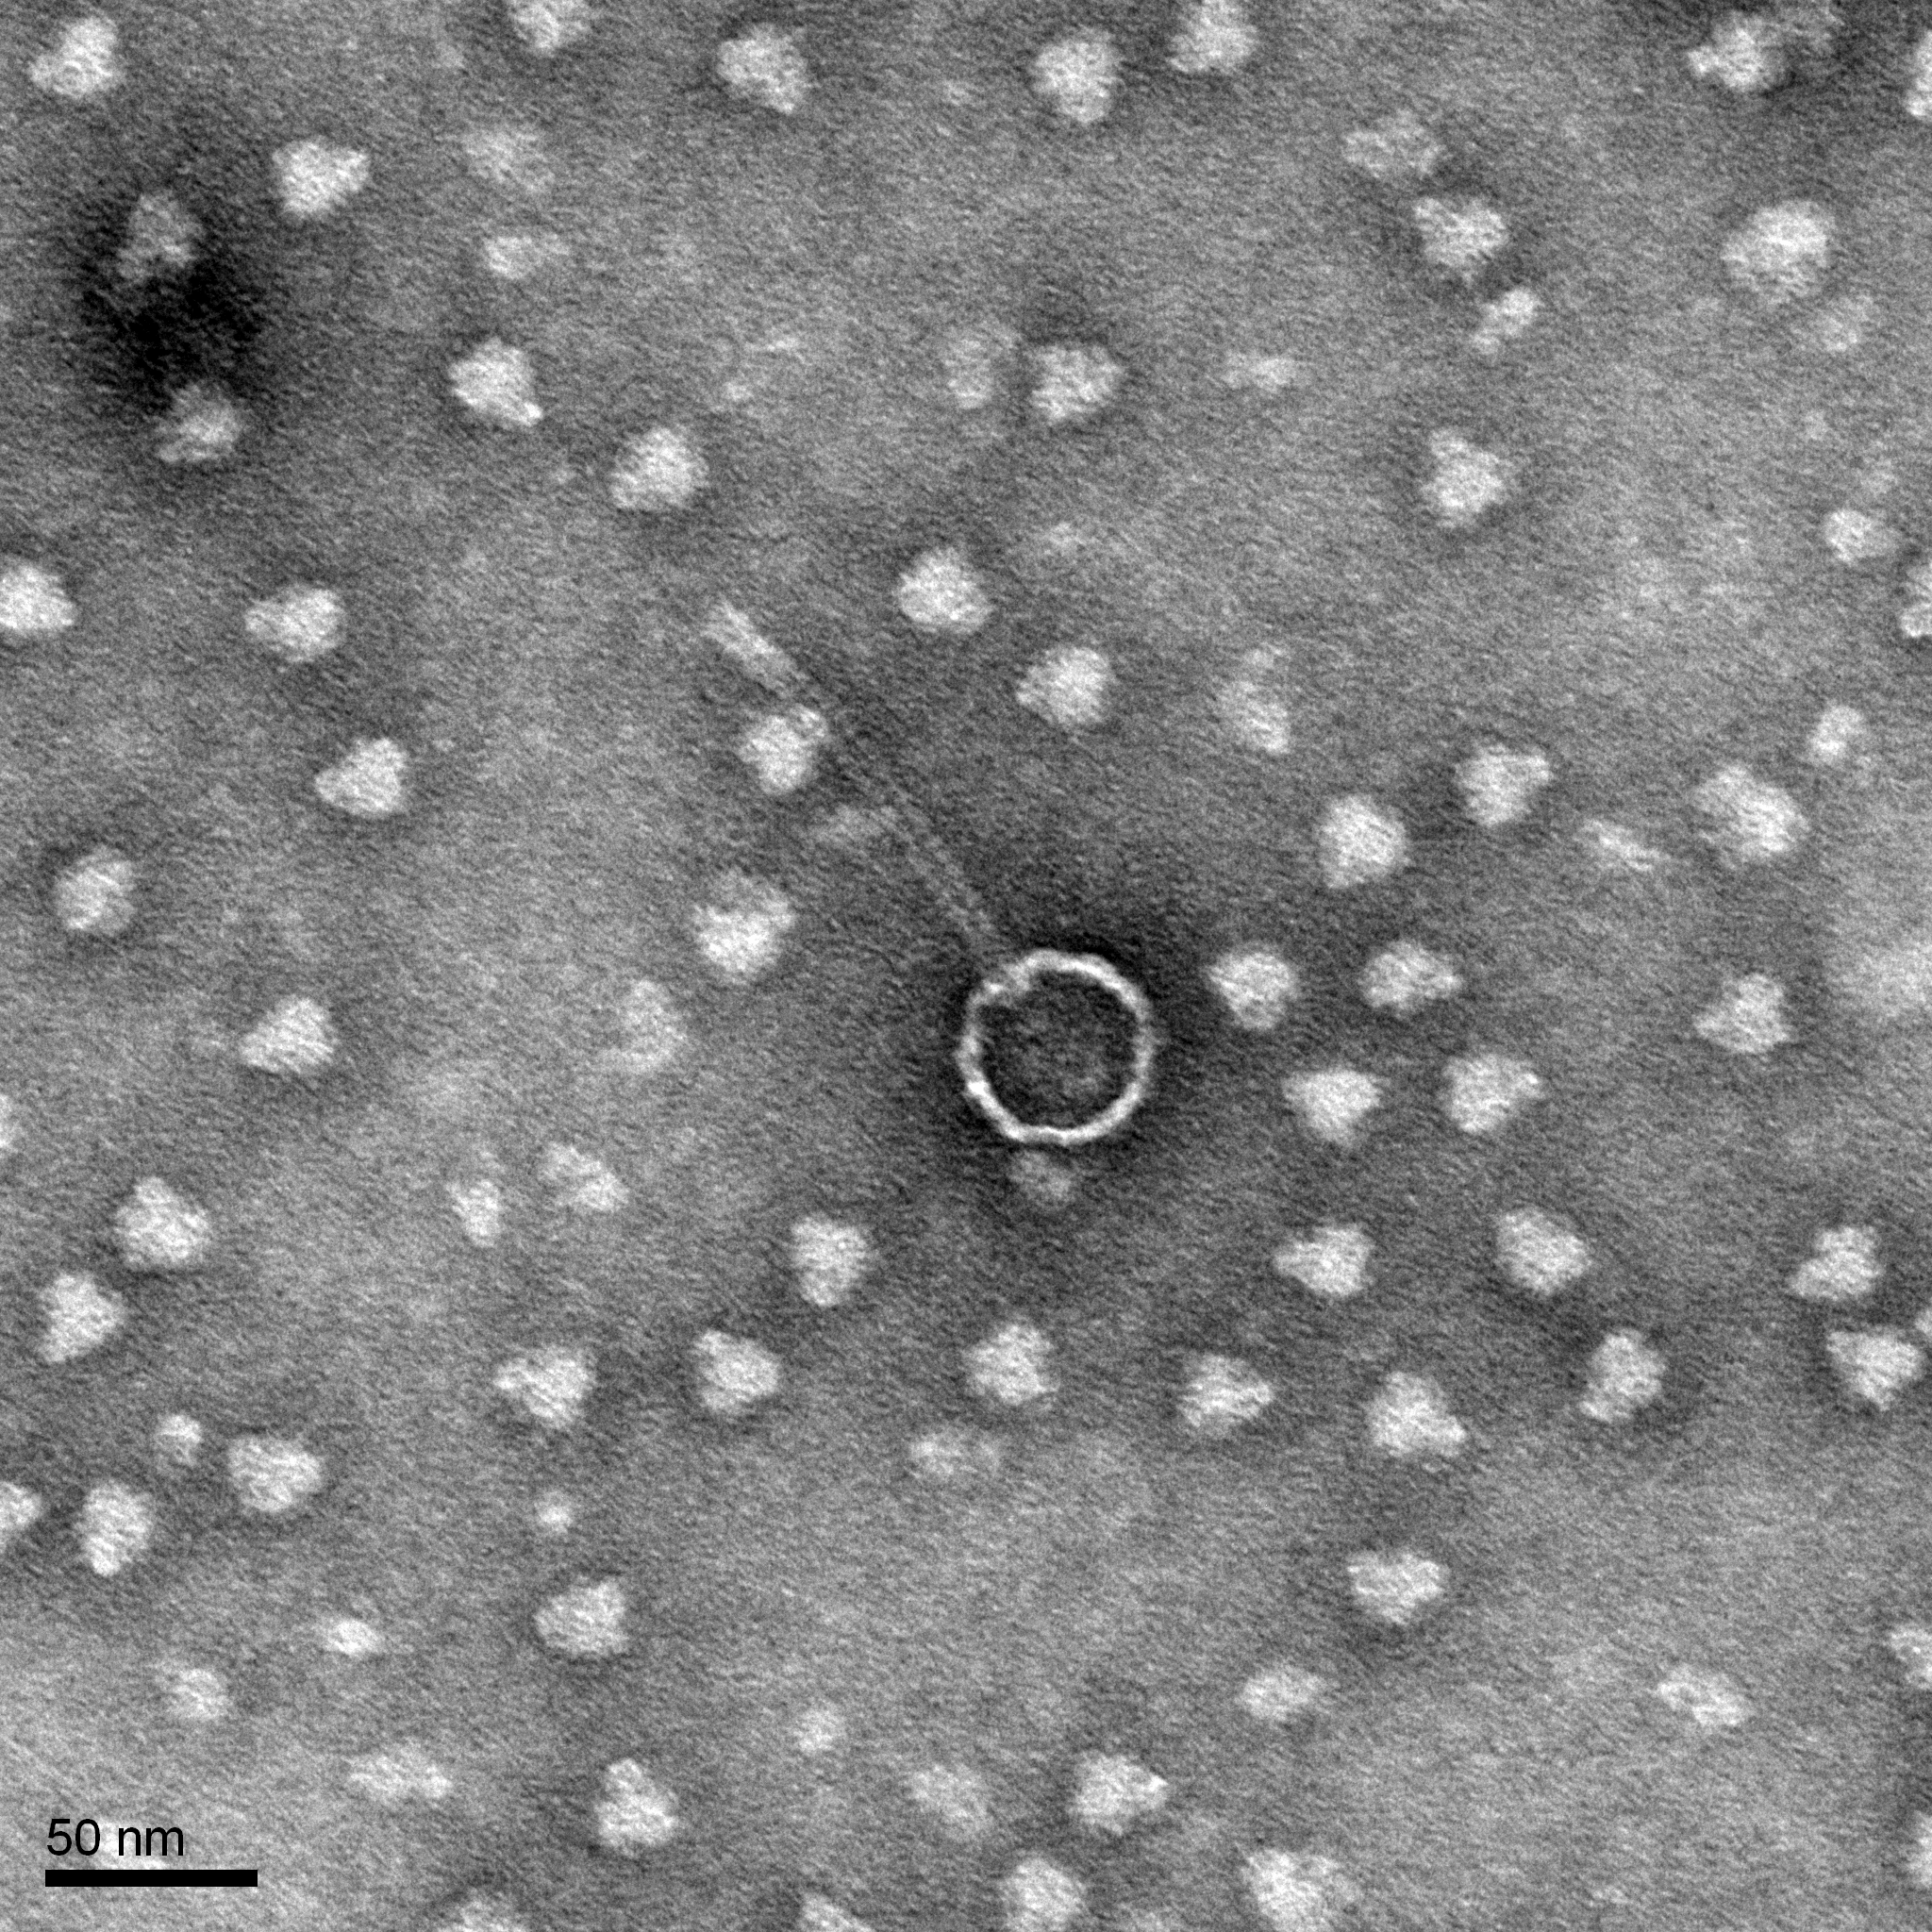
Morphology: Siphoviridae
Sample Collection
| Collector Name |
Mia | Mia | Evelyn | Evelyn | Evelyn |
| Sample No. | 1 | 2 | 3 | 4 | 5 |
| Date of Collection | 8/27/24 | 8/27/24 | 8/27/24 | 09/11/24 | 09/12/24 |
| Sample Type | soil | soil | soil | soil | soil |
| General Location | Bosque River Trail | Stephenville City Park | Optimist Jaycee Park | 727 W McNeil St | 3698 E Washington St |
| Location Description | Underneath leaves in the forest off trail surrounded by trees | Near the riverbank off of Bosque river | an ant hill next to a tree | an ant hill on the front lawn next to the sidewalk | an ant hill next to a bench at a dog park |
|
GPS Coordinates.
|
32.23 N, 98.20 W | 32.22 N, 98.20 W | 32°13’24” N, 98°13’50″W | 32.21739°N, 98.20577°W | 32.23593°N, 98.17027°W |
| Sample Depth | 1in | 3in | 1in | 1in | 1 in |
| Ambient Temperature | 89°F | 89°F |
82°F
|
73°F | 73°F |
Isolation/Purification
Sample 1 Isolation
Date: 09/06/2024
Redo: Yes
Purpose: The isolation of sample 1 is to determine if we had a viable phage to further purify.
Notes:
-
- Using an aseptic technique and once the environmental sample was collected in the 15 mL tubes, we started a direct isolation by using a buffer (PYCa) to mix our dirt sample in.
- We added the media until it was submerged beneath 2-3 mL of liquid.
- The sample was mixed and placed in the shaking incubator at 250 rpm for 1 hour.
- We let the sample sit for 20 minutes.
- Next we opened a 0.22 μm syringe filter, leaving the filter in the packaging.
- The filter was attached to the syringe first then the plunger was removed from the syringe.
- The sample was tipped into the barrel of the syringe.
- The plunger was attached and 0.5 mL filtrate was dispensed into a microcentrifuge tube.
- It was incubated at 4°C for seven days.
- After seven days, we proceeded with the plaque assay.
- Using an aseptic technique, we used a micropipettor to dispense our isolated sample into a culture tube of 250 µL of M. Foliorum.
- The culture tube was flicked a couple of times to mix everything and let it sit for 10 minutes.
- We retrieved a container of molten agar and retrieved 3 mL using a micropipettor.
- We dispensed the molten agar into our culture tube of phage sample and M. Foliorum. Then it was retrieved back into the micropipettor and dispensed the liquid onto the agar plate.
- We rotated the agar plate to evenly coat the surface and let it solidify for 20 minutes.
- At 10:17 AM, we incubated the sample for 48 hours at 29°C.
Results:
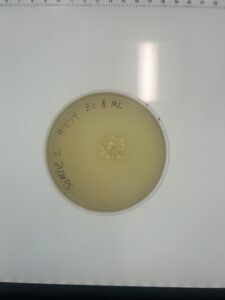
After about 48 hours of incubating in 29°C, there is a very small plaque starting to grow on the plate. It’s a little too early to tell its morphology. So we let it incubate for another 4 days. After additional incubation, we did not find any viable plaque growing.
Conclusions and Next Steps:
We had to restart the experiment with sample 2.
Sample 2 Isolation
Date: 09/06/2024
Redo: yes
Purpose: The isolation of sample 2 is to determine if we had a viable phage to further purify.
Notes:
-
-
- Using an aseptic technique and once the environmental sample was collected in the 15 mL tubes, we started a direct isolation by using a buffer (PYCa) to mix our dirt sample in.
- We added the media until it was submerged beneath 2-3 mL of liquid.
- The sample was mixed and placed in the shaking incubator at 250 rpm for 1 hour.
- We let the sample sit for 20 minutes.
- Next we opened a 0.22 μm syringe filter, leaving the filter in the packaging.
- The filter was attached to the syringe first then the plunger was removed from the syringe.
- The sample was tipped into the barrel of the syringe.
- The plunger was attached and 0.3 mL filtrate was dispensed into a microcentrifuge tube.
- We noticed the filtrate was colored differently; a clear brownish red.
- It was incubated at 4°C for five days.
- After five days, we proceeded with the plaque assay.
- Using an aseptic technique, we used a micropipettor to dispense our isolated sample into a culture tube of 250 µL of M. Foliorum.
- The culture tube was flicked a couple of times to mix everything and let it sit for 15 minutes.
- We retrieved a container of molten agar and retrieved 3 mL using a micropipettor.
- We dispensed the molten agar into our culture tube of phage sample and M. Foliorum. Then it was retrieved back into the micropipettor and dispensed the liquid onto the agar plate.
- We rotated the agar plate to evenly coat the surface and let it solidify for 20 minutes.
- At 9:43 AM, we incubated the sample at 29°C.
-
Results:
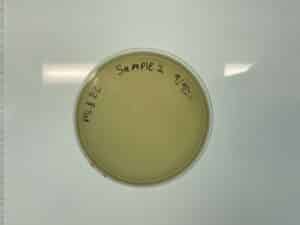
On 9/11/24 Unfortunately, no plaque was growing.
Conclusions and Next Steps:
The plate was discarded and we restarted the experiment with sample 3, during this time we will be collecting a 4th sample.
Sample 3 Isolation
Date: 09/09/2024
Redo: yes
Purpose: The isolation of sample 3 is to determine if we had a viable phage to further purify.
Notes:
- Using an aseptic technique and once the environmental sample was collected in the 15 mL tubes, we started a direct isolation by using a buffer (PYCa) to mix our dirt sample in.
- We added the media until it was submerged beneath 2-3 mL of liquid.
- The sample was mixed and placed in the shaking incubator at 250 rpm for 1 hours
- We let the sample sit for 20 minutes.
- Next we opened a 0.22 μm syringe filter, leaving the filter in the packaging.
- The filter was attached to the syringe first then the plunger was removed from the syringe.
- The sample was tipped into the barrel of the syringe.
- The plunger was attached and 0.3 mL filtrate was dispensed into a microcentrifuge tube.
- It was incubated at 4°C for two days
- After two days, we proceeded with the plaque assay.
- Using an aseptic technique, we used a micropipettor to dispense our isolated sample into a culture tube of 250 µL of M. Foliorum.
- The culture tube was flicked a couple of times to mix everything and let it sit for 2 hr
- We retrieved a molten agar container and 3 mL using a micropipettor.
- We dispensed the molten agar into our culture tube of phage sample and M. Foliorum. Then it was retrieved back into the micropipettor and dispensed the liquid onto the agar plate.
- We rotated the agar plate to evenly coat the surface and let it solidify for 20 minutes.
- At 12:40 PM, on 09/11/24 we incubated the sample at 29°C.
Results:
Waiting on results of plate
Conclusions and Next Steps:
Sample 4 Isolation
Date: 09/16/2024
Redo: No
Purpose: The isolation of sample 4 is to determine if we had a viable phage to further purify.
Notes:
- Using an aseptic technique and once the environmental sample was collected in the 15 mL tubes, we started a direct isolation by using a buffer (PYCa) to mix our dirt sample in.
- We added the media until it was submerged beneath 2-3 mL of liquid.
- The sample was mixed and placed in the shaking incubator at 250 rpm for 2 hours
- We let the sample sit for 20 minutes.
- Next we opened a 0.22 μm syringe filter, leaving the filter in the packaging.
- The filter was attached to the syringe first then the plunger was removed from the syringe.
- The sample was tipped into the barrel of the syringe.
- The plunger was attached and 0.3 mL filtrate was dispensed into a microcentrifuge tube.
- It was incubated at 4°C for 5 days
- After 5 days, we proceeded with the plaque assay.
- Using an aseptic technique, we used a micropipettor to dispense our isolated sample into a culture tube of 250 µL of M. Foliorum.
- The culture tube was flicked a couple of times to mix everything and let it sit for 2 hr
- We retrieved a molten agar container and 3 mL using a micropipettor.
- We dispensed the molten agar into our culture tube of phage sample and M. Foliorum. Then it was retrieved back into the micropipettor and dispensed the liquid onto the agar plate.
- We rotated the agar plate to evenly coat the surface and let it solidify for 20 minutes.
- At 9:53 AM, on 09/16/24 we incubated the sample at 29°C.
Results:
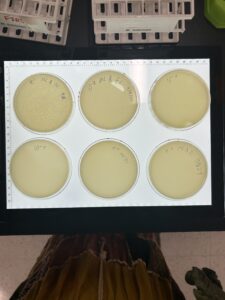
We have a plaque!
Conclusions and Next Steps:
We proceeded to our first serial dilution with sample 4.
Sample 4 Serial Dilution #1
Date: 09/23/2024
Redo: yes
Purpose: The first serial solution of sample 4 is to dilute our phage sample further to isolate plaques on a plate
Notes:
- Using an aseptic technique, we used a micropipettor to pick a plaque from the agar plate.
- The plaque picked was then transferred to a microcentrifuge tube, labeled OG and containing 90 microliters of PYCa buffer, by carefully tapping the micropipette tip on the inside of the microcentrifuge tube.
- Another eight microcentrifuge tubes were gathered and labeled 10^-1, 10^-2, and so on.
- Then, using a micropipette, 10 microliters were taken from the OG sample and dispensed into the microcentrifuge tube labeled 10^-1.
- The microcentrifuge labeled 10^-1 was vortexed for about 3 seconds.
- Then 10 microliters were taken from the microcentrifuge tube labeled 10^-1 and dispensed into the microcentrifuge tube labeled 10^-2.
- The microcentrifuge tube labeled 10^-2 is vortexed for about 3 seconds.
- The previous two steps are repeated for all remaining microcentrifuge tubes.
- Using a micropipette, 10 microliters are taken from each microcentrifuge and dispensed into separate culture tubes of 250 µL of M. Foliorum.
- The culture tube was flicked a couple of times to mix everything and let it sit for 10-20 minutes.
- We retrieved a molten agar container and 3 mL using a micropipettor.
- We dispensed the molten agar into our culture tube, retrieved it back into the micropipettor, and dispensed the liquid onto the agar plate. This was done for all culture tubes.
- We rotated the agar plate to evenly coat the surface and let it solidify for 20 minutes.
- At 9:53 AM, on 09/16/24 we incubated the sample at 29°C.
Results:
Dilution was unsuccessful
Conclusions and Next Steps:
We will redo the dilution procedure
Sample 4 Serial Dilution #2
Date: 09/25/2024
Redo: no
Purpose: The second serial solution of sample 4 is to dilute our phage sample further to isolate 1-3 plaques on a plate.
Notes:
- Using an aseptic technique, we used a micropipettor to pick a plaque from the agar plate.
- The plaque picked was then transferred to a microcentrifuge tube, labeled OG and containing 90 microliters of PYCa buffer, by carefully tapping the micropipette tip on the inside of the microcentrifuge tube.
- Another eight microcentrifuge tubes were gathered and labeled 10^-1, 10^-2, and so on.
- Then, using a micropipette, 10 microliters were taken from the OG sample and dispensed into the microcentrifuge tube labeled 10^-1.
- The microcentrifuge labeled 10^-1 was vortexed for about 3 seconds.
- Then 10 microliters were taken from the microcentrifuge tube labeled 10^-1 and dispensed into the microcentrifuge tube labeled 10^-2.
- The microcentrifuge tube labeled 10^-2 is vortexed for about 3 seconds.
- The previous two steps are repeated for all remaining microcentrifuge tubes.
- Using a micropipette, 10 microliters are taken from each microcentrifuge and dispensed into separate culture tubes of 250 µL of M. Foliorum.
- The culture tube was flicked a couple of times to mix everything and let it sit for 10-20 minutes.
- We retrieved a molten agar container and 3 mL using a micropipettor.
- We dispensed the molten agar into our culture tube, retrieved it back into the micropipettor, and dispensed the liquid onto the agar plate. This was done for all culture tubes.
- We rotated the agar plate to evenly coat the surface and let it solidify for 20 minutes.
- At 10:16 AM, on 09/25/24 we incubated the sample at 29°C.
Results:
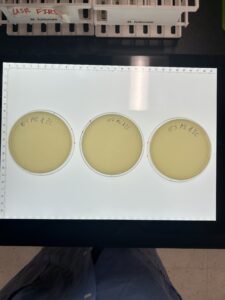
Dilution was successful
Conclusions and Next Steps:
We now proceed with creating a webbed plate
Sample 4 Webbed Plate Serial Dilution #3
Date: 09/30/2024
Redo: no
Purpose: This 3rd dilution was to see if we can create a webbed plate to collect a lysate from
Notes:
- Using an aseptic technique, we used a micropipettor to pick a plaque from the agar plate.
- The plaque picked was then transferred to a microcentrifuge tube, labeled OG (10^0) and containing 90 microliters of PYCa buffer, by carefully tapping the tip of the micropipette on the inside of the microcentrifuge tube.
- Another 2 microcentrifuge tubes were gathered and labeled 10^-1, and 10^-2,
- Then, using a micropipette, 10 microliters were taken from the 10^0 sample and dispensed into the microcentrifuge tube labeled 10^-1.
- The microcentrifuge labeled 10^-1 was vortexed for about 3 seconds.
- Then 10 microliters were taken from the microcentrifuge tube labeled 10^-1 and dispensed into the microcentrifuge tube labeled 10^-2.
- The microcentrifuge tube labeled 10^-2 is vortexed for about 3 seconds.
- Using a micropipette, 10 microliters are taken from each microcentrifuge tube and dispensed into separate culture tubes of 250 µL of M. Foliorum.
- The culture tube was flicked a couple of times to mix everything and let it sit for 20 minutes.
- We retrieved a molten agar container and 3 mL using a micropipettor.
- We dispensed the molten agar into our culture tube, retrieved it back into the micropipettor, and dispensed the liquid onto the agar plate. This was done for all culture tubes with respective labeled plates.
- We rotated the agar plate to evenly coat the surface and let it solidify for 20 minutes.
- At 10:07 AM, on 09/30/24 we incubated the sample at 29°C.
Results:
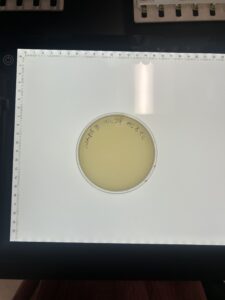
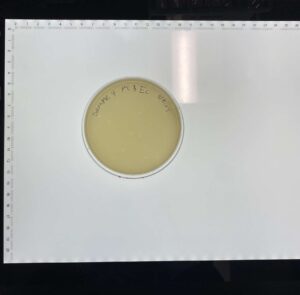
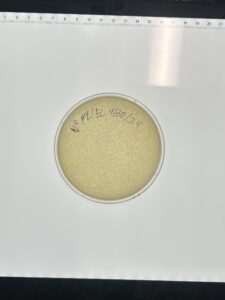
We have a webbed plate ready to flood
Conclusions and Next Steps:
We will now collect a phage lysate by flooding the plate.
Amplification
Sample 4 Collecting Low-Volume Lysate
Date: 10/2/2024
Redo: n/a
Purpose: The purpose of this experiment is to collect a vial of low-volume phage lysate.
Notes:
- Using an aseptic technique, we used a pipettor to collect 8 mLs of phage buffer
- We dispensed the PYCa buffer onto the webbed plate at let it sit at room temperature for 3 hrs
- After allowing the plate to sit, the plate was tilted by placing the lid underneath the plate on one side. This allows the lysate to pool.
- Using a 5mL syringe, the lysate was aspirated.
- Then a freshly opened 0.22 μm filter was attached to the syringe.
- The lysate was dispensed into a 15 mL conical tube.
- The conical tube containing the lysate was labeled and stored at 4°C for five days.
Conclusions and Next Steps:
We will plate the low-volume lysate to obtain a viable plate for a high-volume lysate.
Sample 4 Webbed Plate Serial Dilution
Date: 10/07/2024
Redo: no
Purpose: This dilution was to see if we could create a webbed plate to collect a high-volume lysate from
Notes:
- Using an aseptic technique, we used a micropipettor to pick a plaque from the agar plate.
- The plaque picked was then transferred to a microcentrifuge tube, labeled OG (10^0) and containing 90 microliters of PYCa buffer, by carefully tapping the micropipette tip on the inside of the microcentrifuge tube.
- Another 5 microcentrifuge tubes were gathered and labeled 10^-1, and 10^-2,
- Then, using a micropipette, 10 microliters were taken from the 10^0 sample and dispensed into the microcentrifuge tube labeled 10^-1.
- The microcentrifuge labeled 10^-1 was vortexed for about 3 seconds.
- Then 10 microliters were taken from the microcentrifuge tube labeled 10^-1 and dispensed into the microcentrifuge tube labeled 10^-2.
- The microcentrifuge tube labeled 10^-2 is vortexed for about 3 seconds.
- Using a micropipette, 10 microliters are taken from each microcentrifuge tube and dispensed into separate culture tubes of 250 µL of M. Foliorum.
- The culture tube was flicked a couple of times to mix everything and let it sit for 20 minutes.
- We retrieved a molten agar container and 3 mL using a micropipettor.
- We dispensed the molten agar into our culture tube, retrieved it back into the micropipettor, and dispensed the liquid onto the agar plate. This was done for all culture tubes with respective labeled plates.
- We rotated the agar plate to evenly coat the surface and let it solidify for 20 minutes.
- At 10:07 AM, on 10/7/24 we incubated the sample at 29°C.
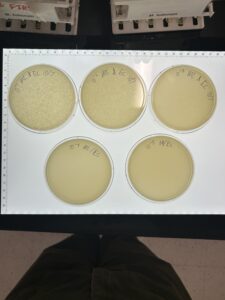
Results: Positive results
Conclusions and Next Steps: The 10^1 dilution was our best. We will use it to make multiple plates to obtain our high lysate.
Collecting high-volume Lysate #1
Date: 10/09/2024
Redo: no
Purpose: The purpose of this experiment was to make multiple plates of the same dilution to collect our high-volume lysate
Notes:
Plating the LTL plates to collect HTL
-
- Using an aseptic technique, we set up 7 microcentrifuge tubes and prefilled them with PYCa buffer.
- we collected 10 microliters of our liquid LTL (low titer lysate) and dispensed it into the first microcentrifuge tube.
- This was our 10^0 tube, from previous knowledge in plating our LTL, we determined 10^-1 was the best dilution for creating webbed plates.
- 10 microliters were collected from the 10^0 tube and placed in each of the 6 prefilled tubes.
- We now had a “clone” of the 10^-1 dilution 6 times
- Using a micropipette, 10 microliters are taken from each microcentrifuge tube and dispensed into separate culture tubes of 250 µL of M. Foliorum.
- The culture tube was flicked a couple of times to mix everything and let it sit for 20 minutes.
- We retrieved a molten agar container and 3 mL using a micropipettor.
- We dispensed the molten agar into our culture tube, retrieved it back into the micropipettor, and dispensed the liquid onto the agar plate. This was done for all culture tubes with respective labeled plates.
- We rotated the agar plate to evenly coat the surface and let it solidify for 20 minutes.
- At 10:19 AM, on 10/9/24 we incubated the sample at 29°C for 5 days.
Collecting HTL
-
- On 10/14/24, the plates were flooded with 8mL of phage buffer.
Results:
We have a high volume lysate of about 6mL
Conclusions and Next Steps:
We will proceed to create TEM grids for electron microscopy
Characterization
Mounting Phage Samples for TEM and Staining with Uranyl Acetate (Classic Protocol Using Pelco Tabs)
Date: 10/21/2024
Redo: no
Purpose: The purpose of this experiment was to make TEM grids for electron microscopy to view our phage
Notes:
Preparing phage samples.
-
- Using an aseptic technique, 1 ml of our high-titer lysate was transferred into a sterile microcentrifuge tube.
- We centrifuged the tube for 1 hour at 4 °C at 15,000 rpm to concentrate the phage particles at the bottom of the tube.
- Using a micropipettor, we carefully remove as much supernatant as possible without disrupting the concentrated phage at the bottom of the tube.
- 100 μl of phage buffer was added and the sample was resuspended at 4 °C for 30 minutes.
Staining the Sample
- Using a micropipettor, we placed 10 μl of lysate onto the grid without touching the tip to the grid itself.
- The phage was allowed to settle and attach onto the grid for at least 2 minutes, this was based on our calculated titer of 2.89 x 10^9
- Using a small wedge of filter paper, the rest of the fluid was wicked off
- The grid was washed with 10 μl of sterile water onto the grid, wicked off, and repeated twice
- 10 μl of 1 % uranyl acetate was added to the grid, allowed to sit for 2 minutes, and wicked off.
- The surface of the grid looked like a rainbow oil slick, the grid air dried before putting it safely back into the grid box, labeled A1
Results:
We have a picture of our phage.
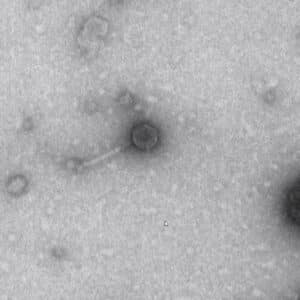
Setting Up Restriction Enzyme Digests
Date: 11/15/24
Redo: No
Purpose: Setting up restriction enzymes for gel electrophoresis.
Notes:
- We started by mixing our DNA sample and placing it in the heating block to incubate at 65 degrees C for 10 minutes. We then immediately put it on ice.
- We then quickly microcentrifuged it to move all the DNA to the bottom of the tube. We calculated the volume of DNA sample needed to obtain 0.5 µg of DNA: 3 microliters.
- We got 7 microcentrifuge tubes and labeled them Ladder, Uncut, HaeIII, MseI, NspI, SacII, and SalI.
- To each tube except the ladder, we added 3 microliters of our phage DNA. To each tube except uncut, we added 1 microliter of the corresponding enzyme.
- To each tube, we added 2 microliters of 10x reaction buffer, and to all tubes except ladder and uncut, we added 14 microliters of ddH2O
- We added 19 microliters of ddH2O to the ladder and 17 microliters to the uncut, we then microcentrifuged each tube for around 1 minute to get all the liquid to the bottom.
- We incubated for 15 minutes at 37 degrees C, and then quickly spinned in a microcentrifuge for around 1 minute.
Results:
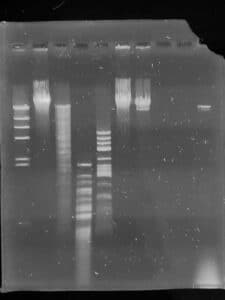
These are our restriction enzyme digests.
Conclusions and Next Steps:
We will put these in storage and move on to making the agarose gels for electrophoresis next lab period.
Making Agarose Gels for Electrophoresis
Date: 11/18/24
Redo: No
Purpose: Setting up agarose gels for gel electrophoresis.
Notes:
-
- We set up a gel apparatus and prepared enough 0.8 % agarose gel to cover the tips of the gel combs by around 2–3 mm. We weighed the appropriate amount of agarose powder and transferred it to an Erlynmeyer flask. We added the appropriate amount of 1X TBE buffer to the agarose powder and gently mixed it. We heated the mixture in the microwave until boiling, about 30 seconds.
- We carefully removed the flask from the microwave, examined for clumps, and continued. We allowed it to cool briefly.
- We poured the agarose mixture into the prepared gel apparatus and inserted the comb to cast the wells. We removed the comb and poured 1X TBE buffer until the gel was 1/4 inch covered
Conclusions and Next Steps:
We will move on to electrophoresis.
Gel electrophoresis
Date: 11/18/24
Redo: No
Purpose: DNA analysis and characterization.
Notes:
-
- We retrieved our enzymes and added 5 microliters of 6x concentrated loading dye to each tube. We placed them in a heating block at 65 degrees C for about 5 minutes, before placing them on ice to cool, and then spinning at 10k rpm for 15 seconds.
- Next, we loaded the enzymes into the gel in order, Ladder, Uncut, HaeIII, MseI, NspI, SacII, and SalI. We ran at 100 volts until the blue dye moved 3.5 inches from the well. (about 1.5 hours) We carefully removed the gel from the electrophoresis chamber and placed it in a shallow container of 40 mL of buffer
- We then added 4 microliters of ethidium bromide to dye the gel
- We swished the container around for 10 minutes, drained the buffer, and added 40 mL of distilled water and mixed it again for 10 minutes
- We drained the container and photographed our gel
Results:
Our electrophoresis went well.
Conclusions and Next Steps:
We have sent our DNA to be sequenced.
DNA Extraction
DNA Extraction of DNA Sample 1
Date: 10/23/2024
Redo: Yes
Purpose: The purpose of the experiment was to see if we could get a pure and concentrated DNA sample
Notes:
Day 1
- HVL was mixed gently, then we took out 5mL of lysate and dispensed it into a 15 mL conical tube.
- 20 uL of nuclease was added to the tube, once nuclease had been added, we gently inverted the tube and incubated at 37°C for 10 minutes.
- The lysate was separated into 5 microfuge tubes, 1mL each.
- To each tube, we added 20uL of ZnCl2, mixed gently by inversion, and incubated at 37°C for 5min.
- We centrifuge at 10,000 rpm for 1 minute at 4°C to pellet the phage.
- We removed supernatants by aspiration but tried not to disturb the pellet.
- The liquid-filled pipette tips were discarded in the sharps trash.
- The pellets were resuspended in 500uL TES buffer per tube, and incubated at 60°C for 15min.
- 1uL of Proteinase K was added and mixed gently, the tubes were then placed in an incubator at 37°C for 10min to completely eliminate
any residual nuclease activity. - 60 uL of sodium acetate was added to each tube, mixed well, and left on ice for 15min.
- The tubes were centrifuged at 4°C for 1min at 12,000 rpm to pellet the capsids.
- The supernatant was kept and placed into new microcentrifuge tubes.
- 500 uL of isopropanol was added to each of the tubes with the supernatant, mixed, and left on ice for 2 days.
- We centrifuged the tubes at 15,000 rpm for 10min to pellet the DNA and discarded the supernatant into a waste
tube. - We added 250uL of 70% ethanol in each tube, and spun again for 1min, at 15,000 rpm. The supernatant was discarded into a WASTE tube.
- The DNA pellets were dried at room temperature by turning upside-down onto paper towels, tapping out excess liquid, and placed into a heat block at 35⁰C until the samples were dry
- We resuspended the first pellet in 50uL nuclease-free water. Then use that solution to resuspend the next pellet, and continued until all 5 pellets have been resuspended in the same 50uL of water.
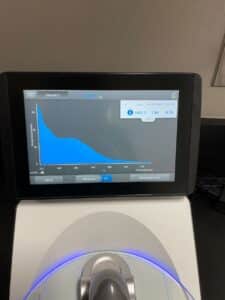
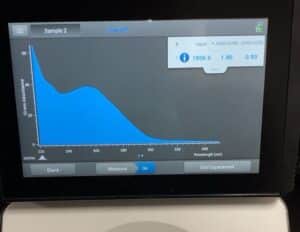
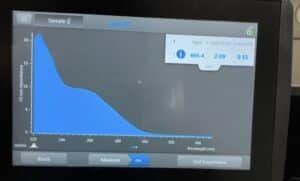
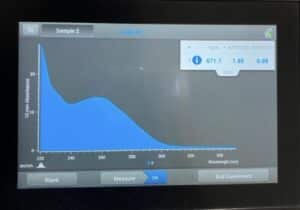
- The DNA concentration and quality (A260:280 and A260:230) were checked with the Nanodrop.
Results:
Our sample had too much salt and was not pure enough, we did have a large concentration though.
Conclusions and Next Steps:
We will redo this procedure and save this sample for possible precipitation.
DNA Extraction of DNA Sample 2
Date: 10/30/2024
Redo: Yes
Purpose: The purpose of the experiment was to see if we could get a pure and concentrated DNA sample
Notes:
Day 1
- HVL was mixed gently, then we took out 5mL of lysate and dispensed it into a 15 mL conical tube.
- 20 uL of nuclease was added to the tube, once nuclease had been added, we gently inverted the tube and incubated at 37°C for 10 minutes.
- The lysate was separated into 5 microfuge tubes, 1mL each.
- To each tube, we added 20uL of ZnCl2, mixed gently by inversion, and incubated at 37°C for 5min.
- We centrifuge at 10,000 rpm for 1 minute at 4°C to pellet the phage.
- We removed supernatants by aspiration but tried not to disturb the pellet.
- The liquid-filled pipette tips were discarded in the sharps trash.
- The pellets were resuspended in 500uL TES buffer per tube, and incubated at 60°C for 15min.
- 1uL of Proteinase K was added and mixed gently, the tubes were then placed in an incubator at 37°C for 10min to completely eliminate
any residual nuclease activity. - 60 uL of sodium acetate was added to each tube, mixed well, and left on ice for 15min.
- The tubes were centrifuged at 4°C for 1min at 12,000 rpm to pellet the capsids.
- The supernatant was kept and placed into new microcentrifuge tubes.
- 500 uL of isopropanol was added to each of the tubes with the supernatant, mixed, and left on ice for 2 days.
- We centrifuged the tubes at 15,000 rpm for 10min to pellet the DNA and discarded the supernatant into a waste
tube. - We added 250uL of 70% ethanol in each tube, and spun again for 1min, at 15,000 rpm. The supernatant was discarded into a WASTE tube.
- The DNA pellets were dried at room temperature by turning upside-down onto paper towels, tapping out excess liquid, and placed into a heat block at 35⁰C until the samples were dry
- We resuspended the first pellet in 50uL nuclease-free water. Then use that solution to resuspend the next pellet, and continued until all 5 pellets have been resuspended in the same 50uL of water.
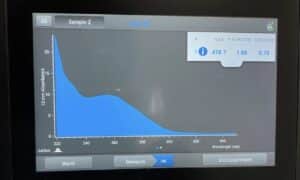
- The DNA concentration and quality (A260:280 and A260:230) were checked with the Nanodrop.
Results:
This sample was slightly better but still had too much salt.
Conclusions and Next Steps:
We will now reprecipitate DNA sample 1 to see if we can get it to be more pure.
Reprecipitation of DNA Sample 1
Date: 10/30/2024
Redo: Yes
Purpose: The purpose of the experiment was to see if we could get a pure and concentrated DNA sample
Notes:
Day 1
- After preparing our table, we calculated the volume of Sodium acetate and ice-cold 100% Ethanol needed for reprecipitation. The sodium acetate was 0.10 vols of the DNA volume, 5 microliters. The 100% ice-cold Ethanol was 3 volumes of the sample; 150 microliters. We combined these volumes with the combined DNA samples and inverted them to mix. We precipitated by placing in a -20⁰C freezer overnight.
Day 2 (10/31/24)
- After one night in the freezer, we centrifuged in the freezer for 30 minutes at 4⁰C. The supernatant was then dispensed into waste, and we added 0.5 mL of 70% ethanol to wash it. The tube was then placed in a 4⁰C centrifuge for 10 minutes. We repeated this twice.
- After removing as much supernatant as possible, we left the tubes in a 35⁰C heating block to dry out. After around an hour and a half, we added 50 microliters of nuclease-free water to the tube. and gently inverted to mix the solution.
- We took our sample to the nanodrop machine to reanalyze the sample.
Results:
The sample was still not pure enough.
Conclusions and Next Steps:
At the same time as the reprecipitation of DNA sample 1, we restarted the DNA extraction with a second sample.
Reprecipitation of DNA Sample 2 Part 1
Date: 11/1/2024
Redo: Yes
Purpose: The purpose of the experiment was to see if we could get a pure and concentrated DNA sample.
Notes:
Day 1 (11/1/24)
- After preparing our table, we calculated the volume of Sodium acetate and ice-cold 100% Ethanol needed for reprecipitation. The sodium acetate was 0.10 vols of the DNA volume, 5 microliters. The 100% ice-cold Ethanol was 3 volumes of the sample; 150 microliters. We combined these volumes with the combined DNA samples and inverted them to mix. We precipitated by placing in a -20⁰C freezer until the next day we could continue.
Day 2 (11/4/24)
- After 2 days in the freezer, we centrifuged in the freezer for 30 minutes at 4⁰C. The supernatant was then dispensed into waste, and we added 0.5 mL of 70% ethanol to wash it. The tube was then placed in a 4⁰C centrifuge for 10 minutes. We repeated this twice.
- After removing as much supernatant as possible, we left the tubes in a 35⁰C heating block to dry out. After around an hour, we added 50 microliters of nuclease-free water to the tube. and gently inverted to mix the solution.
- We took our sample to the nanodrop machine to reanalyze the sample.
Results:
The sample was still not pure enough.
Conclusions and Next Steps:
We will do another reprecipitation with sample 2.
Reprecipitation of DNA Sample 2 Part 2
Date: 11/6/2024
Redo: Yes
Purpose: The purpose of the experiment was to see if we could get a pure and concentrated DNA sample.
Notes:
Day 1 (11/6/24)
- After preparing our table, we calculated the volume of Sodium acetate and ice-cold 100% Ethanol needed for reprecipitation. The sodium acetate was 0.10 vols of the DNA volume, 5 microliters. The 100% ice-cold Ethanol was 3 volumes of the sample; 150 microliters. We combined these volumes with the combined DNA samples and inverted them to mix. We precipitated by placing in a -20⁰C freezer until the next day we could continue.
Day 2 (11/8/24)
- After 1 day in the freezer, we centrifuged in the freezer for 30 minutes at 4⁰C. The supernatant was then dispensed into waste, and we added 0.5 mL of 70% ethanol to wash it. The tube was then placed in a 4⁰C centrifuge for 10 minutes. We repeated this twice.
- After removing as much supernatant as possible, we left the tubes in a 35⁰C heating block to dry out. After around an hour, we added 50 microliters of nuclease-free water to the tube. and gently inverted to mix the solution.
- We took our sample to the nanodrop machine to reanalyze the sample.
Results:
The sample was still not good enough.
Conclusions and Next Steps:
We will do another DNA Extraction for the third time.
DNA Extraction of DNA Sample 3
Date: 11/15/2024
Redo: no
Purpose: The purpose of the experiment was to see if we could get a pure and concentrated DNA sample.
Notes:
Day 1
- HVL was mixed gently, then we took out 5mL of lysate and dispensed it into a 15 mL conical tube.
- 20 uL of nuclease was added to the tube, once nuclease had been added, we gently inverted the tube and incubated at 37°C for 10 minutes.
- The lysate was separated into 5 microfuge tubes, 1mL each.
- To each tube, we added 20uL of ZnCl2, mixed gently by inversion, and incubated at 37°C for 5min.
- We centrifuge at 10,000 rpm for 1 minute at 4°C to pellet the phage.
- We removed supernatants by aspiration but tried not to disturb the pellet.
- The liquid-filled pipette tips were discarded in the sharps trash.
- The pellets were resuspended in 500uL TES buffer per tube, and incubated at 60°C for 15min.
- 1uL of Proteinase K was added and mixed gently, the tubes were then placed in an incubator at 37°C for 10min to completely eliminate
any residual nuclease activity. - 60 uL of sodium acetate was added to each tube, mixed well, and left in the -20°C freezer for 15min.
- The tubes were centrifuged at 4°C for 1min at 12,000 rpm to pellet the capsids, this was done twice.
- The supernatant was kept and placed into new microcentrifuge tubes.
- 500 uL of isopropanol was added to each of the tubes with the supernatant, mixed, and left in the -20°C freezer overnight.
- We centrifuged the tubes at 15,000 rpm for 10min to pellet the DNA and discarded the supernatant into a waste
tube. - We added 250uL of 70% ethanol in each tube, and spun again for 1min, at 15,000 rpm. The supernatant was discarded into a WASTE tube.
- The DNA pellets were dried at room temperature by turning upside-down onto paper towels, tapping out excess liquid, and placed into a heat block at 35⁰C until the samples were dry
- We resuspended the first pellet in 50uL nuclease-free water. Then use that solution to resuspend the next pellet, and continued until all 5 pellets have been resuspended in the same 50uL of water.
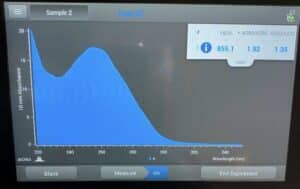
- The DNA concentration and quality (A260:280 and A260:230) were checked with the Nanodrop.
Results:
Our sample was finally good enough to send off.
Conclusions and Next Steps:
Our sample was sent off for sequencing.
