Discovery of HoneyBear
HoneyBear Information
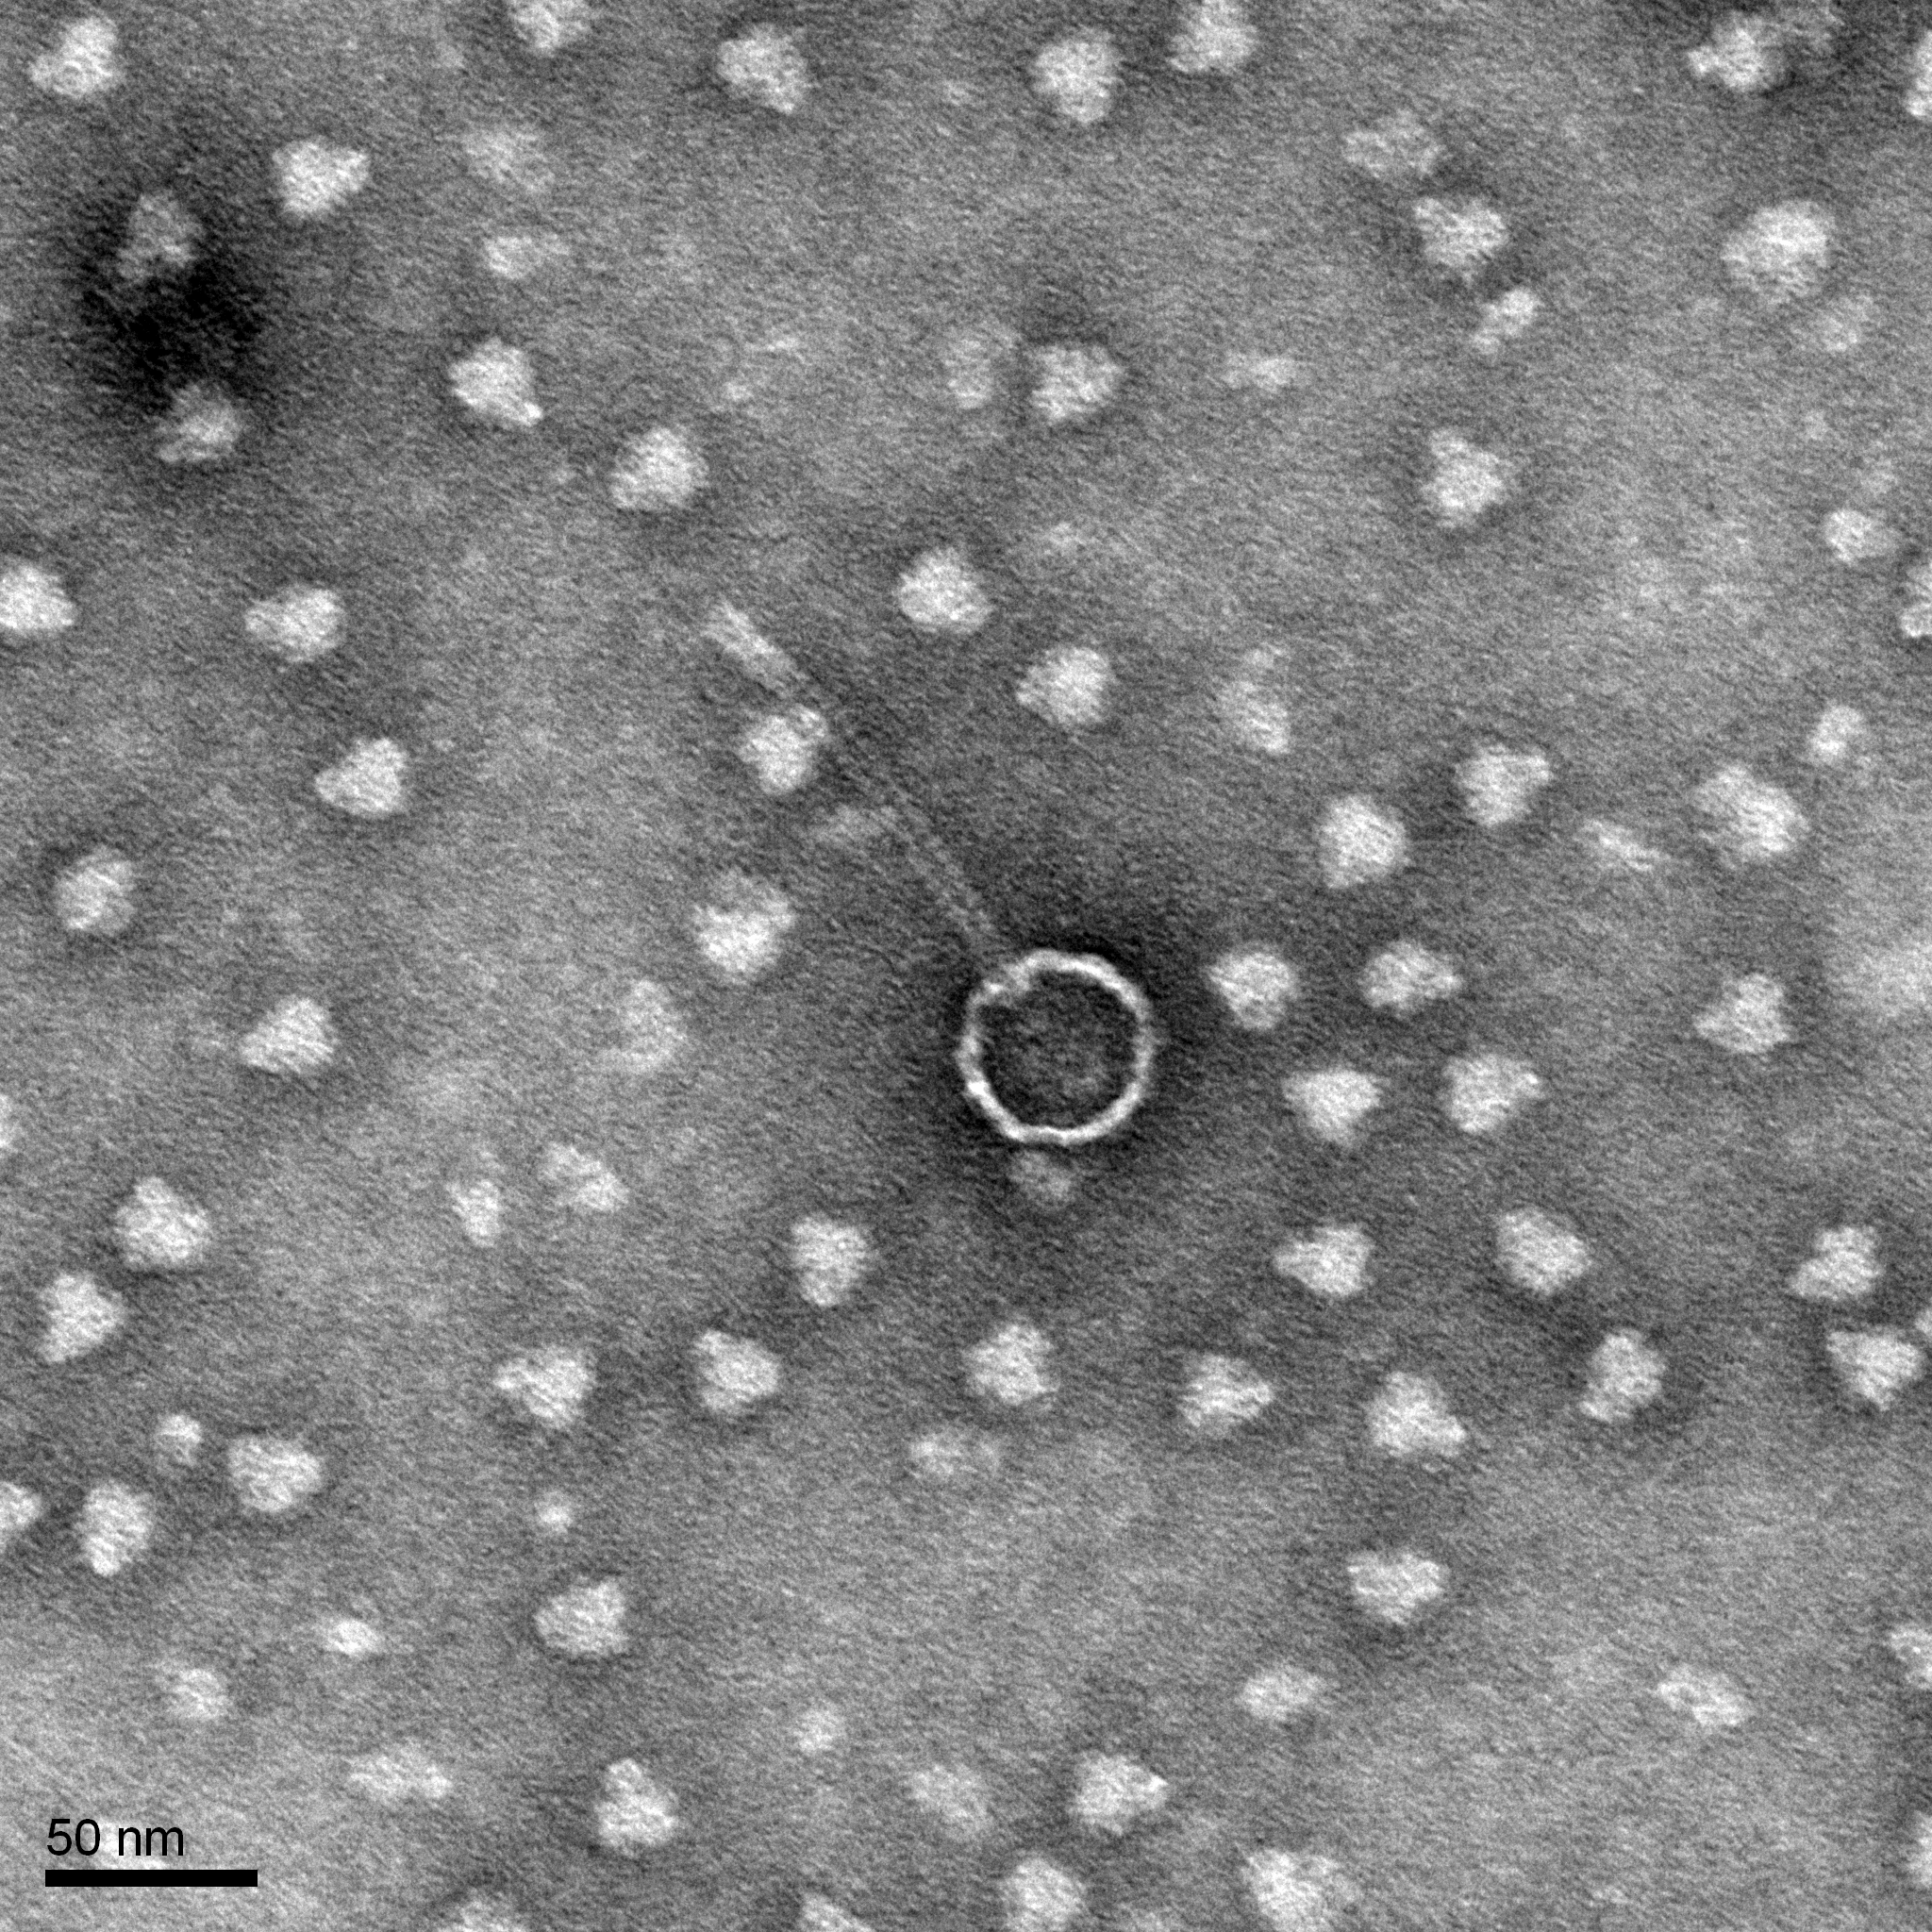
Morphology: Siphoviridae
Sample Collection
| Collector Name |
Mattisyn B. | Morgan M. | Morgan M. | Mattisyn B. | Mattisyn B. |
| Sample No. | 1 | 2 | 3 | 4 | 5 |
| Date of Collection | 08/28/24 | 08/27/24 | 08/27/24 | 09/11/24 | 09/16/24 |
| Sample Type | soil | compost | soil | ant hill | soil |
| General Location | Personal backyard | Compost Yard | Field on Farming Land | Ant hill on Tarleton campus | Friends backyard |
| Location Description | Near fence line under shrub, no grass in yard. | In a compost pile with no grass, recently screened. | Recently plowed field on farm with grass teilled into the soil. | Near a sidewalk, on an area of grass, recently rained. | Near pole in ground, grassy yard with multiple dogs, recently buried deer head in area. |
| GPS Coordinates | 32.21810° N, 98.21084° W | 32.15583 °N, 98.07947 °W | 32.15626 °N, 98.08244 °W | 32.21582°N, 98.21964°W | 32.20837°N, 98.21049°W |
| Sample Depth | 0.5-1 inch | 1-2 inches | 1-2 inches | surface | 2 inches |
| Ambient Temperature | 22°C | 33 °C | 33 °C | 22°C | 31°C |
| Collector Name |
Morgan M. | Mattisyn B. | Morgan M. | ||
| Sample No. | 6 | 7 | 8 | ||
| Date of Collection | 09/23/24 | 09/25/24 | 09/25/24 | ||
| Sample Type | soil | soil | soil | ||
| General Location | Personal front yard | Ant hill on campus | Ant hill on campus | ||
| Location Description | Near fence line under shrub, no grass in yard. | Grass near sidwalk | Grass near sidwalk | ||
| GPS Coordinates | 32.21162° N, 98.23248° W | 32.21666 °N, 98.22080 °W | 32.21666 °N, 98.22080 °W | ||
| Sample Depth | 2-3 inches | 2-3 inches | 2-3 inches | ||
| Ambient Temperature | 18.89°C | 19.44 °C | 19.44 °C |
Isolation/Purification
Isolation and purification of sample 1
Date: 08/28/2024
Redo: No
Sample 1
Purpose: Direct isolation is used to exctract phages from microbes within enviromental samples, and then infect host bacteria using plaque assay.
Notes:
A.) PPE was put on and the bench was prepared for aseptic work by applying 70% ethanol solution and1:128 cidecon 1:128 cidecon solution.
B.) Extraction of phage from enviromental sample
-
- A bunsen burner was set up to work under at the lab bench to perform the following steps.
- Liquid media was added to the 15 mL conical tube until the sample was submerged by 2-3 mL of liquid.
- The tube was then capped and inverted several times to mix the sample thoroughly.
- The sample was then put into a shaken incubator at 250 rmp for 1 and a half hours
- Once the sample was collected it was allowed to rest for 10 minutes to allow particulate matter to settle
C.) Preparation of phage filtrate
-
- PPE (gloves and labcoat) was put on.
- The bench was prepared for aseptic work by applying 70% ethanol solution and 1:128 cidecon solution.
- A bunsen burner was set up to work under at the lab bench to perform the following steps.
- Once particulate matter settled, a 0.22 μm syringe filter was attached to a syringe.
- The supernanent fluid was then poured into the syringe.
- The plunger was depressed slowly to dispense the filtered fluid into a microcentrifuge tube. About 1 millimeter of fluid was obtained in the microcentrifuge tube.
- The tube was then capped then placed into the fridge at 4 degrees Celcius for 7 days.
- The lab bench was cleaned with 70% ethanol solution and 1:128 cidecon solution.
09/04/2024
D.) Inoculating host bacteria (M. foliorum) with phage sample
- PPE was put on and the bench was prepared for aseptic work by applying 70% ethanol solution and 1:128 cidecon solution.
- A bunsen burner was set up to work under at the lab bench to perform the following steps.
- 500 μl was added to a glass culture tube containing 250 μl of M. foliorum bacteria culture.
- The inoculated sample was mixed by gently tapping the culture tube, then left undisturbed for 10 minutes.
E.) Plating samples with top agar
- An agar plate was obtained then labeled appropriately.
- The bottle of top agar was in a 55° C bath when not in use.
- Using a 5 mL pipette 3 mL of top agar was transfered to the inoculated host sample tube. The mixture was then mixed, and immediately aspirated into the pipette then transferred to the agar plate.
- The plate was then tilted all directions to evenly distribute the top agar on the plate.
- The plate was left undisturbed for 22 minutes to allow the top agar to solidify.
- The lab bench was cleaned with 70% ethanol solution and 1:128 cidecon solution.
F.) Incubation
- Once the top agar had solidified, the sample was inverted and placed into incubator at 29° C for 2 days.
Results:
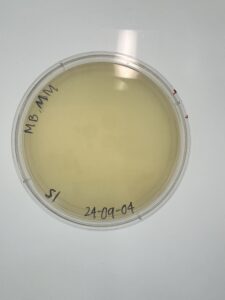
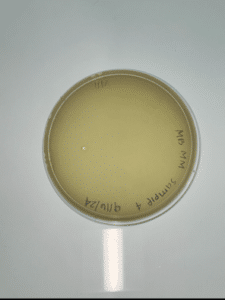
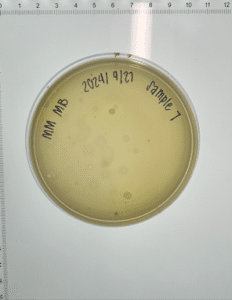
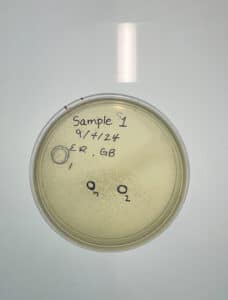
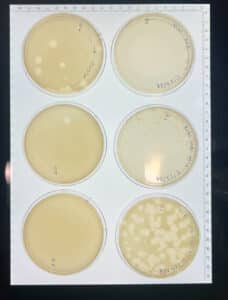
Our plate had no bacteriophages.
Conclusions and Next Steps:
We disposed of our plate in the autoclave bag on 9/6/2024 at 1pm.
Isolation and purification of sample 2
Date: 09/04/2024
Redo: No
Purpose: Direct isolation is used to extract phages from microbes within environmental samples, and then infect host bacteria (M. foliorum) using plaque assay.
Notes:
A.) PPE was put on and the bench was prepared for aseptic work by applying 70% ethanol solution and 1:128 cidecon solution.
B.) Extraction of phage from enviromental sample
-
- A bunsen burner was set up to work under at the lab bench to perform the following steps.
- Liquid media was added to the 15 mL conical tube until the sample was submerged by 2-3 mL of liquid.
- The tube was then capped and inverted several times to mix the sample thoroughly.
- The sample was then put into a shaken incubator at 250 rmp for 1 hour and 15 minutes.
- Once the sample was collected it was allowed to rest for 7 minutes to allow particulate matter to settle
C.) Preparation of phage filtrate
- Once particulate matter settled, a 0.22 μm syringe filter was attached to a syringe.
- The supernanent fluid was then poured into the syringe.
- The plunger was depressed slowly to dispense the filtered fluid into a microcentrifuge tube. About 2 millimeters of fluid was obtained in the microcentrifuge tube.
- The tube was then capped then placed into the fridge at 5 degrees Celcius for 5 days.
- The lab bench was cleaned with 70% ethanol solution and 1:128 cidecon solution.
D.) Inoculate host bacteria (M. foliorum) with phage sample.
- PPE was put on and the bench was prepared for aseptic work by applying 70% ethanol solution and 1:128 cidecon solution.
- A Bunsen burner was set up to work under at the lab bench to perform the following steps.
- 500 μl was added to a glass culture tube containing 250 μl of M. foliorum bacteria culture.
- The inoculated sample was mixed by gently tapping the culture tube, then left undisturbed for 10 minutes.
E.) Plating samples with top agar
- An agar plate was obtained then labeled appropriately.
- The bottle of top agar was in a 55° C bath when not in use.
- Using a 5 mL pipette 3 mL of top agar was transfered to the inoculated host sample tube. The mixture was then mixed, and immediately aspirated into the pipette then transferred to the agar plate.
- The plate was then tilted all directions to evenly distribute the top agar on the plate.
- The plate was left undisturbed for 22 minutes to allow the top agar to solidify.
- The lab bench was cleaned with 70% ethanol solution and 1:128 cidecon solution.
F.) Incubation
- Once the top agar had solidified, the sample was inverted and placed into incubator at 29° C for 2 days. The plate was obtained from the incubator on 2024-09-11.
Results:
Conclusions and Next Steps:
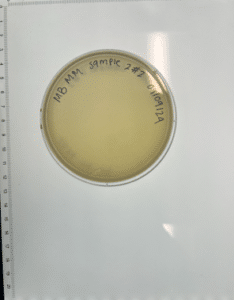
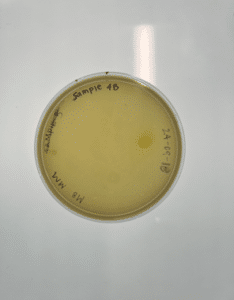
Our plate had no evidence of bacteriophages. We disposed of our plate into the autoclave bag on 2024/09/11 at 9:15am.
Isolation and purification of sample 3A
Date: 09/09/2024
Redo: No
Purpose: Direct isolation is used to exctract phages from microbes within enviromental samples, and then infect host bacteria using plaque assay.
Notes:
A.) PPE was put on and the bench was prepared for aseptic work by applying 70% ethanol solution and 1:128 cidecon solution.
B.) Extraction of phage from enviromental sample
-
- A bunsen burner was set up to work under at the lab bench to perform the following steps.
- Liquid media was added to the 15 mL conical tube until the sample was submerged by 2-3 mL of liquid.
- The tube was then capped and inverted several times to mix the sample thoroughly.
- The sample was then put into a shaken incubator at 250 rmp for 1 hour and 15 minutes.
- Once the sample was collected it was allowed to rest for 7 minutes to allow particulate matter to settle
C.) Preparation of phage filtrate
- Once particulate matter settled, a 0.22 μm syringe filter was attached to a syringe.
- The supernanent fluid was then poured into the syringe.
- The plunger was depressed slowly to dispense the filtered fluid into a microcentrifuge tube. About 2 millimeters of fluid was obtained in the microcentrifuge tube.
- The tube was then capped then placed into the fridge at 5 degrees Celcius for 5 days.
- The lab bench was cleaned with 70% ethanol solution and 1:128 cidecon solution.
09/11/24
D.) Inoculate host bacteria (M. foliorum) with phage sample. X2
- PPE was put on and the bench was prepared for aseptic work by applying 70% ethanol solution and 1:128 cidecon solution.
- A Bunsen burner was set up to work under at the lab bench to perform the following steps.
- 500 μl was added to a glass culture tube containing 250 μl of M. foliorum bacteria culture.
- The inoculated sample was mixed by gently tapping the culture tube, then left undisturbed for 10 minutes.
E.) Plating samples with top agar
- An agar plate was obtained then labeled appropriately.
- The bottle of top agar was in a 55° C bath when not in use.
- Using a 5 mL pipette 3 mL of top agar was transfered to the inoculated host sample tube. The mixture was then mixed, and immediately aspirated into the pipette then transferred to the agar plate.
- The plate was then tilted all directions to evenly distribute the top agar on the plate.
- The plate was left undisturbed for 8 minutes to allow the top agar to solidify.
- The lab bench was cleaned with 70% ethanol solution and 1:128 cidecon solution.
F.) Incubation
- Once the top agar had solidified, the sample was inverted and placed into incubator at 29° C for 5 days. The plate was obtained from the incubator on 2024-09-16.
Results:
Conclusions and next steps:
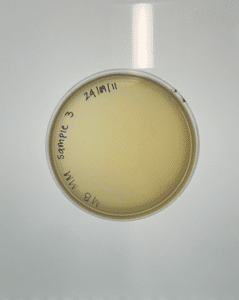
Our plate had no evidence of bacteriophages. We disposed of our plate into the autoclave bag on 2024/09/16 at 9:00am.
Isolation and purification of sample 3B
Date: 09/11/2024
Redo: Yes
Purpose: Direct isolation is used to exctract phages from microbes within enviromental samples, and then infect host bacteria using plaque assay.
Notes:
A.) PPE was put on and the bench was prepared for aseptic work by applying 70% ethanol solution and 1:128 cidecon solution.
B.) Extraction of phage from enviromental sample
-
- A bunsen burner was set up to work under at the lab bench to perform the following steps.
- Liquid media was added to the 15 mL conical tube until the sample was submerged by 2-3 mL of liquid.
- The tube was then capped and inverted several times to mix the sample thoroughly.
- The sample was then put into a shaken incubator at 250 rmp for 1 hour and 15 minutes.
- Once the sample was collected it was allowed to rest for 7 minutes to allow particulate matter to settle
C.) Preparation of phage filtrate
- Once particulate matter settled, a 0.22 μm syringe filter was attached to a syringe.
- The supernanent fluid was then poured into the syringe.
- The plunger was depressed slowly to dispense the filtered fluid into a microcentrifuge tube. About 2 millimeters of fluid was obtained in the microcentrifuge tube.
- The tube was then capped then placed into the fridge at 5 degrees Celcius for 5 days.
- The lab bench was cleaned with 70% ethanol solution and 1:128 cidecon solution.
09/16/24
D.) Inoculate host bacteria (M. foliorum) with phage sample. X2
- PPE was put on and the bench was prepared for aseptic work by applying 70% ethanol solution and 1:128 cidecon solution.
- A Bunsen burner was set up to work under at the lab bench to perform the following steps.
- 500 μl was added to a glass culture tube containing 250 μl of M. foliorum bacteria culture.
- The inoculated sample was mixed by gently tapping the culture tube, then left undisturbed for 10 minutes.
E.) Plating samples with top agar
- An agar plate was obtained then labeled appropriately.
- The bottle of top agar was in a 55° C bath when not in use.
- Using a 5 mL pipette 3 mL of top agar was transfered to the inoculated host sample tube. The mixture was then mixed, and immediately aspirated into the pipette then transferred to the agar plate.
- The plate was then tilted all directions to evenly distribute the top agar on the plate.
- The plate was left undisturbed for 10 minutes to allow the top agar to solidify.
- The lab bench was cleaned with 70% ethanol solution and 1:128 cidecon solution.
F.) Incubation
- Once the top agar had solidified, the sample was inverted and placed into incubator at 29° C for 2 days. The plate was obtained from the incubator on 2024-09-18.
Results:
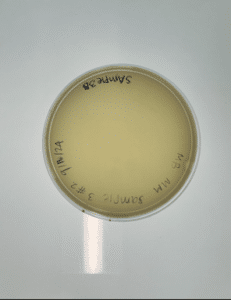
Conclusions and next steps: Our plate had no evidence of bacteriophages. We disposed of our plate into the autoclave bag on 2024/09/18 at 9:00am.
Isolation and purification of sample 4A
Date: 09/11/2024
Redo: No
Sample 4A
Purpose: Direct isolation is used to extract phages from microbes within environmental samples, and then infect host bacteria (M. foliorum) using plaque assay.
Notes:
A.) PPE was put on and the bench was prepared for aseptic work by applying 70% ethanol solution and1:128 cidecon 1:128 cidecon solution.
B.) Extraction of phage from environmental sample
-
- A Bunsen burner was set up to work under at the lab bench to perform the following steps.
- Liquid media was added to the 15 mL conical tube until the sample was submerged by 2-3 mL of liquid.
- The tube was then capped and inverted several times to mix the sample thoroughly.
- The sample was then put into a shaken incubator at 250 rmp for 1 hour.
- Once the sample was collected it was allowed to rest for 10 minutes to allow particulate matter to settle
C.) Preparation of phage filtrate
- Once particulate matter settled, a 0.22 μm syringe filter was attached to a syringe.
- The supernanent fluid was then poured into the syringe.
- The plunger was depressed slowly to dispense the filtered fluid into a microcentrifuge tube. About 2 millimeters of fluid was obtained in the microcentrifuge tube.
- The tube was then capped then placed into the fridge at 5 degrees Celcius for 5 days.
- The lab bench was cleaned with 70% ethanol solution and 1:128 cidecon solution.
09/16/24
D.) Inoculate host bacteria (M. foliorum) with phage sample. X2
- PPE was put on and the bench was prepared for aseptic work by applying 70% ethanol solution and 1:128 cidecon solution.
- A Bunsen burner was set up to work under at the lab bench to perform the following steps.
- 500 μl was added to a glass culture tube containing 250 μl of M. foliorum bacteria culture.
- The inoculated sample was mixed by gently tapping the culture tube, then left undisturbed for 10 minutes.
E.) Plating samples with top agar
- An agar plate was obtained then labeled appropriately.
- The bottle of top agar was in a 55° C bath when not in use.
- Using a 5 mL pipette 3 mL of top agar was transfered to the inoculated host sample tube. The mixture was then mixed, and immediately aspirated into the pipette then transferred to the agar plate.
- The plate was then tilted all directions to evenly distribute the top agar on the plate.
- The plate was left undisturbed for 10 minutes to allow the top agar to solidify.
- The lab bench was cleaned with 70% ethanol solution and 1:128 cidecon solution.
F.) Incubation
- Once the top agar had solidified, the sample was inverted and placed into incubator at 29° C for 2 days. The plate was obtained from the incubator on 2024-09-18.
Results:
Conclusions and next steps: Our plate had no evidence of bacteriophages. We disposed of our plate into the autoclave bag on 2024/09/18 at 9:00am.
Isolation and purification of sample 4B
Date: 09/18/2024
Redo: Yes
Sample 4B
Purpose: Direct isolation is used to extract phages from microbes within environmental samples, and then infect host bacteria (M. foliorum) using plaque assay.
Notes:
A.) PPE was put on and the bench was prepared for aseptic work by applying 70% ethanol solution and1:128 cidecon 1:128 cidecon solution.
B.) Extraction of phage from environmental sample
-
- A Bunsen burner was set up to work under at the lab bench to perform the following steps.
- Liquid media was added to the 15 mL conical tube until the sample was submerged by 2-3 mL of liquid.
- The tube was then capped and inverted several times to mix the sample thoroughly.
- The sample was then put into a shaken incubator at 250 rmp for 1 hour.
- Once the sample was collected it was allowed to rest for 10 minutes to allow particulate matter to settle
C.) Preparation of phage filtrate
- Once particulate matter settled, a 0.22 μm syringe filter was attached to a syringe.
- The supernanent fluid was then poured into the syringe.
- The plunger was depressed slowly to dispense the filtered fluid into a microcentrifuge tube. About 2 millimeters of fluid was obtained in the microcentrifuge tube.
- The tube was then capped then placed into the fridge at 5°C for 5 days.
- The lab bench was cleaned with 70% ethanol solution and 1:128 cidecon solution.
D.) Inoculate host bacteria (M. foliorum) with phage sample.
- PPE was put on and the bench was prepared for aseptic work by applying 70% ethanol solution and 1:128 cidecon solution.
- A Bunsen burner was set up to work under at the lab bench to perform the following steps.
- 500 μl was added to a glass culture tube containing 250 μl of M. foliorum bacteria culture.
- The inoculated sample was mixed by gently tapping the culture tube, then left undisturbed for 10 minutes.
E.) Plating samples with top agar
- An agar plate was obtained then labeled appropriately.
- The bottle of top agar was in a 55° C bath when not in use.
- Using a 5 mL pipette 3 mL of top agar was transfered to the inoculated host sample tube. The mixture was then mixed, and immediately aspirated into the pipette then transferred to the agar plate.
- The plate was then tilted all directions to evenly distribute the top agar on the plate.
- The plate was left undisturbed for 10 minutes to allow the top agar to solidify.
- The lab bench was cleaned with 70% ethanol solution and 1:128 cidecon solution.
F.) Incubation
- Once the top agar had solidified, the sample was inverted and placed into incubator at 29° C for 5 days. The plate was obtained from the incubator on 09/23/2024.
Results:
Conclusions and next steps:
Our plate had no evidence of bacteriophages. We disposed of our plate into the autoclave bag on 2024/09/23 at 9:00am.
Isolation and purification of sample 5A
Date: 09/18/2024
Redo: No
Sample 5
Purpose: Direct isolation is used to extract phages from microbes within environmental samples, and then infect host bacteria (M. foliorum) using plaque assay.
Notes:
A.) PPE was put on and the bench was prepared for aseptic work by applying 70% ethanol solution and1:128 cidecon 1:128 cidecon solution.
B.) Extraction of phage from environmental sample
-
- A Bunsen burner was set up to work under at the lab bench to perform the following steps.
- Liquid media was added to the 15 mL conical tube until the sample was submerged by 2-3 mL of liquid.
- The tube was then capped and inverted several times to mix the sample thoroughly.
- The sample was then put into a shaken incubator at 250 rmp for 1 hour.
- Once the sample was collected it was allowed to rest for 10 minutes to allow particulate matter to settle
C.) Preparation of phage filtrate
- Once particulate matter settled, a 0.22 μm syringe filter was attached to a syringe.
- The supernanent fluid was then poured into the syringe.
- The plunger was depressed slowly to dispense the filtered fluid into a microcentrifuge tube. About 2 millimeters of fluid was obtained in the microcentrifuge tube.
- The tube was then capped then placed into the fridge at 5°C for 5 days.
- The lab bench was cleaned with 70% ethanol solution and 1:128 cidecon solution.
D.) Inoculate host bacteria (M. foliorum) with phage sample.
- PPE was put on and the bench was prepared for aseptic work by applying 70% ethanol solution and 1:128 cidecon solution.
- A Bunsen burner was set up to work under at the lab bench to perform the following steps.
- 500 μl was added to a glass culture tube containing 250 μl of M. foliorum bacteria culture.
- The inoculated sample was mixed by gently tapping the culture tube, then left undisturbed for 10 minutes.
E.) Plating samples with top agar
- An agar plate was obtained then labeled appropriately.
- The bottle of top agar was in a 55° C bath when not in use.
- Using a 5 mL pipette 3 mL of top agar was transfered to the inoculated host sample tube. The mixture was then mixed, and immediately aspirated into the pipette then transferred to the agar plate.
- The plate was then tilted all directions to evenly distribute the top agar on the plate.
- The plate was left undisturbed for 20 minutes to allow the top agar to solidify.
- The lab bench was cleaned with 70% ethanol solution and 1:128 cidecon solution.
F.) Incubation
- Once the top agar had solidified, the sample was inverted and placed into incubator at 29° C for 2 days. The plate was obtained from the incubator on 09/25/2024.
Results:
Conclusions and next steps:
Our plate had no evidence of bacteriophages. We disposed of our plate into the autoclave bag at 9:05 am.
Enriched isolation of sample 6
Date: 09/25/2024
Redo: No
Sample 6
Purpose: Enriched isolation is used to amplify phages present in environmental samples.
Notes:
DAY 1 (09/25/24)
A.) The solid environmental sample 6 was obtained.
B.) Extract phages from a soil sample
1. A 50 mL conical tube was obtained and filled to the 15 mL mark with the solid environmental sample.
2. Liquid media wsa added to the conical tube to the 35 mL mark. The tube was then vortexed and placed into a shaken incubator at 250 rmp for 1 hour and 10 minutes.
3. A centrifuge was balanced and the tube sample was centrifuged at 2000 x g for 10 minutes.
C.) Prepare bench for aseptic work and assemble supplies
1. A 0.22 µm filter was attached to a syringe.
2. supernanent fluid was poured into the syringe and slowly filtered through into a sterile 50 mL conical tube.
3. 5 mL was obtained from the enriched isolation.
D.) Seed culture with host bacteria
1. 0.5 mL of bacterial host culture (M.folirum) was added to the 50 mL conical tube
2. The tube was then capped and placed into a shaking incubator at 220 rmp for 2 days.
DAY 2
A.) PPE was put on and the bench was prepared for aseptic work by applying 70% ethanol solution and1:128 cidecon 1:128 cidecon solution.
B.) Filtered the enriched culture.
-
- Using an appropriate pipette, transfer 1.4 ml of your enriched culture from the Erlenmeyer flask to a microcentrifuge tube.
- Repeat this procedure so that you have two microcentrifuge tubes, each with 1.4 ml of enriched culture.
- Spin the tubes at high speed in the microcentrifuge for 1 minute to pellet the bacteria.
- The supernatant was not clear so we filtered the supernatant through a 0.22 µm filter as described below.
- Remove the plunger from a syringe.
- Open a sterile filter and attach it to the barrel of the syringe.
- Pipette 1 ml of supernatant from each microcentrifuge tube into the syringe barrel (for a total of 2 ml). We only obtained 0.08mL total, however.
- Place the tip of the filter/syringe over a sterile microcentrifuge tube and insert the plunger into the syringe.
- Depress the plunger and collect the sterile filtrate.
- Transfer the supernatant into a clean microcentrifuge tube, avoiding the bacterial pellet.
- Immediately cap the microfuge tube containing your supernatant or filtrate and label it appropriately.
C.) Inoculate the host bacteria with your phage sample.
- Obtain the same number of aliquots of 250 μl host bacterial cultures as you have phage samples.
- Label the culture tubes accordingly.
- Use a micropipettor and aseptic technique to
- Dispense 10 microliters of phage sample into the appropriate culture tube containing 250 μl of host bacteria.
- Mix each inoculated host culture by gently tapping the tube.
- Let your sample sit undisturbed for 5–10 minutes to allow for attachment.
D.) Plating samples with top agar
- An agar plate was obtained then labeled appropriately.
- The bottle of top agar was in a 55° C bath when not in use.
- Using a 5 mL pipette 3 mL of top agar was transfered to the inoculated host sample tube. The mixture was then mixed, and immediately aspirated into the pipette then transferred to the agar plate.
- The plate was then tilted all directions to evenly distribute the top agar on the plate.
- The plate was left undisturbed for 20 minutes to allow the top agar to solidify.
- The lab bench was cleaned with 70% ethanol solution and 1:128 cidecon solution.
E.) Incubation
- Once the top agar had solidified, the sample was inverted and placed into incubator at 29° C for 3 days. The plate was obtained from the incubator on 09/30/2024.
Results:
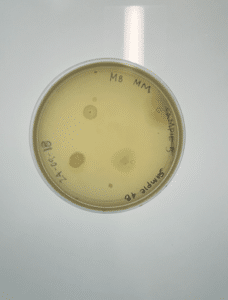
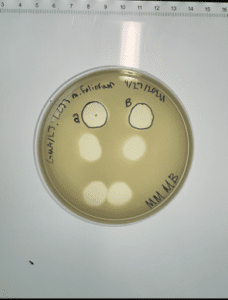
Conclusions and next steps: Our plate had some evidence of bacteriophages, so we continued to purification.
Isolation and purification of sample 7
Date: 09/25/2024
Redo: No
Sample 7
Purpose: Direct isolation is used to extract phages from microbes within environmental samples, and then infect host bacteria (M. foliorum) using plaque assay.
Notes:
A.) PPE was put on and the bench was prepared for aseptic work by applying 70% ethanol solution and1:128 cidecon 1:128 cidecon solution.
B.) Extraction of phage from environmental sample
-
- A Bunsen burner was set up to work under at the lab bench to perform the following steps.
- Liquid media was added to the 15 mL conical tube until the sample was submerged by 2-3 mL of liquid.
- The tube was then capped and inverted several times to mix the sample thoroughly.
- The sample was then put into a shaken incubator at 250 rmp for 1 hour.
- Once the sample was collected it was allowed to rest for 10 minutes to allow particulate matter to settle
C.) Preparation of phage filtrate
- Once particulate matter settled, a 0.22 μm syringe filter was attached to a syringe.
- The supernanent fluid was then poured into the syringe.
- The plunger was depressed slowly to dispense the filtered fluid into a microcentrifuge tube. About 1.5 millimeters of fluid was obtained in the microcentrifuge tube.
- The tube was then capped then placed into the fridge at 5°C for 1 day.
- The lab bench was cleaned with 70% ethanol solution and 1:128 cidecon solution.
D.) Inoculate host bacteria (M. foliorum) with phage sample. 9/27/24
- PPE was put on and the bench was prepared for aseptic work by applying 70% ethanol solution and 1:128 cidecon solution.
- A Bunsen burner was set up to work under at the lab bench to perform the following steps.
- 500 μl was added to a glass culture tube containing 250 μl of M. foliorum bacteria culture.
- The inoculated sample was mixed by gently tapping the culture tube, then left undisturbed for 10 minutes.
E.) Plating samples with top agar
- An agar plate was obtained then labeled appropriately.
- The bottle of top agar was in a 55° C bath when not in use.
- Using a 5 mL pipette 3 mL of top agar was transfered to the inoculated host sample tube. The mixture was then mixed, and immediately aspirated into the pipette then transferred to the agar plate.
- The plate was then tilted all directions to evenly distribute the top agar on the plate.
- The plate was left undisturbed for 20 minutes to allow the top agar to solidify.
- The lab bench was cleaned with 70% ethanol solution and 1:128 cidecon solution.
F.) Incubation
- Once the top agar had solidified, the sample was inverted and placed into incubator at 29° C for 2 days. The plate was obtained from the incubator on 09/30/2024.
Results:
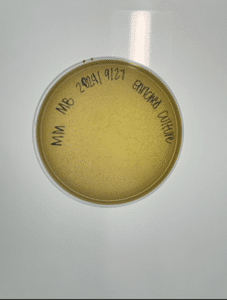
Conclusions and next steps: Our plate had no evidence of bacteriophages. We disposed of our plate into the autoclave bag at 9:05 am on 9/30/2024.
Isolation and purification of sample 8
Date: 09/25/2024
Redo: No
Sample 8
Purpose: Direct isolation is used to extract phages from microbes within environmental samples, and then infect host bacteria (M. foliorum) using plaque assay.
Notes:
A.) PPE was put on and the bench was prepared for aseptic work by applying 70% ethanol solution and1:128 cidecon 1:128 cidecon solution.
B.) Extraction of phage from environmental sample
-
- A Bunsen burner was set up to work under at the lab bench to perform the following steps.
- Liquid media was added to the 15 mL conical tube until the sample was submerged by 2-3 mL of liquid.
- The tube was then capped and inverted several times to mix the sample thoroughly.
- The sample was then put into a shaken incubator at 250 rmp for 1 hour.
- Once the sample was collected it was allowed to rest for 10 minutes to allow particulate matter to settle
C.) Preparation of phage filtrate
- Once particulate matter settled, a 0.22 μm syringe filter was attached to a syringe.
- The supernanent fluid was then poured into the syringe.
- The plunger was depressed slowly to dispense the filtered fluid into a microcentrifuge tube. About 1.5 millimeters of fluid was obtained in the microcentrifuge tube.
- The tube was then capped then placed into the fridge at 5°C for 1 day.
- The lab bench was cleaned with 70% ethanol solution and 1:128 cidecon solution.
D.) Inoculate host bacteria (M. foliorum) with phage sample. 9/27/24
- PPE was put on and the bench was prepared for aseptic work by applying 70% ethanol solution and 1:128 cidecon solution.
- A Bunsen burner was set up to work under at the lab bench to perform the following steps.
- 500 μl was added to a glass culture tube containing 250 μl of M. foliorum bacteria culture.
- The inoculated sample was mixed by gently tapping the culture tube, then left undisturbed for 10 minutes.
E.) Plating samples with top agar
- An agar plate was obtained then labeled appropriately.
- The bottle of top agar was in a 55° C bath when not in use.
- Using a 5 mL pipette 3 mL of top agar was transfered to the inoculated host sample tube. The mixture was then mixed, and immediately aspirated into the pipette then transferred to the agar plate.
- The plate was then tilted all directions to evenly distribute the top agar on the plate.
- The plate was left undisturbed for 20 minutes to allow the top agar to solidify.
- The lab bench was cleaned with 70% ethanol solution and 1:128 cidecon solution.
F.) Incubation
- Once the top agar had solidified, the sample was inverted and placed into incubator at 29° C for 2 days. The plate was obtained from the incubator on 09/30/2024.
Results:
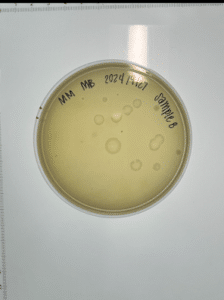
Conclusions and next steps: Our plate had no evidence of bacteriophages. We disposed of our plate into the autoclave bag at 9:05 am.
Due to deadlines that must be met for this research, we have adopted a phage to continue purification on. This phage was isolated via enriched isolation. The phage was adopted 9/30/2024 and will be referred to as sample 9 throughout this notebook.
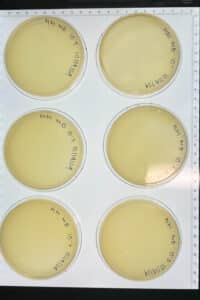
Purification of Honeybear – 1st serial dilution
Date: 09/30/2024
Redo: No
Sample 9
Purpose: The purpose is to dilute the phage found for purification and amplification.
Notes:
A.) PPE was put on and the bench was prepared for aseptic work by applying 70% ethanol solution and1:128 cidecon solution.
B.) A 10-fold serial dilution was set up using 8 microcentrifuge tubes.
1.) The microcentrifuge tubes were labeled accordingly from 10^-1 to 10^-8.
2.) Using a micropipette 90 μl of phage buffer solution was added to each tube
C.) A 10-fold serial dilution was performed using our undiluted phage sample.
1.) Using a micropipette, 10 μl of the undiluted phage sample was added to the tube labeled 10^-1, which was then vortexed well.
2.) 10 μl of the 10^-1 sample was then added to the tube labeled 10^-2, which was then vortexed well.
3.) We continued in the successive manner until we reached the final dilution tube labeled 10^-8.
D.) Plating of each serial dilution
1.) 8 agar plates were obtained and labeled accordingly
2.) 8 host culture tubes were then inoculated with 10 μl of the serial dilutions, gently mixed and allowed to sit for 10minutes for attachment.
3.) 3 mL of top agar was then added to the culture tube, mixed with the bacteria and diluted phage sample, then added to the corresponding agar plate.
4.) step 3 was repeated for each dilution and plate, resulting in 8 plates.
E.) Incubation
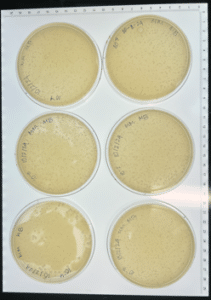
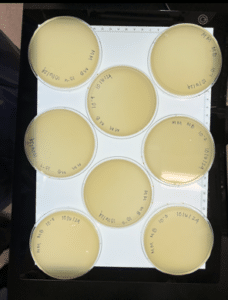
1.) All plates were incubated at 29°C for 2 days. The plates were obtained from the incubator on 10/02/2024.
Important note: A clean micropipette tip was used between each step of the dilution as well as the area was sanitized.
Results:
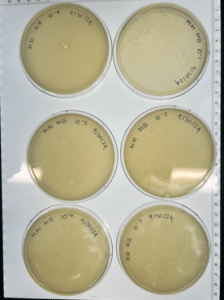
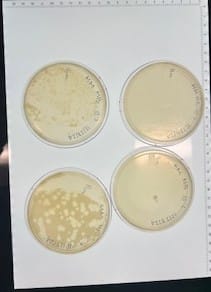
Conclusions and next steps: Our plates were contaminated and showed no growth, we will repeat the first serial dilution taking extra caution to avoid contamination. We disposed of the plates in the autoclave bag at 9:05 am on 10/02/24.
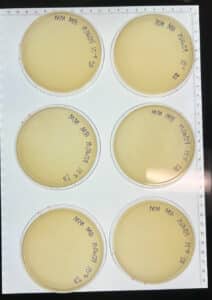
Purification of Honeybear – 1st serial dilution
Date: 10/02/2024
Redo: Yes
Sample 9
Purpose: The purpose is to dilute the phage found for purification and amplification.
Notes:
A.) PPE was put on and the bench was prepared for aseptic work by applying 70% ethanol solution and1:128 cidecon solution.
B.) A 10-fold serial dilution was set up using 8 microcentrifuge tubes.
1.) The microcentrifuge tubes were labeled accordingly from 10^-1 to 10^-8.
2.) Using a micropipette 90 μl of phage buffer solution was added to each tube
C.) A 10-fold serial dilution was performed using our undiluted phage sample.
1.) Using a micropipette, 10 μl of the undiluted phage sample was added to the tube labeled 10^-1, which was then vortexed well.
2.) 10 μl of the 10^-1 sample was then added to the tube labeled 10^-2, which was then vortexed well.
3.) We continued in the successive manner until we reached the final dilution tube labeled 10^-8.
D.) Plating of each serial dilution
1.) 8 agar plates were obtained and labeled accordingly
2.) 8 host culture tubes were then inoculated with 10 μl of the serial dilutions, gently mixed and allowed to sit for 10minutes for attachment.
3.) 3 mL of top agar was then added to the culture tube, mixed with the bacteria and diluted phage sample, then added to the corresponding agar plate.
4.) step 3 was repeated for each dilution and plate, resulting in 8 plates.
E.) Incubation
1.) All plates were incubated at 29°C for 2 days. The plates were obtained from the incubator on 10/04/2024.
Results:
Conclusions and next steps: Our plates were contaminated and showed no growth. We disposed of the plates in the autoclave bag at 9:30 am on 10/04/24. We will explore further plans and options 10/01/2024.
Purification of Honeybear – 1st serial dilution & use of phage directly from plate (A).
Date: 10/07/2024
Redo: Yes
Sample 9
Purpose: The purpose is to dilute the phage found for purification and amplification.
Notes:
A.) PPE was put on and the bench was prepared for aseptic work by applying 70% ethanol solution and1:128 cidecon solution.
- Labeled plaque A.
- Top left plaque from plate with a round, clear appearance.
- Labeled and prepared microcentrifuge tube as A.
- Using aseptic technique, aliquot 100 μl of phage buffer into the microcentrifuge tube.
- Picked a plaque (A).
- Place a sterile tip onto a p200 micropipettor.
- Holding the pipettor perpendicular to the agar surface, gently stab the top agar in the center of the plaque (Figure 5.4-1).
- Place the end of the tip into the phage buffer in the corresponding microcentrifuge tube. Then tap the tip on the wall of the tube and pipette up and down to dislodge phage particles. Discard the tip.
- Mix well by vortexing.
B.) A 10-fold serial dilution was set up using 8 microcentrifuge tubes.
1. The microcentrifuge tubes were labeled accordingly from 10^-1 to 10^-8.
2. Using a micropipette 90 μl of phage buffer solution was added to each tube
C.) A 10-fold serial dilution was performed using our undiluted phage sample.
1. Using a micropipette, 10 μl of the undiluted phage sample was added to the tube labeled 10^-1, which was then vortexed well.
2. 10 μl of the 10^-1 sample was then added to the tube labeled 10^-2, which was then vortexed well.
3.) We continued in the successive manner until we reached the final dilution tube labeled 10^-8.
D.) Plating of each serial dilution
1. 8 agar plates were obtained and labeled accordingly
2. 8 host culture tubes were then inoculated with 10 μl of the serial dilutions, gently mixed and allowed to sit for 10minutes for attachment.
3. 3 mL of top agar was then added to the culture tube, mixed with the bacteria and diluted phage sample, then added to the corresponding agar plate.
4. step 3 was repeated for each dilution and plate, resulting in 8 plates.
E. Incubation
1. All plates were incubated at 29°C for 2 days. The plates were obtained from the incubator on 10/09/2024.
Results:
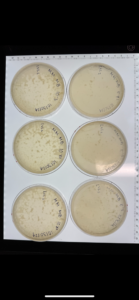
Conclusions and next steps: Our plates were contaminated and showed no growth. We disposed of the plates in the autoclave bag at 9:30 am on 10/09/24.
Purification of Honeybear – 1st serial dilution & use of phage directly from plate 10 (plaque 2).
Date: 10/14/2024
Redo: No
Sample 10
Purpose: The purpose is to dilute the phage found for purification and amplification.
Notes:
A.) PPE was put on and the bench was prepared for aseptic work by applying 70% ethanol solution and1:128 cidecon solution.
- Labeled plaque 2.
- Plaque is small and not completely clear.
- Labeled and prepared microcentrifuge tube as A.
- Using aseptic technique, aliquot 100 μl of phage buffer into the microcentrifuge tube.
- Picked a plaque (2).
- Place a sterile tip onto a p200 micropipettor.
- Holding the pipettor perpendicular to the agar surface, gently stab the top agar in the center of the plaque (Figure 5.4-1).
- Place the end of the tip into the phage buffer in the corresponding microcentrifuge tube. Then tap the tip on the wall of the tube and pipette up and down to dislodge phage particles. Discard the tip.
- Mix well by vortexing.
B.) A 10-fold serial dilution was set up using 8 microcentrifuge tubes.
1. The microcentrifuge tubes were labeled accordingly from 10^-1 to 10^-6.
2. Using a micropipette 90 μl of phage buffer solution was added to each tube
C.) A 10-fold serial dilution was performed using our undiluted phage sample.
1. Using a micropipette, 10 μl of the undiluted phage sample was added to the tube labeled 10^-1, which was then vortexed well.
2. 10 μl of the 10^-1 sample was then added to the tube labeled 10^-2, which was then vortexed well.
3.) We continued in the successive manner until we reached the final dilution tube labeled 10^-6.
D.) Plating of each serial dilution
1. 6 agar plates were obtained and labeled accordingly
2. 6 host culture tubes were then inoculated with 10 μl of the serial dilutions, gently mixed and allowed to sit for 10minutes for attachment.
3. 3 mL of top agar was then added to the culture tube, mixed with the bacteria and diluted phage sample, then added to the corresponding agar plate.
4. step 3 was repeated for each dilution and plate, resulting in 6 plates.
E. Incubation
1. All plates were incubated at 29°C. The plates were thrown away and we are unsure how long they were actually in the incubator.
Results:
Conclusions and next steps: Re-Do experiment due to plates being thrown away.
Purification of Honeybear – 1st serial dilution & use of phage directly from plate 10 (plaque 2).
Date: 10/16/2024
Redo: Yes
Sample 10 (2)
Purpose: The purpose is to dilute the phage found for purification and amplification.
Notes:
A.) PPE was put on and the bench was prepared for aseptic work by applying 70% ethanol solution and1:128 cidecon solution.
- Labeled plaque 2.
- Plaque is small and not completely clear.
- Labeled and prepared microcentrifuge tube as B.
- Using aseptic technique, aliquot 100 μl of phage buffer into the microcentrifuge tube.
- Picked a plaque (2).
- Place a sterile tip onto a p200 micropipettor.
- Holding the pipettor perpendicular to the agar surface, gently stab the top agar in the center of the plaque (Figure 5.4-1).
- Place the end of the tip into the phage buffer in the corresponding microcentrifuge tube. Then tap the tip on the wall of the tube and pipette up and down to dislodge phage particles. Discard the tip.
- Mix well by vortexing.
B.) A 10-fold serial dilution was set up using 8 microcentrifuge tubes.
1. The microcentrifuge tubes were labeled accordingly from 10^-1 to 10^-6.
2. Using a micropipette 90 μl of phage buffer solution was added to each tube
C.) A 10-fold serial dilution was performed using our undiluted phage sample.
1. Using a micropipette, 10 μl of the undiluted phage sample was added to the tube labeled 10^-1, which was then vortexed well.
2. 10 μl of the 10^-1 sample was then added to the tube labeled 10^-2, which was then vortexed well.
3.) We continued in the successive manner until we reached the final dilution tube labeled 10^-6.
D.) Plating of each serial dilution
1. 6 agar plates were obtained and labeled accordingly
2. 6 host culture tubes were then inoculated with 10 μl of the serial dilutions, gently mixed and allowed to sit for 10minutes for attachment.
3. 3 mL of top agar was then added to the culture tube, mixed with the bacteria and diluted phage sample, then added to the corresponding agar plate.
4. step 3 was repeated for each dilution and plate, resulting in 6 plates.
E. Incubation
1. All plates were incubated at 29°C for 2 days.
Results:
Conclusions and next steps: Our plates showed no growth. We disposed of the plates in the autoclave bag at 9:30 am on 10/18/24. We will explore further plans and options 10/21/2024.
Purification of Honeybear – 1st serial dilution & use of phage directly from plate 10 (plaque 3).
Date: 10/16/2024
Redo: No
Sample 10- 3
Purpose: The purpose is to dilute the phage found for purification and amplification.
Notes:
A.) PPE was put on and the bench was prepared for aseptic work by applying 70% ethanol solution and1:128 cidecon solution.
- Labeled plaque 3.
- Plaque is small and not completely clear.
- INSERT PIC
- Labeled and prepared microcentrifuge tube as B.
- Using aseptic technique, aliquot 100 μl of phage buffer into the microcentrifuge tube.
- Picked a plaque (3).
- Place a sterile tip onto a p200 micropipettor.
- Holding the pipettor perpendicular to the agar surface, gently stab the top agar in the center of the plaque (Figure 5.4-1).
- Place the end of the tip into the phage buffer in the corresponding microcentrifuge tube. Then tap the tip on the wall of the tube and pipette up and down to dislodge phage particles. Discard the tip.
- Mix well by vortexing.
B.) A 10-fold serial dilution was set up using 8 microcentrifuge tubes.
1. The microcentrifuge tubes were labeled accordingly from 10^-1 to 10^-6.
2. Using a micropipette 90 μl of phage buffer solution was added to each tube
C.) A 10-fold serial dilution was performed using our undiluted phage sample.
1. Using a micropipette, 10 μl of the undiluted phage sample was added to the tube labeled 10^-1, which was then vortexed well.
2. 10 μl of the 10^-1 sample was then added to the tube labeled 10^-2, which was then vortexed well.
3.) We continued in the successive manner until we reached the final dilution tube labeled 10^-6.
D.) Plating of each serial dilution
1. 6 agar plates were obtained and labeled accordingly
2. 6 host culture tubes were then inoculated with 10 μl of the serial dilutions, gently mixed and allowed to sit for 10minutes for attachment.
3. 3 mL of top agar was then added to the culture tube, mixed with the bacteria and diluted phage sample, then added to the corresponding agar plate.
4. step 3 was repeated for each dilution and plate, resulting in 6 plates.
E. Incubation
1. All plates were incubated at 29°C for 2 days.
Results:
INSERT PIC
Conclusions and next steps: Our plates showed no growth. We disposed of the plates in the autoclave bag at 9:30 am on 10/18/24. We will explore further plans and options 10/21/2024.
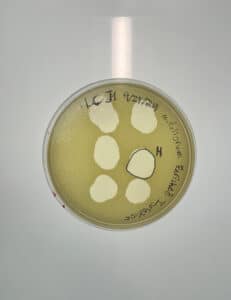
Purification of Honeybear – 1st serial dilution & use of phage directly from plate 11 (plaque H).
Date: 10/21/2024
Redo: No
Sample 11
Purpose: The purpose is to dilute the phage found for purification and amplification.
Notes:
A.) PPE was put on and the bench was prepared for aseptic work by applying 70% ethanol solution and1:128 cidecon solution.
- Labeled plaque H.
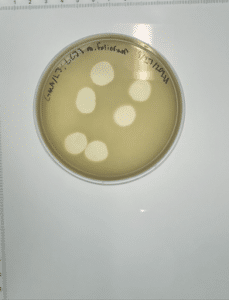
- Plaque is round, clear and about 1 inch in diameter.
- Labeled and prepared microcentrifuge tube as H.
- Using aseptic technique, aliquot 100 μl of phage buffer into the microcentrifuge tube.
- Picked a plaque (H).
- Place a sterile tip onto a p200 micropipettor.
- Holding the pipettor perpendicular to the agar surface, gently stab the top agar in the center of the plaque (Figure 5.4-1).
- Place the end of the tip into the phage buffer in the corresponding microcentrifuge tube. Then tap the tip on the wall of the tube and pipette up and down to dislodge phage particles. Discard the tip.
- Mix well by vortexing.
B.) A 10-fold serial dilution was set up using 6 microcentrifuge tubes.
1. The microcentrifuge tubes were labeled accordingly from 10^-1 to 10^-6.
2. Using a micropipette 90 μl of phage buffer solution was added to each tube
C.) A 10-fold serial dilution was performed using our undiluted phage sample.
1. Using a micropipette, 10 μl of the undiluted phage sample was added to the tube labeled 10^-1, which was then vortexed well.
2. 10 μl of the 10^-1 sample was then added to the tube labeled 10^-2, which was then vortexed well.
3.) We continued in the successive manner until we reached the final dilution tube labeled 10^-6.
D.) Plating of each serial dilution
1. 6 agar plates were obtained and labeled accordingly
2. 6 host culture tubes were then inoculated with 10 μl of the serial dilutions, gently mixed and allowed to sit for 10minutes for attachment.
3. 3 mL of top agar was then added to the culture tube, mixed with the bacteria and diluted phage sample, then added to the corresponding agar plate.
4. step 3 was repeated for each dilution and plate, resulting in 6 plates.
E. Incubation
1. All plates were incubated at 29°C for 2 days.
Results:
Conclusions and next steps: Obtained plaques and will continue with 2nd serial dilution.
Purification of Honeybear – 2nd serial dilution & use of phage directly from plate 10^-2 from 1st serial dilution.
Date: 10/23/2024
Redo: No
Sample 11
Purpose: The purpose is to dilute the phage found for purification and amplification.
Notes:
A.) PPE was put on and the bench was prepared for aseptic work by applying 70% ethanol solution and1:128 cidecon solution.
- Labeled plaque H2.
- Plaque is round, clear and about 1 millimeter in diameter.
- IPAD
- Labeled and prepared microcentrifuge tube as H2.
- Using aseptic technique, aliquot 100 μl of phage buffer into the microcentrifuge tube.
- Picked a plaque (H2).
- Place a sterile tip onto a p200 micropipettor.
- Holding the pipettor perpendicular to the agar surface, gently stab the top agar in the center of the plaque (Figure 5.4-1).
- Place the end of the tip into the phage buffer in the corresponding microcentrifuge tube. Then tap the tip on the wall of the tube and pipette up and down to dislodge phage particles. Discard the tip.
- Mix well by vortexing.
B.) A 10-fold serial dilution was set up using 6 microcentrifuge tubes.
1. The microcentrifuge tubes were labeled accordingly from 10^-1 to 10^-6.
2. Using a micropipette 90 μl of phage buffer solution was added to each tube
C.) A 10-fold serial dilution was performed using our undiluted phage sample.
1. Using a micropipette, 10 μl of the undiluted phage sample was added to the tube labeled 10^-1, which was then vortexed well.
2. 10 μl of the 10^-1 sample was then added to the tube labeled 10^-2, which was then vortexed well.
3.) We continued in the successive manner until we reached the final dilution tube labeled 10^-6.
D.) Plating of each serial dilution
1. 6 agar plates were obtained and labeled accordingly
2. 6 host culture tubes were then inoculated with 10 μl of the serial dilutions, gently mixed and allowed to sit for 10minutes for attachment.
3. 3 mL of top agar was then added to the culture tube, mixed with the bacteria and diluted phage sample, then added to the corresponding agar plate.
4. step 3 was repeated for each dilution and plate, resulting in 6 plates.
E. Incubation
1. All plates were incubated at 29°C for 2 days.
Results:
Conclusions and next steps: Obtained on 10/25 and had plaques! Continued with flooding 10^-2 plate for 3 hours and obtaining low volume lysate.
Purification of Honeybear – Collecting Low Volume Lysate
Date: 10/28/2024
Redo: No
Sample 11
Purpose: The purpose is to collect the low volume lysate to find the best dilution titer in full plate titers.
Notes:
- Prepared our bench for aseptic work and assembled our supplies.
- Utilized our 10^-2 plate from our 2nd serial dilution.
- Flood the webbed plate.
- Apply 8 ml of sterile phage buffer to the webbed plate.
- Let the plate sit at room temperature for 3 hours.
- Swirl the phage buffer gently, taking care not to splash.
- Harvest a plate lysate.
- When the incubation time is complete, remove the lid from the plate and place it on the bench. Tilt the plate slightly by placing one edge of the plate on the lid, allowing the lysate to pool to one side.
- Prepare a 0.22 μm filter by opening the packaging but not removing the filter. Set aside.
- Using a 5 ml syringe aspirate (suck up) the lysate from the plate.
- Carefully attach the syringe to the filter. Depress the syringe plunger and collect the filtrate in a 15 ml sterile conical tube.
- Labeled the tube with our initials, date & LVL.
- Set up 10-fold serial dilutions.
- Arranged the proper number of microcentrifuge tubes in a rack and label them 10-1, 10-2, 10-3,10-4.
- Add 90 μl of phage buffer to each of the tubes.
- Set up 10-fold serial dilutions.
- Perform 10-fold serial dilutions.
- Add 10 μl of your undiluted phage sample to the “10-1” tube and vortex well.
- Transfer 10 μl of the “10 -1” sample to the “10-2” tube and vortex well.
- Continue each successive dilution until we got to the 10^-4 tube.
- Inoculate the host bacteria with your phage sample.
- Obtain the same number of aliquots of 250 μl host bacterial cultures as you have phage samples.
- Label the culture tubes accordingly.
- Use a micropipettor and aseptic technique to
- Dispensed 10 microliters nof each phage sample into the appropriate culture tube containing 250 μl of host bacteria according to Table 5.3-1.
- Mix each inoculated host culture by gently tapping the tube.
- Let your sample sit undisturbed for 5–10 minutes to allow for attachment.
- Obtain the same number of aliquots of 250 μl host bacterial cultures as you have phage samples.
- Plate the samples with top agar. For this part of the experiment you will need 3 ml of molten top agar per sample.
- Obtained 4 agar plates as you have samples. Labeled these plates accordingly.
- Removed a bottle of top agar from the 55 °C bath.
- For each sample:
- Using a sterile 5 ml pipette, aseptically transfered 3 ml of top agar to an inoculated host tube.
- Immediately aspirated (suck-up) the mixture back into the pipette and transfer it to the appropriate plate and discard the pipette.
- Gently, but quickly, tilted the plate in multiple directions until the top agar mixture evenly coats the agar plate.
- Repeated this process for each dilution.
- Incubated plates to allow bacterial growth and phage infection.
- Let the plates sit undisturbed for ~20 minutes until the top agar solidifies.
- After the top agar has solidified, gently invert the plates and place in the proper incubator.
- Incubation
- Each plate was incubated for 2 days.
- Results: INSERT PIC
Conclusions and next steps:
Amplification
Purification of Honeybear – 2nd serial dilution & use of phage directly from plate 10^-2 from 1st serial dilution.
Date: 10/23/2024
Redo: No
Sample 11
Purpose: The purpose is to dilute the phage found for purification and amplification.
Notes:
A.) PPE was put on and the bench was prepared for aseptic work by applying 70% ethanol solution and1:128 cidecon solution.
- Labeled plaque H2.
- Plaque is round, clear and about 1 millimeter in diameter.
- IPAD
- Labeled and prepared microcentrifuge tube as H2.
- Using aseptic technique, aliquot 100 μl of phage buffer into the microcentrifuge tube.
- Picked a plaque (H2).
- Place a sterile tip onto a p200 micropipettor.
- Holding the pipettor perpendicular to the agar surface, gently stab the top agar in the center of the plaque (Figure 5.4-1).
- Place the end of the tip into the phage buffer in the corresponding microcentrifuge tube. Then tap the tip on the wall of the tube and pipette up and down to dislodge phage particles. Discard the tip.
- Mix well by vortexing.
B.) A 10-fold serial dilution was set up using 6 microcentrifuge tubes.
1. The microcentrifuge tubes were labeled accordingly from 10^-1 to 10^-6.
2. Using a micropipette 90 μl of phage buffer solution was added to each tube
C.) A 10-fold serial dilution was performed using our undiluted phage sample.
1. Using a micropipette, 10 μl of the undiluted phage sample was added to the tube labeled 10^-1, which was then vortexed well.
2. 10 μl of the 10^-1 sample was then added to the tube labeled 10^-2, which was then vortexed well.
3.) We continued in the successive manner until we reached the final dilution tube labeled 10^-6.
D.) Plating of each serial dilution
1. 6 agar plates were obtained and labeled accordingly
2. 6 host culture tubes were then inoculated with 10 μl of the serial dilutions, gently mixed and allowed to sit for 10minutes for attachment.
3. 3 mL of top agar was then added to the culture tube, mixed with the bacteria and diluted phage sample, then added to the corresponding agar plate.
4. step 3 was repeated for each dilution and plate, resulting in 6 plates.
E. Incubation
1. All plates were incubated at 29°C for 2 days.
Results:
Conclusions and next steps: Obtained on 10/25 and had plaques! Continued with flooding 10^-2 plate for 3 hours and obtaining low volume lysate.
Purification of Honeybear – Collecting Low Volume Lysate
Date: 10/28/2024
Redo: No
Sample 11
Purpose: The purpose is to collect the low volume lysate to find the best dilution titer in full plate titers.
Notes:
- Prepared our bench for aseptic work and assembled our supplies.
- Utilized our 10^-2 plate from our 2nd serial dilution.
- Flood the webbed plate.
- Apply 8 ml of sterile phage buffer to the webbed plate.
- Let the plate sit at room temperature for 3 hours.
- Swirl the phage buffer gently, taking care not to splash.
- Harvest a plate lysate.
- When the incubation time is complete, remove the lid from the plate and place it on the bench. Tilt the plate slightly by placing one edge of the plate on the lid, allowing the lysate to pool to one side.
- Prepare a 0.22 μm filter by opening the packaging but not removing the filter. Set aside.
- Using a 5 ml syringe aspirate (suck up) the lysate from the plate.
- Carefully attach the syringe to the filter. Depress the syringe plunger and collect the filtrate in a 15 ml sterile conical tube.
- Labeled the tube with our initials, date & LVL.
- Set up 10-fold serial dilutions.
- Arranged the proper number of microcentrifuge tubes in a rack and label them 10-1, 10-2, 10-3,10-4.
- Add 90 μl of phage buffer to each of the tubes.
- Set up 10-fold serial dilutions.
- Perform 10-fold serial dilutions.
- Add 10 μl of your undiluted phage sample to the “10-1” tube and vortex well.
- Transfer 10 μl of the “10 -1” sample to the “10-2” tube and vortex well.
- Continue each successive dilution until we got to the 10^-4 tube.
- Inoculate the host bacteria with your phage sample.
- Obtain the same number of aliquots of 250 μl host bacterial cultures as you have phage samples.
- Label the culture tubes accordingly.
- Use a micropipettor and aseptic technique to
- Dispensed 10 microliters nof each phage sample into the appropriate culture tube containing 250 μl of host bacteria according to Table 5.3-1.
- Mix each inoculated host culture by gently tapping the tube.
- Let your sample sit undisturbed for 5–10 minutes to allow for attachment.
- Obtain the same number of aliquots of 250 μl host bacterial cultures as you have phage samples.
- Plate the samples with top agar. For this part of the experiment you will need 3 ml of molten top agar per sample.
- Obtained 4 agar plates as you have samples. Labeled these plates accordingly.
- Removed a bottle of top agar from the 55 °C bath.
- For each sample:
- Using a sterile 5 ml pipette, aseptically transfered 3 ml of top agar to an inoculated host tube.
- Immediately aspirated (suck-up) the mixture back into the pipette and transfer it to the appropriate plate and discard the pipette.
- Gently, but quickly, tilted the plate in multiple directions until the top agar mixture evenly coats the agar plate.
- Repeated this process for each dilution.
- Incubated plates to allow bacterial growth and phage infection.
- Let the plates sit undisturbed for ~20 minutes until the top agar solidifies.
- After the top agar has solidified, gently invert the plates and place in the proper incubator.
- Incubation
- Each plate was incubated for 2 days.
- Results:
-
- Conclusions and next steps:
Making webbed plates from 10^-3 dilution of low volume lysates
Date: 10/30/2024
Redo: No
Purpose: To generate plates with high density of plaques from a known lysate
Notes:
-
- Prepared our bench for aseptic work and assembled our supplies.
- Labeled the tube with our initials, date & LVL.
- Set up 10-fold serial dilutions.
- Arranged the proper number of microcentrifuge tubes in a rack and label them 10-1, 10-2, 10-3
- Add 90 μl of phage buffer to each of the tubes.
- Set up 10-fold serial dilutions.
- Perform 10-fold serial dilutions.
- Add 10 μl of your undiluted phage sample to the “10-1” tube and vortex well.
- Transfer 10 μl of the “10 -1” sample to the “10-2” tube and vortex well.
- Continue each successive dilution until we got to the 10^-3tube.
- Inoculate the host bacteria with your phage sample.
- Obtain the same number of aliquots of 250 μl host bacterial cultures as you have phage samples.
- Label the culture tubes accordingly.
- Use a micropipettor and aseptic technique to
- Dispensed 10 microliters nof each phage sample into the appropriate culture tube containing 250 μl of host bacteria according to Table 5.3-1.
- Mix each inoculated host culture by gently tapping the tube.
- Let your sample sit undisturbed for 5–10 minutes to allow for attachment.
- Obtain the same number of aliquots of 250 μl host bacterial cultures as you have phage samples.
- Plate the samples with top agar. For this part of the experiment you will need 3 ml of molten top agar per sample.
- Obtained 6 agar plates as you have samples. Labeled these plates accordingly.
- Removed a bottle of top agar from the 55 °C bath.
- For each sample:
- Using a sterile 5 ml pipette, aseptically transfered 3 ml of top agar to an inoculated host tube.
- Immediately aspirated (suck-up) the mixture back into the pipette and transfer it to the appropriate plate and discard the pipette.
- Gently, but quickly, tilted the plate in multiple directions until the top agar mixture evenly coats the agar plate.
- Repeated this process for each dilution.
- Incubated plates to allow bacterial growth and phage infection.
- Let the plates sit undisturbed for ~20 minutes until the top agar solidifies.
- After the top agar has solidified, gently invert the plates and place in the proper incubator.
- Incubation
- Each plate was incubated for 1 day and then placed in the fridge for 1 day.
Results:
Conclusions and Next Steps: Make high volume lysate by flooding the 6 plates.
Making High Volume Lysate
Date: 11/01/2024
Redo: No
Purpose: Make high volume lysate to continue the rest of the research protocols.
Notes:
-
- Prepared our bench for aseptic work and assembled our supplies.
- Flood the webbed plates.
- Apply 8 ml of sterile phage buffer to each webbed plate.
- Let the plates sit at room temperature for 3.5 hours.
- Harvest a plate lysate.
- When the incubation time is complete, remove the lid from the plate and place it on the bench. Tilt the plate slightly by placing one edge of the plate on the lid, allowing the lysate to pool to one side (Figure 6.3-2).
- Prepare a 0.22 μm filter by opening the packaging but not removing the filter. Set aside.
- Using a 5 ml syringe aspirate (suck up) the lysate from the plate.
- Utilize the vacuum filter that directly flows into the 50 ml tube.
- Collected 35ml of high volume lysate, labeled the tube and stored in fridge.
- Cleaned work station and disposed of materials in proper containers.
Results:
We collected 35 mL of high titer lysate.
Conclusions and Next Steps: Continue with serial dilutions & plaque assay with HTL to determine titer.
Finding & Calculating Titer
Date: 11/04/2024
Redo: No
Purpose: Make serial dilutions & do plaque assay to calculate titer.
Notes:
A.) PPE was put on and the bench was prepared for aseptic work by applying 70% ethanol solution and1:128 cidecon solution.
B.) A 10-fold serial dilution was set up using 6 microcentrifuge tubes.
1. The microcentrifuge tubes were labeled accordingly from 10^-1 to 10^-6.
2. Using a micropipette 90 μl of phage buffer solution was added to each tube
C.) A 10-fold serial dilution was performed using our undiluted phage sample.
1. Using a micropipette, 10 μl of the HTL was added to the tube labeled 10^-1, which was shaken by hand.
2. 10 μl of the 10^-1 sample was then added to the tube labeled 10^-2, which was then shaken by hand.
3.) We continued in the successive manner until we reached the final dilution tube labeled 10^-6.
D.) Plating of each serial dilution
1. 6 agar plates were obtained and labeled accordingly
2. 6 host culture tubes were then inoculated with 10 μl of the serial dilutions, gently mixed and allowed to sit for 10 minutes for attachment.
3. 3 mL of top agar was then added to the culture tube, mixed with the bacteria and diluted phage sample, then added to the corresponding agar plate.
4. step 3 was repeated for each dilution and plate, resulting in 6 plates.
E. Incubation
1. All plates were incubated at 29°C for 1 day & obtained on 11/5/2024.
Results:
Conclusions and Next Steps: Bacteria was bad and did not form plaques; we will redo. We disposed of the plates in the autoclave bag.
Date: 11/06/2024
Redo: Yes
Purpose: Make serial dilutions & do plaque assay to calculate titer.
Notes:
A.) PPE was put on and the bench was prepared for aseptic work by applying 70% ethanol solution and1:128 cidecon solution.
B.) A 10-fold serial dilution was set up using 6 microcentrifuge tubes.
1. The microcentrifuge tubes were labeled accordingly from 10^-1 to 10^-6.
2. Using a micropipette 90 μl of phage buffer solution was added to each tube
C.) A 10-fold serial dilution was performed using our undiluted phage sample.
1. Using a micropipette, 10 μl of the HTL was added to the tube labeled 10^-1, which was shaken by hand.
2. 10 μl of the 10^-1 sample was then added to the tube labeled 10^-2, which was then shaken by hand.
3.) We continued in the successive manner until we reached the final dilution tube labeled 10^-6.
D.) Plating of each serial dilution
1. 6 agar plates were obtained and labeled accordingly
2. 6 host culture tubes were then inoculated with 10 μl of the serial dilutions, gently mixed and allowed to sit for 10 minutes for attachment.
3. 3 mL of top agar was then added to the culture tube, mixed with the bacteria and diluted phage sample, then added to the corresponding agar plate.
4. step 3 was repeated for each dilution and plate, resulting in 6 plates.
E. Incubation
1. All plates were incubated at 29°C for 1 day & obtained on 11/7/2024.
Results:
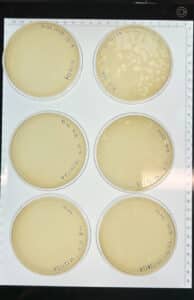
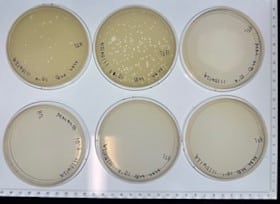
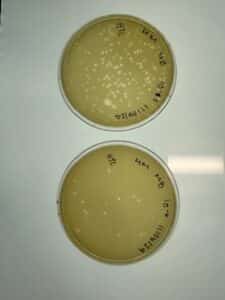
Conclusions and Next Steps: Bacteria was bad for the first 4 plates, but the last 2 dilutions/plates have 20-200 PFU, so we counted the 10^-6 plate, which had 23 plaques. We disposed of the first 4 plates in the autoclave bag & stored the last 2 plates in the fridge.
Date: 11/11/2024
Redo: No
Purpose: Calculate titer.
Notes:
A. We calculated the titer in pfu/ml using the formula: Titer (pfu/ml) = (# pfu/ volume used in μl) x (103 μl/ml) x dilution factor*
Our formula is as follows: (2.3 pfu/μl) x (103 μl/ml) x (10^6), which calculated our titer to be 2.3 x 10 ^9.
CONCLUSIONS AND NEXT STEPS
We will proceed and create TEM grids for electron microscopy.
Characterization
Mounting phage samples for TEM and staining with uranyl acetate using pelco tabs.
Date: 11/11/2024
Redo: No
Purpose: To prepare phage sample for viewing via electron microscope.
Notes:
-
-
- Prepare phage samples.
- Aseptically transfer 1 ml of your high-titer lysate into a sterile microcentrifuge tube.
- Balance the tube(s) and centrifuge for 1 hour at 4 °C at top speed to concentrate the phage particles at the bottom of the tube.
- Using a micropipettor, carefully remove as much supernatant as possible without disrupting the concentrated phage at the bottom of the tube.
- Add 100 μl of phage buffer and let resuspend at 4 °C for 30 minutes to one hour.
- Proceed with the rest of the protocol immediately to avoid damaging the phage heads.
- Prepare your work area. (This may have been done before class by your instructor.)
- Put on a fresh pair of gloves.
- Cover the designated work area with bench paper or a Kimwipe to create a clean work surface.
- Remove the cover from a 5 x 5 cm piece of parafilm, and place the parafilm into the lid of Petri dish.
- Place a PELCO Tab or small piece of double-sided tape onto the parafilm in the lid of the Petri dish. Expose the adhesive or the tab.
- Using EM forceps, remove a fresh grid from a box of unused grids, touching only the very edge of the grid.
- Place the grid dark-and-shiny side UP, on the edge of the tab or double-sided tape so that only the very edge of the grid (no more than 0.5 mm) is touching the adhesive.
- Mount and stain your phage.
- Using a micropipettor, place 10 μl of lysate onto the grid without touching the tip to the grid itself.
- Allow the phage settle and attach onto the grid for at least 2 minutes, or according to the times in Table 8.1b-1.
- Using a small wedge of filter paper, wick off the excess fluid.
- Rinse the grid two times by the following method:
- Carefully pipette 10 μl of sterile water onto the grid. Allow it to sit for 2 minutes.
- Wick off the water using a fresh wedge of filter paper.
Important: Work quickly and carefully! Do NOT allow the grid to dry out!
- Add 10 μl of 1 % uranyl acetate to the grid.
Important: Uranyl acetate is a very toxic compound. You should wear gloves throughout this procedure and when working in any area where this material has been used. - Let it sit for 2 minutes.
- Wick off excess stain by using a wedge of filter paper. UA staining occurs by leaving a very thin layer of stain dried across the entire grid. You should continue to wick away the stain until the surface of the grid looks like a rainbow oil slick. Then allow the grid to air dry before putting it safely back into the grid box.
- Observe your phage.
- Place your grid in the designated grid box for storage. Be sure to accurately record the location of your grid in the box.
- Transport your samples to your EM facility for imaging.
- Calculate the capsid diameter and tail length relative to the size bar.
- Using a ruler, measure the widest point (edge-to-edge, not vertex-to-vertex) of the capsid and the length of the tail (excluding the capsid and the tail tip). If possible, measure multiple phage heads and tails and average their respective values.
- Measure the length of the size bar with the ruler.
- Using the known and relative lengths of the size bar, calculate the length of the capsid and tail.
- Prepare phage samples.
-
Results:
Conclusions and Next Steps:
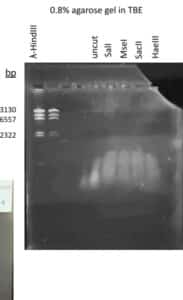
Gel electrophoresis of restriction enzyme digest
Date: 11/21/2024
Redo: No
Purpose: To separate extracted DNA fragments via agarose gel electrophoresis.
Notes:
- Set up the gel electrophoresis equipment with a gel prepared according to the Casting Agarose Gels protocol.
- Wearing gloves, orient the gel in such a way that the wells are closest to the cathode (black electrode).
- Prepare your restriction enzyme digest samples for electrophoresis.
- Add 5 μl of concentrated 6x loading dye to each 25 µl restriction enzyme sample.
- Place samples at 65 °C, either in a heat block or a hot water bath, for 5 minutes. Immediately place the samples on ice to cool, and then spin them in a microcentrifuge for ~ 15 seconds at 10,000 rpm.
- This step prevents annealing of the cohesive ends of phage DNA.
- Load the gel in the following order:
Ladder Uncut DNA Enzyme-1 Enzyme-2 Enzyme-3 Enzyme-n- Carefully load the gel with the proper volume of DNA ladder. Each manufacturer is different, so follow the manufacturer’s instructions.
- Using a fresh tip on your micropipettor for each sample, pipette 20 μl (or as much will fit in the well) of each RE reaction into the wells in the order suggested above.
- Holding the pipette in both hands, place your elbows on either side of the gel apparatus.
- Situate your eyes directly above the wells to make the wells easier to see.
- Place the pipette tip directly above the well, just below the surface of the buffer. Do not try to get the pipette tip into the well, or you might puncture the bottom of the gel.
- Slowly depress the pipette plunger, allowing the solution to slowly sink into the well.
- Remove the pipette from the gel before releasing the plunger.
- Draw a picture of the gel in your lab notebook, making note of where your samples are relative to your classmates’ samples. (Once the gels are loaded, everyone’s samples look alike!)
- Plug the electrodes into the appropriate locations on the power supply. Turn on the power supply and set the voltage to 100 V.
Important: Remember, DNA runs toward the RED electrode! - Run the gel until the blue dye front has migrated at least 3.5 inches from the well. This will take approximately 1 hour.
- Turn off the power supply.
- Photograph the gel.
- Using gloves, carefully remove the gel from the electrophoresis chamber.
- Photograph your gel and obtain a copy of the gel photograph, following your instructor’s directions.
- Label your copy of the gel photograph to include the names of each enzyme used above its corresponding lane.
- Clean up your work area.
- If another gel isn’t going to be run, empty the buffer into the sink, rinse out the gel apparatus, and set it aside to dry. (The buffer can be reused, so check to see if anyone else will need to run a gel in the next few days.)
- Dispose of your gel as directed by your instructor.
Results:
DNA Extraction
First DNA extraction of Honeybear
Date: 11/13/2024
Redo: No
Purpose: To get a pure and concentrated DNA sample from our high volume lysate.
Notes:
- Day One
1. Gently mix your HVL, then aliquot 5mL of your lysate into a 15 mL conical tube. Give that tube to a GSI or TA who will add 20uL of nuclease mix for you.
2. Once nuclease has been added, gently invert the tube and incubate at 37°C for 10min.
3. Aliquot lysate into 5 microfuge tubes, 1mL each.
4. To each tube, add 20uL of ZnCl2, mix gently by inversion, and incubate at 37°C for 5min. This “precipitates” the phage.
5. Centrifuge at 10,000rpm for 1min to pellet the phage.
STEPS 6 and 7 MUST BE DONE QUICKLY AND EFFICIENTLY
6. KEEP THE PELLET. Remove supernatants by aspiration, but try not to disturb the pellet. Discard the liquid filled pipette tips in the sharps trash.
7. Resuspend pellets in 500uL TES buffer per tube, and incubate at 60°C for 15min. This will denature the capsids, exposing the DNA, while protecting it from the nuclease activity (EDTA in the TES sequesters divalent cations required for nuclease function).
8. Add 1uL of Proteinase K and mix gently. Incubate at 37°C for 10min to completely eliminate any residual nuclease activity.
9. Add 60uL of potassium acetate to each tube. Mix well and leave on ice for 15min. A white, dense precipitate will form. This represents your capsids.
10. Centrifuge at 4°C for 1min at 12,000rpm to pellet the capsids. KEEP THE SUPERNATANTS containing your DNA, and place into new microfuge tubes. You can throw away the tubes with the pellets.
11. Add 500uL of isopropanol to each of the tubes with the supernatant, mix, and leave on ice overnight (or until next lab).
Day Two 11/14/2024
12. Centrifuge at top speed for 10min to pellet DNA, and discard the supernatant into a WASTE tube. It is OK if you do not see a pellet.
13. Add 250uL of 70% ethanol in each tube, and spin again for 1min, at top speed. This washes your DNA pellet. Discard supernatants into a WASTE tube.
14. Dry the DNA pellets at room temperature by turning upside-down onto paper towels, tapping out excess liquid, and leaving upside-down until pellets begin to turn clear. The tubes can also be placed in a fume hood or 30⁰C incubator to help with drying. DO NOT RUSH THIS STEP! If not dry enough, you will NOT recover enough DNA!
15. Resuspend the first pellet in 50uL nuclease-free water. Then use that solution to resuspend the next pellet. Continue until all 5 pellets have been resuspended in the same 50uL of water.
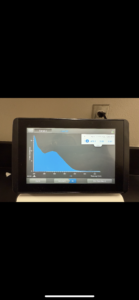
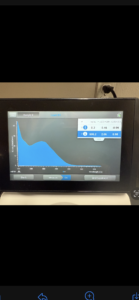
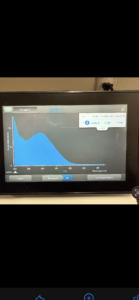
16. Check DNA concentration and quality (A260:280 and A260:230) with the Nanodrop.
Results:
Conclusions and Next Steps: Our curve showed the DNA was not pure, so we will reprecipitate then do another Nanodrop reading
Second DNA extraction of Honeybear
Date: 11/19/2024
Redo: Yes
Purpose: To get a pure and concentrated DNA sample from our high volume lysate.
Notes:
- Day One
1. Gently mix your HVL, then aliquot 5mL of your lysate into a 15 mL conical tube. Give that tube to a GSI or TA who will add 20uL of nuclease mix for you.
2. Once nuclease has been added, gently invert the tube and incubate at 37°C for 10min.
3. Aliquot lysate into 5 microfuge tubes, 1mL each.
4. To each tube, add 20uL of ZnCl2, mix gently by inversion, and incubate at 37°C for 5min. This “precipitates” the phage.
5. Centrifuge at 10,000rpm for 1min to pellet the phage.
STEPS 6 and 7 MUST BE DONE QUICKLY AND EFFICIENTLY
6. KEEP THE PELLET. Remove supernatants by aspiration, but try not to disturb the pellet. Discard the liquid filled pipette tips in the sharps trash.
7. Resuspend pellets in 500uL TES buffer per tube, and incubate at 60°C for 15min. This will denature the capsids, exposing the DNA, while protecting it from the nuclease activity (EDTA in the TES sequesters divalent cations required for nuclease function).
8. Add 1uL of Proteinase K and mix gently. Incubate at 37°C for 10min to completely eliminate any residual nuclease activity.
9. Add 60uL of potassium acetate to each tube. Mix well and leave on ice for 15min. A white, dense precipitate will form. This represents your capsids.
10. Centrifuge at 4°C for 1min at 12,000rpm to pellet the capsids. KEEP THE SUPERNATANTS containing your DNA, and place into new microfuge tubes. You can throw away the tubes with the pellets.
11. Add 500uL of isopropanol to each of the tubes with the supernatant, mix, and leave on ice overnight (or until next lab).
Day Two
12. Centrifuge at top speed for 10min to pellet DNA, and discard the supernatant into a WASTE tube. It is OK if you do not see a pellet.
13. Add 250uL of 70% ethanol in each tube, and spin again for 1min, at top speed. This washes your DNA pellet. Discard supernatants into a WASTE tube.
14. Dry the DNA pellets at room temperature by turning upside-down onto paper towels, tapping out excess liquid, and leaving upside-down until pellets begin to turn clear. The tubes can also be placed in a fume hood or 30⁰C incubator to help with drying. DO NOT RUSH THIS STEP! If not dry enough, you will NOT recover enough DNA!
15. Resuspend the first pellet in 50uL nuclease-free water. Then use that solution to resuspend the next pellet. Continue until all 5 pellets have been resuspended in the same 50uL of water.
16. Check DNA concentration and quality (A260:280 and A260:230) with the Nanodrop.
Results:
Conclusions and Next Steps:
DNA Reprecipitation
Date: 11/18/2024
Redo: No
Purpose: Reprecipitate our DNA from our first DNA extraction to see if we obtain adequate DNA concentrations
Notes:
- We cleaned our work bench with 1:128 Cidecon & 70% Ethanol and wiped down.
- We put on appropriate PPE (gloves & lab coat).
- The DNA precipitate from our first DNA extraction was taken out of the fridge.
- A micropipette was used to aspirate DNA precipitate. We set the micropipette to 50 uL, as that was the original volume of precipitate we acquired from DNA extraction. Then, in order to calculate the volume we actually had left, we slowly decreased the micropipette reading until the air gap could not be seen. We appeared to have 46uL of DNA precipitate.
- Afterward, we ejected our DNA into a new centrifuge tube labeled DNA reprecipitation. We calculated the amount of Sodium Acetate and 100% ethanol by utilizing these rules: The amount of Sodium Acetate we add is 10% of the volume of DNA, and the amount of 100%EtOH we add is 300% of the volume. 4.6uL of Sodium Acetate, and 138uL of 100%EtOH. The total volume of the mixture was 188.6uL. We mixed by inverting, and placed the DNA in the -15.9 degrees C fridge for an hour.
- We got our precipitate out of the freezer and centrifuged it at 15000 rpm for 30 minutes.
- The supernatant was then dispensed into a waste tube, and 0.5mL of 75% Ethanol was added to the microcentrifuge tube to wash it. The tube was placed in the centrifuge at 4°C for 10 min. This step was conducted twice, with all supernatants being discarded in a waste tube.
- After aspirating as much liquid out of the microcentrifuge tube, the tube was set in a 30°C incubator to air dry. It was important to not proceed with the next step until all liquid droplets were evaporated from the tube.
- Once ALL liquid was dried out of the tube, 50ul of nuclease-free water was added to the tube. The liquid was pipetted up and down to mix the solution.
- The tube was taken to a Nanodrop machine, where the DNA concentration and quality (A260:280 and A260:230) was checked.
Results:
Conclusions and Next Steps: Did not purify any further than first time. It is still too salty. We will reprecipitate this again and begin another DNA Extraction due to time limitations.
Second DNA Reprecipitation
Date: 11/19/2024
Redo: Yes
Purpose: Reprecipitate our DNA from our first DNA extraction to see if we obtain adequate DNA concentrations
Notes:
- We cleaned our work bench with 1:128 Cidecon & 70% Ethanol and wiped down.
- We put on appropriate PPE (gloves & lab coat).
- The DNA precipitate from our first DNA extraction was taken out of the fridge.
- A micropipette was used to aspirate DNA precipitate. We set the micropipette to 50 uL, as that was the original volume of precipitate we acquired from DNA extraction. Then, in order to calculate the volume we actually had left, we slowly decreased the micropipette reading until the air gap could not be seen. We appeared to have 48.8uL of DNA precipitate.
- Afterward, we ejected our DNA into a new centrifuge tube labeled DNA reprecipitation. We calculated the amount of Sodium Acetate and 100% ethanol by utilizing these rules: The amount of Sodium Acetate we add is 10% of the volume of DNA, and the amount of 100%EtOH we add is 300% of the volume. 4.88uL of Sodium Acetate, and 146.4uL of 100%EtOH. The total volume of the mixture was 200.08uL. We mixed by inverting, and placed the DNA in the -20 degrees C fridge overnight.
- Cleaned lab bench with Cideon & 70% Ethanol.
DAY 2
- We got our precipitate out of the freezer and centrifuged it at 15000 rpm for 30 minutes.
- The supernatant was then dispensed into a waste tube, and 0.5mL of 75% Ethanol was added to the microcentrifuge tube to wash it. The tube was placed in the centrifuge at 4°C for 10 min. This step was conducted twice, with all supernatants being discarded in a waste tube.
- After aspirating as much liquid out of the microcentrifuge tube, the tube was set in a 30°C incubator to air dry. It was important to not proceed with the next step until all liquid droplets were evaporated from the tube.
- Once ALL liquid was dried out of the tube, 50ul of nuclease-free water was added to the tube. The liquid was pipetted up and down to mix the solution.
- The tube was taken to a Nanodrop machine, where the DNA concentration and quality (A260:280 and A260:230) was checked.
Results:
Conclusions and Next Steps: Our curve was acceptable, we will proceed with restriction enzyme digest.
