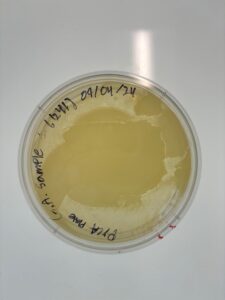
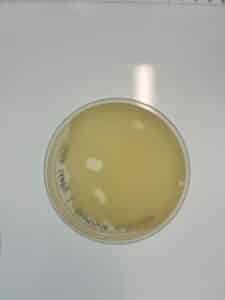
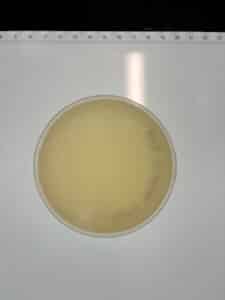
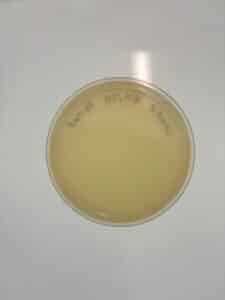
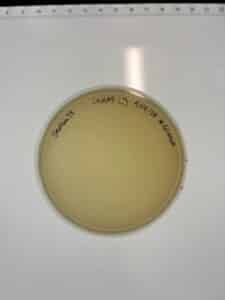
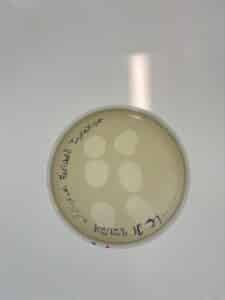
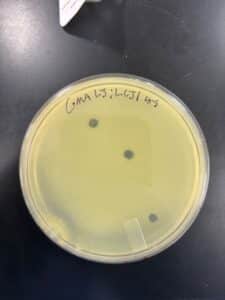
Discovery of JohnMadden
JohnMadden Information
Morphology: Siphoviridae
Sample Collection
19,7
| Collector Name |
Gus Allen | Gus Allen | Gus Allen | Gus Allen | Gus Allen | Gus Allen |
| Sample No. | GMA1 | GMA2 | GMA3 | GMA4 | GMA 5 | GMA 6 |
| Date of Collection | 27 August, 2024 | 27 August 2024 | 27 August, 2024 | 9/11/2024 | 9/14/2024 | 9/15/2024 |
| Sample Type | Ant Bed | soil | Q-tip | Fire ant bed | Soil | Soil |
| General Location | The sample that was collected was an ant bed that was located in a friend’s backyard. The house was located on Wildwood Dr. | This sample was collected in my backyard, which is located next to a dry creek. The house was located on Rowland St. | The sample I collected was in my house, where the temperature was around 64 degrees F. I used a cue tip and swabbed both sides, hoping that I collected something. | This sample consisted of a fire-ant bed that was found in my front yard. The house was located on Rowland St. | I collected this sample out near a family friend’s barn in Daffau, TX. It was in a pen where horses and cattle stay. Much manure was present. | I collected this sample on the same ranch that GMA5 was on, in Duffau, TX. It was out in an open field where horses and cattle roamed. |
| Location Description | It was a well-kept yard with little to no trees. The grass had only grown around an inch. However, the corners of the lawn had not been weed-eated, and the ant bed was a few feet away from the untrimmed grass. | This part of the yard had not been taken care of in some time. It was highly populated with grass, weeds, and dead tree limbs. | The sample was collected on my bathroom counter, close to where the faucet to my sink is. It hadn’t been disinfected in some time. It was also close to where my toothbrushes and toothpaste were. | The ant-bed was a foot or so away from the curb. It was larger and had a good amount of loose dirt. The grass had grown a few inches and hadn’t been cut. It was also next to a cedar tree. | The soil that was collected was dark, and was near some plants that looked healthy. The sample was also near some horse maure, around 5 feet or so. | The sample was collected next to a pile of horse manure. The open field contained lots of green grass. |
| GPS Coordinates | 32.22162 N, 98.22506 W |
32.21239 N, 98.23349 W |
32.21239 N, 98.23349 W |
32.21239 N 98.23349 W
|
31.95710 N, 98.03092 W | 31.95710 N, 98.03092 W |
| Sample Depth | 3 cm | 6.5 cm | N/A | 7 cm | 10 cm | 6.5 |
| Ambient Temperature | 29.4 C | 33.8 FC | 17.8 C | 23.3 C | 35 C | 35 C |
| Collector Name |
Levi Jackson | Levi Jackson | Levi Jackson | |||
| Sample No. | LCJ 1 | LCJ 2 | LCJ 3 | |||
| Date of Collection | 19 September, 2024 | 19 September 2024 | 19 September 2024 | |||
| Sample Type | Top soil | Top soil | Top soil | |||
| General Location | The sample was collected from an outside horse enclosure at the Tarleton agriculture center. | The sample was collected from an outside dairy cow enclosure at the Tarleton agriculture center. | The sample was collected from an outside rodeo arena at a cowboy church. | |||
| Location Description | The horse pen was located next to an education building on one side and a asphalt parking lot on another. The enclosure was comprised of very loose soil mixed in with occasional soil clumps and hay. | The dairy cow barn was surrounded on all sides by pasture that had sparse grass. The enclosure was comprised of very loose soil that was mixed with manure and hay. | The rodeo arena was located next to a loose gravel parking lot and a church building. The arena top soil was very loose, dry and fine. It also has a bright red color. | |||
| GPS Coordinates | 32.24105 N, 98.20469 W |
32.25632 N, 98.19756 W |
32.20178 N, 98.15186 W |
|||
| Sample Depth | 3 cm | 3 cm | 3 CM | |||
| Ambient Temperature | 26.7 C | 26.7 C | 26.1 C |
Isolation/Purification
1et i Top Agar 5
Title: Direct Isolation Sample GMA1
Date: 08/28/2024
Redo: No
Purpose: This procedure aims to isolate the phages from sample GMA1 and prepare for a plaque assay.
Protocol:
-
-
- Spray the bench with CiDecon and wait for thirty seconds. Then, wipe down the bench and spray 70% EtOH. Wait for thirty seconds then wipe down.
- GMA1 was obtained and used for direct isolation.
- Extract phage from solid environmental samples, such as soil or compost.
- Add liquid media until the sample is submerged beneath 2–3 ml of liquid.
- Cap the tube and invert several times to mix thoroughly.
- Incubate the tube while shaking vigorously in a shaking incubator at 250 rpm for 1–2 hours.
- Allow the sample to sit until particulate matter has mostly settled. This may take as few as 2 minutes or as many as 20 minutes.
- Prepare a phage filtrate using aseptic technique.
- Open the package of a syringe filter (0.22 μm), leaving the filter in the packaging.
- Open the syringe pack and remove the syringe from the package. Afterward, remove the plunger. Then, screw the syringe onto the filter.
- Using a 2ml sero-pipette, remove approximately 2 ml of liquid from the top of the flooded sample.
- Avoid withdrawing any solid material from the bottom of the tube to prevent clogging the filter during filtration.
- Attach the syringe-filter complex to a microcentrifuge tube. This is where the filtrate can be collected.
- Depressing the syringe plunger, dispense a minimum of 0.5 ml of filtrate into a labeled microcentrifuge tube.
- Because debris can clog the filter, you may encounter resistance. Do not continue to force liquid through the filter or it will break. If your filter clogs, remove the clogged filter, replace it with a new one, and continue filtering.
- Cap the tube immediately.
- Discard the syringe and filter.
- Wipe down benches with CiDecon and EtOH as described in step 1.
-
- Notes:
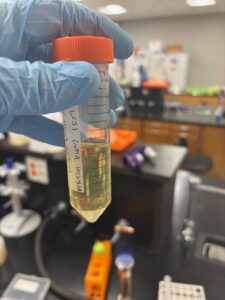
PyCa media was slightly contaminated; had to get more.
Results: Direct Isolation was successful. The isolated phage remained uncontaminated and was allowed to proceed with plaque assay.
Conclusions and Next Steps: We will now move on to a Plaque Assay to determine if our phage is specific for m. foliorum
Title: Plaque Assay Sample GMA1
Date: 09/04/2024
Redo: No
Purpose: The purpose of the plaque assay is to observe the presence of phage particles within our sample visually.
Protocol:
-
- Day 1
- Spray your bench with CiDecon. Wait around thirty seconds, then wipe down the bench. Afterward, add 70%EtOH. Wait thirty seconds, then wipe the bench down. Prepare Bunsen Burner Apparatus. Make sure to work within eight inches of the Bunsen Burner.
- Assemble the samples you want to assay.
- Inoculate the host bacteria with your phage sample.
- Obtain the same number of aliquots of 250 μl host bacterial cultures as you have phage samples (1).
- Label the culture tubes accordingly.
- Use a 2mL sero-pipetter and aseptic technique to
- Dispense each phage sample into the appropriate culture tube containing 250 μl of host bacteria according to Table 5.3-1.
- Mix each inoculated host culture by gently tapping the tube.
Important: Make sure your sample makes contact with the bacteria. When you pipette a volume as small as 10 μl sometimes your sample may stick to the side of the tube. - Let your sample sit undisturbed for 5–10 minutes to allow for attachment.
Table 5.3-1. Volumes of phage samples added to bacterial cultures for a plaque assay. Sample Type
Sample Volume
Direct isolation sample
500 μl
Enriched culture
10 μl
Serial dilutions of picked plaques
10 μl
Lysates for titering
10 μl
Negative control
10 μl phage buffer
Positive control
10 μl provided phage sample
- Obtain the same number of aliquots of 250 μl host bacterial cultures as you have phage samples (1).
- Plate the samples with top agar. For this part of the experiment you will need 3 ml of molten top agar per sample.
- Obtain the same number of agar plates as you have samples. Label these plates accordingly.
- Remove a bottle of top agar from the 55 °C bath.
Important: You want to keep the top agar in the 55 °C bath for as long as possible to prevent it from prematurely solidifying on your bench. - For each sample, including controls
- Using a sterile 5 ml pipette, aseptically transfer 3 ml of top agar to an inoculated host tube (i.e., the tube containing bacterial host and phage sample).
Important: Try to avoid making or withdrawing bubbles, as they can look like plaques on plates. - Immediately aspirate (suck-up) the mixture back into the pipette and transfer it to the appropriate plate and discard the pipette.
Important: The top agar should not sit in the pipette for more than a few seconds because the agar will begin to solidify. - Gently, but quickly, tilt the plate in multiple directions until the top agar mixture evenly coats the agar plate.
- Using a sterile 5 ml pipette, aseptically transfer 3 ml of top agar to an inoculated host tube (i.e., the tube containing bacterial host and phage sample).
- Repeat this process for each of your samples.
- Incubate plates in the incubator labeled m. foliorum. This should be at 29 degrees Celcius.
- Let the plates sit undisturbed for ~20 minutes until the top agar solidifies.
- After the top agar has solidified, gently invert the plates and place in the proper incubator.
- Incubate the plates at the specified temperature for 24–48 hours.
- Record the incubation time and temperature in your notebook.
- Wipe down Bench with CiDecon and EtOH as described in step 1.
Day 2
- Check the plates for plaques.
- Remove the plates from the incubator and hold them up to a light source to look for plaques. (It is easier to see them if you remove the lid.)
- If you do not see plaques, return the plates to the incubator for further incubation and check again.
- Record your results in your lab notebook.
- Be thorough. What do you see on your plates? Count the number of plaques and take note of the size, shape, and other distinctive features of the plaques. Remember, negative results are important too.
Important: The morphology of a plaque is an important characteristic. Simply noting “small” or “round” is not an adequate descriptor of plaque morphology. Try to be specific in your plaque descriptions. A good description will include size, turbidity, margin type, etc.
- Be thorough. What do you see on your plates? Count the number of plaques and take note of the size, shape, and other distinctive features of the plaques. Remember, negative results are important too.
- Wipe down bench with CiDecon and EtOH as described in step 1.
- Remove the plates from the incubator and hold them up to a light source to look for plaques. (It is easier to see them if you remove the lid.)
- Notes:
Incubation time and temperature: 10:47AM; 29 degrees Celsius
Agar plate containing inoculated bacteria was incubated right-side up due to top-agar not solidifying properly.
- Day 1
Results: No Plaques were found; plate was discarded.
Conclusions and Next Steps: We will perform a direct isolation on GMA2 and repeat the plaque assay procedure.
Title: Direct Isolation Sample GMA2
Date: 09/04/2024
Redo: No
Purpose: This procedure aims to isolate the phages from GMA 2 and prepare for a plaque assay.
Protocol:
-
-
-
-
- Spray the bench with CiDecon and wait for thirty seconds. Then, wipe down the bench and spray 70% EtOH. Wait for thirty seconds then wipe down.
- GMA1 was obtained and used for direct isolation.
- Extract phage from solid environmental samples, such as soil or compost.
- Add liquid media until the sample is submerged beneath 2–3 ml of liquid.
- Cap the tube and invert several times to mix thoroughly.
- Incubate the tube while shaking vigorously in a shaking incubator at 250 rpm for 1–2 hours.
- Allow the sample to sit until particulate matter has mostly settled. This may take as few as 2 minutes or as many as 20 minutes.
- Prepare a phage filtrate using aseptic technique.
- Open the package of a syringe filter (0.22 μm), leaving the filter in the packaging.
- Open the syringe pack and remove the syringe from the package. Afterward, remove the plunger. Then, screw the syringe onto the filter.
- Using a 2ml sero-pipette, remove approximately 2 ml of liquid from the top of the flooded sample.
- Avoid withdrawing any solid material from the bottom of the tube to prevent clogging the filter during filtration.
- Attach the syringe-filter complex to a microcentrifuge tube. This is where the filtrate can be collected.
- Depressing the syringe plunger, dispense a minimum of 0.5 ml of filtrate into a labeled microcentrifuge tube.
- Because debris can clog the filter, you may encounter resistance. Do not continue to force liquid through the filter or it will break. If your filter clogs, remove the clogged filter, replace it with a new one, and continue filtering.
- Cap the tube immediately.
- Discard the syringe and filter.
- Wipe down benches with CiDecon and EtOH as described in step 1.
-
-
-
- Notes:
- Sample 2 (found in my backyard)
- Less than 1 ml of media was aspirated.
Results: Direct Isolation was successful.
Conclusions and Next Steps: We will move on to Plaque Assay for GMA 2.
Title: Plaque Assay Sample GMA2
Date: 09/09/2024
Redo: No
Purpose: This procedure aims to visualize if any plaques are present, which indicates our sample contains phage.
Protocol:
-
- Day 1
- Spray your bench with CiDecon. Wait around thirty seconds, then wipe down the bench. Afterward, add 70%EtOH. Wait thirty seconds, then wipe the bench down. Prepare Bunsen Burner Apparatus. Make sure to work within eight inches of the Bunsen Burner.
- Assemble the samples you want to assay.
- Inoculate the host bacteria with your phage sample.
- Obtain the same number of aliquots of 250 μl host bacterial cultures as you have phage samples (1).
- Label the culture tubes accordingly.
- Use a 2mL sero-pipetter and aseptic technique to
- Dispense each phage sample into the appropriate culture tube containing 250 μl of host bacteria according to Table 5.3-1.
- Mix each inoculated host culture by gently tapping the tube.
Important: Make sure your sample makes contact with the bacteria. When you pipette a volume as small as 10 μl sometimes your sample may stick to the side of the tube. - Let your sample sit undisturbed for 5–10 minutes to allow for attachment.
Table 5.3-1. Volumes of phage samples added to bacterial cultures for a plaque assay. Sample Type
Sample Volume
Direct isolation sample
500 μl
Enriched culture
10 μl
Serial dilutions of picked plaques
10 μl
Lysates for titering
10 μl
Negative control
10 μl phage buffer
Positive control
10 μl provided phage sample
- Obtain the same number of aliquots of 250 μl host bacterial cultures as you have phage samples (1).
- Plate the samples with top agar. For this part of the experiment you will need 3 ml of molten top agar per sample.
- Obtain the same number of agar plates as you have samples. Label these plates accordingly.
- Remove a bottle of top agar from the 55 °C bath.
Important: You want to keep the top agar in the 55 °C bath for as long as possible to prevent it from prematurely solidifying on your bench. - For each sample, including controls
- Using a sterile 5 ml pipette, aseptically transfer 3 ml of top agar to an inoculated host tube (i.e., the tube containing bacterial host and phage sample).
Important: Try to avoid making or withdrawing bubbles, as they can look like plaques on plates. - Immediately aspirate (suck-up) the mixture back into the pipette and transfer it to the appropriate plate and discard the pipette.
Important: The top agar should not sit in the pipette for more than a few seconds because the agar will begin to solidify. - Gently, but quickly, tilt the plate in multiple directions until the top agar mixture evenly coats the agar plate.
- Using a sterile 5 ml pipette, aseptically transfer 3 ml of top agar to an inoculated host tube (i.e., the tube containing bacterial host and phage sample).
- Repeat this process for each of your samples.
- Incubate plates in the incubator labeled m. foliorum. This should be at 29 degrees Celcius.
- Let the plates sit undisturbed for ~20 minutes until the top agar solidifies.
- After the top agar has solidified, gently invert the plates and place in the proper incubator.
- Incubate the plates at the specified temperature for 24–48 hours.
- Record the incubation time and temperature in your notebook.
- Wipe Down Bench with CiDecon and EtOH as described in step 1.
Day 2
- Check the plates for plaques.
- Remove the plates from the incubator and hold them up to a light source to look for plaques. (It is easier to see them if you remove the lid.)
- If you do not see plaques, return the plates to the incubator for further incubation and check again.
- Record your results in your lab notebook.
- Be thorough. What do you see on your plates? Count the number of plaques and take note of the size, shape, and other distinctive features of the plaques. Remember, negative results are important too.
Important: The morphology of a plaque is an important characteristic. Simply noting “small” or “round” is not an adequate descriptor of plaque morphology. Try to be specific in your plaque descriptions. A good description will include size, turbidity, margin type, etc.
- Be thorough. What do you see on your plates? Count the number of plaques and take note of the size, shape, and other distinctive features of the plaques. Remember, negative results are important too.
- Wipe down bench with CiDecon and EtOH as described in step 1
- Remove the plates from the incubator and hold them up to a light source to look for plaques. (It is easier to see them if you remove the lid.)
- Day 1
Notes:
Incubating temperature: 29 C
Incubating time: 10:45
Results: No plaques were observed
Conclusions and Next Steps: The plaque assay for sample GMA2 was unsuccessful. We will now perform a plaque assay on GMA3. We will also collect a newer sample, GMA4 and perform direct isolation.
Title: Direct Isolation Sample GMA3
Date: 09/09/2024
Redo: No
Purpose: This procedure aims to isolate the phages from sample GMA3 and prepare for a plaque assay.
Protocol:
-
-
- Spray the bench with CiDecon and wait for thirty seconds. Then, wipe down the bench and spray 70% EtOH. Wait for thirty seconds then wipe down.
- GMA1 was obtained and used for direct isolation.
- Extract phage from solid environmental samples, such as soil or compost.
- Add liquid media until the sample is submerged beneath 2–3 ml of liquid.
- Cap the tube and invert several times to mix thoroughly.
- Incubate the tube while shaking vigorously in a shaking incubator at 250 rpm for 1–2 hours.
- Allow the sample to sit until particulate matter has mostly settled. This may take as few as 2 minutes or as many as 20 minutes.
- Prepare a phage filtrate using aseptic technique.
- Open the package of a syringe filter (0.22 μm), leaving the filter in the packaging.
- Open the syringe pack and remove the syringe from the package. Afterward, remove the plunger. Then, screw the syringe onto the filter.
- Using a 2ml sero-pipette, remove approximately 2 ml of liquid from the top of the flooded sample.
- Avoid withdrawing any solid material from the bottom of the tube to prevent clogging the filter during filtration.
- Attach the syringe-filter complex to a microcentrifuge tube. This is where the filtrate can be collected.
- Depressing the syringe plunger, dispense a minimum of 0.5 ml of filtrate into a labeled microcentrifuge tube.
- Because debris can clog the filter, you may encounter resistance. Do not continue to force liquid through the filter or it will break. If your filter clogs, remove the clogged filter, replace it with a new one, and continue filtering.
- Cap the tube immediately.
- Discard the syringe and filter.
- Wipe down benches with CiDecon and EtOH as described in step 1.
-
- Notes:
Results: The isolation phase was successful.
Conclusions and Next Steps: In class, we will start a direct isolation on GMA4. This way, we can perform plaque assay on two samples simultaneously.
Title: Direct Isolation Sample GMA4
Date: 09/11/2024
Redo: No
Purpose: This procedure aims to isolate the phages from sample GMA3 and GMA4 and prepare for a plaque assay.
Protocol:
-
-
- Spray the bench with CiDecon and wait for thirty seconds. Then, wipe down the bench and spray 70% EtOH. Wait for thirty seconds then wipe down.
- GMA1 was obtained and used for direct isolation.
- Extract phage from solid environmental samples, such as soil or compost.
- Add liquid media until the sample is submerged beneath 2–3 ml of liquid.
- Cap the tube and invert several times to mix thoroughly.
- Incubate the tube while shaking vigorously in a shaking incubator at 250 rpm for 1–2 hours.
- Allow the sample to sit until particulate matter has mostly settled. This may take as few as 2 minutes or as many as 20 minutes.
- Prepare a phage filtrate using aseptic technique.
- Open the package of a syringe filter (0.22 μm), leaving the filter in the packaging.
- Open the syringe pack and remove the syringe from the package. Afterward, remove the plunger. Then, screw the syringe onto the filter.
- Using a 2ml sero-pipette, remove approximately 2 ml of liquid from the top of the flooded sample.
- Avoid withdrawing any solid material from the bottom of the tube to prevent clogging the filter during filtration.
- Attach the syringe-filter complex to a microcentrifuge tube. This is where the filtrate can be collected.
- Depressing the syringe plunger, dispense a minimum of 0.5 ml of filtrate into a labeled microcentrifuge tube.
- Because debris can clog the filter, you may encounter resistance. Do not continue to force liquid through the filter or it will break. If your filter clogs, remove the clogged filter, replace it with a new one, and continue filtering.
- Cap the tube immediately.
- Discard the syringe and filter.
- Wipe down benches with CiDecon and EtOH as described in step 1.
-
- Notes: Had to use a fresh batch of top agar
Results: The isolation phase was successful.
Conclusions and Next Steps: We will perform plaque assay on GMA3 and GMA4 simultaneously.
Title: Plaque Assay Sample GMA3 and GMA4
Date: 09/09/2024
Redo: No
Purpose: This procedure aims to visualize if any plaques are present in samples GMA3 and GMA4, which indicates our samples contain phage.
Protocol:
-
- Day 1
- Spray your bench with CiDecon. Wait around thirty seconds, then wipe down the bench. Afterward, add 70%EtOH. Wait thirty seconds, then wipe the bench down. Prepare Bunsen Burner Apparatus. Make sure to work within eight inches of the Bunsen Burner.
- Assemble the samples you want to assay.
- Inoculate the host bacteria with your phage sample.
- Obtain the same number of aliquots of 250 μl host bacterial cultures as you have phage samples (1).
- Label the culture tubes accordingly.
- Use a 2mL sero-pipetter and aseptic technique to
- Dispense each phage sample into the appropriate culture tube containing 250 μl of host bacteria according to Table 5.3-1.
- Mix each inoculated host culture by gently tapping the tube.
Important: Make sure your sample makes contact with the bacteria. When you pipette a volume as small as 10 μl sometimes your sample may stick to the side of the tube. - Let your sample sit undisturbed for 5–10 minutes to allow for attachment.
Table 5.3-1. Volumes of phage samples added to bacterial cultures for a plaque assay. Sample Type
Sample Volume
Direct isolation sample
500 μl
Enriched culture
10 μl
Serial dilutions of picked plaques
10 μl
Lysates for titering
10 μl
Negative control
10 μl phage buffer
Positive control
10 μl provided phage sample
- Obtain the same number of aliquots of 250 μl host bacterial cultures as you have phage samples (1).
- Plate the samples with top agar. For this part of the experiment you will need 3 ml of molten top agar per sample.
- Obtain the same number of agar plates as you have samples. Label these plates accordingly.
- Remove a bottle of top agar from the 55 °C bath.
Important: You want to keep the top agar in the 55 °C bath for as long as possible to prevent it from prematurely solidifying on your bench. - For each sample, including controls
- Using a sterile 5 ml pipette, aseptically transfer 3 ml of top agar to an inoculated host tube (i.e., the tube containing bacterial host and phage sample).
Important: Try to avoid making or withdrawing bubbles, as they can look like plaques on plates. - Immediately aspirate (suck-up) the mixture back into the pipette and transfer it to the appropriate plate and discard the pipette.
Important: The top agar should not sit in the pipette for more than a few seconds because the agar will begin to solidify. - Gently, but quickly, tilt the plate in multiple directions until the top agar mixture evenly coats the agar plate.
- Using a sterile 5 ml pipette, aseptically transfer 3 ml of top agar to an inoculated host tube (i.e., the tube containing bacterial host and phage sample).
- Repeat this process for each of your samples.
- Incubate plates in the incubator labeled m. foliorum. This should be at 29 degrees Celcius.
- Let the plates sit undisturbed for ~20 minutes until the top agar solidifies.
- After the top agar has solidified, gently invert the plates and place in the proper incubator.
- Incubate the plates at the specified temperature for 24–48 hours.
- Record the incubation time and temperature in your notebook.
- Wipe Down Bench with CiDecon and EtOH as described in step 1.
Day 2
- Check the plates for plaques.
- Remove the plates from the incubator and hold them up to a light source to look for plaques. (It is easier to see them if you remove the lid.)
- If you do not see plaques, return the plates to the incubator for further incubation and check again.
- Record your results in your lab notebook.
- Be thorough. What do you see on your plates? Count the number of plaques and take note of the size, shape, and other distinctive features of the plaques. Remember, negative results are important too.
Important: The morphology of a plaque is an important characteristic. Simply noting “small” or “round” is not an adequate descriptor of plaque morphology. Try to be specific in your plaque descriptions. A good description will include size, turbidity, margin type, etc.
- Be thorough. What do you see on your plates? Count the number of plaques and take note of the size, shape, and other distinctive features of the plaques. Remember, negative results are important too.
- Wipe down bench with CiDecon and EtOH as described in step 1
- Remove the plates from the incubator and hold them up to a light source to look for plaques. (It is easier to see them if you remove the lid.)
- Day 1
Notes:
Incubating temperature: 29 C
Incubating time: 3:22 PM for both samples
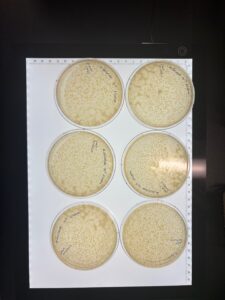
Results: No plaques were observed on either sample.
GMA3
GMA 4
Conclusions and Next Steps: The plaque assays for GMA3 and GMA4 were both unsuccessful. We will continue to look for more samples.
Title: Direct Isolation Sample GMA5
Date: 09/14/2024
Redo: No
Purpose: This procedure aims to isolate the phages from sample GMA5 and prepare for a plaque assay.
Protocol:
-
-
- Spray the bench with CiDecon and wait for thirty seconds. Then, wipe down the bench and spray 70% EtOH. Wait for thirty seconds then wipe down.
- GMA5 was obtained and used for direct isolation.
- Extract phage from solid environmental samples, such as soil or compost.
- Add liquid media until the sample is submerged beneath 2–3 ml of liquid.
- Cap the tube and invert several times to mix thoroughly.
- Incubate the tube while shaking vigorously in a shaking incubator at 250 rpm for 1–2 hours.
- Allow the sample to sit until particulate matter has mostly settled. This may take as few as 2 minutes or as many as 20 minutes.
- Prepare a phage filtrate using aseptic technique.
- Open the package of a syringe filter (0.22 μm), leaving the filter in the packaging.
- Open the syringe pack and remove the syringe from the package. Afterward, remove the plunger. Then, screw the syringe onto the filter.
- Using a 2ml sero-pipette, remove approximately 2 ml of liquid from the top of the flooded sample.
- Avoid withdrawing any solid material from the bottom of the tube to prevent clogging the filter during filtration.
- Attach the syringe-filter complex to a microcentrifuge tube. This is where the filtrate can be collected.
- Depressing the syringe plunger, dispense a minimum of 0.5 ml of filtrate into a labeled microcentrifuge tube.
- Because debris can clog the filter, you may encounter resistance. Do not continue to force liquid through the filter or it will break. If your filter clogs, remove the clogged filter, replace it with a new one, and continue filtering.
- Cap the tube immediately.
- Discard the syringe and filter.
- Wipe down benches with CiDecon and EtOH as described in step 1.
-
- Notes: New PyCa liquid media was used; Incubated on shaker incubator at wrong temperature
Results: Unknown if Isolation works; will perform plaque assay to see.
Conclusions and Next Steps: We will perform plaque assay on GMA5.
Title: Plaque Assay Sample GMA5
Date: 09/14/2024; 9/16/2024
Redo: Yes. Reattempted on 9/16
Purpose: This procedure aims to visualize if any plaques are present in samples GMA5, which indicates our samples contain phage.
Protocol:
-
- Day 1
- Spray your bench with CiDecon. Wait around thirty seconds, then wipe down the bench. Afterward, add 70%EtOH. Wait thirty seconds, then wipe the bench down. Prepare Bunsen Burner Apparatus. Make sure to work within eight inches of the Bunsen Burner.
- Assemble the samples you want to assay.
- Inoculate the host bacteria with your phage sample.
- Obtain the same number of aliquots of 250 μl host bacterial cultures as you have phage samples (1).
- Label the culture tubes accordingly.
- Use a 2mL sero-pipetter and aseptic technique to
- Dispense each phage sample into the appropriate culture tube containing 250 μl of host bacteria according to Table 5.3-1.
- Mix each inoculated host culture by gently tapping the tube.
Important: Make sure your sample makes contact with the bacteria. When you pipette a volume as small as 10 μl sometimes your sample may stick to the side of the tube. - Let your sample sit undisturbed for 5–10 minutes to allow for attachment.
Table 5.3-1. Volumes of phage samples added to bacterial cultures for a plaque assay. Sample Type
Sample Volume
Direct isolation sample
500 μl
Enriched culture
10 μl
Serial dilutions of picked plaques
10 μl
Lysates for titering
10 μl
Negative control
10 μl phage buffer
Positive control
10 μl provided phage sample
- Obtain the same number of aliquots of 250 μl host bacterial cultures as you have phage samples (1).
- Plate the samples with top agar. For this part of the experiment you will need 3 ml of molten top agar per sample.
- Obtain the same number of agar plates as you have samples. Label these plates accordingly.
- Remove a bottle of top agar from the 55 °C bath.
Important: You want to keep the top agar in the 55 °C bath for as long as possible to prevent it from prematurely solidifying on your bench. - For each sample, including controls
- Using a sterile 5 ml pipette, aseptically transfer 3 ml of top agar to an inoculated host tube (i.e., the tube containing bacterial host and phage sample).
Important: Try to avoid making or withdrawing bubbles, as they can look like plaques on plates. - Immediately aspirate (suck-up) the mixture back into the pipette and transfer it to the appropriate plate and discard the pipette.
Important: The top agar should not sit in the pipette for more than a few seconds because the agar will begin to solidify. - Gently, but quickly, tilt the plate in multiple directions until the top agar mixture evenly coats the agar plate.
- Using a sterile 5 ml pipette, aseptically transfer 3 ml of top agar to an inoculated host tube (i.e., the tube containing bacterial host and phage sample).
- Repeat this process for each of your samples.
- Incubate plates in the incubator labeled m. foliorum. This should be at 29 degrees Celcius.
- Let the plates sit undisturbed for ~20 minutes until the top agar solidifies.
- After the top agar has solidified, gently invert the plates and place in the proper incubator.
- Incubate the plates at the specified temperature for 24–48 hours.
- Record the incubation time and temperature in your notebook.
- Wipe Down Bench with CiDecon and EtOH as described in step 1.
Day 2
- Check the plates for plaques.
- Remove the plates from the incubator and hold them up to a light source to look for plaques. (It is easier to see them if you remove the lid.)
- If you do not see plaques, return the plates to the incubator for further incubation and check again.
- Record your results in your lab notebook.
- Be thorough. What do you see on your plates? Count the number of plaques and take note of the size, shape, and other distinctive features of the plaques. Remember, negative results are important too.
Important: The morphology of a plaque is an important characteristic. Simply noting “small” or “round” is not an adequate descriptor of plaque morphology. Try to be specific in your plaque descriptions. A good description will include size, turbidity, margin type, etc.
- Be thorough. What do you see on your plates? Count the number of plaques and take note of the size, shape, and other distinctive features of the plaques. Remember, negative results are important too.
- Wipe down bench with CiDecon and EtOH as described in step 1
- Remove the plates from the incubator and hold them up to a light source to look for plaques. (It is easier to see them if you remove the lid.)
- Day 1
Notes: Top agar was contaminated. Inoculated bacteria was disposed of. Will reattempt plaque assay on Monday the 16th.
Incubating temperature: 29 C
Incubating time: 1:13 PM
Results: No plaques were observed.
Conclusions and Next Steps: The plaque assays for GMA 5 was unsuccessful. We will continue to look for more samples.
Title: Direct Isolation Sample GMA6
Date: 09/16/2024
Redo: No
Purpose: This procedure aims to isolate the phages from sample GMA6 and prepare for a plaque assay.
Protocol:
-
-
- Spray the bench with CiDecon and wait for thirty seconds. Then, wipe down the bench and spray 70% EtOH. Wait for thirty seconds then wipe down.
- GMA5 was obtained and used for direct isolation.
- Extract phage from solid environmental samples, such as soil or compost.
- Add liquid media until the sample is submerged beneath 2–3 ml of liquid.
- Cap the tube and invert several times to mix thoroughly.
- Incubate the tube while shaking vigorously in a shaking incubator at 250 rpm for 1–2 hours.
- Allow the sample to sit until particulate matter has mostly settled. This may take as few as 2 minutes or as many as 20 minutes.
- Prepare a phage filtrate using aseptic technique.
- Open the package of a syringe filter (0.22 μm), leaving the filter in the packaging.
- Open the syringe pack and remove the syringe from the package. Afterward, remove the plunger. Then, screw the syringe onto the filter.
- Using a 2ml sero-pipette, remove approximately 2 ml of liquid from the top of the flooded sample.
- Avoid withdrawing any solid material from the bottom of the tube to prevent clogging the filter during filtration.
- Attach the syringe-filter complex to a microcentrifuge tube. This is where the filtrate can be collected.
- Depressing the syringe plunger, dispense a minimum of 0.5 ml of filtrate into a labeled microcentrifuge tube.
- Because debris can clog the filter, you may encounter resistance. Do not continue to force liquid through the filter or it will break. If your filter clogs, remove the clogged filter, replace it with a new one, and continue filtering.
- Cap the tube immediately.
- Discard the syringe and filter.
- Wipe down benches with CiDecon and EtOH as described in step 1.
-
- Notes: New PyCa liquid media was used; Incubated on shaker incubator at wrong temperature
Results: Unknown if Isolation works; will perform plaque assay to see.
Conclusions and Next Steps: We will perform plaque assay on GMA6.
Title: Plaque Assay Sample GMA6
Date: 09/16/2024
Redo: No
Purpose: This procedure aims to visualize if any plaques are present in samples GMA6, which indicates our samples contain phage.
Protocol:
-
- Day 1
- Spray your bench with CiDecon. Wait around thirty seconds, then wipe down the bench. Afterward, add 70%EtOH. Wait thirty seconds, then wipe the bench down. Prepare Bunsen Burner Apparatus. Make sure to work within eight inches of the Bunsen Burner.
- Assemble the samples you want to assay.
- Inoculate the host bacteria with your phage sample.
- Obtain the same number of aliquots of 250 μl host bacterial cultures as you have phage samples (1).
- Label the culture tubes accordingly.
- Use a 2mL sero-pipetter and aseptic technique to
- Dispense each phage sample into the appropriate culture tube containing 250 μl of host bacteria according to Table 5.3-1.
- Mix each inoculated host culture by gently tapping the tube.
Important: Make sure your sample makes contact with the bacteria. When you pipette a volume as small as 10 μl sometimes your sample may stick to the side of the tube. - Let your sample sit undisturbed for 5–10 minutes to allow for attachment.
Table 5.3-1. Volumes of phage samples added to bacterial cultures for a plaque assay. Sample Type
Sample Volume
Direct isolation sample
500 μl
Enriched culture
10 μl
Serial dilutions of picked plaques
10 μl
Lysates for titering
10 μl
Negative control
10 μl phage buffer
Positive control
10 μl provided phage sample
- Obtain the same number of aliquots of 250 μl host bacterial cultures as you have phage samples (1).
- Plate the samples with top agar. For this part of the experiment you will need 3 ml of molten top agar per sample.
- Obtain the same number of agar plates as you have samples. Label these plates accordingly.
- Remove a bottle of top agar from the 55 °C bath.
Important: You want to keep the top agar in the 55 °C bath for as long as possible to prevent it from prematurely solidifying on your bench. - For each sample, including controls
- Using a sterile 5 ml pipette, aseptically transfer 3 ml of top agar to an inoculated host tube (i.e., the tube containing bacterial host and phage sample).
Important: Try to avoid making or withdrawing bubbles, as they can look like plaques on plates. - Immediately aspirate (suck-up) the mixture back into the pipette and transfer it to the appropriate plate and discard the pipette.
Important: The top agar should not sit in the pipette for more than a few seconds because the agar will begin to solidify. - Gently, but quickly, tilt the plate in multiple directions until the top agar mixture evenly coats the agar plate.
- Using a sterile 5 ml pipette, aseptically transfer 3 ml of top agar to an inoculated host tube (i.e., the tube containing bacterial host and phage sample).
- Repeat this process for each of your samples.
- Incubate plates in the incubator labeled m. foliorum. This should be at 29 degrees Celcius.
- Let the plates sit undisturbed for ~20 minutes until the top agar solidifies.
- After the top agar has solidified, gently invert the plates and place in the proper incubator.
- Incubate the plates at the specified temperature for 24–48 hours.
- Record the incubation time and temperature in your notebook.
- Wipe Down Bench with CiDecon and EtOH as described in step 1.
Day 2
- Check the plates for plaques.
- Remove the plates from the incubator and hold them up to a light source to look for plaques. (It is easier to see them if you remove the lid.)
- If you do not see plaques, return the plates to the incubator for further incubation and check again.
- Record your results in your lab notebook.
- Be thorough. What do you see on your plates? Count the number of plaques and take note of the size, shape, and other distinctive features of the plaques. Remember, negative results are important too.
Important: The morphology of a plaque is an important characteristic. Simply noting “small” or “round” is not an adequate descriptor of plaque morphology. Try to be specific in your plaque descriptions. A good description will include size, turbidity, margin type, etc.
- Be thorough. What do you see on your plates? Count the number of plaques and take note of the size, shape, and other distinctive features of the plaques. Remember, negative results are important too.
- Wipe down bench with CiDecon and EtOH as described in step 1
- Remove the plates from the incubator and hold them up to a light source to look for plaques. (It is easier to see them if you remove the lid.)
- Day 1
Notes: Top agar was contaminated. Inoculated bacteria was disposed of. Will reattempt plaque assay on Monday the 16th.
Incubating temperature: 29 C
Incubating time: 1:13 PM
Results: No plaques were found.
Conclusions and Next Steps: Plaque Assay unsuccessful. We will now move on to Direct Isolation for samples LCJ1 through LCJ3.
Title: Enriched Isolation LCJ1
Date: 09/20/2024
Redo: No
Purpose: This procedure aims to isolate the phages from sample LCJ1 and prepare for visualization of phage via Spot Test.
Protocol:
- Fill a 50 ml conical tube with your sample to the 15 ml mark.
- Add liquid media to the 35 ml mark and vortex.
- Shake the sample at ~250 rpm for 1–2 hour1.
- Balance the tubes and centrifuge at 2,000 x g for 10 minutes to pellet (i.e., force to the bottom of the tube) most of the soil2.
- Filter the supernatant through a 0.22 µm filter to remove unwanted bacteria and soil particles3.
- Collect the flow through in a sterile baffled Erlenmeyer flask or a 50 ml sterile conical tube.
- Recovered volumes will range between 20 and 25 ml.
- Add 0.5 ml of bacterial host culture to the flask or conical tube.
- Incubate the flask or conical tube at the proper temperature, shaking at 220 rpm for 2–5 days.
- If you are using a 50 ml conical tube, you must ensure that the culture will be properly aerated. To do so, screw the cap on one-quarter of a turn so that the conical tube is only loosely capped, and then secure the cap with a short piece of lab tape to ensure it does not fall off. Check to make sure that the conical tube remains only loosely capped. Tubes must remain upright while being shaken, and care taken to avoid spillage.
- If using a liquid environmental sample, you must add the appropriate volume of 10X liquid media as a source of nutrients for your host bacteria.
- Filter the enriched culture.
- Using an appropriate pipette, transfer 1.4 ml of your enriched culture from the Erlenmeyer flask to a microcentrifuge tube.
- Repeat this procedure so that you have two microcentrifuge tubes, each with 1.4 ml of enriched culture.
- Spin the tubes at high speed in the microcentrifuge for 1 minute to pellet the bacteria.
- If your supernatant is not clear or if you suspect your enrichment contains non-host bacteria, filter the supernatant through a 0.22 µm filter as described below. Otherwise, proceed directly to Step 5.
- Remove the plunger from a syringe.
- Open a sterile filter and attach it to the barrel of the syringe.
- Pipette 1 ml of supernatant from each microcentrifuge tube into the syringe barrel (for a total of 2 ml).
- Place the tip of the filter/syringe over a sterile microcentrifuge tube and insert the plunger into the syringe.
- Depress the plunger and collect the sterile filtrate.
- Transfer the supernatant into a clean microcentrifuge tube, avoiding the bacterial pellet.
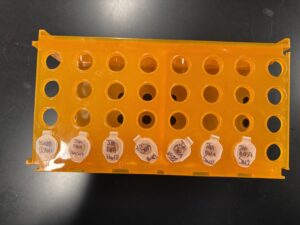
- Immediately cap the microfuge tube containing your supernatant or filtrate and label it appropriately. It should be stored at 4 °C.
- Either return your culture to the incubator, or dispose of your enriched culture as directed by your instructor.
Notes: Taken out of incubator at 9:10Am 9/23/2024
Incubating temperature: 29 C
Incubating time: 9:00 PM
Results: Enriched Issolated phage was collected.
Conclusions and Next Steps: We will now proceed with a spot test for LCJ1.
Title: Spot Test LCJ1
Date: 09/23/2024
Redo: No
Purpose: This procedure aims to visualize if phage was present in sample LCJ1
Protocol:
- We prepared our lab bench by spraying CiDecon and 70% EtOH on our work area and obtained a bunsen burner for aseptic purposes. .
- We obtained 1 PyCa media plate and let it sit until it warmed to room temperature.
- We acquired a 250uL tube of m. foliorum; we dispense 3mL of Top agar into the bacterial tube, mixed it up, and dispensed it on the plate. We let the plate sit undisturbed for 20 minutes or so.
- After the top agar solidified, we acquired the phage filtrate we obtained from enriched isolation.
- We dropped our liquid phage sample onto our bacterial lawn and placed in the 29C incubator.
Notes:
Incubating temperature: 29 C
Incubating time: 10:45 AM
The plaques that appeared were clear, indicating that this is a lytic phage.
Results: Plaques WERE observed on our plate, indicating that phage was present in sample LCJ1.
Conclusions and Next Steps: We will now proceed with serial dilution/titer test.
Title: Enriched Isolation LCJ2 and LCJ3
Date: 09/23/2024
Redo: No
Purpose: This procedure aims to isolate the phages from samples LCJ2 and LCJ3 and prepare for visualization of phage via Spot Test.
Protocol:
- Fill a 50 ml conical tube with your sample to the 15 ml mark.
- Add liquid media to the 35 ml mark and vortex.
- Shake the sample at ~250 rpm for 1–2 hour1.
- Balance the tubes and centrifuge at 2,000 x g for 10 minutes to pellet (i.e., force to the bottom of the tube) most of the soil2.
- Filter the supernatant through a 0.22 µm filter to remove unwanted bacteria and soil particles3.
- Collect the flow through in a sterile baffled Erlenmeyer flask or a 50 ml sterile conical tube.
- Recovered volumes will range between 20 and 25 ml.
- Add 0.5 ml of bacterial host culture to the flask or conical tube.
- Incubate the flask or conical tube at the proper temperature, shaking at 220 rpm for 2–5 days.
- If you are using a 50 ml conical tube, you must ensure that the culture will be properly aerated. To do so, screw the cap on one-quarter of a turn so that the conical tube is only loosely capped, and then secure the cap with a short piece of lab tape to ensure it does not fall off. Check to make sure that the conical tube remains only loosely capped. Tubes must remain upright while being shaken, and care taken to avoid spillage.
- If using a liquid environmental sample, you must add the appropriate volume of 10X liquid media as a source of nutrients for your host bacteria.
- Filter the enriched culture.
- Using an appropriate pipette, transfer 1.4 ml of your enriched culture from the Erlenmeyer flask to a microcentrifuge tube.
- Repeat this procedure so that you have two microcentrifuge tubes, each with 1.4 ml of enriched culture.
- Spin the tubes at high speed in the microcentrifuge for 1 minute to pellet the bacteria.
- If your supernatant is not clear or if you suspect your enrichment contains non-host bacteria, filter the supernatant through a 0.22 µm filter as described below. Otherwise, proceed directly to Step 5.
- Remove the plunger from a syringe.
- Open a sterile filter and attach it to the barrel of the syringe.
- Pipette 1 ml of supernatant from each microcentrifuge tube into the syringe barrel (for a total of 2 ml).
- Place the tip of the filter/syringe over a sterile microcentrifuge tube and insert the plunger into the syringe.
- Depress the plunger and collect the sterile filtrate.
- Transfer the supernatant into a clean microcentrifuge tube, avoiding the bacterial pellet.
- Immediately cap the microfuge tube containing your supernatant or filtrate and label it appropriately. It should be stored at 4 °C.
- Either return your culture to the incubator, or dispose of your enriched culture as directed by your instructor.
Notes: Taken out of incubator at 12:00 9/26/2024
Incubating temperature: 29 C
Incubating time LCJ2: 12:53 PM
Incubating time LCj3: 4:20 PMResults: Enriched Isolated phage was collected.
Conclusions and Next Steps: We will now proceed with a spot test for LCJ1.
Title: Serial Dilution/Titer test LCJ1
Date: 09/25/2024
Redo: No
Purpose: The purpose of this experiment is to find which dilution factor provides an optimal titer (phage count).
Notes:
-
- We set up our lab workbench by spraying CiDecon and 70% EtOH. Afterwards, we set up a bunsen burner to prepare for aseptic technique.
- We obtained and labled eight microcentrifuge tubes with their respective dilution factor. We set up our dilutions by filling 90uL of phage buffer each into eight microcentrifuge tubes.
- Starting off with our 10 to the -1 dilution (10uL sample, 90uL buffer), we dispensed ten uL of the mixture into the tube that contained the next dilution factor, diluting by a factor of ten for each tube.
- After obtaining our 10-8 dilution, we obtained 8 PyCa plates and labeled them each with a dilution factor.
- Afterwards, we performed the plaque assay protocol except we did it with each of our eight dilutions of sample.
- After the top agar+inoculated bacteria mixture solidified for each plate, they were set in the incubator at 10:46 AM at 29C.
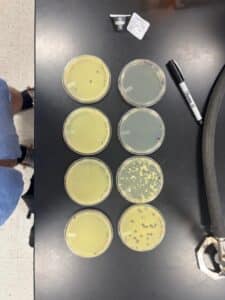
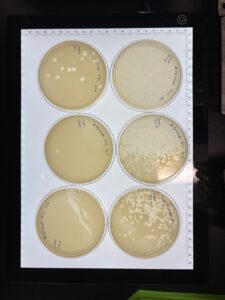
Results: We obtained optimal phage concentration at a 10 to the fifth dilution factor.
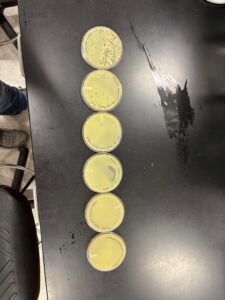
All Dilution plates for LCJ1
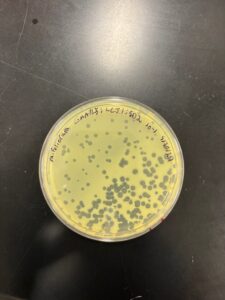
Plate we will use for our second serial dilution.
Plaques were small and clear, indicating it is a lytic phage. Plaques started showing after 24 hours of incubation time.
Conclusions and Next Steps: We will now for our second serial dilution by using the 10 to the fifth plate.
Title: Spot Test LCJ2 and LCJ3
Date: 09/27/2024
Redo: No
Purpose: This procedure aims to viusalize if phage was present in samples LCJ2 and LCJ3.
Protocol:
- We prepared our lab bench by spraying CiDecon and 70% EtOH on our work area and obtained a bunsen burner for aseptic purposes. .
- We obtained 1 PyCa media plate and let it sit until it warmed to room temperature.
- We acquired a 250uL tube of m. foliorum; we dispense 3mL of Top agar into the bacterial tube, mixed it up, and dispensed it on the plate. We let the plate sit undisturbed for 20 minutes or so.
- After the top agar solidified, we acquired the phage filtrate we obtained from enriched isolation.
- We dropped our liquid phage sample onto our bacterial lawn and placed in the 29C incubator.
Notes:
Incubating temperature: 29 C
Incubating time: 10:45 AM
Results: Plaques WERE observed on LCJ3, but none on LCJ2.
Conclusions and Next Steps: We will donate LCJ3 to Megan and Mattisyn’s group.
Title: Picked Plaque
Date: 10/16/2024
Redo: Yes
Purpose: We picked a plaque from the plate that contained our 10*-1 dilution of Low-Titer Lysate
Protocol:
We cleaned our bench first and then gowned and gloved up.
We started the bunsen burner to maintain our sterile environment.
Using a pipette we moved 100 uL of phage buffer into a microcentrifuge tube.
Using a 200 uL tip we picked a plaque.
After picking a plaque we inserted the tip into the phage buffer.
We then mixed by pipetting up and down and then vortexed.
After obtaining our dilutions of our plaque, we ran a plaque assay to observe if our phage was isolated.
Incubation occurred at 10:45 AM at 29 degrees C
Notes: The plaques appear to similar in size and shape, indicating that we may have collected an isolated phage.
Results: We were able to obtain an isolated phage from our low-titer lysate dilutions
Conclusions and Next Steps: We flood our 10*-1 plate with phage buffer to collect new low-titer lysate.
Amplification
The u. 2nd Serial Dilution LCJ1
Date: 10/02/2024
Redo: No
Purpose: The purpose of this experiment is to see if our plaque morphologies are consistent, and if any webbed plates are present so we can obtain low-volume lysate.
Notes:
-
- We set up our lab workbench by spraying CiDecon and 70% EtOH. Afterwards, we set up a bunsen burner to prepare for aseptic technique.
- We started off by picking a plaque from our plate containing the 10-5 dilution. Three plaques were present. We used a 200uL pipette tip to pick, and we placed the tip in 100uL of phage buffer. After vortexing, this solution would be our base for our second serial dilution.
- We obtained and labled six microcentrifuge tubes with their respective dilution factor. We set up our dilutions by filling 90uL of phage buffer each into eight microcentrifuge tubes.
- Starting off with our 10 to the -1 dilution (10uL sample, 90uL buffer), we dispensed ten uL of the mixture into the tube that contained the next dilution factor, diluting by a factor of ten for each tube.
- After obtaining our 10-6 dilution, we obtained 6 PyCa plates and labeled them each with a dilution factor.
- Afterwards, we performed the plaque assay protocol except we did it with each of our eight dilutions of sample.
- After the top agar+inoculated bacteria mixture solidified for each plate, they were set in the incubator at 10:46 AM at 29C.
Results: Our morphologies were consistent with the first serial dilution, indicating that we have collected a specific phage. The titer calculated for the 2nd SD 10*-1 plate was 1.72e6.
Second Serial Dilution from our picked plaque
10*-1 Dilution
Conclusions and Next Steps: We will use the webbed plate to collect low-volume lysate. We will make several of these webbed plates and collect high-volume lysate.
Collection of Low-Volume Lysate
Date: 10/02/2024
Redo: No
Purpose: The purpose for collecting low-volume lysate is to collect low concentrated phage sample.
Notes:
-
- We Cleaned our bench with CiDecon and 70% EtOH.
- We collected our plaques from our second serial dilution; the 10*-1 plate from the second serial dilution was flooded.
- We sterilized our phage buffer by spraying 70% EtOH around the sides of the conical tube.
- We aspirated 8 mL of Phage buffer and pooled our plate.
- The plate was allowed to incubate for 12-14 hours at 4n degrees C. Incubation time was at 9:45.
Results: We collected around 6 mL of Low-Titer Lysate. The titer calculated for the 2nd SD 10*-1 plate was 1.72e6.
Conclusions and Next Steps: We will perform a serial dilution of the Low-titer Lysate in order to determine the volume of lysate required to make webbed plates.
Serial Dilution of Low-Volume Lysate
Date: 10/07/2024
Redo: No
Purpose: The main objective is to figure out what concentration/ how much volume is needed in order to create webbed plates.
Notes:
- We Cleaned our bench with CiDecon and 70% EtOH.
- We obtained our low volume lysate, 6 microcentrifuge tubes, and phage buffer
- We dispensed 90uL of phage buffer into each centrifuge tube.
- We performed serial dilution by adding 10uL of lysate to the 10*-1 tube; after thoroughly mixing, we dispensed 10uL of the diluted content into the 10*-2 tube (so on and so forth)
- After finishing the serial dilutions, we performed plaque assay on all 6 plates.
- We incubated at 1:55 PM at 29C
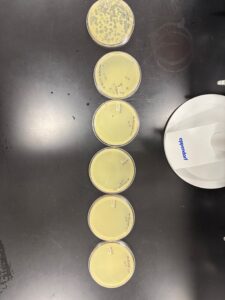
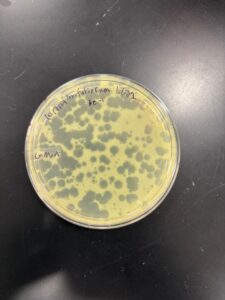
Results: The lysate formed phages with different morphologies. Some plaques were larger than others.
Serial DIlution of the Low Volume Lysate
Serial Dilution of Low Volume Lysate 10*-1
Conclusions and Next Steps: We will redo our low-titer lysate to see if we get plaques with consistent morphology.
Serial Dilution of Low-Volume Lysate
Date: 10/13/2024
Redo: No
Purpose: The main objective is to figure out what concentration/ how much volume is needed in order to create webbed plates.
Notes:
- We Cleaned our bench with CiDecon and 70% EtOH.
- We obtained our low volume lysate, 6 microcentrifuge tubes, and phage buffer
- We dispensed 90uL of phage buffer into each centrifuge tube.
- We performed serial dilution by adding 10uL of lysate to the 10*-1 tube; after thoroughly mixing, we dispensed 10uL of the diluted content into the 10*-2 tube (so on and so forth)
- After finishing the serial dilutions, we performed plaque assay on all 6 plates.
- We incubated at 1:55 PM at 29C
Results: The lysate formed phages with similar morphologies, but the plaques were smaller, and a webbed plate was not produced.
Serial Dilution of Picked Plaque
Date: 10/18/2024
Redo: Yes
Purpose: The purpose of this procedure is to see which dilution factor will produce webbed plates.
Notes:
We cleaned our bench with CiDecon and 70% Ethanol.
We got out our 10^-1 plate from our picked plaque serial dilution and flooded it with 8 mL of phage buffer.
After letting set at room temp for around 2 hours, we collected the phage buffer. This is our new Low-Titer Lysate
After collecting the lysate, we performed serial dilutions according to the serial dilutions protocol.
After diluting to a factor of 10e-6, we performed plaque assay for each dilution factor.
After our top agar + bacteria + diluted sample mixture solidified, we placed in the m. foliorum incubator at 10:45 AM at 29 degrees C.
After around 24 hours, plates were removed from the incubator and placed in the 4 degrees C fridge.
Results: We found that our 10e-4 plate produced a proper webbed plate. Our 10e-5 plate produced a plausible plaque count that allows us to calculate the titer of our lysate. The titer for the new Low-volume lysate is 3e8
Conclusions and Next Steps: We will produce multiple webbed plates to collect our high-titer lysate. Afterwards, we will perform a spot titer to calculate the concentration of our high-titer lysate.
Making Webbed Plates
Date: 10/21/2024
Redo: No
Purpose: The purpose of this procedure is to create multiple webbed plates that were produced from our 10e-4 dilution of our low-titer lysate. We will flood these plates and collect high-titer lysate.
Notes:
We cleaned our workbench with CiDecon and 70% EtOH
We made a fresh 10e-4 dilution by performing a new set of serial dilutions of our low-titer lysate all the way up to 10e-4
After going all the way to our 10e-4 dilution, we obtained six plates and performed plaque assay with each plate containing our 10e-4 dilution.
We placed in the Incubator at 10:53 AM at 29 degrees C and let sit for around 24 hours
Results: Our plates produced plaques with different morphologies, similar to what we produced on our first run of serial dilution of low-titer lysate. Our plaques were larger.
Conclusions and Next Steps: We will move on and instead of using our 10e-4 dilution of our low-titer lysate, we will go down a dilution factor, where we will use our 10e-3 dilution to make webbed plates
Serial Dilution of LTL
Date: 10/23/2024
Redo: No
Purpose: The purpose of this procedure is to obtain a dilution factor of our low-titer lysate that is sufficient to produce webbed plates.
Notes:
- We Cleaned our bench with CiDecon and 70% EtOH.
- We obtained our low volume lysate, 3 microcentrifuge tubes, and phage buffer
- We dispensed 90uL of phage buffer into each centrifuge tube.
- We performed serial dilution by adding 10uL of lysate to the 10*-1 tube; after thoroughly mixing, we dispensed 10uL of the diluted content into the 10*-2 tube (so on and so forth)
- After finishing the serial dilutions, we performed plaque assay on all 6 plates; plates were incubated at 10:53
- Results: No plaques were produced. Conclusions and Next Steps: We will redo our dilutions.
Making Webbed Plates
Date: 10/25/2024
Redo: Yes
Purpose: The purpose of this procedure is to make webbed plates to use for collecting High-Titer Lysate (using a 10e-3 dilution).
Notes:
- We Cleaned our bench with CiDecon and 70% EtOH.
- We obtained our low volume lysate, 3 microcentrifuge tubes, and phage buffer
- We dispensed 90uL of phage buffer into each centrifuge tube.
- We performed serial dilution by adding 10uL of lysate to the 10*-1 tube; after thoroughly mixing, we dispensed 10uL of the diluted content into the 10*-2 tube (so on and so forth)
- After finishing the serial dilutions, we performed plaque assay on all 6 plates; plates were incubated at 10:33 AM
- Results: Plaques were observed, and webbed plates were produced. However, the plates were contaminated.
- Conclusions and Next Steps: Despite contamination, we will flood the plates and collect lysate.
Collection of High-Titer Lysate
Date: 10/27/2024
Redo: No
Purpose: The purpose of this procedure is to obtain adequate volume of High-Titer Lysate that can be used for titering.
Notes:
1. We started off by cleaning our bench with CiDecon and 70% EtOH. We gathered our required materials which include a Bunsen Burner, 5mL Serological Pipette tips, Phage buffer, and 50 mL conical tube / filter apparatus.
2. We gathered our six plates and flooded each of them with 8mL of phage buffer. We then let them incubate at room temp.
3. After incubation, we gathered our plates and collected lysate via vacuum filtration. By our third plate, we had clogged our .22 micron filter due to the contamination from the foreign bacteria. We would filter with new apparatus the next day. On the first day, we collected around 15 mL. We put our other three plates in the beer fridge too cool overnight @ 4 C
4. The next day, we got our remaining plates and collected the lysate via vacuum filtration. In total we collected around 25 mL of Lysate.
Results: We collected around 25 mL of lysate.
Conclusions and Next Steps: We will perform serial dilutions on our lysate and conduct a full-plate titer in order to determine the concentration of our lysate.
Titer Calculation
Date: 10/27/2024
Redo: No
Purpose: The purpose of this procedure is to calculate an approximate value of our phage concentration.
Notes:
1. We cleaned our bench using CiDecon and 70% EtOH
2. We gathered the materials that we need which include:
1. High Titer Lysate
2, 6 PyCa plates
3. 6 250uL colonies of m. foliorum
4. Bunsen Burner
5. Serological pipettes
6. Phage Buffer
7. Top Agar
3. We performed serial dilutions all the way up to 10e-6; refer to Serial Dilution protocol.
4.After diluting, we inoculated each the m. foliorum colonies using 10 uL of diluted lysate for each colony.
5. Afterward, we performed a plaque assay using 3mL of top agar for each plate; refer to plaque assay protocol
6. Incubated at 9:22 PM @ 29 C
Results: After incubating for around 36 hrs, we visualized our plates; we found that the dilution was a success, and our 10e-4 dilution contained optimal plaque counts for titering calculations. Our titer was calculated to be around 1.3e7.
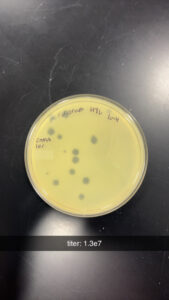
Conclusions and Next Steps: We will use our Lysate to move on to Transmission Electron Microscopy and DNA Extraction.
Characterization
h Total Electron Microscopy
Date: 11/1/2024
Redo: No
Purpose: The purpose of this procedure is to observe our phage and characterize it by observing the morphology of the phage.
Notes:
-
- We cleaned our bench with 70% EtOH and CIdecon and put on lab attire. We acquired the Bunsen Burner to utilize for aseptic technique.
- We aseptically transfer 1 ml of your high-titer lysate into a sterile microcentrifuge tube.
- We balance the tube(s) and centrifuge for 1 hour at 4 °C at top speed to concentrate the phage particles at the bottom of the tube.
- Using a micropipettor, we carefully removed as much supernatant as possible without disrupting the concentrated phage at the bottom of the tube.
- We added 100 μl of phage buffer and let resuspend at 4 °C for 30 minutes to one hour.
- We moved to the fume hood to perform the rest of the protocol.
- Using EM forceps, remove a fresh grid from a box of unused grids, touching only the very edge of the grid.
- Place the grid dark-and-shiny side UP, on the edge of the tab or double-sided tape so that only the very edge of the grid (no more than 0.5 mm) is touching the adhesive.
- We ejected 10 uL of the lysate onto the grid without actually touching the grid.
- Allow the phage settle and attach onto the grid for at least 7 minutes
- Using a small wedge of filter paper, wick off the excess fluid.
- Rinse the grid two times by the following method:
- Carefully pipette 10 μl of sterile water onto the grid. Allow it to sit for 2 minutes.
- Wick off the water using a fresh wedge of filter paper.
Important: Work quickly and carefully! Do NOT allow the grid to dry out!
- Add 10 μl of 1 % uranyl acetate to the grid.
Important: Uranyl acetate is a very toxic compound. You should wear gloves throughout this procedure and when working in any area where this material has been used - Let it sit for 2 minutes.
- Wick off excess stain by using a wedge of filter paper. UA staining occurs by leaving a very thin layer of stain dried across the entire grid. You should continue to wick away the stain until the surface of the grid looks like a rainbow oil slick. Then allow the grid to air dry before putting it safely back into the grid box.
Results:
Conclusions and Next Steps:
Restriction Enzyme Digests
Date: 11/11/2024
Redo: No
Purpose: The purpose of this experiment is to visualize our phage DNA to see how large our uncut DNA is and compare it with our DNA that has been cut by restriction enzymes.
Notes:
-
- We cleaned our bench using CiDecon and 70%EtOH. We put on our personal protective equipment (PPE) and set up our work station by acquiring the following: 7 microcentrifuge tubes, Restriction enzymes, 10X reaction buffer, Lambda DNA, and Nuclease free water.
- We gently mixed our phage DNA by flicking the bottom of the tube.
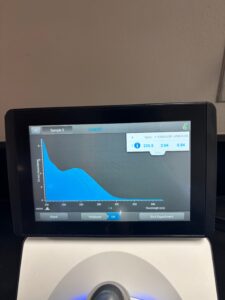
- We incubated on a heating plate at 65 degrees C. We waited until the DNA was warm, then we let it incubate for 5 minutes. Our DNA concentration was 155.7ng/uL; for this procedure, we need 500ng, or .5ug of DNA. After calculating, it was determined that we needed 3.2uL of DNA. However, to keep things simple, we estimated and decided to use 3uL of our DNA.
- We obtained our centrifuge and labeled each tube with which enzyme they have been assigned with. We used the following restriction enzymes: HindIII Digest as the ladder, Hae3, Mse1, Nsp1, Sac2, and Sal1. We also used our uncut phage DNA as a negative control.
- We added the following reagents in each microcentrifuge tube that is designed to contain our enzyme digests: 14uL of H2O, 2uL of 10X reaction buffer, 1uL of Restriction Enzyme, 3uL of phage DNA. NOTE: The buffer that we needed to use to match the enzyme are color coded — Reaction buffers that had green on the tube matched with restriction enzymes that had green on their tubes. Sac1 had red colored on its tube, so a different reaction buffer that was also colored red was used.
- We repeated steps 4 and 5 for Lambda restriction enzyme digest.
- For uncut DNA, we added 17uL of H2O and 3uL of phage DNA. The volumes added for all tubes should sum to 20uL of reaction mixture.
- After mixing gently with the pipette, we spun down our mixtures to ensure that ll of our reagents were at the bottom of the tube.
- We incubated our mixtures for 1 hour at 37 degrees Celcius. Afterward we spun down the mixture again for 1 minute. and stored.
Results: All of the mixtures were prepared successfully.
Conclusions and Next Steps: We will visualize our enzyme digests via gel electrophoresis. This fulfills the purpose of visualizing our DNA.
Gel Electrophoresis of Enzymes Digests
Date: 11/13/2024
Redo: No
Purpose: The purpose of this experiment is to visualize our restriction enzyme digests.
- We cleaned our bench with 70% EtOH and CIdecon. We put on our personal protective equipment (PPE) and set up our work station by acquiring the following: Restriction enzyme digests, Hind3 ladder, gel chamber (with electrodes), Erlenmeyer flask, agarose, TAE buffer, and 6X gel loading dye.
- We prepared a 0.8% agarose gel: 0.24 g agarose, and 30 mL of DI H20. After mixing via swirling the flask, we microwaved the mixture for 90 seconds, dividing it into 30 second increments. NOTE: it is important to ensure that the mixture is hot enough to where agarose is soluble with the water. Afterwards, we loaded the gel on the gel tray, placed 10-well combs in the slit at the top, and let solidify.
- Once the gel has solidified, bour the running buffer until the gel is completely covered. A good estimate is a cm under the fill line.
- We obtained our restriction enzymes/DNA mixture from previous lab day from the freezer.
- After our mixtures thawed, we added 5uL of 6X gel loading dye to all of our tubes, adding up to a total of 25uL for each tube. We mixed via pipetting.
- We added 20uL to each well and ran the gel for around an hour.
- After a hour passed, we took our gel off of the tray and stained using 0.01% Ethidium Bromide solution. After staining for 15 minutes, we de-stained using 60mL of DIH2O for another 15 minutes. Afterward, we visualized the gel via UV light.
Results: None of our DNA showed up in any of the wells, indicating that either DNA extraction was a failure, or we somehow did not collect any DNA while loading the gels.
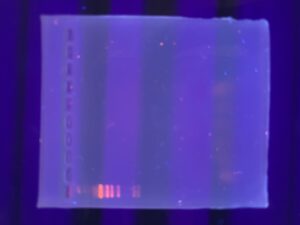
Conclusions and Next Steps: We will run another gel using the Lambda phage restriction enzyme digests.
Gel Electrophoresis of Enzymes Digests (Lambda)
Date: 11/18/2024
Redo: No
Purpose: The purpose of this experiment is to visualize Lambda restriction enzyme digests.
- We cleaned our bench with 70% EtOH and CIdecon. We put on our personal protective equipment (PPE) and set up our work station by acquiring the following: Restriction enzyme digests, Hind3 ladder, gel chamber (with electrodes), Erlenmeyer flask, agarose, TAE buffer, and 6X gel loading dye.
- We prepared a 0.8% agarose gel: 0.24 g agarose, and 30 mL of DI H20. After mixing via swirling the flask, we microwaved the mixture for 90 seconds, dividing it into 30 second increments. NOTE: it is important to ensure that the mixture is hot enough to where agarose is soluble with the water. Afterwards, we loaded the gel on the gel tray, placed 10-well combs in the slit at the top, and let solidify.
- Once the gel has solidified, bour the running buffer until the gel is completely covered. A good estimate is a cm under the fill line.
- We obtained our restriction enzymes/DNA mixture from previous lab day from the freezer.
- After our mixtures thawed, we added 5uL of 6X gel loading dye to all of our tubes, adding up to a total of 25uL for each tube. We mixed via pipetting.
- We added 20uL to each well and ran the gel for around an hour.
- After a hour passed, we took our gel off of the tray and stained using 0.01% Ethidium Bromide solution. After staining for 15 minutes, we de-stained using 60mL of DIH2O for another 15 minutes. Afterward, we visualized the gel via UV light.
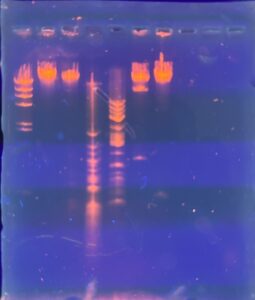
Results: Our restriction enzymes worked with the lambda DNA. However, on our last well, we included our uncut DNA, which showed no bands, indicating that we have very little DNA present.
Conclusions and Next Steps: We will extract DNA again using all of our high titer lysate to see if we can get a better DNA precipitate.
Gel Electrophoresis of our Uncut DNA compared to Lambda
Date: 11/20/2024
Redo: No
Purpose: The purpose of this experiment is to visualize our uncut DNA to see if we extracted enough DNA.
- We cleaned our bench with 70% EtOH and CIdecon. We put on our personal protective equipment (PPE) and set up our work station by acquiring the following: Restriction enzyme digests, Hind3 ladder, gel chamber (with electrodes), Erlenmeyer flask, agarose, TAE buffer, and 6X gel loading dye.
- We prepared a 0.8% agarose gel: 0.24 g agarose, and 30 mL of TBE. After mixing via swirling the flask, we microwaved the mixture for 90 seconds, dividing it into 30 second increments. NOTE: it is important to ensure that the mixture is hot enough to where agarose is soluble with the TBE. Afterwards, we loaded the gel on the gel tray, placed 10-well combs in the slit at the top, and let solidify.
- Once the gel has solidified, bour the running buffer until the gel is completely covered. A good estimate is a cm under the fill line.
- We obtained our uncut DNA from our previous extraction and the Hindi3 Lambda DNA. In order to match the concentrations of both our phage DNA and Lambda DNA, we diluted the Lambda DNA with a 1:3 dilution, and utilized 5uL of our phage DNA. We utilized 1 uL of the Lambda DNA.
- After our mixtures thawed, we added 5uL of 6X gel loading dye to all of our tubes, adding up to a total of 25uL for each tube. We mixed via pipetting.
- We added 20uL to each well and ran the gel for around an hour.
- After a hour passed, we took our gel off of the tray and stained using 0.01% Ethidium Bromide solution. After staining for 15 minutes, we de-stained using 60mL of DIH2O for another 15 minutes. Afterward, we visualized the gel via UV light.
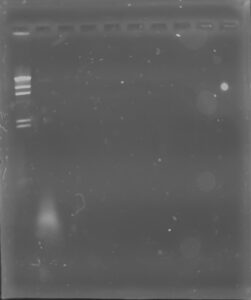
Results: Our DNA appeared to show up as a small, clear band in the second well. Since the band can’t be visualized well, we made our best estimate, and concluded that our DNA was around 19,000 bp.
Conclusions and Next Steps: We will send the DNA off to get sequenced. We will enter our phage information on phagesDB so it can be in manifest.
DNA Extraction
and
DNA Extraction
Date: 11/04/2024
Redo: Yes
Purpose: The purpose of this experiment was to isolate DNA using ZnCl2
Notes:
-
- We first cleaned the work table by spraying it CiDecon and Ethanol and then wiping it with paper towels.
- We put on lab coats and gloves for protection.
- We took a 15 mL conical tube and aliquoted 5 mL of high volume lysate into the tube, before having our TA add 20 uL of nuclease.
- We inverted the tube several times before incubating at 37 °C for 10 minutes.
- We procured 5 microcentrifuge tubes and aliquoted 1 mL of lysate into each.
- We then added 20 uL of ZnCl2 to each of the microcentrifuge tubes and inverted each of them several times to mix them.
- We incubated the microcentrifuge tubes at 37 °C for 5 minutes and then centrifuged the samples at 10,000 rpm for 1 minute.
- Using an electronic pipette we removed the supernatant from each of the microcentrifuge tubes and discarded the liquid.
- We then pipetted 500 uL of TES buffer into each tube and incubated the samples at 60 °C for 15 minutes.
- We added 1 uL of Proteinase K into each tube and then incubated them at 37 °C for 10 minutes.
- We added 60 uL of sodium acetate into each tube and mixed before putting them on ice for 15 minutes.
- We centrifuged the samples at 12,000 rpm and 4 °C for 1 minute.
- We then extracted the supernatants using an electronic pipette and moved the liquid into 5 new microcentrifuge tubes, before disposing of the tubes with the pellets.
- Finally we added 500 uL of 100% isopropanol into each tube and put them on ice in a refrigerator set at 4 °C.
Day 2
-
- We cleaned the work bench by spraying it with CiDecon and Ethanol and then wiping it down with paper towels.
- We put on lab coats and gloves for protection.
- We took our 5 microcentrifuge tubes from our procedure on 11/4/2024 and centrifuged them at top speed for 10 minutes.
- We then added 250 uL of 70% ethanol into each tube and centrifuged the samples for 1 minute.
- We took the supernatant liquid and disposed of it by transfering it into a waste tube.
- We dried the samples by inverting them onto a paper towel with the lid open and gently tapping to them to cause the excess liquid to fall out.
- After they had dried completely we added 50 uL of nuclease-free water to the first tube and gently mixed it, before taking 50 uL of the mix and transferring it to the second tube.
- We repeated this process for the tubes 3 – 5.
- We aspirated 3 uL of the DNA precipitate into the nanodrop and performed final calculations to get the DNA concentration.
Results:
We didn’t have adequate DNA concentrations
.
Conclusions and Next Steps:
We will perform DNA reprecipitation at a later date.
DNA Extraction
Date: 11/06/2024
Redo: No
Purpose: The purpose of this experiment was to extract phage DNA precipitate to use for characterization.
Notes:
- We first cleaned the work table by spraying it CiDecon and Ethanol and then wiping it with paper towels.
- We put on lab coats and gloves for protection.
- We took a 15 mL conical tube and aliquoted 5 mL of high volume lysate into the tube, before having our TA add 20 uL of nuclease.
- We inverted the tube several times before incubating at 37 °C for 10 minutes.
- We procured 5 microcentrifuge tubes and aliquoted 1 mL of lysate into each.
- We then added 20 uL of ZnCl2 to each of the microcentrifuge tubes and inverted each of them several times to mix them.
- We incubated the microcentrifuge tubes at 37 °C for 5 minutes and then centrifuged the samples at 10,000 rpm for 1 minute.
- Using an electronic pipette we removed the supernatant from each of the microcentrifuge tubes and discarded the liquid.
- We then pipetted 500 uL of TES buffer into each tube and incubated the samples at 60 °C for 15 minutes.
- We added 1 uL of Proteinase K into each tube and then incubated them at 37 °C for 10 minutes.
- We added 60 uL of sodium acetate into each tube and mixed before putting them on ice for 15 minutes.
- We centrifuged the samples at 12,000 rpm and 4 °C for 1 minute.
- We then extracted the supernatants using an electronic pipette and moved the liquid into 5 new microcentrifuge tubes, before disposing of the tubes with the pellets.
- Finally we added 500 uL of 100% isopropanol into each tube and put them on ice in a refrigerator set at 4 °C.
Day 2
- We cleaned the work bench by spraying it with CiDecon and Ethanol and then wiping it down with paper towels.
- We put on lab coats and gloves for protection.
- We took our 5 microcentrifuge tubes from our procedure on 11/4/2024 and centrifuged them at top speed for 10 minutes.
- We then added 250 uL of 70% ethanol into each tube and centrifuged the samples for 1 minute.
- We took the supernatant liquid and disposed of it by transfering it into a waste tube.
- We dried the samples by inverting them onto a paper towel with the lid open and gently tapping to them to cause the excess liquid to fall out.
- After they had dried completely we added 50 uL of nuclease-free water to the first tube and gently mixed it, before taking 50 uL of the mix and transferring it to the second tube.
- We repeated this process for the tubes 3 – 5.
- We aspirated 3 uL of the DNA precipitate into the nanodrop and performed final calculations to get the DNA concentration.
Results:
We didn’t have adequate DNA concentrations.
Conclusions and Next Steps:
We will be preforming DNA reprecipitation at a later time.
DNA Reprecipitation
Date: 11/07/2024
Redo: No
Purpose: The purpose of this procedure is to reprecipitate our DNA from our first DNA extraction to see if we obtain adequate DNA concentrations
Notes:
- We cleaned the work bench by spraying it with CiDecon and Ethanol and then wiping it down with paper towels.
- We put on lab coats and gloves for protection.
- The DNA precipitate from the FIRST DNA extraction was taken out of the fridge.
- A micropipette was used to aspirate DNA precipitate. We set the micropipette to 50 uL, as that was the original volume of precipitate we acquired from DNA extraction. Then, in order to calculate the volume we actually had left, we slowly decreased the micropipette reading until the air gap could not be seen. We appeared to have 44uL of DNA precipitate.
- Afterward, we ejected our DNA into a new centrifuge tube labeled DNA reprecipitation. We calculated the amount of Sodium Acetate and 100% ethanol by utilizing these rules: The amount of Sodium Acetate we add is 10% of the volume of DNA, and the amount of 100%EtOH we add is 300% of the volume. 4.4uL of Sodium Acetate, and 132uL of 100%EtOH. The total volume of the mixture was 180.4uL. We mixed by inverting, and placed the DNA in the 4C fridge overnight.
Day 2
- We cleaned the work bench by spraying it with CiDecon and Ethanol and then wiping it down with paper towels.
- We put on our gloves for protection
- We got our precipitate out of the fridge and centrifuged it at 15000 rpm for 30 minutes.
- The supernatant was then dispensed into a waste tube, and 0.5mL of 75% Ethanol was added to the microcentrifuge tube to wash it. The tube was placed in the centrifuge at 4°C for 10 min. This step was conducted twice, with all supernatants being discarded in a waste tube.
- After aspirating as much liquid out of the microcentrifuge tube, the tube was set in a 30°C incubator to air dry. It was important to not proceed with the next step until all liquid droplets were evaporated from the tube.
- Once ALL liquid was dried out of the tube, 50ul of nuclease-free water was added to the tube. The liquid was pipetted up and down to mix the solution.
- The tube was taken to a Nanodrop machine, where the DNA concentration and quality (A260:280 and A260:230) was checked.
DNA Concentration after reprecipitation
ng/uL: 155.7 A260/A280: 1.84 A260/A230:1.79
Results: The precipitation gives us adequate values to proceed with analysis via gel electrophoresis.
DNA Extraction
Date: 11/18/2024
Redo: No
Purpose: The purpose of this experiment was to extract phage DNA precipitate to use for characterization.
Notes:
- We first cleaned the work table by spraying it CiDecon and Ethanol and then wiping it with paper towels.
- We put on lab coats and gloves for protection.
- We took a 15 mL conical tube and aliquoted all of our high volume lysate (12.5mL) of high volume lysate into the tube, before having our TA add 50 uL of nuclease.
- We inverted the tube several times before incubating at 37 °C for 10 minutes.
- We procured 13 microcentrifuge tubes and aliquoted 1 mL of lysate into each.
- We then added 50 uL of ZnCl2 to each of the microcentrifuge tubes and inverted each of them several times to mix them.
- We incubated the microcentrifuge tubes at 37 °C for 5 minutes and then centrifuged the samples at 10,000 rpm for 1 minute.
- Using an electronic pipette we removed the supernatant from each of the microcentrifuge tubes and discarded the liquid.
- We then pipetted 1.25mL of TES buffer into each tube and incubated the samples at 60 °C for 15 minutes.
- We added 2.5 uL of Proteinase K into each tube and then incubated them at 37 °C for 10 minutes.
- We added 150 uL of sodium acetate into each tube and mixed before putting them on ice for 15 minutes.
- We centrifuged the samples at 12,000 rpm and 4 °C for 1 minute.
- We then extracted the supernatants using an electronic pipette and moved the liquid into 5 new microcentrifuge tubes, before disposing of the tubes with the pellets.
- Finally we added 1.25mL uL of 100% isopropanol into each tube and put them on ice in a refrigerator set at 4 °C.
Day 2
- We cleaned the work bench by spraying it with CiDecon and Ethanol and then wiping it down with paper towels.
- We put on lab coats and gloves for protection.
- We took our 5 microcentrifuge tubes from our procedure on 11/4/2024 and centrifuged them at top speed for 10 minutes.
- We then added 620 uL of 70% ethanol into each tube and centrifuged the samples for 1 minute. It was supposed to be 625uL but we were short on time.
- We took the supernatant liquid and disposed of it by transferring it into a waste tube.
- We dried the samples by inverting them onto a paper towel with the lid open and gently tapping to them to cause the excess liquid to fall out. We then left it incubating on a heater at 30 degrees Celcius.
- After they had dried completely we added 50 uL of nuclease-free water to the first tube and gently mixed it, before taking 50 uL of the mix and transferring it to the second tube.
- We repeated this process for the tubes 3 – 5.
- We aspirated 2 uL of the DNA precipitate into the nanodrop and performed final calculations to get the DNA concentration.
Results: Our DNA concentration in ng/uL was high, but our DNA purity and salinity were not at adequate values.
Conclusion and Next Steps: We will perform DNA reprecipitation on this final extraction.
DNA Reprecipitation
Date: 11/19/2024
Redo: No
Purpose: The purpose of this procedure is to reprecipitate our DNA from our first DNA extraction to see if we obtain adequate DNA concentrations
Notes:
- We cleaned the work bench by spraying it with CiDecon and Ethanol and then wiping it down with paper towels.
- We put on lab coats and gloves for protection.
- The DNA precipitate from the FIRST DNA extraction was taken out of the fridge.
- A micropipette was used to aspirate DNA precipitate. We set the micropipette to 50 uL, as that was the original volume of precipitate we acquired from DNA extraction. Then, in order to calculate the volume we actually had left, we slowly decreased the micropipette reading until the air gap could not be seen. We appeared to have 41uL of DNA precipitate.
- Afterward, we ejected our DNA into a new centrifuge tube labeled DNA reprecipitation. We calculated the amount of Sodium Acetate and 100% ethanol by utilizing these rules: The amount of Sodium Acetate we add is 10% of the volume of DNA, and the amount of 100%EtOH we add is 300% of the volume. 4.1uL of Sodium Acetate, and 123uL of 100%EtOH. The total volume of the mixture was 108.1uL. We mixed by inverting, and placed the DNA in the 4C fridge overnight.
Day 2
- We cleaned the work bench by spraying it with CiDecon and Ethanol and then wiping it down with paper towels.
- We put on our gloves for protection
- We got our precipitate out of the fridge and centrifuged it at 15000 rpm for 30 minutes.
- The supernatant was then dispensed into a waste tube, and 0.5mL of 75% Ethanol was added to the microcentrifuge tube to wash it. The tube was placed in the centrifuge at 4°C for 10 min. This step was conducted twice, with all supernatants being discarded in a waste tube.
- After aspirating as much liquid out of the microcentrifuge tube, the tube was set in a 30°C incubator to air dry. It was important to not proceed with the next step until all liquid droplets were evaporated from the tube.
- Once ALL liquid was dried out of the tube, 50ul of nuclease-free water was added to the tube. The liquid was pipetted up and down to mix the solution.
- The tube was taken to a Nanodrop machine, where the DNA concentration and quality (A260:280 and A260:230) was checked.
Results: Our DNA concentration had adequate values in all 3 sectors of the nanodrop.
Conclusion and Next Steps: We will analyze our DNA on a gel using a lambda ladder and our uncut DNA.
