Discovery of Triri
Triri Information
Morphology: Siphoviridae

Sample Collection
s
| Collector Name |
Trinity Cobb | Trinity Cobb | McKenna Rice | ||
| Sample No. | 1 | 2 | 3 | 4 | 5 |
| Date of Collection | 8/24/2025 | 8/24/2025 | 9/1/2025 | ||
| Sample Type | soil | soil | soil | ||
| General Location | Stephenville TX | Stephenville TX | Farmersville, Tx | ||
| Location Description | In the front yard of the townhome complex, where armadillos had torn up the soil | In the backyard of the townhome complex, taken from the top of a fire ant hill | In the runs of a cow barn, soil had manure, moist soil | ||
|
GPS Coordinates.
|
32.20959°N, 98.21471°W | 32.20959°N, 98.21471°W | 33.24359N, 96.37316W | ||
| Sample Depth | Surface | surface | surface | ||
| Ambient Temperature | 28C | 28C | 23C |
Isolation/Purification
Sample 2 Isolation
Date: 08/25/2025
Redo: No
Purpose: The direct isolation of sample 2 is to determine if we have a viable phage to purify further.
Notes:
- An environmental sample was collected (sample 2).
- Using a 15 mL conical tube, it was filled with soil halfway. Liquid media (Pyca) was added until the soil was submerged beneath 3 mL of liquid. The tube was capped and inverted several times to mix it thoroughly.
- The tube was put into a shaking incubator at 250 rpm for 1 hour.
- The sample was centrifuged for 10 minutes so that particulate matter would settle.
- Using a syringe, 2 mL of liquid was removed from the top of the flooded sample.
- The syringe was attached to a 0.22 micrometer filter, and 0.5 mL of filtrate was dispensed. The filtrate was placed in the fridge until 8/27
- On 8/27, the plaque assay was started. An agar plate was placed in the incubator to warm until it was needed for use. 500 microliters of the direct isolation sample was inoculated with the host bacteria. The tube was mixed by gently tapping it. The sample was left undisturbed for 7 minutes.
- The agar plate was taken out of the incubator. 3 mL molten top agar was added to the inoculated bacteria and then immediately aspirated and poured onto the agar plate. The plate was not tilted in different directions, and the top agar was unevenly spread on the agar plate. The plate sits undisturbed for 20 minutes to allow the agar to solidify.
- The plate was incubated for 2 days.
Results:
After approximately 48 hours of incubation at 29 °C, no plaques began to form on the plate.
Conclusions and Next Steps:
The plate was discarded. Enriched isolation will be used for sample 1 to identify a viable phage for further purification.
Sample 1 Isolation
Date: 08/27/2025
Redo: No
Purpose: The isolation of sample 1 is to determine if we have a viable phage to purify further.
Notes:
1. A 50 mL conical tube was filled with the soil sample to the 15 mL mark. Liquid media (Pyca) was added until the 35 mL mark and then vortexed at 250 rpm for 1 hour.
2. The supernatant was filtered through a 0.22-micrometer filter with a vacuum. The flow through was collected in another 50 mL conical tube. The recovered volume was 21 mL.
3. 0.5 mL of bacterial host culture was added to the conical tube. The tube was incubated and shaken at 220 rpm for 7 days. The cap was very loosely screwed back on to allow the culture to be properly aerated.
4. 1.4 mL of the enriched culture was transferred twice into a microcentrifuge tube. The tubes were put in the microcentrifuge for 1 minute to pellet the bacteria.
5. Since the supernatant was not clear, it was filtered through a 0.22-micrometer filter using a syringe.
6. After filtering, we proceeded directly to the plaque assay. An agar plate was placed in the incubator to warm until it was needed for use. 10 microliters of the enriched isolation sample was inoculated with the host bacteria. The tube was mixed by gently tapping it. The sample was left undisturbed for 5 minutes.
7. The agar plate was taken out of the incubator. 3 mL molten top agar was added to the inoculated bacteria and then immediately aspirated and poured onto the agar plate. The plate was tilted in different directions, and the top agar was evenly spread on the agar plate. The plate sits undisturbed for 20 minutes to allow the agar to solidify.
8. The plate was incubated for 2 days.
Results:

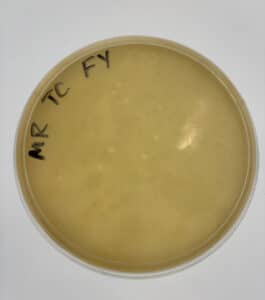
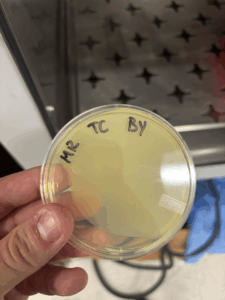
After approximately 48 hours of incubation at 29 °C, tiny plaques begin to form on the plate. It’s a little too early to tell its morphology.
Conclusions and Next Steps:
The plate was wrapped and placed in the fridge so that further isolation could be performed.
Sample 1 Serial Dilution
Date: 09/08/2025
Redo: No
Purpose: The direct isolation of sample 1 is to isolate the discovered phage further.
Notes:
1. A 10-fold serial dilution was performed until the phage sample was diluted to 10^-5. The plaque chosen was small, white, round, and cloudy.
2. 100 microliters of phage buffer was added to 5 microcentrifuge tubes. 10 microliters of the undiluted phage sample was added to the tube labeled 10^-1. The dilution was continued until the last tube was reached. After the serial dilution, we proceeded directly into the plaque assay for each of the 5 tubes.
3. 5 agar plates were placed in the incubator to warm until it was needed for use. 10 microliters of each of the serial dilution samples were separately inoculated with host bacteria. The tubes were mixed by gently tapping them. The samples were left undisturbed for 5 minutes.
7. The agar plates were taken out of the incubator. 3 mL molten top agar was added to the inoculated bacteria and then immediately aspirated and poured onto the agar plate. The plate was tilted in different directions, and the top agar was evenly spread on the agar plate. The plates sat undisturbed for 20 minutes to allow the agar to solidify.
8. The plate was incubated for 2 days.
Results:
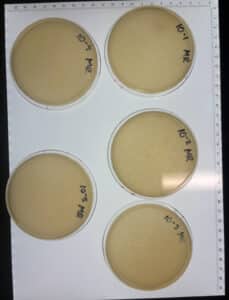
The dilution was successful.
Conclusions and Next Steps:
We will proceed to a second serial dilution to further isolate the phage.
Sample 1 Serial Dilution #2
Date: 09/10/2025
Redo: No
Purpose: The second serial dilution of sample 2 is to isolate the discovered phage further.
Notes:
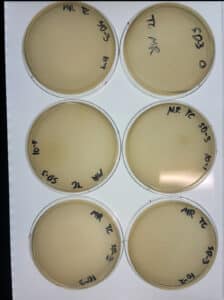
1. A 10-fold serial dilution was performed until the phage sample was diluted to 10^-5. The plaque chosen was small, white, round, and cloudy.
2. 100 microliters of phage buffer was added to 5 microcentrifuge tubes. 10 microliters of the undiluted phage sample was added to the tube labeled 10^-1. The dilution was continued until the last tube was reached. After the serial dilution, we proceeded directly into the plaque assay for each of the 5 tubes.
3. 5 agar plates were placed in the incubator to warm until it was needed for use. 10 microliters of each of the serial dilution samples were separately inoculated with host bacteria. The tubes were mixed by gently tapping them. The samples were left undisturbed for 5 minutes.
7. The agar plates were taken out of the incubator. 3 mL molten top agar was added to the inoculated bacteria and then immediately aspirated and poured onto the agar plate. The plate was tilted in different directions, and the top agar was evenly spread on the agar plate. The plates sat undisturbed for 20 minutes to allow the agar to solidify.
8. The plate was incubated for 2 days.
Results:
The serial dilution was successful.
Conclusions and Next Steps:
The serial dilution was successful. We will proceed to obtain the lysate.
Amplification
Collecting Low-Volume Lysate
Date: 9/15/2025
Redo: no
Purpose: The purpose of this experiment is to collect a low-volume lysate.
Notes:
- Using an aseptic technique, we used a pipettor to collect 8 mL of phage buffer
- We dispensed the PYCa buffer onto the webbed plate and let it sit at room temperature for 3 hrs
- After allowing the plate to sit, the plate was tilted by placing the lid underneath the plate on one side. This enables the lysate to pool.
- Using a 5mL syringe, the lysate was aspirated.
- Then a freshly opened 0.22 μm filter was attached to the syringe.
- The lysate was dispensed into a 15 mL conical tube.
- The conical tube containing the lysate was labeled and stored at 4°C for two days.
Conclusions and Next Steps:
A low-volume lysate was obtained. We will perform a third serial dilution to see if we can get a webbed plate.
3rd Serial Dilution
Date: 9/17/2025
Redo: no
Purpose: The purpose of this experiment is to perform another serial dilution using the low-volume lysate to see if we can obtain a webbed plate.
Notes:
1. Using an aseptic technique, we used a micropipettor to perform a serial dilution with 10 microliters of our low-volume lysate.
2. Another five microcentrifuge tubes were gathered. Then, using a micropipette, 10 microliters were taken from the 10^0 sample and dispensed into the microcentrifuge tube labeled 10^-1, and so on until we had a microcentrifuge tube labeled 10^-5
3. We retrieved a molten agar container and 3 mL using a micropipettor. We dispensed the molten agar into our culture tube, retrieved it back into the micropipettor, and dispensed the liquid onto the agar plate. This was done for all culture tubes with respective labeled plates.
4. We rotated the agar plate to evenly coat the surface and let it solidify for 20 minutes. The plates were incubated for five days.
Results:
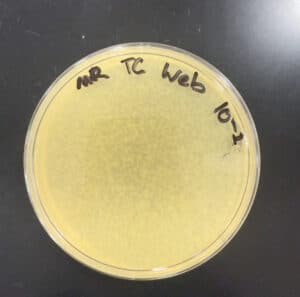
The dilution was successful, and a webbed plate was chosen.
Conclusions and Next Steps:
With the chosen webbed plate, we will create more webbed plates.
Amplification of the Web Plate
Date: 9/15/2025
Redo: no
Purpose: The purpose of this experiment is to make copies of the web plate.
Notes:
1. 10 microliters of the low-volume phage lysate was diluted to 10^-1 into 10 microcentrifuge tubes. We inoculated our bacteria with 10 microliters from each tube.
2. We retrieved a molten agar container and 3 mL using a micropipettor. We dispensed the molten agar into our culture tube, retrieved it back into the micropipettor, and dispensed the liquid onto the agar plate. This was done for all culture tubes with respective labeled plates.
3. We rotated the agar plate to evenly coat the surface and let it solidify for 20 minutes. The plates were incubated for two days.
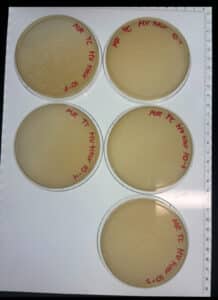
Results:
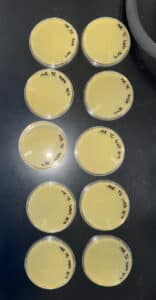
The dilution was successful and 10 web plates were created.
Conclusions and Next Steps:
10 web plates were created. We will move on to a high-volume titer.
High-Volume Titer
Date: 9/29/2025
Redo: no
Purpose: The purpose of this experiment is to perform a serial dilution using our high-volume lysate to find the titer.
Notes:
1. Using an aseptic technique, we used a micropipettor to perform a serial dilution with 10 microliters of our high-volume lysate.
3. Another five microcentrifuge tubes were gathered. Then, using a micropipette, 10 microliters were taken from the 10^0 sample and dispensed into the microcentrifuge tube labeled 10^-1, and so on until we had a microcentrifuge tube labeled 10^-5
4. We retrieved a molten agar container and 3 mL using a micropipettor. We dispensed the molten agar into our culture tube, retrieved it back into the micropipettor, and dispensed the liquid onto the agar plate. This was done for all culture tubes with respective labeled plates.
5. We rotated the agar plate to evenly coat the surface and let it solidify for 20 minutes. The plates were incubated for two days.
Results:
The dilution was successful, and we found our titer. We kept the 10^-4 plate and discarded the rest of the plates.
Conclusions and Next Steps:
After the titer is found, we will continue to DNA extraction.
Characterization
Title
Date: XX/XX/2025
Redo: n/a
Purpose: The purpose of this experiment is to…
Notes:
Results:
Add results and photos here.
Conclusions and Next Steps:
Add conclusions and next steps here.
DNA Extraction
DNA Extraction Part 1
Date: 10/01/2025
Redo: no
Purpose: The purpose of this experiment is to extract DNA from the high-volume lysate.
Notes:
Day One
1. Gently mix your HVL, then aliquot 5mL of your lysate into a 15 mL conical tube.
2. Once nuclease has been added, gently invert the tube and incubate at 37°C for 10min.
3. Aliquot lysate into 5 microfuge tubes, 1mL each.
4. To each tube, add 20uL of ZnCl2, mix gently by inversion, and incubate at 37°C for 5min. This
“precipitates” the phage.
5. Centrifuge at 10,000rpm for 1min to pellet the phage
6. KEEP THE PELLET. Remove supernatants by aspiration, but try not to disturb the pellet.
7. Resuspend pellets in 500uL TES buffer per tube, and incubate at 60°C for 15min. This will
denature the capsids, exposing the DNA, while protecting it from the nuclease activity (EDTA in
the TES sequesters divalent cations required for nuclease function).
8. Add 1uL of Proteinase K and mix gently. Incubate at 37°C for 10min to completely eliminate
any residual nuclease activity.
9. Add 60uL of potassium acetate to each tube. Mix well and leave on ice for 15min. A white,
dense precipitate will form. This represents your capsids.
containing your DNA, and place into new microfuge tubes. You can throw away the tubes with
the pellets.
11. Add 500uL of isopropanol to each of the tubes with the supernatant, and mix. the tubes were left on ice for 5 days.
tube. It is OK if you do not see a pellet.
13. Add 250uL of 70% ethanol in each tube, and spin again for 1min, at top speed. This washes
your DNA pellet. Discard supernatants into a WASTE tube.
14. Dry the DNA pellets at room temperature by turning upside-down onto paper towels, tapping out
excess liquid, and leaving upside-down until pellets begin to turn clear. The tubes can also be
placed in a fume hood or 30⁰C incubator to help with drying. DO NOT RUSH THIS STEP! If not
dry enough, you will NOT recover enough DNA!
15. Resuspend the first pellet in 50uL nuclease-free water. Then use that solution to resuspend the
next pellet. Continue until all 5 pellets have been resuspended in the same 50uL of water.
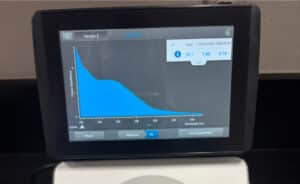
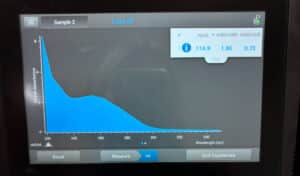
16. Check DNA concentration and quality (A260:280 and A260:230) with the Nanodrop.
Results:
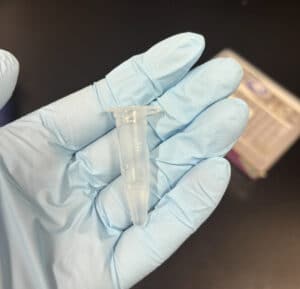
The DNA extraction was successful
Conclusions and Next Steps:
The DNA extraction was successful, but we need more DNA. Next steps will be to extract more DNA from our high-volume lysate.
DNA Extraction Part 2
Date: 10/13/2025
Redo: no
Purpose: The purpose of this experiment is to extract DNA from the high-volume lysate.
Notes:
Day One
1. Gently mix your HVL, then aliquot 5mL of your lysate into a 15 mL conical tube.
2. Once nuclease has been added, gently invert the tube and incubate at 37°C for 10min.
3. Aliquot lysate into 5 microfuge tubes, 1mL each.
4. To each tube, add 20uL of ZnCl2, mix gently by inversion, and incubate at 37°C for 5min. This
“precipitates” the phage.
5. Centrifuge at 10,000rpm for 1min to pellet the phage
6. KEEP THE PELLET. Remove supernatants by aspiration, but try not to disturb the pellet.
7. Resuspend pellets in 500uL TES buffer per tube, and incubate at 60°C for 15min. This will
denature the capsids, exposing the DNA, while protecting it from the nuclease activity (EDTA in
the TES sequesters divalent cations required for nuclease function).
8. Add 1uL of Proteinase K and mix gently. Incubate at 37°C for 10min to completely eliminate
any residual nuclease activity.
9. Add 60uL of potassium acetate to each tube. Mix well and leave on ice for 15min. A white,
dense precipitate will form. This represents your capsids.
containing your DNA, and place into new microfuge tubes. You can throw away the tubes with
the pellets.
11. Add 500uL of isopropanol to each of the tubes with the supernatant, and mix. the tubes were left on ice for 2 days.
tube. It is OK if you do not see a pellet.
13. Add 250uL of 70% ethanol in each tube, and spin again for 1min, at top speed. This washes
your DNA pellet. Discard supernatants into a WASTE tube.
14. Dry the DNA pellets at room temperature by turning upside-down onto paper towels, tapping out
excess liquid, and leaving upside-down until pellets begin to turn clear. The tubes can also be
placed in a fume hood or 30⁰C incubator to help with drying. DO NOT RUSH THIS STEP! If not
dry enough, you will NOT recover enough DNA!
15. Resuspend the first pellet in 50uL nuclease-free water. Then use that solution to resuspend the
next pellet. Continue until all 5 pellets have been resuspended in the same 50uL of water.
16. Check DNA concentration and quality (A260:280 and A260:230) with the Nanodrop.
Results:
The DNA extraction was successful.
Conclusions and Next Steps:
pending
Electron Microscopy
Date: 10/13/2025
Redo: no
Purpose: The purpose of this experiment is to prepare a TEM grid.
Notes:
- Prepare phage samples.
- Aseptically transfer 1 ml of your high-titer lysate into a sterile microcentrifuge tube.
- Balance the tube(s) and centrifuge for 1 hour at 4 °C at top speed to concentrate the phage particles at the bottom of the tube.
- Using a micropipettor, carefully remove as much supernatant as possible without disrupting the concentrated phage at the bottom of the tube.
- Add 100 μl of phage buffer and let resuspend at 4 °C for 30 minutes to one hour.
- Proceed with the rest of the protocol immediately to avoid damaging the phage heads.
- Prepare your work area.
- Put on a fresh pair of gloves.
- Cover the designated work area with bench paper or a Kimwipe to create a clean work surface.
- Remove the cover from a 5 x 5 cm piece of parafilm, and place the parafilm into the lid of Petri dish.
- Place a PELCO Tab or small piece of double-sided tape onto the parafilm in the lid of the Petri dish. Expose the adhesive or the tab.
- Using EM forceps, remove a fresh grid from a box of unused grids, touching only the very edge of the grid.
- Place the grid dark-and-shiny side UP, on the edge of the tab or double-sided tape so that only the very edge of the grid (no more than 0.5 mm) is touching the adhesive.
- Mount and stain your phage.
- Using a micropipettor, place 10 μl of lysate onto the grid without touching the tip to the grid itself.
- Allow the phage settle and attach onto the grid for 7 minutes
- Using a small wedge of filter paper, wick off the excess fluid.
- Add 10 μl of 1 % uranyl acetate to the grid.
- Let it sit for 2 minutes.
- Wick off excess stain by using a wedge of filter paper. UA staining occurs by leaving a very thin layer of stain dried across the entire grid. You should continue to wick away the stain until the surface of the grid looks like a rainbow oil slick. Then allow the grid to air dry before putting it safely back into the grid box.
- Observe your phage.
- Place your grid in the designated grid box for storage. Triri sample was placed in the A1 spot.
- Transport your samples to your EM facility for imaging.
Results:
pending
Conclusions and Next Steps:
pending
DNA Extraction- Reprecipitating the DNA
Date: 10/29/2025
Redo: no
Purpose: The purpose of this experiment is to repriciptate the DNA already extracted
Notes:
- The two DNA samples from DNA Isolation were removed from their storage in the freezer and set out at room temperature to thaw.
- Once the samples returned to a liquid state, a micropipette was used to aspirate and calculate the volume of each sample. This was done by aspirating all of the liquid into the micropipette, and then gradually decreasing the micropipette reading until there were no air bubbles left in the micropipette tip.Both volumes were then dispensed together into a new microcentrifuge tube.
- With the combined volume, 280ul, the volume of Sodium acetate and ice cold 100% Ethanol was calculated. The potassium acetate would be 0.10 vols of the DNA volume, or 2.8ul. The ice cold 100% Ethanol would be 3 volumes of the DNA volume, or 840ul.
- All volumes from step 4 were aspirated using a micropipette and dispensed into the microcentrifuge tube containing the 280ul of DNA sample. The contents were inverted to mix.
- The microcentrifuge tube was then precipitated by being placed in a -80°C freezer for 5 days.