Discovery of Acorn15
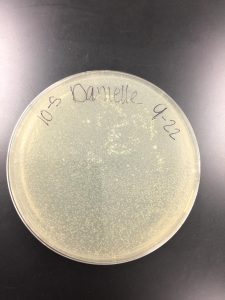
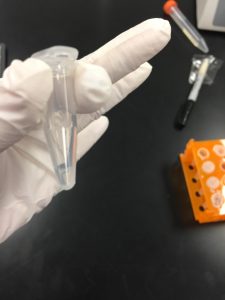
Direct Isolation 9-6-17
- Use the soil sample that came from the flower bed (sample 1) to fill a 15 mL conical tube about 1/2 way full
- Add enrichment broth until the soil is under about 3 mL of liquid
- Cap the tube and shake until it is well mixed
- Incubate the tube in a shaking incubator for 1-2 hours (started: 10:27am ; stopped: 11:47am)
- Centrifuge the tube for 5 mins to allow soil to settle at bottom of tube
- Open a 0.22 um syringe filter but leave it in the packaging to keep it steril
- Use a syringe to remove 2 mL of liquid from the top of the soil sample and attach the syringe to the top of the filter and remove it from the package
- Press the syringe plunger and dispense about 0.5 mL of filtrate into a labeled micro-centrifuge tube
- Cap tube immediately and discard the syringe and filter. Continue on to the plaque assay protocol.
Direct Sample 1- plaque assay 9-6-17
- Use the sample taken from soil sample 1 using the direct isolation method and micropipette 500 uL of phage sample to a tube containing the host bacteria. Let sit about 5 mins for attachment.
- Obtain top agar and an agar plate. Use a sterile 5 mL pipette to transfer 3 mL of top agar to the tube containing the phage plus the host bacteria.
- Immediately aspirate the mixture back into the pipette and place it onto the labeled agar plate.
- Gently but quickly tilt the agar plate make sure the solution spreads evenly. Let the agar plate sit for about 20 mins before inverting the plate and allowing it to incubate for 24-48 hours. (started: 9-6-17 1:41pm)
Because my agar plate showed no signs of plaques, it was discarded. My direct isolation sample was not a success.
Enriched Isolation 9-6-17
Day 1
- Use the soil sample that was taken from Benbrook lake (sample 2) to fill a 50 mL conical tube to the 15 mL mark.
- Add enrichment broth to the 35 mL mark and vortex.
- Place the sample in a shaking incubator for 1-2 hour (started: 10:42am; stopped: 12:13pm)
- Centrifuge the tube containing soil for 10 mins to allow the soil to settle at the bottom.
- Use a sterile baffled erlenmeyer flask to filter the sample.
- Add 0.5 mL of bacterial host culture to the flask and place in a shaking incubator for 5 days.
Day 2 9-11-16
- Use a micropipette to transfer 1.4 mL of the enriched sample from the erlenmeyer flask to a micro centrifuge tube. Repeat this step so you can have a balanced centrifuge.
- Spin the tubes in the centrifuge for 1 minute.
- Remove the plunger from a syringe
- Open a sterile filter and attach it to the syringe
- Pipette 1 mL from each micro centrifuge tube into the syringe barrel.
- Place the tip of the filter over a sterile micro centrifuge tube and place the plunger into the syringe. Depress the plunger and collect sterile filtrate.
- Label centrifuge tube and continue on to do a spot test with this sample.
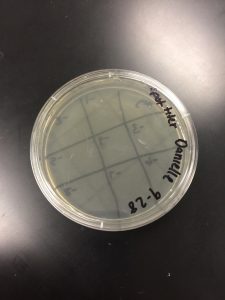
Spot Test 9-11-17
- Use the enriched sample only, since the direct sample had no phages present.
- Label the bottom of an agar plate by dividing it into 9 sections (like a hashtag).
- Obtain a 250 uL of host bacteria and top agar.
- Use a sterile 5 mL pipette to transfer 3 mL of top agar into the tube containing the host bacteria and immediately aspirate the solution back into the same pipette.
- Dispense the solution onto the labeled agar plate and quickly tilt the plate to evenly spread the solution. Allow plate to sit for about 20 mins to solidify.
- Use a micropipette to transfer 10 uL of the enriched sample onto the agar plate in sections 3, 5, and 7 so that they are as far away as possible.
- Spot 10 uL of phage buffer onto section 1 for the negative control.
- Let the spots absorb into the agar for about 15 mins before incubating for 24-48 hours. Do not invert the plate. (start: 11am 9-11; stop: 9am 9-13)
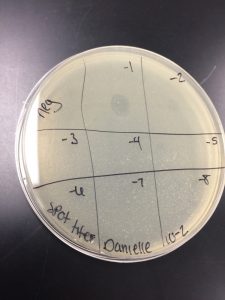
The spot test showed little indication of plaques. Large clearings are present, but it is not known that those are exactly plaques. A tiny spot was present in section of 8 of my agar plate that resembled a plaque, but it was the only one and was no where near where I spotted with the enrichment sample. The spot test was done again to try and obtain clearer results.

Spot test done on 9-11-17
Day 2 of spot testing 9-11-17
Instead of just using my own enrichment sample, I decided to spot on of Travis’s samples to see if I would have better luck with finding a plaque. Travis’s sample was his enriched sample #3.
- Obtain an agar plate and label it the same was as before by diving it into 9 sections with a hashtag.
- Sections 3 and 7 will be my enriched sample, and section 5 will be Travis’s enriched sample. Phage buffer will be placed in section 1 as the negative control just like before.
- Obtain a 250 uL of host bacteria and top agar.
- Use a 5 mL sterile pipette to transfer 3 mL of top agar into the tube with the bacteria. Immediately aspirate the solution and place onto the labeled agar plate.
- Gently tilt the plate to evenly spread the solution. Allow to sit for 20 mins to solidify.
- Use a pipette to transfer 5 uL of my enriched sample onto section 3 and another 5 uL onto section 7. Transfer 5 uL of Travis’s sample onto section 5 and transfer 5 uL of phage buffer onto section 1.
- Allow the liquid to absorb into the agar for about 15 mins.
- Do not invert the plates while incubating for 24-48 hours. (started: 10:40am)
Because my spot test showed no signs of plaques, the agar plate was discarded and no results were recorded.
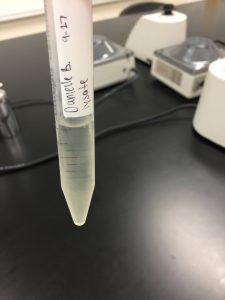
Serial Dilutions 9-18-17
- Use the filtered enriched sample as the starting material.
- Set up 5 centrifuge tubes in a rack to be used in the serial dilutions. Label them accordingly.
- Add 90 ul of phage buffer to each of the 5 tubes using a pipett.
- Add 10 uL from the original filtered enriched sample to the first centrifuge tube labeled 10^-1 and vortex.
- Use a clean pipette to transfer 10 uL from the 10^-1 to to the 10^-2 tube and vortex. Continue this until all tubes have been completed and contain phage. Continue on to plaque assay protocol.
Plaque Assay
- Obtain 5 tubes containing host bacteria and label them 1-5. These correspond to the centrifuge tubes labeled 1-5.
- Dispense 10 uL of the phage sample from tube 1 into the tube containing the host bacteria labeled 1. Continue this until all 5 host bacteria tubes contain phage. Let sit for 5 mins for detachment.
- Obtain 5 agar plates and label them accordingly (1-5).
- Remove top agar and use a sterile 5 mL pipette to transfer 3 mL of top agar into the tube labeled 1. Immediately aspirate and place onto the agar plate that is labeled 1.
- Gently tilt the plate to spread the solution evenly over the plate
- Continue until all 5 tubes containing host and phage have been plated onto their corresponding agar plates.
- Let sit about 20 mins to solidify.
- Invert plates and incubate for 24-48 hours. (start: 12pm 9-18; stop: 9am 9-20)
Results: No plaques were present on any of my agar plates. Discarded plates and tried the serial dilutions again, but this time I used a plaque from Travis’s direct isolation plate.
Serial Dilutions Take Two 9-20-17
Since my first serial dilutions did not succeed, I tried again, but this time I used a plaque off of Travis’s direct isolation plate
Sample from
32°16’44.0″N 98°08’55.0″W
32.278889, -98.148611
Step 1- picking a plaque
- Obtain a centrifuge tube and add 100 uL of phage buffer using a pipette.
- Place a sterile pipette tip onto a p200 micropipette.
- Gently stab the center of a plaque on Travis’s plate.
- Place the end of the pipette tip into the centrifuge tup and top the tip on the wall and pipette up and down to dislodge the phage particles. Discard tip. Mix by vortexing. Continue onto serial dilutions.
Step 2- serial dilutions
- Obtain 5 centrifuge tubes and label them 10^-1, 10^-2, etc.
- Add 90 uL of phage buffer to each tube using a sterile pipette tip.
- Add 10 ul of the phage sample containing Travis’s phage into the tube labeled 10^-1. Discard pipette tip.
- Add 10 ul of sample from 10^-1 tube into the tube labeled 10^-2. Discard tip. Continue this until all 5 tubes contain phage sample from the previous tube.
- Vortex each tube after each transfer. Continue onto plaque assay.
Step 3- plaque assay
- Obtain 5 tubes of 250 ul host bacteria as well as 5 agar plates.
- Label tubes 1-5 as well as agar plates.
- Use a sterile pipette tip to transfer 10 ul of phage sample from the micro centrifuge tube into the tube containing host bacteria labeled number 1. Do this until all 5 tubes with bacteria contain 10 ul of phages. Use a clean tip for each transfer. Let sit for 5 mins for attachment.
- Obtain top agar.
- Use a sterile 5 mL pipette to transfer 3 mL of top agar into the tube containing host bacteria and phage that is labeled number 1.
- Immediately aspirate and transfer to the agar plate that is labeled number 1.
- Gently tilt the plate to spread the solution over the plate.
- Repeat until all 5 agar plates contain the host bacteria with the phage and top agar.
- Let sit for about 20 mins to solidify.
- Invert plates and incubate 24-48 hours. (start: 11:10am 9-20; stop: 9am 9-22)
The plate that is labeled 1 shows signs of three tiny plaques that are hard to capture by photograph. The plate labeled two shows one tine plaque-like clearing, and another large clearing that looks like a plaque, but could possibly be from a bubble that formed.

Plaque-like clearing

Hard to see, 3 small plaque-like clearing
2nd Serial Dilution 9-22
After checking my results from the serial dilutions, I observed three small plaques present on the 10^-1 plate. I used the largest of these three plaques to further dilute the phage with a second set of serial dilutions.
Step 1- picking a plaque
- Obtain a micro centrifuge tube and add 100 ul phage buffer to the tube using a sterile pipette. Discard tip.
- Use a sterile pipette tip to stab the center of a plaque and place into the phage buffer and tap the tip on the sides of the wall to dislodge the phage.
- Vortex well
Step 2- serial dilutions
- Obtain 5 centrifuge tubes (1.5 mL) and label them 10^-1, 10^-2, etc.
- Use a sterile pipette tip to add 90 ul of phage buffer to each of the tubes.
- Add 10 ul from the sample containing phage to the tube labeled 10^1 using a sterile pipette tip. Vortex. Discard tip.
- Add 10 ul from the tube labeled 10^-1 to the tube labeled 10^-2. Do this until all tubes contain 10 ul of phage from the previous tube. Use a sterile tip between each transfer.
Step 3- Plaque assay
- Obtain 5 tubes of 250 ul host bacteria and label them 1-5 to coordinate with the centrifuge tubes labeled 10^-1. . .10^-5.
- Use a sterile pipette to dispense 10 ul of phage sample to each tube with the corresponding number. Mix tube by tapping.
- Let sit for 5 mins for attachment.
- Obtain 5 agar plates and label them 1-5 to correspond to the tubes containing phage and host bacteria.
- Obtain top agar and use a sterile 5 ml pipette to put 3 ml of top agar into the tube containing phage and bacteria that is labeled 1.
- Immediately aspirate into the same pipette and transfer onto the agar plate labeled number one.
- Gently tilt the plate until the solution is evenly spread on the plate. Repeat this until all plates are plated with the agar, phage, bacteria mix.
- Let the plates sit for about 20 mins to solidify.
- Incubate for 24-48 hours. (start: 10:21am 9-22; end: 9-23)
9-25
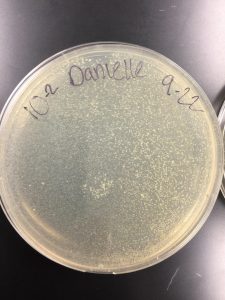
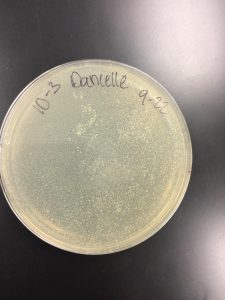
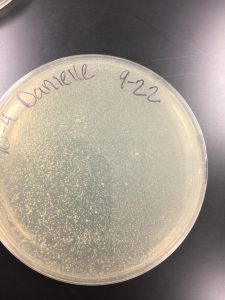
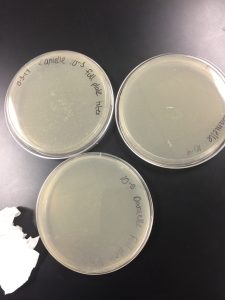
Examined results from the second serial dilution series. Tiny plaques were present on all plates expect for the one labeled 10^-5. The 10^-1 plate has 1000+ plaques, as well as the 10^-2 plate. The 10^-3 plate has 29 plaques and the 10^-4 plate only has 5 plaques. The plaques are so tiny that it is hard to visualize them through photographs, but below are images from this second serial dilution. The next step is to collect plate lysate on Wednesday.
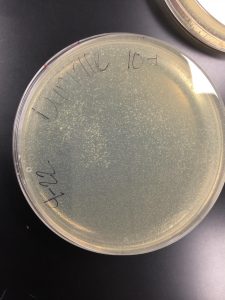
Plates from the second serial dilutions. Plaques are tiny and hard to visualize, but they are present.
9-27
Collecting Plate Lysate
- Obtain the 10^-1 plate from the 2nd serial dilution series
- Add 8 mL of phage buffer to the webbed plate
- Let the plate sit for 2-4 hours (9:17am-11:17am)
- Remove the lid and tilt plate to one side by placing lid underneath plate to pool lysate to one side
- Obtain a 0.22 ul filter and open it, but do not remove from its packaging to maintain sterility
- Use a 5 ml syringe to aspirate lysate from plate
- Attach syringe to filter and collect filtrate in a 15 ml sterile conical tube
- Aspirate the remaining lysate and filter it to the same conical tube
- Label the tube “lysate 9-27 Danielle”
- Store lysate in the fridge
9-28
Spot titer
- Obtain filtered lysate and an empty agar plate
- Label agar plate with name, date, “spot titer” and divide into 9 sections using a #
- Label one spot for the negative control
- Use a sterile 5 ml pipetter to transfer 3 ml of top agar into a tube containing 250 host bacteria
- Immediately aspirate the mix and place onto the labeled agar plate.
- Gently, but quickly tilt the plate and let sit for about 20 mins to solidify
- Perform a serial dilution on lysate sample
- Obtain 8 sterile 1.5 ml microcentrifuge tube and label them 10^-1, 10^-2. . . . .10^-8
- Add 90 ul of phage buffer to each centrifuge tube
- Add 10 ul of lysate to the tube labeled 10^-1. Discard pipette tip. Vortex to mix
- Add 10 ul from 10^-1 tube into the 10^-2 tube. Discard pipette tip. Vortex
- Continue this until all 8 tubes contain 10 ul from the previous tube.
- Obtain a sterile pipette tip. Transfer 3 ul of all samples onto the proper location on the bacterial lawn.
- Use a clean tip for each transfer. Use 3 ul phage buffer as the negative control.
- Let the liquid absorb onto the agar for 30 mins (9:49am-10:19am)
- Incubate plate right side up (not inverted) for 24-48 hours (start 10:20am 9-28; end
- Check plates for spots

10-2
Results from last time: Plate was left in incubation for too long, agar hardened and cracked. No results were obtained. 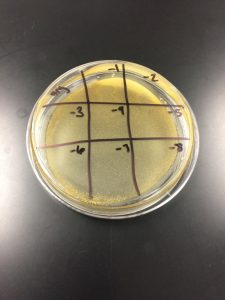 Repeat procedure from 9-28, with less incubation time. Time started incubated: 10-2-17 10:00am; Time ended incubation: 10-3-17 9:20am
10-3
Results: Spot titer take 2 shows better results. In the section labeled 10^-1, there is a large clearing. In the 10^-2 section, there is a smaller and cloudier clearing. There is a few small plaques present in the 10^-3 section. The 10^-4 section has only two plaques, and all sections show no signs of plaques.
The next step is to do the full plate titer using the 10^-3, 10^-4 and 10^-5 lysate dilutions.
Perform a plaque assay
- Add 10 ul from the lysate dilution tube labeled 10^-3 into a tube containing host bacteria; repeat for 10^-4 and 10^-5 lysate dilution samples
- Let tube sit undisturbed for 5 minutes for attachment
- Obtain 3 agar plates and label them 10^-3, 10^-4 and 10^-5 respectively
- Obtain top agar
- Use a sterile 5 ml pipette to transfer 3 ml of top agar to the tube labeled 10^-3 that contains the bacteria and phage sample
- Immediately aspirate back into the pipette and transfer the liquid to the agar plate labeled 10^-3
- Repeat for 10^-4 and 10^-5 tubes, making sure to use a clean pipette tip between transfers
- Gently but quickly tilt the plate to spread the liquid and then let sit undisturbed for 20 mins to solidify
Start incubation: 10-3-13 10:13am; End incubation 10-4-17 9:05 am ; No plaques were present, placed back into incubation on 10-4-17 at 9:17am and ended incubation on 10-5-17 at 8:50 am
Results: There are 9 plaques on the plate labeled 10^-3, 1 plaque on the 10^-4 plate, and 0 plaques on the 10^-5 plate. My titer value is 9.0×10^7 pfu/ml
10-9-17
After storing my full titer plates in the fridge, I noticed that my 10^-3 plate had froze over. This is most likely a result of the plate being stored too far back in the fridge.

10-16-17
The next step is to create two webbed plates using lysate of known titer.
- Add 10 ul of phage sample from 10^-1 dilution series to a tube containing host bacteria.
- Let sit 10 mins for attachment.
- Add 3 ml of top agar to the tube containing phage and sample using a sterile 5 ml pipette.
- Immediately aspirate and plate onto a labeled agar plate.
- Repeat this process on a second agar plate to ensure you will have enough lysate to collect.
- Place in incubator at 10:45am on 10-16 and remove from incubator on 10-18 at 9am

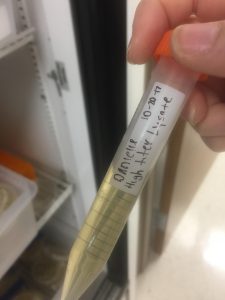
10-20 Collecting high titer lysate
- Flood webbed plates with 8 ml of phage buffer.
- Let sit for 4 hours.
- Tilt plates to one side by placing the lip under the agar plates.
- Use a pipette to aspirate the lysate.
- Obtain a sterile 0.22 ul filter and attach it to a sterile syringe.
- Remove the plunger from the syringe.
- Pipette the lysate into the barrel of the syringe and place the plunger in the syringe.
- Filter all lysate into a sterile 15 ml conical tube.
- Label it and store it in the fridge.
10-23 High titer lysate serial dilutions
- Obtain high titer lysate and 6 sterile micro centrifuge tubes.
- Label each tube 10^-1, 10^-2, etc.
- Add 90 ul of phage buffer to each tube.
- Pipette 10 uL of high titer lysate into the 10^-1 tube.
- Vortex well.
- Pipette 10 uL from tube 1 into tube 2 and vortex.
- Repeat this until all tubes contain 10 ul from the previous tube.
Spot titer with high lysate serial dilutions
- Obtain an agar plate and divide it into 9 sections.
- Obtain host bacteria.
- Pipette 3 ml of top agar into the tube with host bacteria.
- Immediately aspirate solution and plate onto the agar plate.
- Let sit for about 20 mins.
- Pipette 3 ul of phage buffer into the first section as a negative control.
- Pipette 3 ul of 10^-1 high titer serial dilution onto the section labeled 10^-1.
- Repeat this until all 6 dilutions have been plated in their correct section.
- Let sit for about 20 mins and incubate on 10-23 at 10 am and take out of incubator at 9 am on 10-25.

Results: Large clearing on all sections and spotted clearing on 10^-6 section.
10-25 Phage DNA extraction
- Pipette 1 ml of high titer phage lysate into a sterile micro centrifuge tube.
- Put gloves on and add 5 ul of nuclease to the lysate.
- Mix gently by inverting the tube.
- Let tube sit for 10 mins at room temperature.
- Put on a fresh pain of gloves and add 2 ml of DNA clean-up resin to a sterile 15 ml conical tube.
- Transfer the solution of nuclease and lysate from the centrifuge tube to the 15 ml conical tube containing resin.
- Mix by inverting the tube for 2 mins.
- Label two wizard kit columns with initials.
- Remove the plungers from two 5 ml syringes and attach a column to each syringe barrel.
- Set the column and syringe barrel on a new centrifuge tube.
- Transfer 1.5 ml of phage DNA/ resin solution to the column using a pipette.
- Insert a plunger into the syringe and carefully push all the liquid through, collecting the flow-through in the used 15 ml conical tube from above. Do steps 10-12 for both columns at the same time.
- Once the liquid is expelled, maintain pressure on the plunger as you dry residual liquid by touching the tip of the column to a paper towel.
- Unscrew the column from the syringe barrel before releasing the plunger and set the column into a clean centrifuge tube.
- Remove the plunger form the syringe barrel, and then reattach the syringe barrel to the column.
- Add 2 ml of 80% isopropanol to each syringe barrel and push the liquid through the column, repeating steps 12-14.
- Repeat twice for a total of three isopropanol washes.
- With each column in a fresh 1.5 ml centrifuge tube, spin at 10,000 g for 5 minutes.
- Transfer columns to new 1.5 ml centrifuge tubes and spin at 10,000 g for 1 min to remove any residual isopropanol.
- Evaporate remaining isopropanol by removing the columns from the tubes and placing them directly in a 90 degree C heating block for 60 seconds.
- Place each column in a clean centrifuge tube and apply 50 ul of 90 degree C serial diH2O directly into the columns.
- Incubate columns for 1 min at room temp.
- Spin at 10,000 g for 1 min in microcentrifuge.
- Combine the products from both centrifuge tubes into one tube; this is your eluted phage DNA.
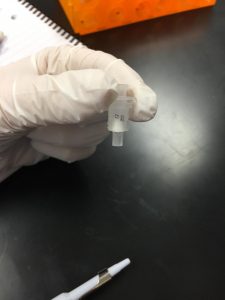
Column
Eluted phage DNA
11-6
Measuring concentration of DNA
- Obtain two 0.5 ml for standards and two for samples
- Label tube lids 1 and 2 for standards
- Dilute Qubit reagent 1:200 in Qubit buffer. Use clean pipette for each transfer
- Add 796 ul Qubit buffer into tube for master mix
- Add 4 ul Qubit reagen to same tube
- Add 10 ul standard 1 into new tube
- Add 10 ul standard 2 into new tube
- Add 190 ul master mix into each standard tube. Mix well
- Add 2 ul DNA sample to new tube
- Add 198 ul master mix to same tube
- Vortex all 4 tubes (my DNA, Travis’, 2 standards)
- Put samples in Qubit reader
- results: 103 ng/ul aka 0.103 ug/ul
Setting up restriction enzyme digest
- Mix DNA sample by vortexing on low
- Incubate tube at 65 degrees C for 10 mins, then quickly place it on ice.
- Spin tube in centrifuge for less than 1 min
- Calculate how many ul of DNA needed to obtain 0.5 ug of DNA = 4.85 ul
- Set up reaction in a micro-centrifuge tube for each enzyme (6 tubes)
- Add 25 ul sterile diH2O to each tube
- restriction enzymes are as follows:
- tube 1: EcoR1
- tube 2: Hae3
- tube 3: Cla1
- tube 4: Sal1
- tube 5: BamH1
- tube 6: Hind3
- Mix contents of each tube by centrifuging for less than 1 min
- Incubate at 37 degree C for up to 1 hour
- Centrifuge for less than 1 min
- Store tubes in freezer
Casting Agarose Gels
- Weigh out 400 mg of agarose powder, then transfer the powder to an erlenmeyer
- Add 50 ml of 1X TBE buffer to the agarose powder. Swirl to mix.
- Heat mix in microwave for 2 mins
- Use heat-resistant gloves to remove from microwave
- Swirl to mix, make sure no clumps remain in mix
- Allow solution to cool to about 60 degree C
- Add gel dye (EtBr) to the mix
- Pour agarose/EtBr mix into the gel apparatus.
- Insert comb to cast the wells
- Allow gel to cool 20-30 mins
- Once gel is solid, remove the comb and lift gel out of casting tray
- Place platform with solid gel into gel box
- Pour 1X TBE buffer into gel apparatus until gel is submerges by about 1/4 in of buffer
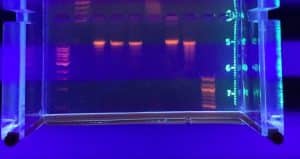
Gel electrophoresis of restriction enzyme digest
- Wearing gloves, orient gels so wells are closest to black cathode
- Add 5 ul of concentrated 6X loading dye to each 25 ul restriction enzyme sample
- Place samples at 65 degrees C in heat block for 5 mins
- Immediately place samples on ice to cool, then spin in micro-centrifuge for about 15 sec
- Load gel as follows: ladder, uncut DNA, BamH1, Cla1, EcoR1, Hae3, Hind3, Sal1
- Use a fresh pipette tip to transfer 20 ul of each reaction into the wells
- Turn on the power supply and set the voltage to 100 V
- Run the gel until the blue dye front has migrated at least 3.5 inches from the wall. This will take about one hour
- Turn off power supply
- Wearing gloves, carefully remove the gel from the chamber.

11-21
7.3 Archiving Your Phage Sample
- Make sure phage has been entered into the Actinobacteriophage database.
- Retrieve two purple barcoded tubes for storage at the University of Pittsburg and a third blue tube for storage here at Tarleton.
- Use aseptic technique to carefully fill each tube with sterile beads to 1.5 cm from the top of the tube.
- Dispense 1.4 mL of high titer lysate into a sterile 1.5 mL centrifuge tube.
- Add 100 ul DMSO to the tube, cap the tube, and then vortex.
- Pipette the lysate/DMSO mix into each of the purple barcoded tube so that the beads are just covered (about 500 ul).
- Properly close the tubes and place them in a storage box.

8.1b Mounting Phage Samples for TEM and Staining with Uranyl Acetate
- Aseptically transfer 1 mL of your high titer lysate into a sterile centrifuge tube.
- Using a micropipette, carefully remove as much supernatant as possible.
- Add 100 ul of phage buffer and let resuspend at 4 degree C for 30 mins to one hour.
- Proceed with the rest of the protocol immediately.
- Put on a fresh pair of gloves.
- Cover the designated work area with bench paper or a Kimwipe to create a clean work surface.
- Remove the cover from a 5 x 5 cm piece of parafilm, and place the parafilm into the lid of Petri dish.
- Place a PELCO Tab or small piece of double-sided tape onto the parafilm in the lid of the Petri dish.
- Using EM forceps, remove a fresh grid from a box of unused grids, touching only the very edge of the grid.
- Place the grid dark-and-shiny side UP, on the edge of the tab or double-sided tape so that only the very edge of the grid is touching the adhesive.
- Using a micropipettor, place 10 ul of lysate onto the grid without touching the tip to the grid itself.
- Allow the phage to settle and attach onto the grid for at least 2 mins.
- Using a small wedge of filter paper, wick off the excess fluid.
- Carefully pipette 10 ul of sterile water onto the grid. Allow it to sit for 2 mins.
- Wick off the water using a fresh wedge of filter paper.
- Repeat steps 14 and 15 an additional time.
- Add 10 ul of 1% uranyl acetate to the grid.
- Let sit for 2 mins.
- Wick off excess stain by using wedge of filter paper.
- Place grid into the proper slot for imaging.
Results: No clear picture of phage, will need to re-do protocol.